Welcome to 2.4G 10-channel Controller repository
Car control routine
Car control routine
Car control routineHardware PreparationHT-10A Remote ControllerSBUS ReceiverExperiment ResultsSetting Channel Reverse
This tutorial is primarily designed for use with the Rosmaster X3. Users who do not own this product can still reference and learn from our source code!
The project source code for this tutorial is rosmaster.zip in the [Software Materials] folder.
Hardware Preparation
The following is the minimum hardware configuration: The Rosmaster X3 includes this configuration
- HT-10A Remote Controller
- SBUS Receiver
- ROS Control Board
- 520 Motor *4
HT-10A Remote Controller
Install 4 AA batteries in advance to power the HT-10A remote controller:
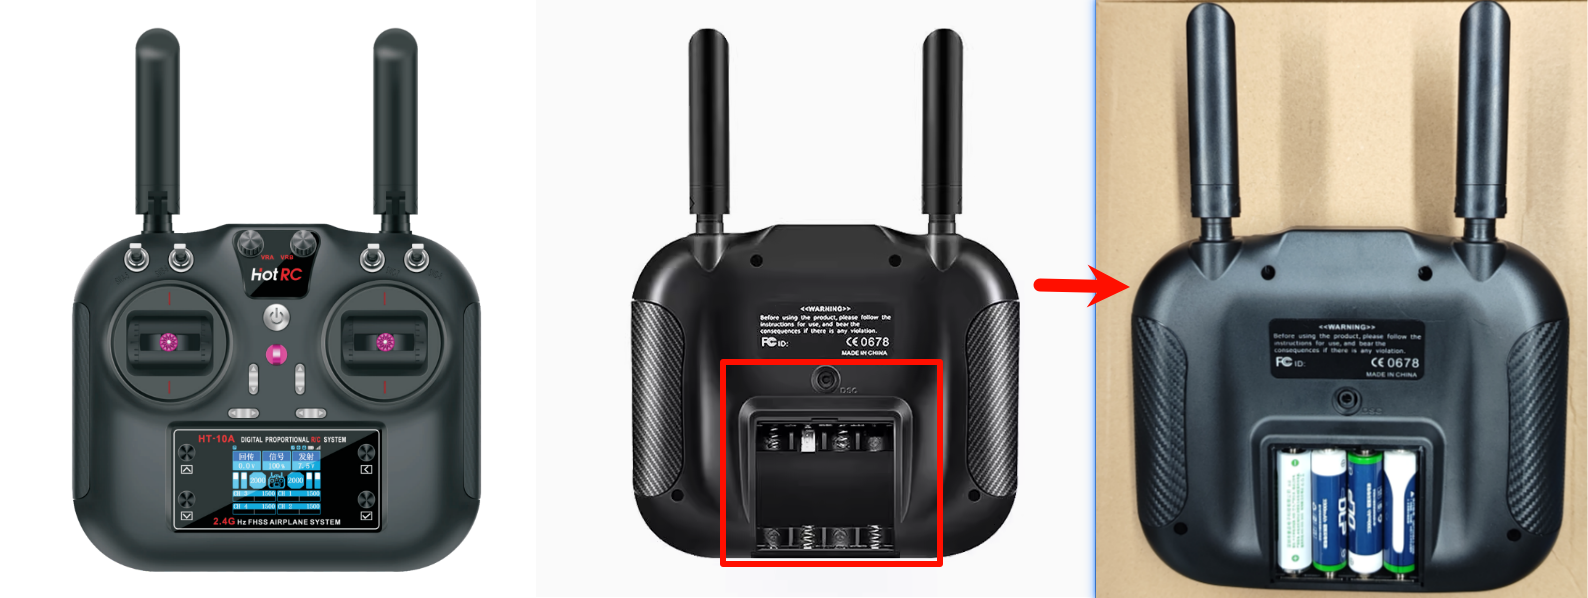
| HT-10A Remote Controller | Default Channels: No channel mapping on the remote |
|---|---|
| CH1 | Right Joystick: Left/Right |
| CH2 | Right Joystick: Up/Down |
| CH3 | Left Joystick: Up/Down |
| CH4 | Left Joystick: Left/Right |
| CH5 | SWA Channel |
| CH6 | SWB Channel |
| CH7 | SWC Channel |
| CH8 | SWD Channel |
| CH9 | VRA Channel |
| CH10 | VRB Channel |
SBUS Receiver
Diagram showing the hardware connection between the SBUS receiver and the ROS control board:
| SBUS Receiver | ROS Control Board |
|---|---|
| S | S |
| + | V |
| - | G |

Experiment Results
After downloading the rosmaster.hex file to the ROS control board, once the HT-10A remote controller pairs with the SBUS receiver successfully, you can control the car using the joysticks.
| HT-10A Remote Controller | Default Channels: No channel mapping on the remote | Car Function |
|---|---|---|
| CH1 | Right Joystick: Left/Right | Rotate Left, Rotate Right |
| CH3 | Left Joystick: Up/Down | Forward, Backward |
| CH4 | Left Joystick: Left/Right | Move Left, Move Right |
| CH6 | SWB Channel | Free Stop, Brake Stop |
Note: If the car's control direction is opposite to the HT-10A remote controller's control direction, you can reverse the channel on the remote controller.
Setting Channel Reverse
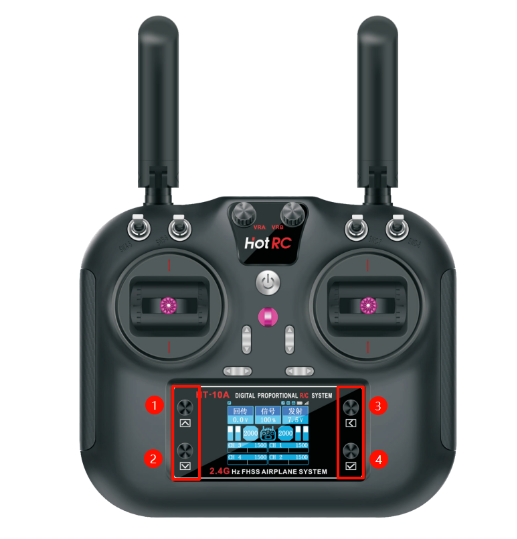
| HT-10A Remote Controller | Function |
|---|---|
| ① | Up Button |
| ② | Down Button |
| ③ | Back Button |
| ④ | OK Button |
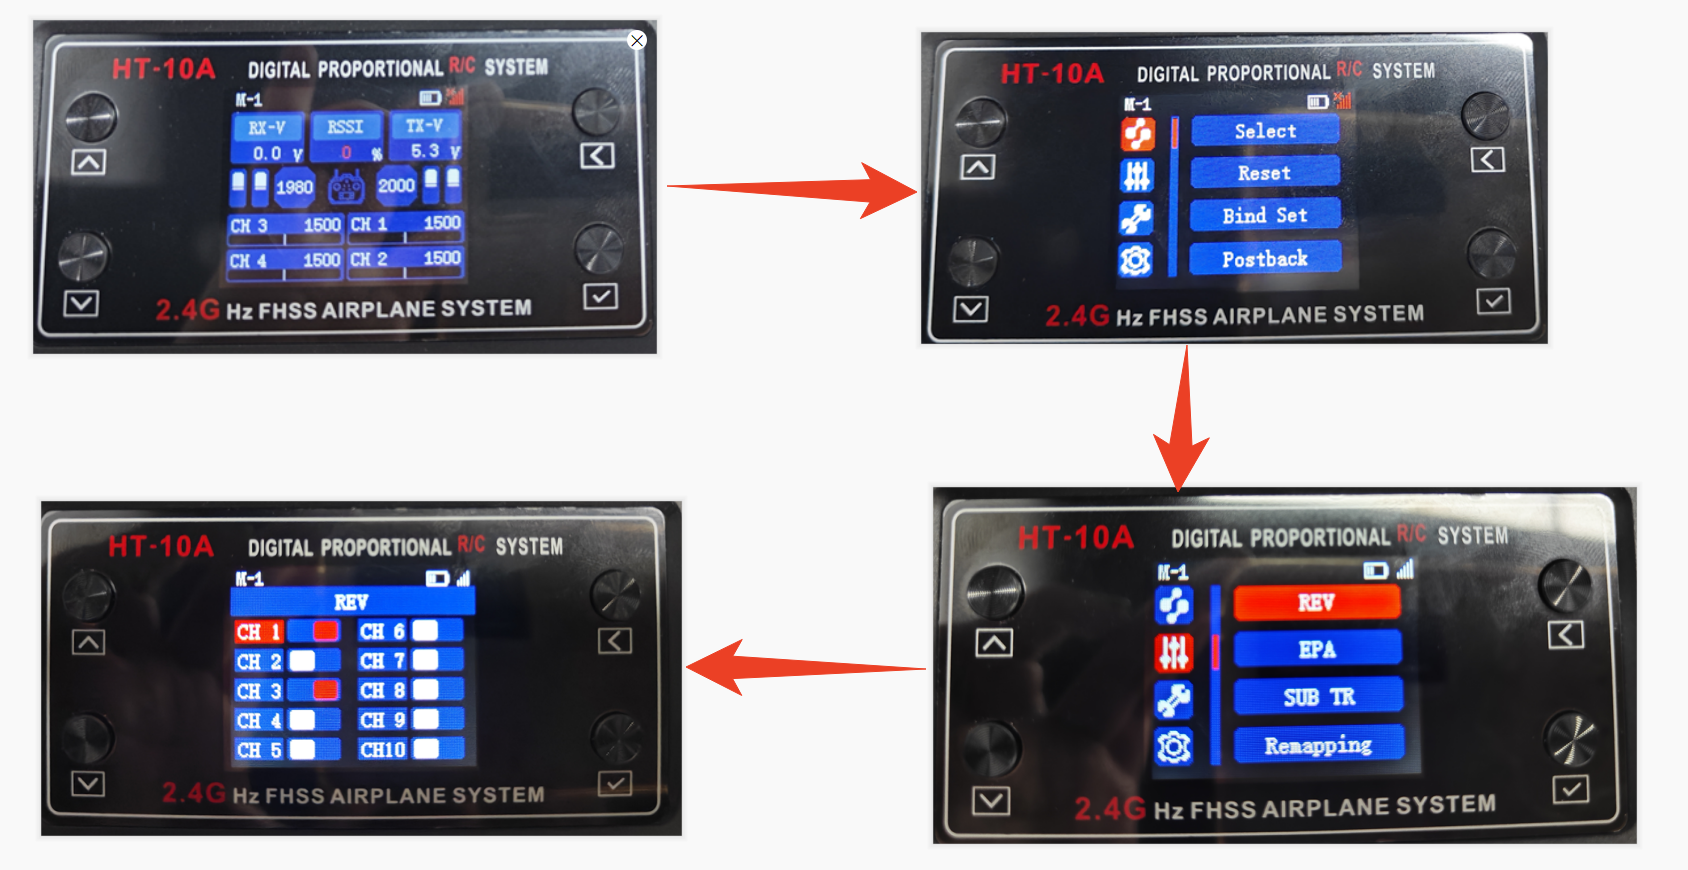
On the main interface, press the "OK button" to enter settings, then use the "Up button", "Down button", "Back button", and "OK button" to navigate different options: