Welcome to Raspberry Pi Pico 2 repository
1. Flash the onboard LED light
1. Flashing the onboard LED light
1. Flashing the onboard LED light1. Learning objectives2. Hardware construction3. Program analysis4. Experimental Phenomenon
1. Learning objectives
- Learn the basic use of the pins of the Raspberry Pi Pico 2 .
- Learn how to control the onboard LED light.
2. Hardware construction
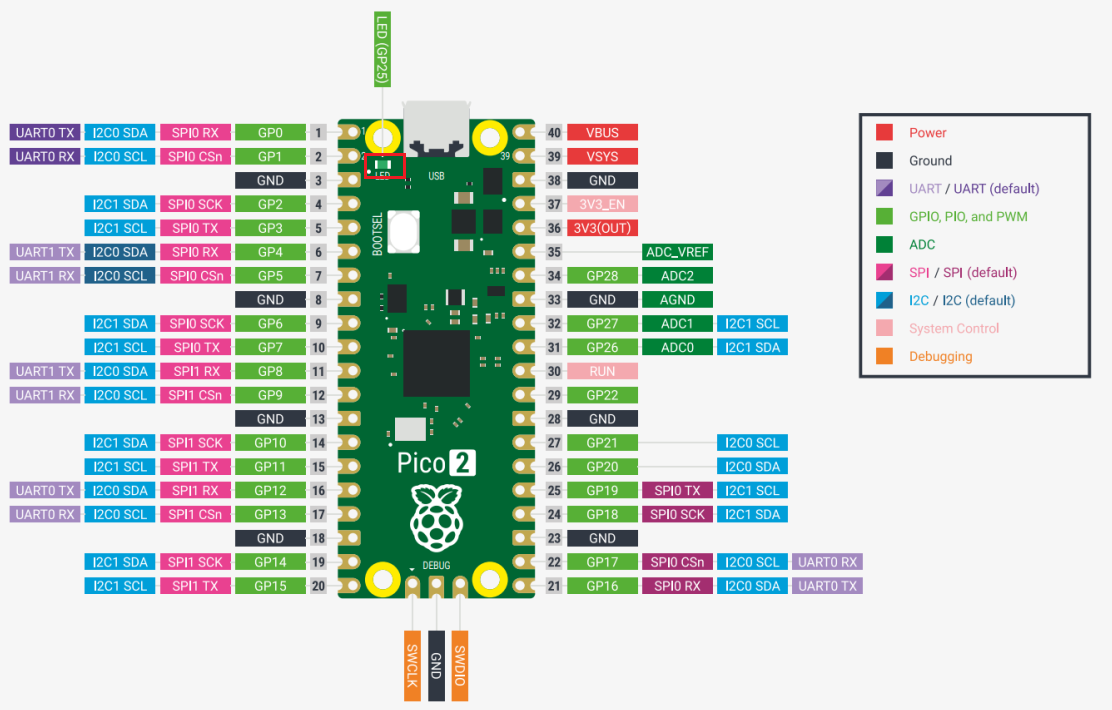
This course does not require additional hardware equipment and can directly use the onboard LED light on the Raspberry Pi Pico 2 motherboard.
3. Program analysis
Thonny programming
For the use of ThonnyIDE, please refer to the previous environment construction related courses.
ximport machineimport utimeled_onboard = machine.Pin(25, machine.Pin.OUT)while True:led_onboard.value(1)utime.sleep(5)led_onboard.value(0)utime.sleep(5)
import machine
The machine library contains all the instructions MicroPython needs to communicate with the Pico 2 and other MicroPython-compatible devices, extending the language of physical computing.
import utime
The "utime" library. This library handles everything to do with time, from measuring it to inserting delays into your program. The units are in seconds.
led_onboard = machine.Pin(25, machine.Pin.OUT)
The first argument, 25, is the number of the pin you are setting; the second argument, machine.Pin.OUT tells the Pico 2 that the pin should be used as an output rather than an input.
utime.sleep(5)
This calls the sleep function from the utime library, which will cause the program to pause for whatever number of seconds you type - in this case, 5 seconds.
4. Experimental Phenomenon
After the program is downloaded, we can see that the LED on the Raspberry Pi Pico 2 development board flashes every 5 seconds.