Welcome to Tiny:bit Robot Car repository
当製品の日本語版マニュアル資料は、こちらからご取得ください。
1. Cat(dog) detection
1. Cat(dog) detection
1. Cat(dog) detection1.1 Experimental preparation1.2 Experimental installation1.3 Import and briefly explain the microbit building blocks1.3.1 Open the programming website1.3.2 Create a new project1.3.3 Add the camera building block1.3.4 Add the building blocks of the car1.3.5 Introduction to the main building blocks1.4 Experimental results1.5 Extension: STA mode connection
1.1 Experimental preparation
- tinybit car
- microbit
- wifi camera
1.2 Experimental installation
Connect the camera to the car, as shown below
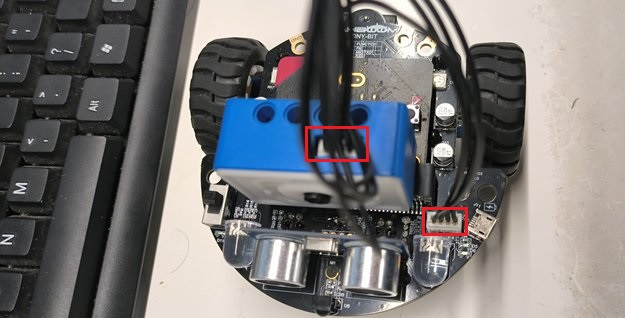
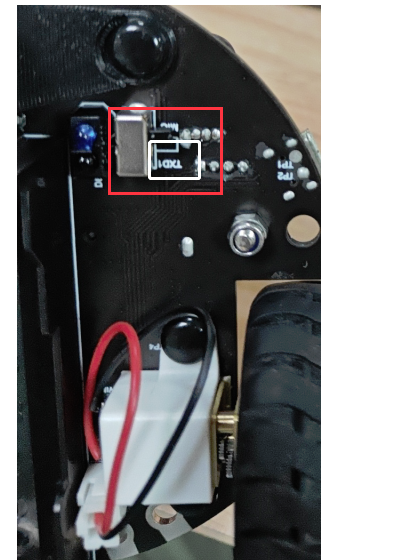
Note: The switch at the bottom of the car must be turned to TXD to work properly with the image transmission camera
1.3 Import and briefly explain the microbit building blocks
1.3.1 Open the programming website
https://makecode.microbit.org/#
1.3.2 Create a new project

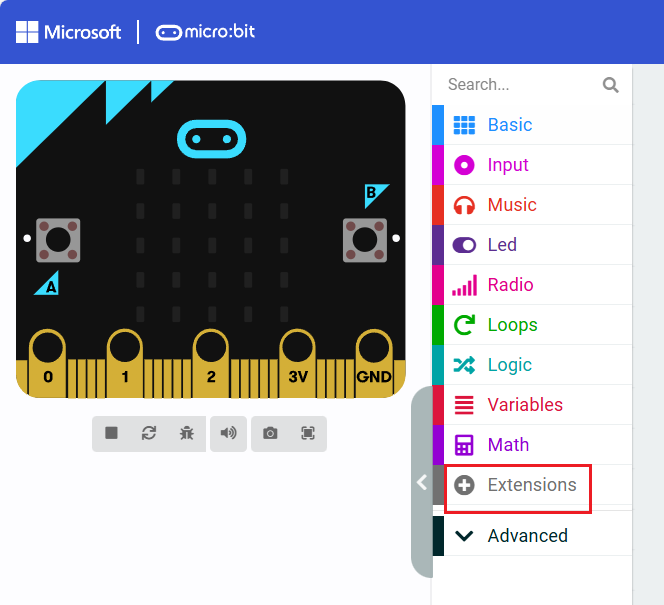
1.3.3 Add the camera building block
Website for the camera building block: https://github.com/yahboomtechnology/ESP32-wifi-Microbit

1.3.4 Add the building blocks of the car
The URL of the building blocks of the car: https://github.com/YahboomTechnology/Tiny-bitLib.git

1.3.5 Introduction to the main building blocks
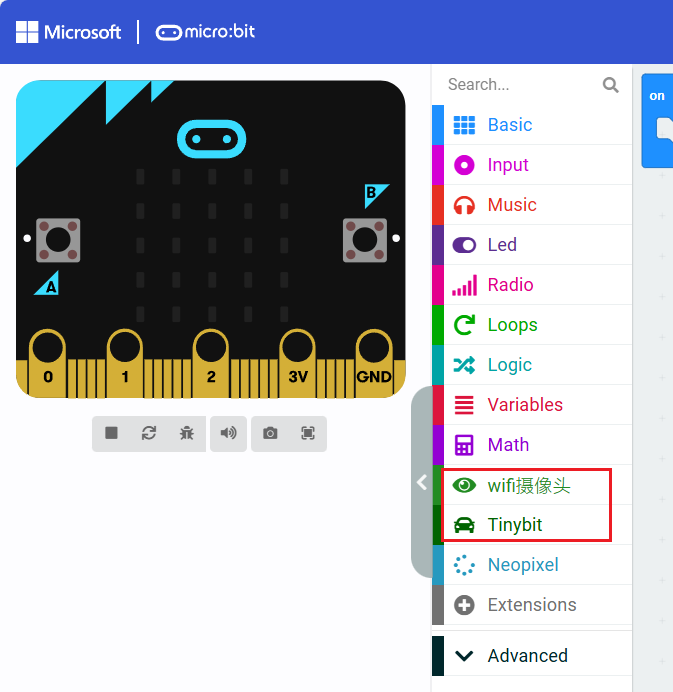
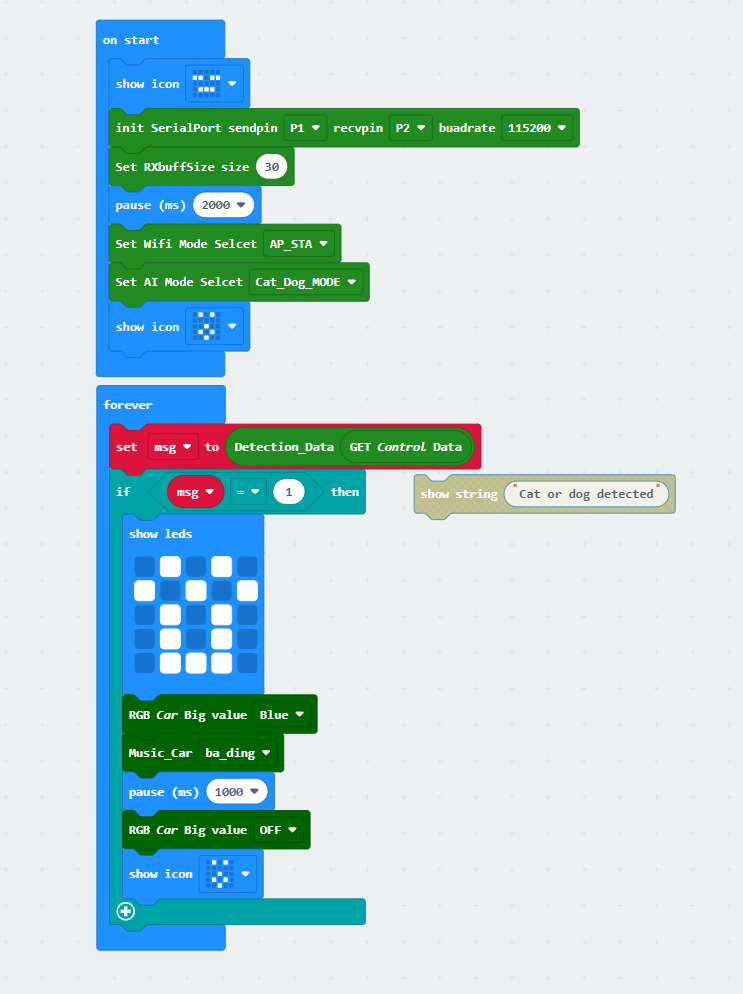
After successfully introducing the above building blocks, the result will be displayed as shown in the figure below
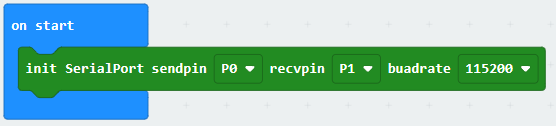
- Serial port initialization block This is used to define the pins for serial communication. When communicating with a wifi camera, the baud rate is 115200 by default and cannot be changed
- Set the size of the serial port receiving buffer This block is used to define the size of a packet of data that can be accepted for transparent transmission, for example
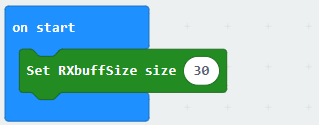 This defines that the maximum size of a packet is 30 characters. Exceeding this will result in incomplete data reception. This value cannot be less than 25, otherwise the IP information will also be incomplete
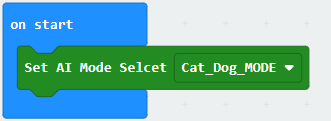
 - Set AI mode This building block is used to set the current AI visual gameplay mode, which can be set to different modes
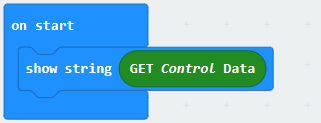
- Building block for obtaining transparent data This building block is mainly used to obtain information sent by the host computer to microbit, and transmits information through the wifi camera as an intermediate
- Method to open the source code provided by the tutorial
- Open the URL https://makecode.microbit.org/# in the browser
- Then drag the microbit-Cat_dog_decect.hex file provided in this experiment into the browser that opens the URL, and the program diagram of the source code of this project will be automatically opened
1.4 Experimental results
- Turn on the switch of the car, wait for the pattern corresponding to the mode setting to be displayed on the microbit, and then you can connect the APP. After successful startup, the camera module will generate a hotspot. The default IP address of the hotspot AP mode is 192.168.4.1 (this tutorial recommends using a simple self-heating hotspot AP mode for connection. To connect to WIFI using STA mode, please see the extended content of STA mode connection below)
- Download the APP: For Android, please use the browser to scan the following QR code to download and install YahboomCam. For Apple, please use the camera to scan the QR code to enter the App Store to download and install, or search for "YahboomCam" in the App Store to find "YahboomCam".

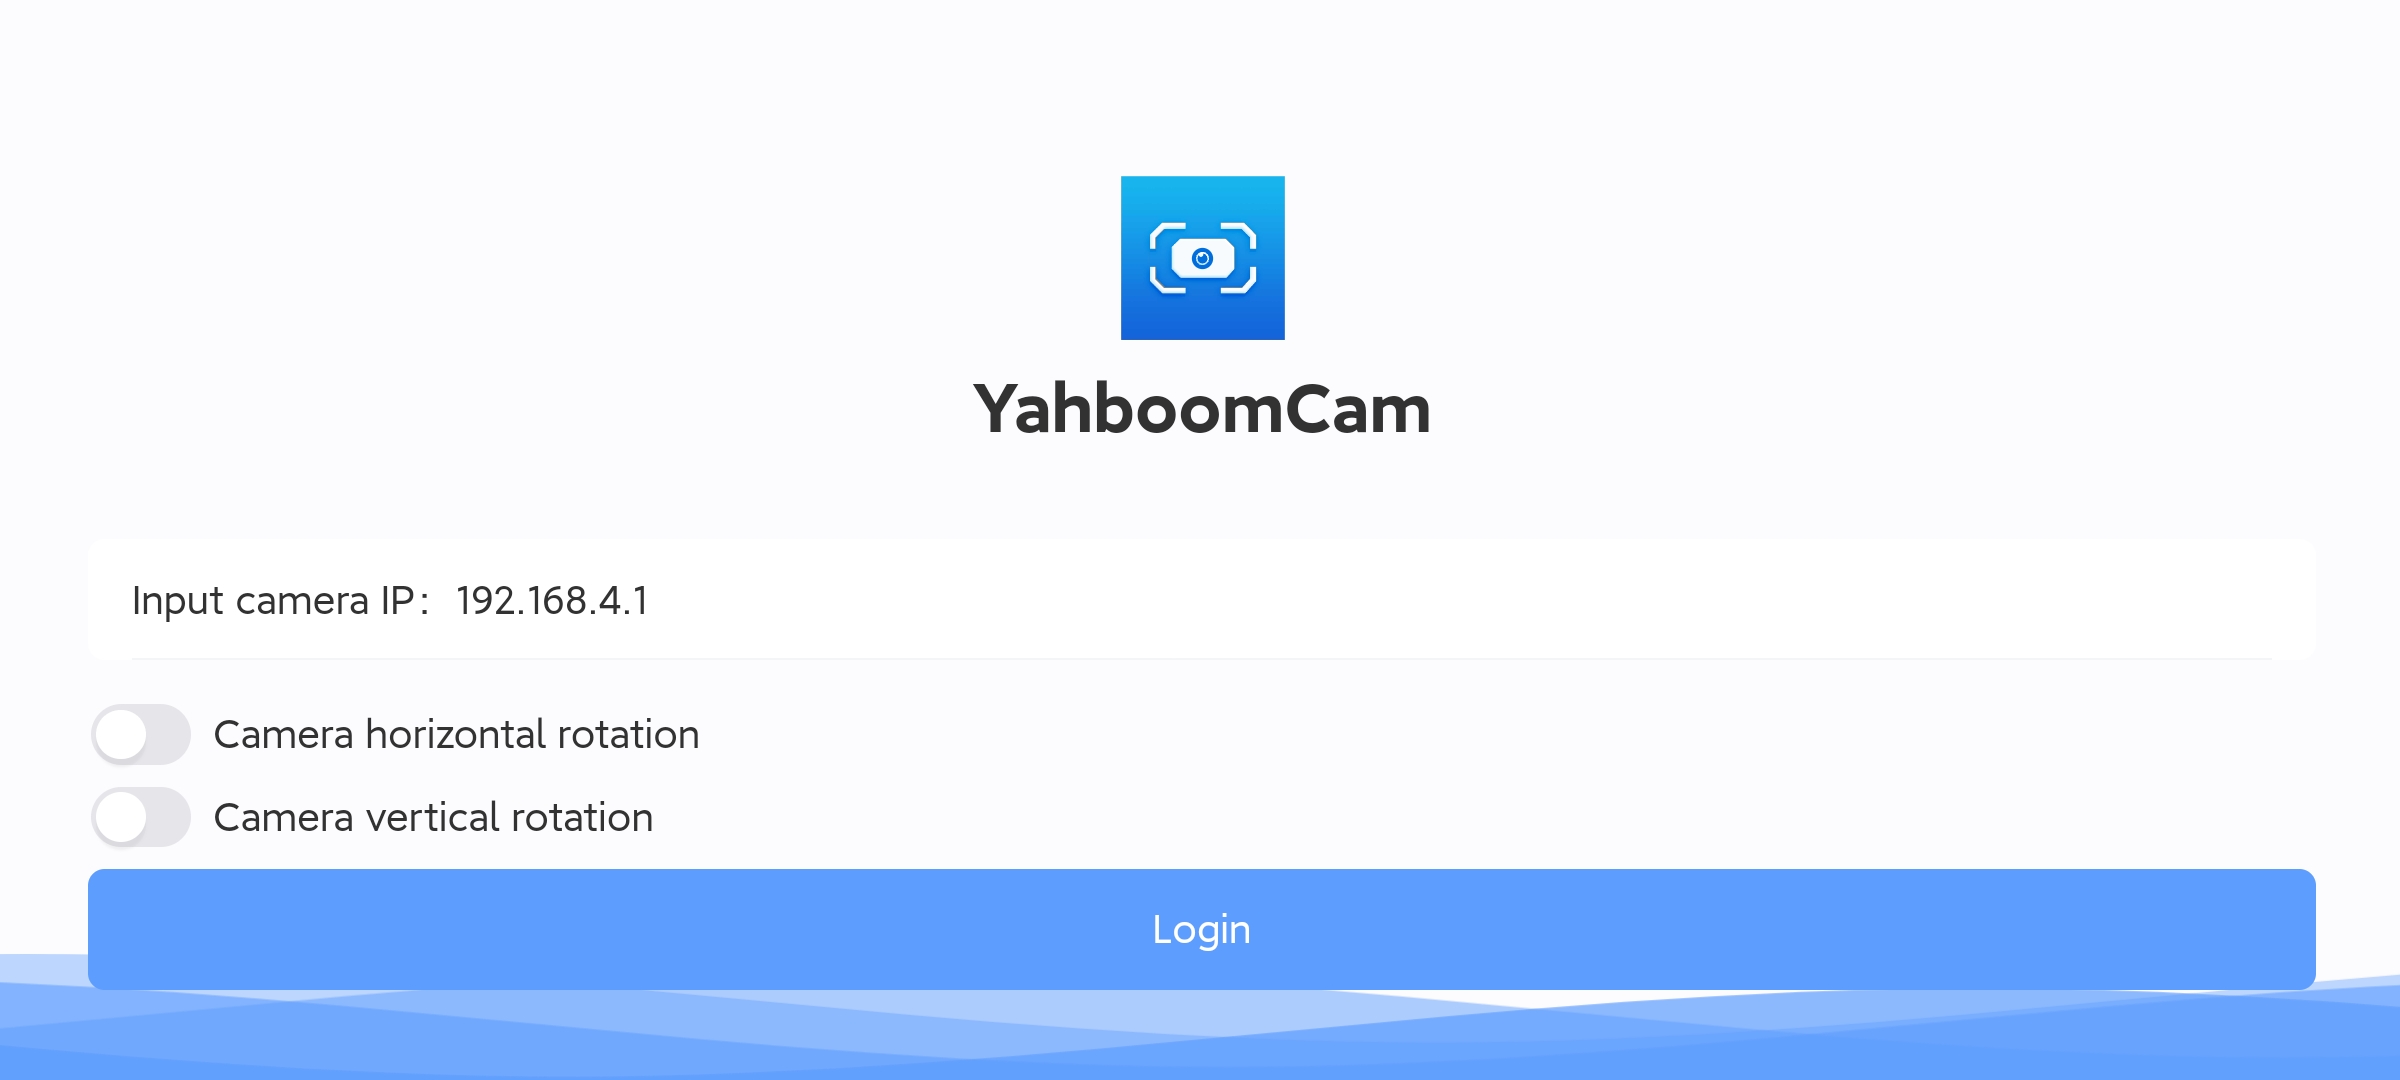
- Use your mobile phone to connect to the hotspot (the default hotspot name is Yahboom_ESP32_WIFI, and there is no password). Open YahboomCam, enter the camera IP and fill in the default IP address 192.168.4.1 displayed by microbit, and then click Login.
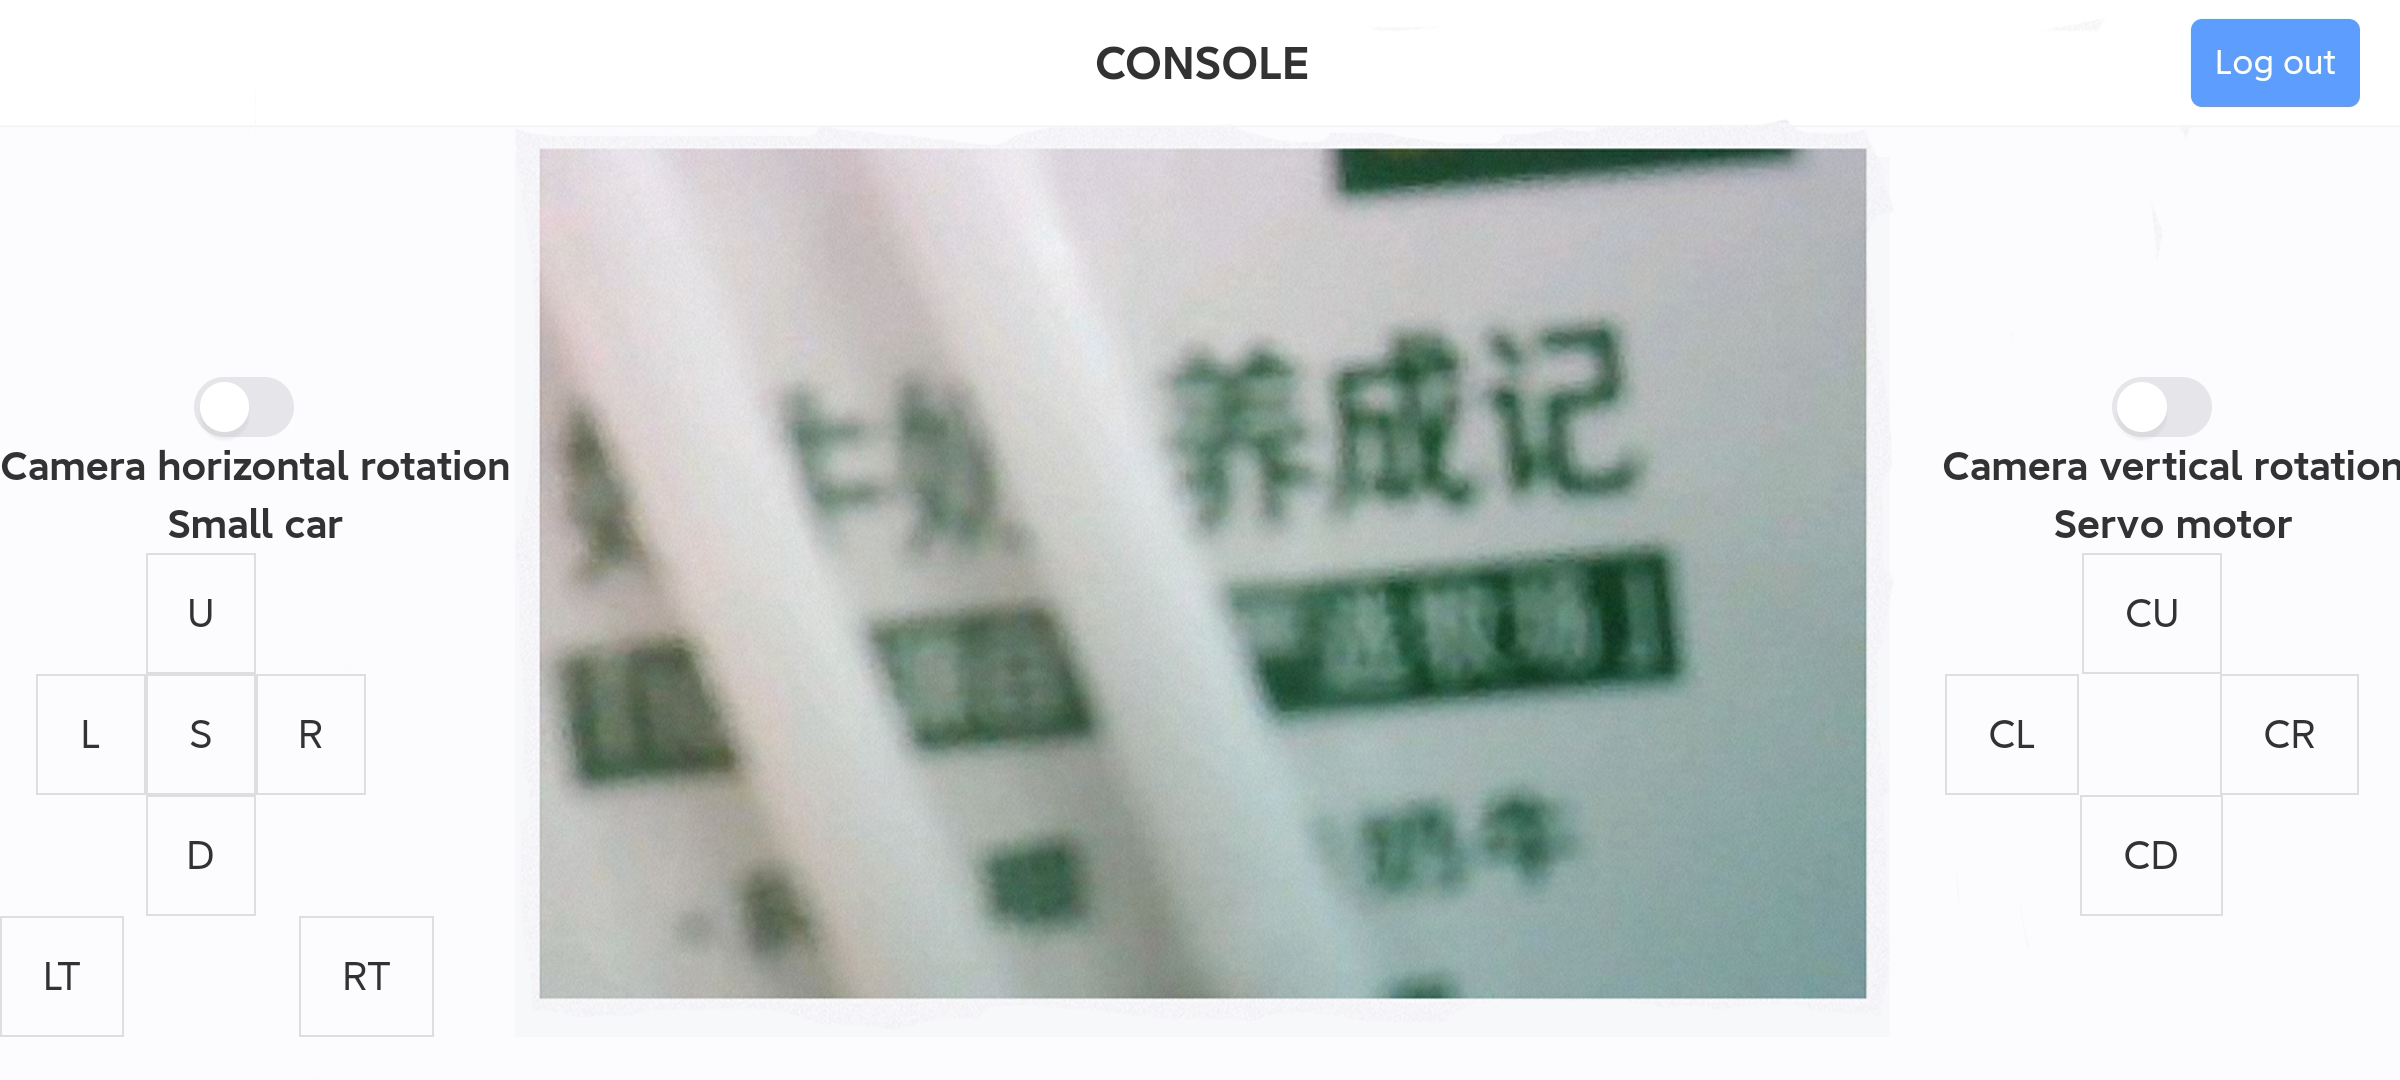
- The page after logging in is as follows, where you can see the camera screen.
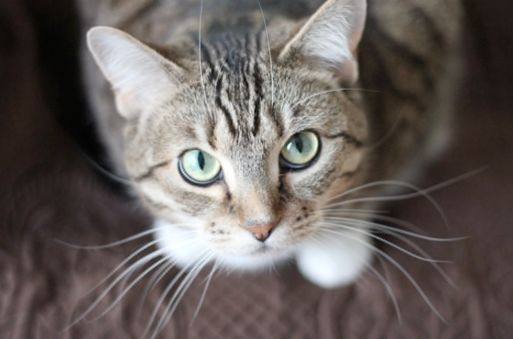
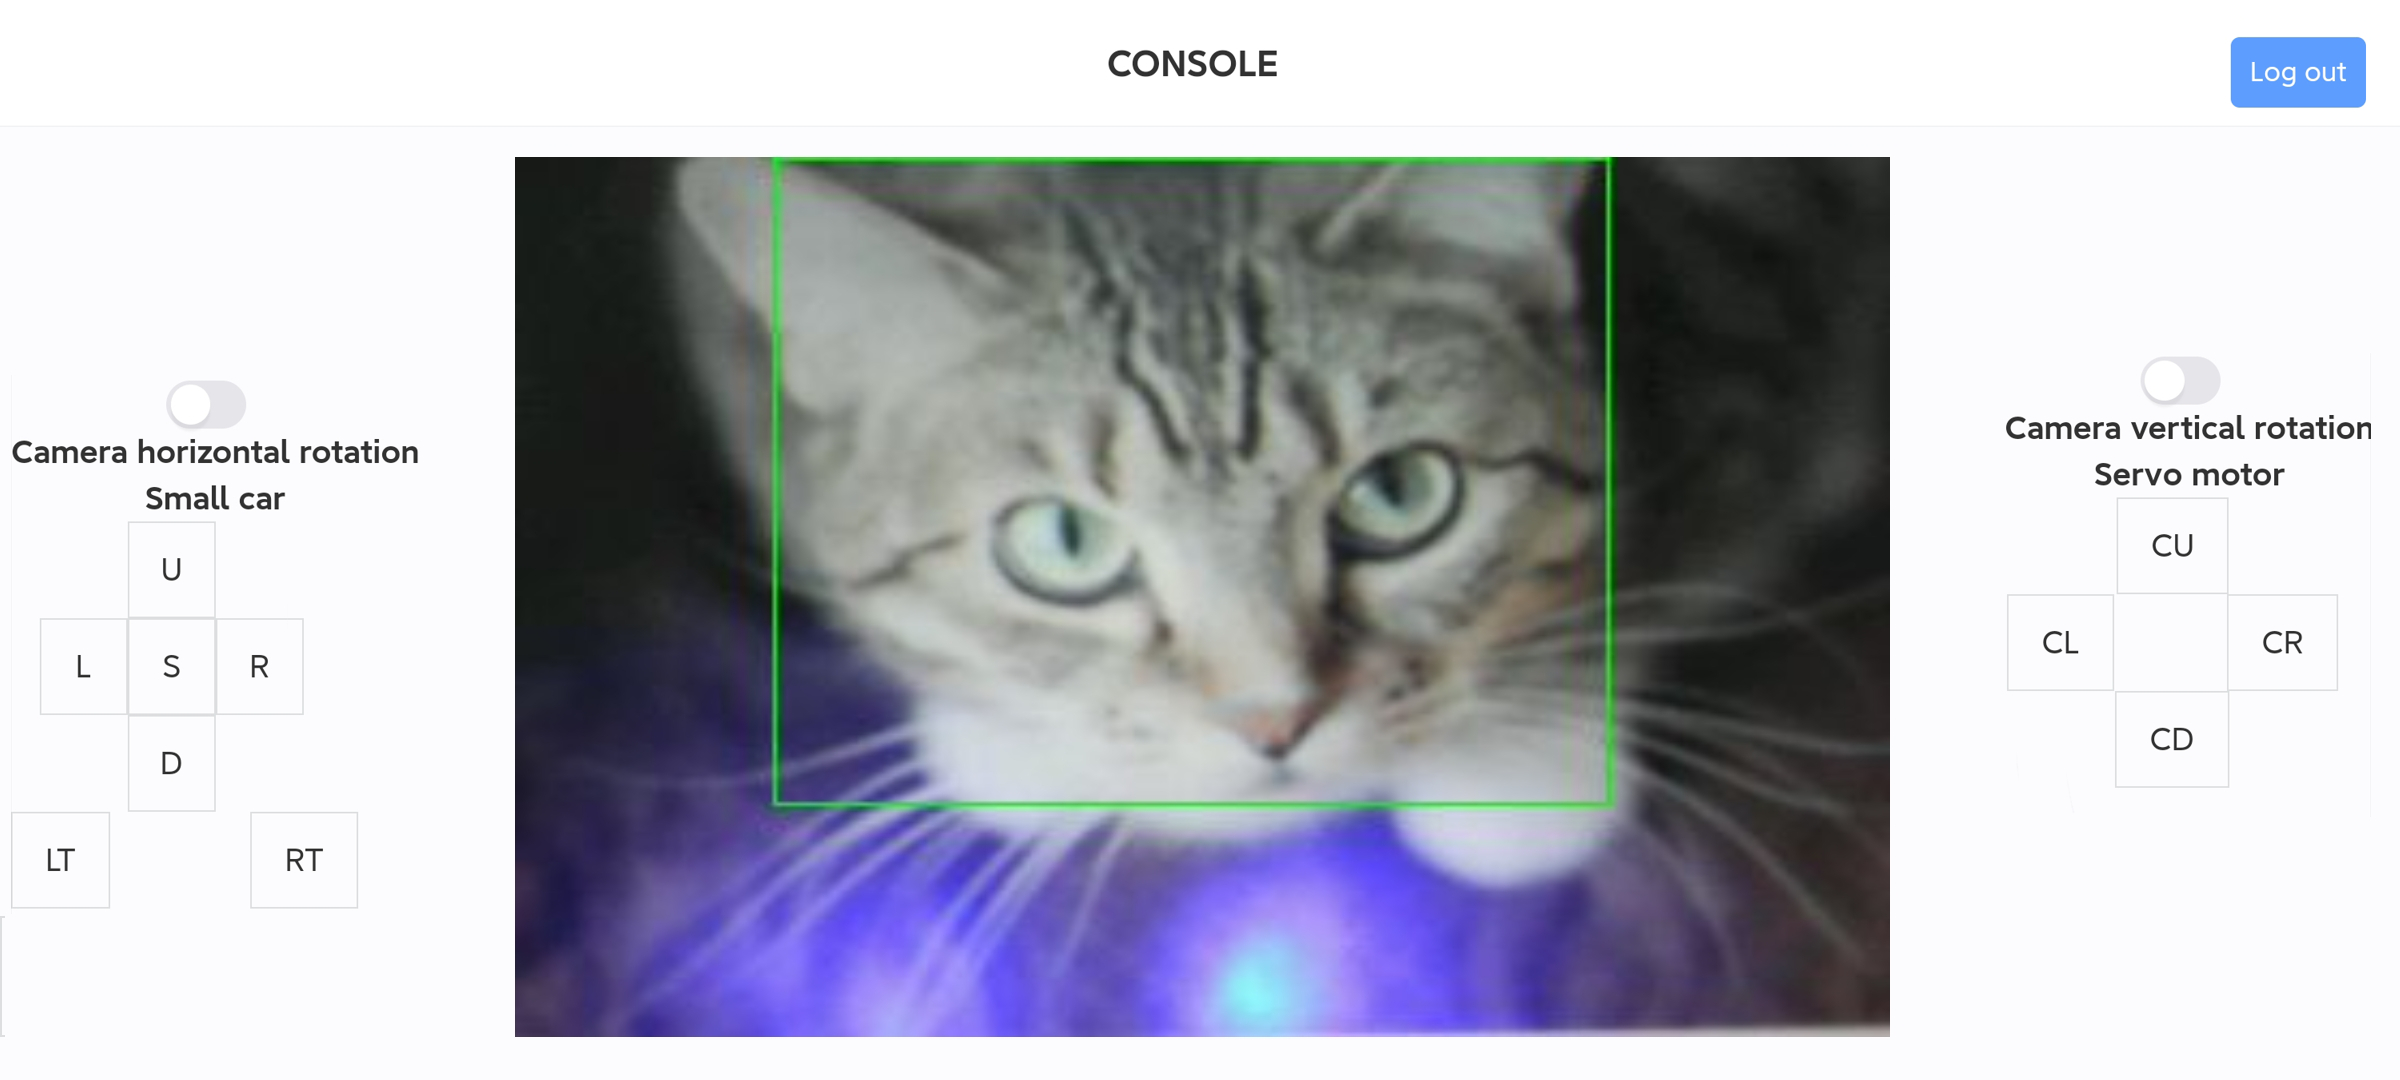
Aim the camera at the picture or cat or dog to be identified. When a cat or dog is identified, the microbit displays the result, the RGB lights of the car turn blue and the horn sounds for 1 second.
Note: You need to turn on the screen to start the identification. If the screen is turned off in the middle, the identification will also be turned off.
Cat
Dog

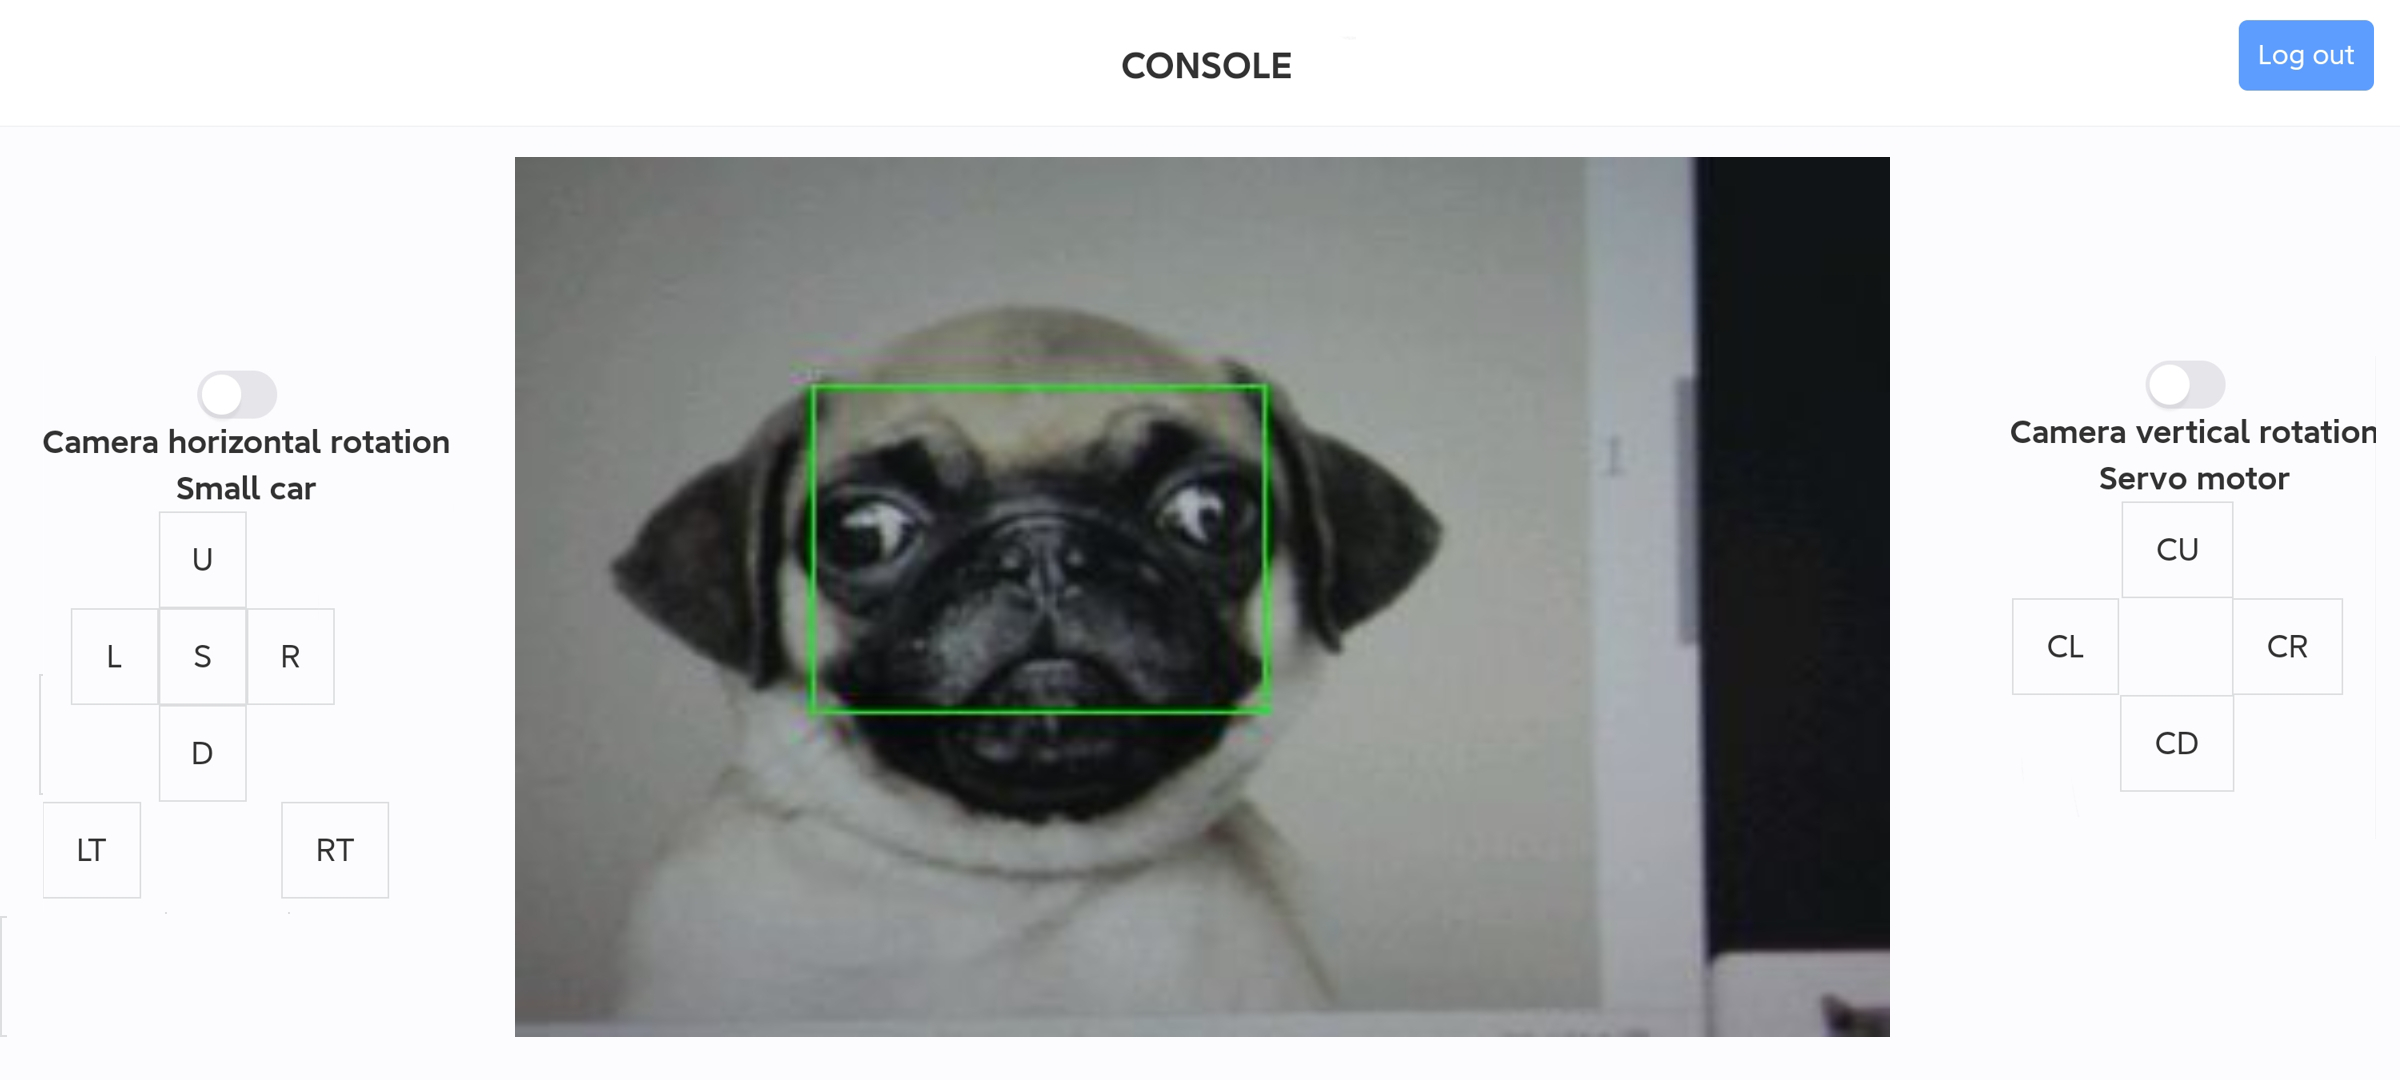
Due to the model, this mode can only detect cats and dogs, and cannot distinguish between cats and dogs
1.5 Extension: STA mode connection
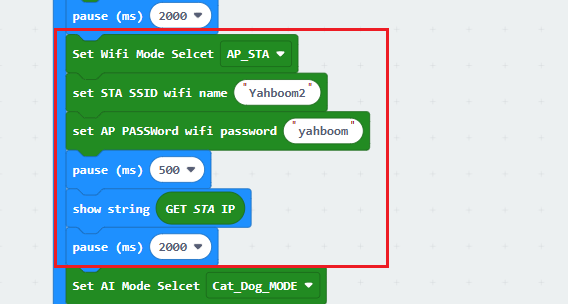
- Change the source code, drag the .hex file provided in this experiment into the browser that opens the URL, and set the WiFi name and password to connect. The WiFi name and password must be filled in correctly according to the WiFi you want to connect to, otherwise there is no way to correctly connect to the WiFi and display the IP address. If the connection is successful, the IP address of sta_ip:192.168.x.x will be displayed. If the connection is unsuccessful, sta_ip:null will be displayed. You need to check whether the WiFi name and address filled in the program are correct.
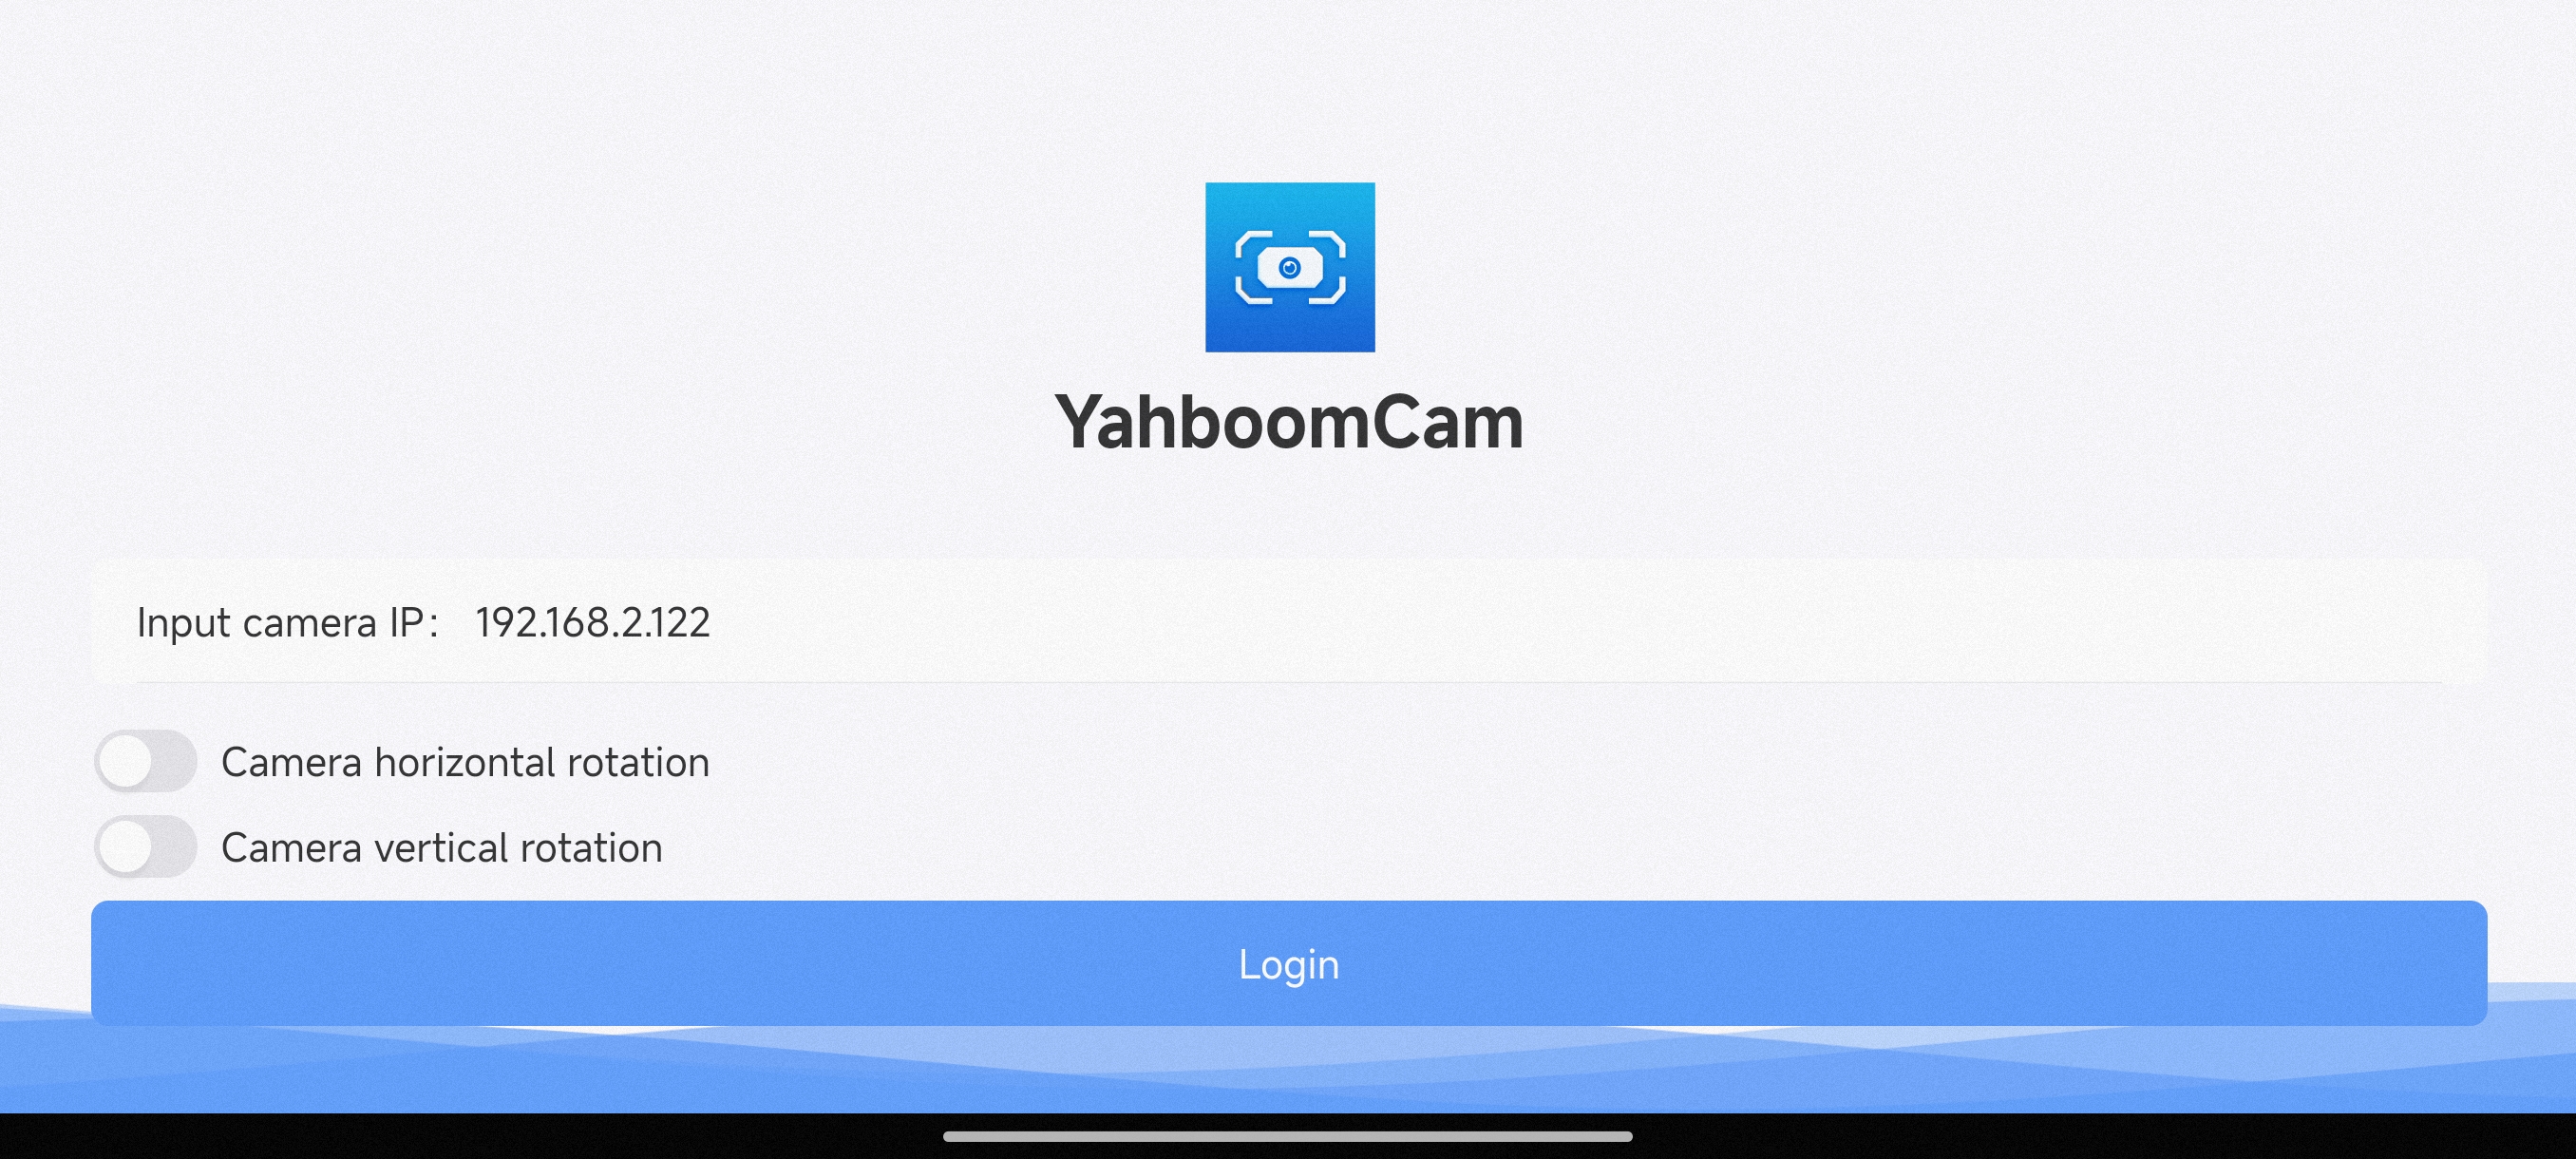
- Connect the mobile phone to the WIFI set above, and make sure that the mobile phone and the robot are connected to the same WiFi. Open YahboomCam, enter the camera IP and fill in the sta_ip address displayed by microbit (pay attention to the content displayed by microbit, and when you see 1, 9, and 2 floating continuously, the IP address is being displayed), and then click Login. (The IP in the picture is only an example, the specific IP should be based on the display of microbit)
- After logging in, you can see the following page and the camera screen.