Welcome to Voice interaction module repository
Arduino code
1. Learning Objectives
In this course, we mainly learn to use the Jetson NANO and the voice interaction module to realize the recognition and broadcast.
2. Preparation
The voice interaction module adopts UART communication, the program adopts virtual serial port, and the TXD and RXD of the module are respectively connected to the A1 and A2 pins of the arduino UNO board. 5V and GND are connected to 5V and GND of the arduino UNO respectively.
Note: The module needs sufficient power to work normally, and external power needs to be supplied to the arduino UNO DC port.
Wiring

3. Code
Serial port receives data
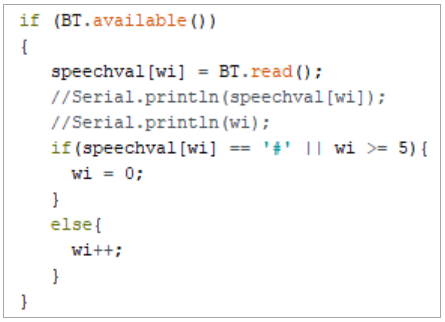
Data processing
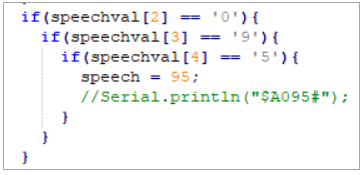
Judging data and broadcasting
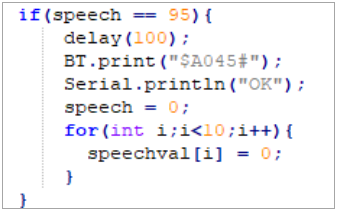
4. Compiling and downloading code
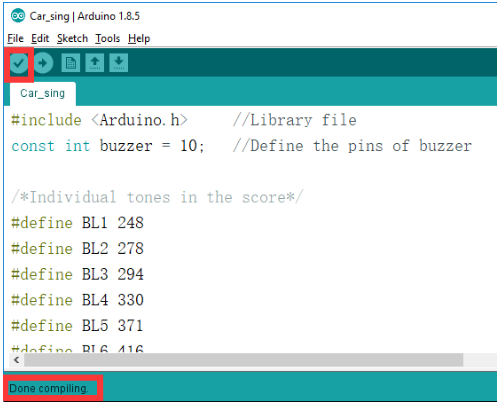
4.1 We need to open the XXX.ino file by Arduino IDE software. Then click“√”in the menu bar to compile the code, and wait for the word "Done compiling " in the lower left corner, as shown in the figure below.
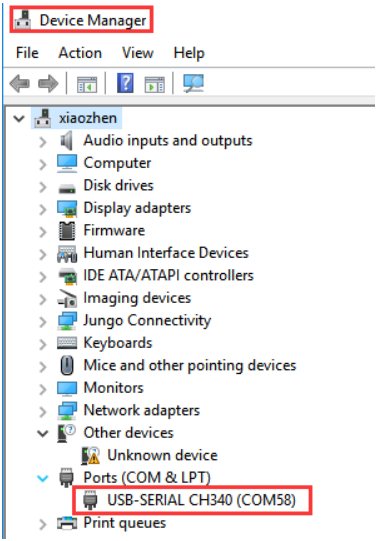
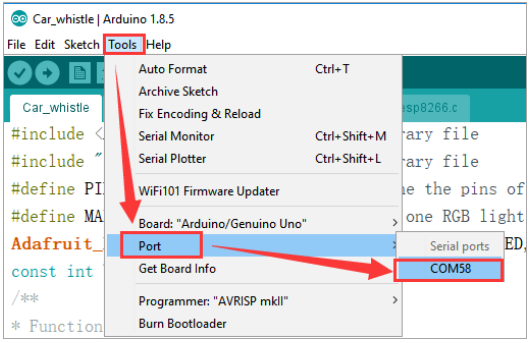
4.2 In the menu bar of Arduino IDE, we need to select 【Tools】---【Port】--- selecting the port that the serial number displayed by the device manager just now, as shown in the figure below.
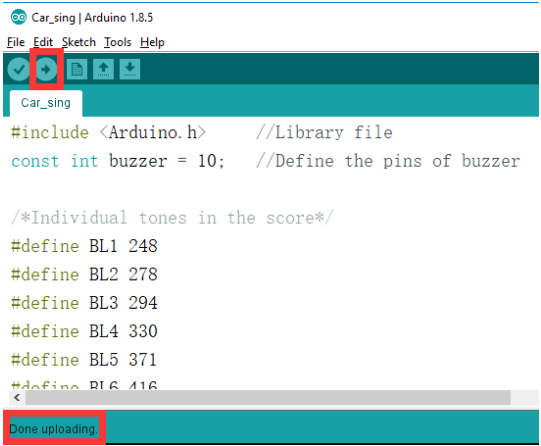
4.3 After the selection is completed, you need to click “→”under the menu bar to upload the code to the UNO board. When the word “Done uploading” appears in the lower left corner, the code has been successfully uploaded to the UNO board, as shown in the figure below.
5. Experimental phenomenon
After the code is run, open the serial monitor and set the baud rate to 9600.
You can say: “Hi, Yahboom”, the speaker will reply: “Hi, i am here”. The terminal will print: hi.
You can say: “ Close light”, the speaker will reply: OK, lights is closed. The terminal will print: OK.