Welcome to Pico Robot Car repository
4.1 Light sensor
4.1 Light sensor
1. Learning objectives
- Learn to combine the photosensitive sensor and OLED of the Raspberry Pi Pico 2/Pico mainboard and the car expansion board to conduct experiments.
- Understand the use of photosensitive sensors.
2. Hardware usage
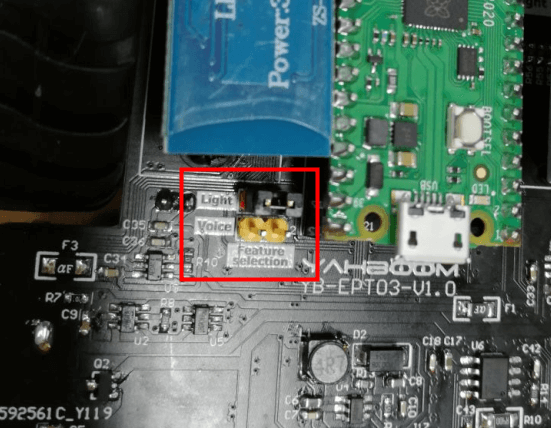
This course uses the photosensitive sensor and OLED of the Pico 2/Pico mainboard and the car expansion board. Please connect the jumper cap to the Light header before running.
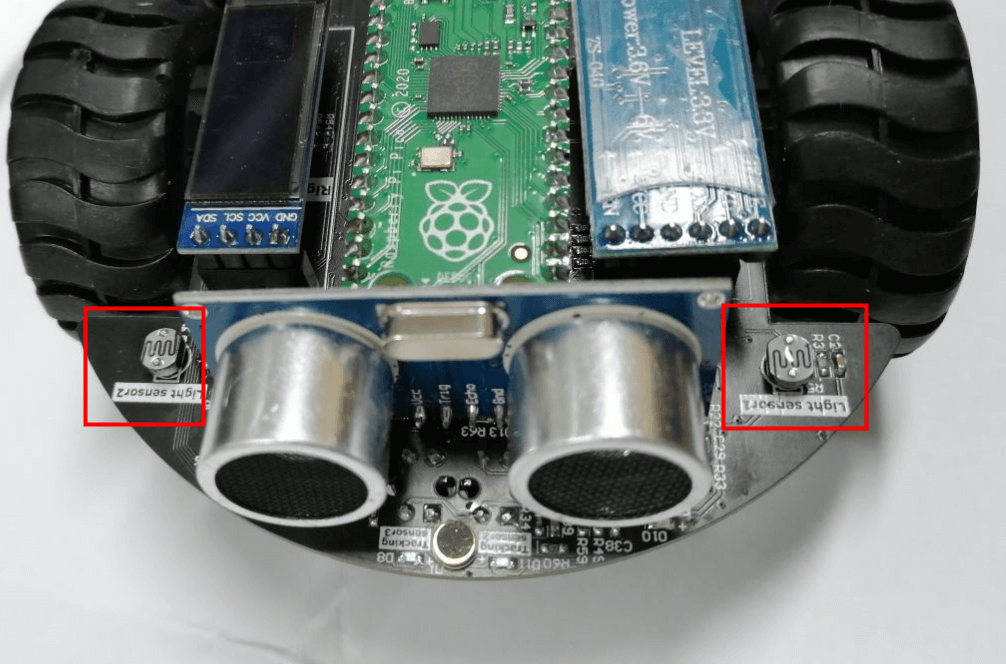
Photosensitive resistors are special resistors made of semiconductor materials such as cadmium sulfide or cadmium selenide. Their working principle is based on the internal photoelectric effect. The stronger the light, the lower the resistance. As the light intensity increases, the resistance decreases rapidly. The sensitivity of photoresistors to light (i.e., spectral characteristics) is very close to the human eye's response to visible light (0.4~0.76) μm. As long as the light is perceptible to the human eye, it will cause its resistance to change.
3. Program Analysis
Code path: Code -> 2.Advanced course -> 1.Photosensitive sensor.py
xfrom pico_car import ds, SSD1306_I2Cfrom machine import Pin, I2C, ADCimport time#initialization oledi2c=I2C(1, scl=Pin(15),sda=Pin(14), freq=100000)oled = SSD1306_I2C(128, 32, i2c)#Light1 -> GP27#Light2 -> GP26light1 = machine.ADC(27)light2 = machine.ADC(26)while True:#get valueLightS1 = light1.read_u16()LightS2 = light2.read_u16()print("light1 is %d"%(LightS1) )print("light2 is %d"%(LightS2) )#Display sound on OLEDoled.text('Light1:', 0, 0)oled.text(str(LightS1), 60, 0)oled.text('Light2:', 0, 10)oled.text(str(LightS2), 60, 10)oled.show()oled.fill(0)time.sleep(0.5)
from pico_car import SSD1306_I2C
Use SSD1306_I2C from pico_car.
import time
The "time" library. This library handles everything to do with time, from measuring it to inserting delays into your program. The unit is seconds.
from machine import Pin, I2C, ADC
The machine library contains all the instructions MicroPython needs to communicate with Pico and other MicroPython-compatible devices, extending the language of physical computing. The Pin, ADC and I2C libraries are used here.
i2c=I2C(1, scl=Pin(15),sda=Pin(14), freq=100000)
Set IIC 1 pin to SCL 15, SDA 14, and frequency to 100000.
oled = SSD1306_I2C(128, 32, i2c)
Initialize the size of OLED to 128*32 and pass the previously set IIC parameters into it.
light1 = machine.ADC(27)
Initialize ADC port 27. There are two light sensors, and pins 27 and 26 are set respectively.
oled.text(str(LightS1), 60, 0)
Convert the light-sensitive value into a string and display it at the 60,0 position of the OLED.
oled.show()
Display the set OLED content.
oled.fill(0)
Clear the set content and prepare for the next display.
LightS1 = light1.read_u16()
The light1.read_u16() function is used to detect the value of the sound sensor and assign it to the variable LightS1.
4.experimental phenomenon
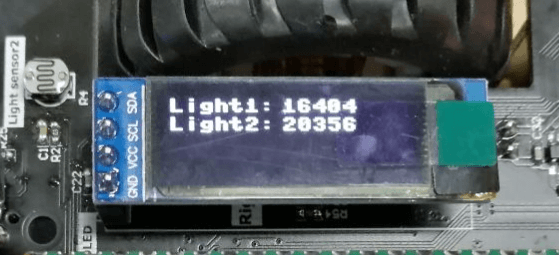
After the program is downloaded, we can see that the first line of OLED displays the value of light sensor 1, and the second line displays the value of light sensor 2. At the same time, Shell will also print the light sensor value. If you cover the light sensor with your hand, the value will change.