Welcome to ESP32 WiFi Camera Lite repository
3.How to update firmware
How to update the firmware
Note: The camera has been burned with the factory firmware. If you have not burned other AI single-instance firmware, you do not need to burn the factory firmware again. The factory firmware of the camera only provides bin file burning, and does not provide program source code.
1. Install the CH340 serial port driver
If the Windows system has already installed the CH340 serial port driver, you can skip this step.
The CH340 serial port driver file path is in the supporting materials [Attachments] -> [Software tools used by each master control] -> [CH341SER.zip]
Unzip to get the following file

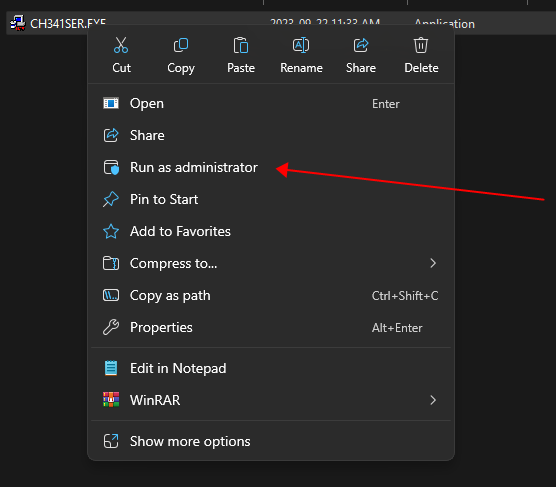
Open the installation package as an administrator
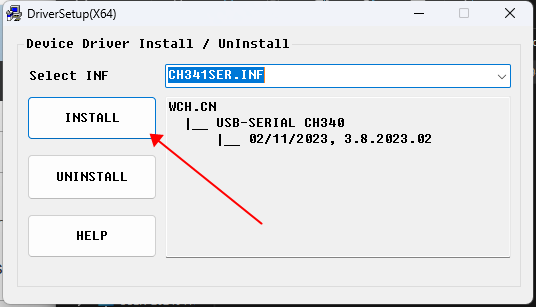
After the driver installation is complete, click OK.
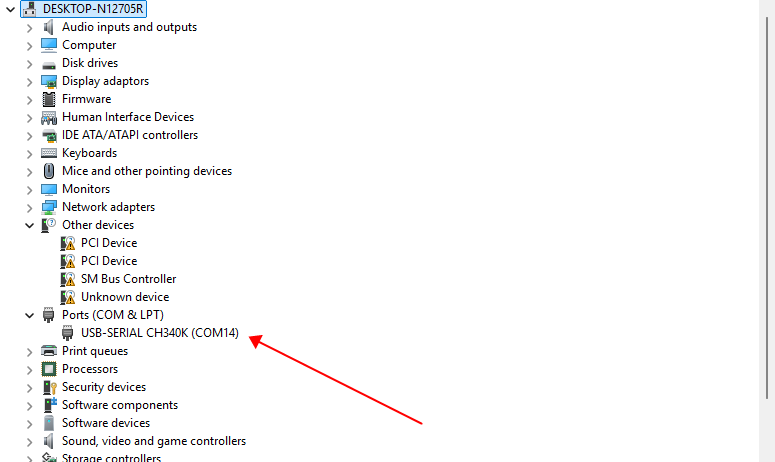
Open the [Device Manager] of the Windows system. If you see the CH340 device in [Port], it means that the driver installation is successful.
Download Flash Tool
2. Download Flash Tool
Download URL:
xhttps://www.espressif.com.cn/en/support/download/other-tools

Unzip to get flash_download_tool, double-click to open.
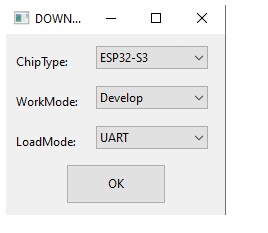
As shown in the figure below, select serial port to burn ESP32-S3. Click OK to open the burning tool.
3. Configure the burning tool
3.1 Burn the factory firmware
Download the factory firmware to the local computer in the attached source code. In ‘SPIDownload’, select the firmware to be burned to ESP32S3 as the one just downloaded to the local computer. The firmware version number is after V, and the firmware address is 0x0. You must confirm that the box on the left of the bin file is checked, and the file and address are both green.
Check DoNotChgBin, select the connected COM port, and keep the other configurations as default.
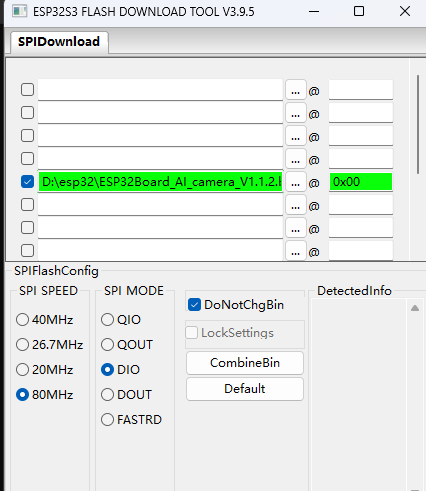
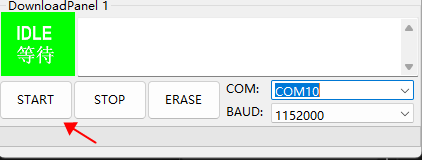
Click the START button, and the tool will automatically start burning the firmware.
Note: If the firmware does not start burning automatically, please press and hold the boot0 key, then press the reset key, release the boot0 key, manually enter the burning mode, and then click the START button.
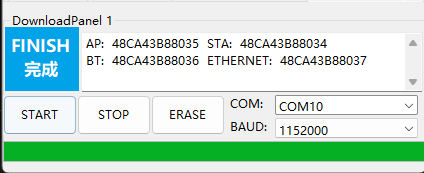
After the download is complete, the blue FINISH logo will be prompted. At this time, power off and restart the MCU or press the reset button to start the program and close the burning tool.
3.2 AI single-case firmware burning
After the AI single-case source code is compiled successfully, open the burning tool as well.
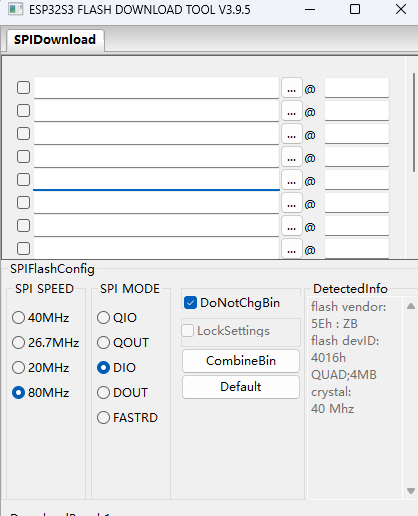
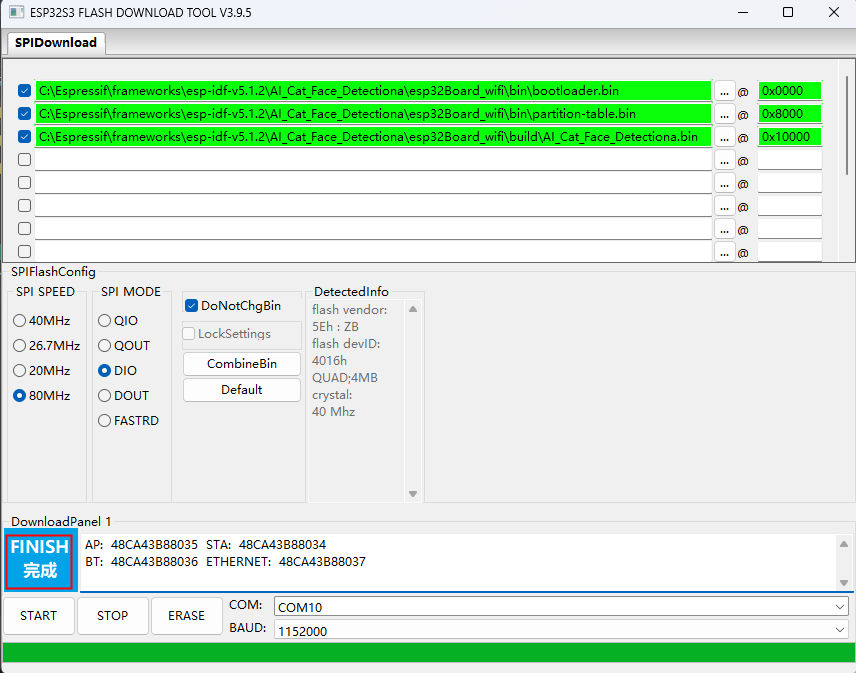
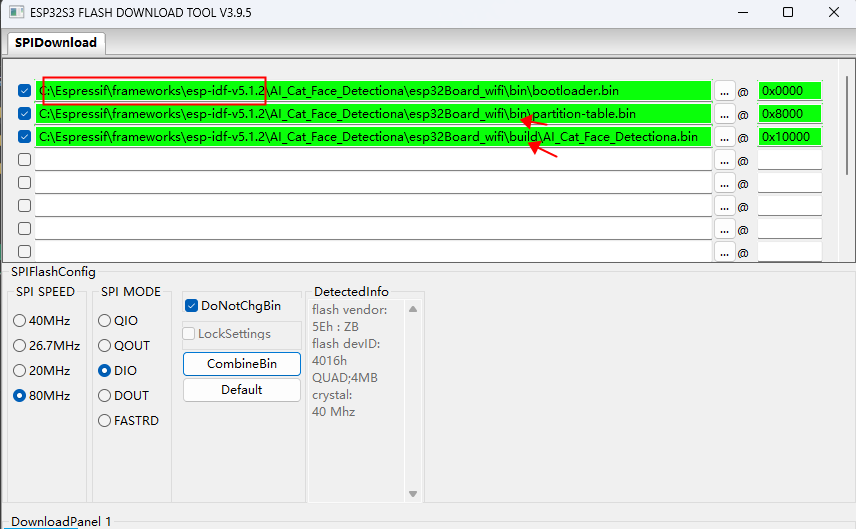
In ‘SPIDownload’, select the firmware to be burned to ESP32S3. The corresponding relationship between the file and the address is shown in the following table. Then select the connected COM port. Keep other configurations as default.
| Firmware Name | Firmware Address | Remarks |
|---|---|---|
| bootloader.bin | 0x0000 | Boot File |
| partition-table.bin | 0x8000 | Partition Table File |
| microROS_Robot.bin | 0x10000 | Function File |
Note: You must confirm that the box on the left of the bin file is checked, and the file and address are both green backgrounds before the file can be burned in. Unchecked files will not be burned in. For specific paths, see the boxed path below the AI single case
Click the Start button and the tool will automatically start burning the firmware.
Note: If the firmware does not start burning automatically, press and hold the boot0 key, then press the reset key, release the boot0 key, and manually enter the burning mode.

After the download is complete, a blue FINISH logo will appear. At this time, power off and restart the microcontroller or press the reset button to start the program.