Welcome to ROS-WiFi Camera Module repository
2. Viewing camera on ROS2
Viewing camera on ROS2
Viewing camera on ROS20. Install Docker on a Linux system1. Start ROS Wifi image transmission module ROS2 agentPublishing nodesTopic informationMessage typeTopic posting frequency2.ROS2 obtains camera image3.View images in RVIZ4.matters needing attention
0. Install Docker on a Linux system
# **If using a system provided by the data, skip this step**sudo apt updatesudo apt install docker.io docker-composedocker -vDownload and install Docker as shown in the picture

1. Start ROS Wifi image transmission module ROS2 agent
- First, start the STA mode of the ROS Wifi image transmission module (default start) and allow ESP32 to connect to an internet enabled WiFi in the local environment. Note: When using AP mode, you cannot enter the proxy because entering the proxy requires a network, and AP mode does not have a network
- The proxy host also needs to be connected to the same local area network as the ROS Wifi image transmission module Proxy host: It is a Linux system with ROS2 (Humble version) installed
- Query the IP address of the proxy host
Enter the command ifconfig
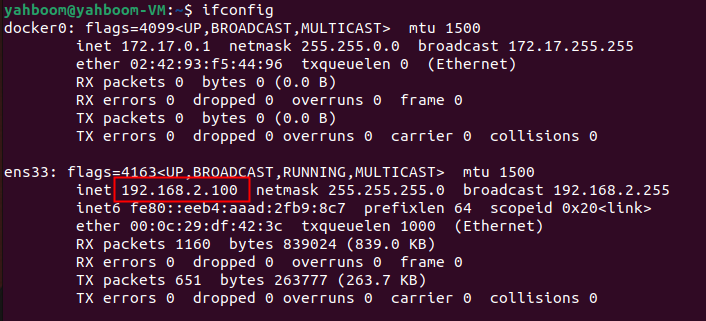
- Then use a serial port tool to configure the ROS Wifi image transmission module's ROS2 proxy host address
For example, in the above figure, my IP address is 192.168.2.100, and the configuration of the serial port is shown in the figure
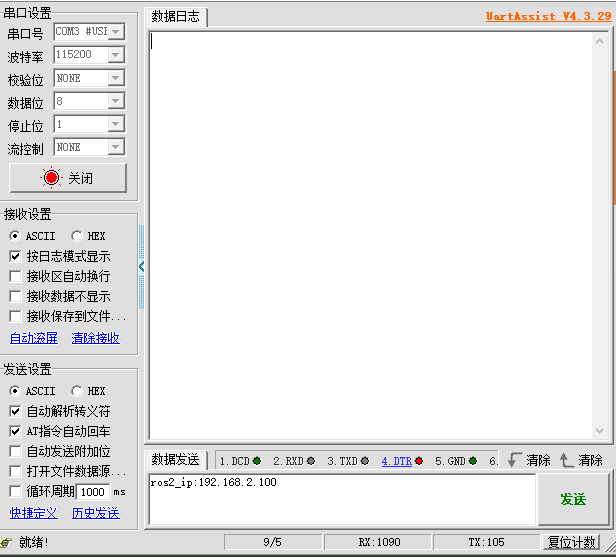
After clicking send, there are two types of information to print, both of which are configured
- If the original proxy IP of the ROS Wifi image transmission module is different from the current one, the current proxy IP will be updated and restarted
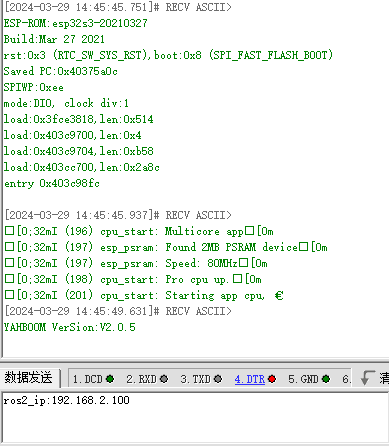
- If the original proxy IP of the ROS Wifi image transmission module is the same as now, the ROS Wifi image transmission module will return an OK message
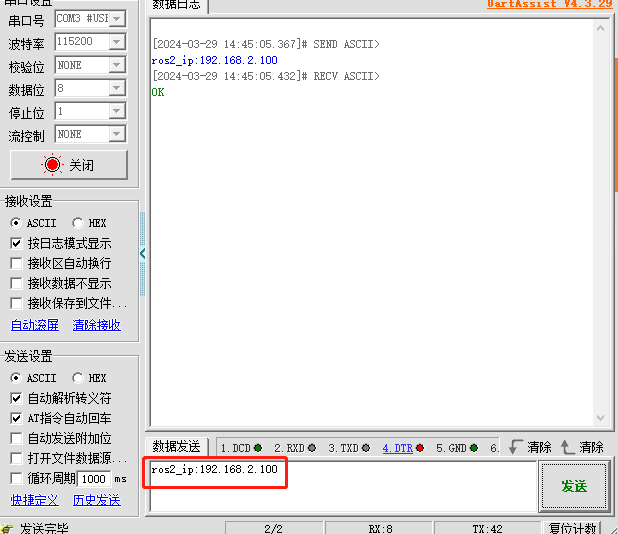
- If the original proxy IP of the ROS Wifi image transmission module is different from the current one, the current proxy IP will be updated and restarted
- After completing the proxy configuration of the ROS Wifi image transmission module, execute the following command on the proxy host
xxxxxxxxxx# If the virtual machine using the data runs the command directlysh start_Camera_computer.shxxxxxxxxxx# Not a virtual machine provided by the datadocker run -it --rm -v /dev:/dev -v /dev/shm:/dev/shm --privileged --net=host microros/micro-ros-agent:humble udp4 --port 9999 -v4- This 9999 port will be used to enter the proxy, so I need to avoid using this port in my future development
The successful entry result is shown in the figure:
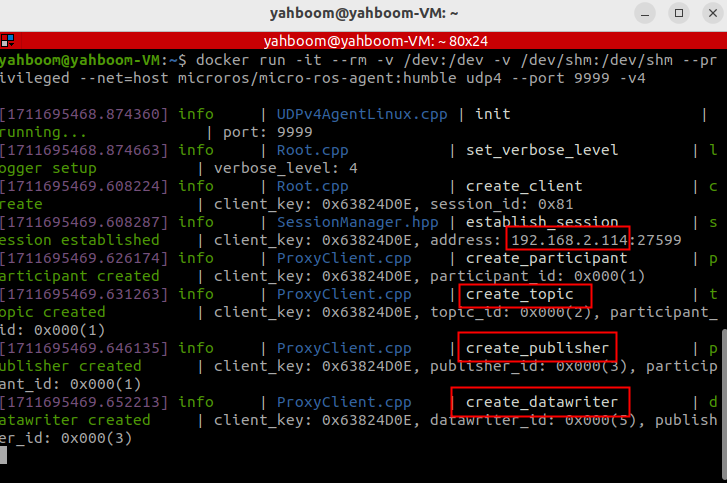 There must be so much information to correctly activate the agent. Missing one may require manually powering off and resetting the ROS Wifi image transmission module
According to the proxy results in the above figure, the IP of the ROS Wifi image transmission module can be obtained as 192.168.2.114
There must be so much information to correctly activate the agent. Missing one may require manually powering off and resetting the ROS Wifi image transmission module
According to the proxy results in the above figure, the IP of the ROS Wifi image transmission module can be obtained as 192.168.2.114
- Query ROS2 nodes, topic information, topic publishing frequency, and topic message types published by the ROS Wifi image transmission module
Publishing nodes

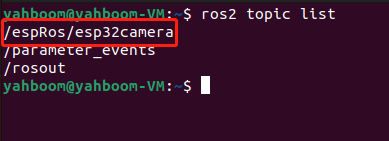
Topic information
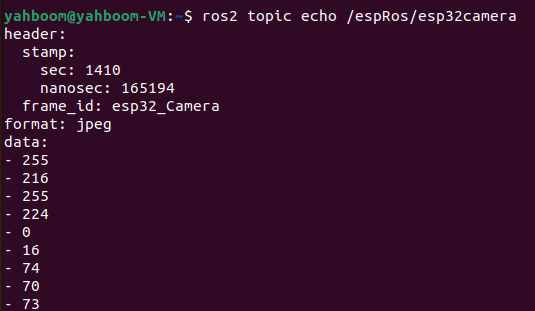
Message type

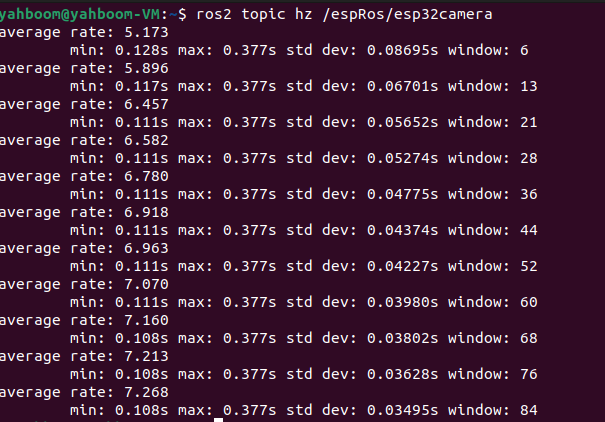
Topic posting frequency
2.ROS2 obtains camera image
Note: If using a virtual machine provided in the data, only refer to step 4
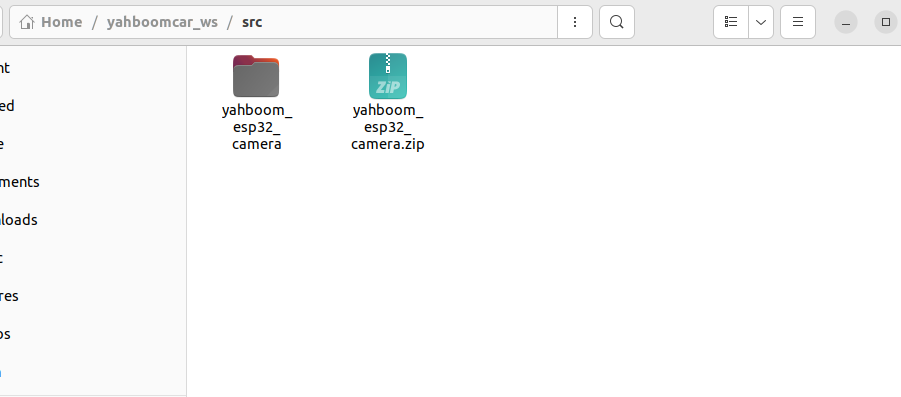
- First, create a folder and execute the following command
xxxxxxxxxxmkdir -p ~/yahboomcar_ws/src
- Place the provided yahboom_esp32_camera in the path you just created and unzip it
- Then compile the feature pack and add the environment
xxxxxxxxxxcolcon buildecho "source ~/yahboomcar_ws/install/setup.bash " >> ~/.bashrcsource ~/.bashrc
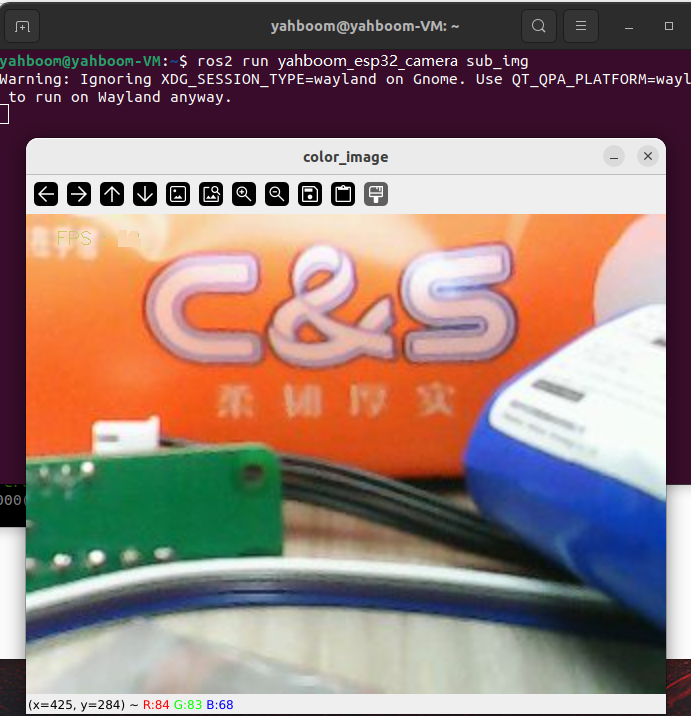
- Run the command to open the camera screen
xxxxxxxxxxros2 run yahboom_esp32_camera sub_img
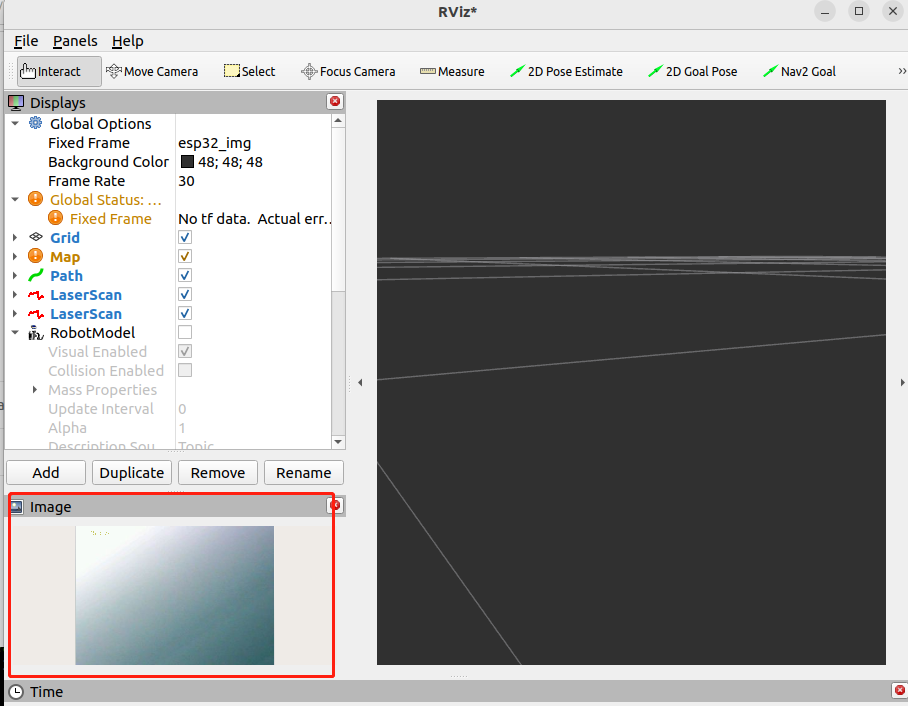
3.View images in RVIZ
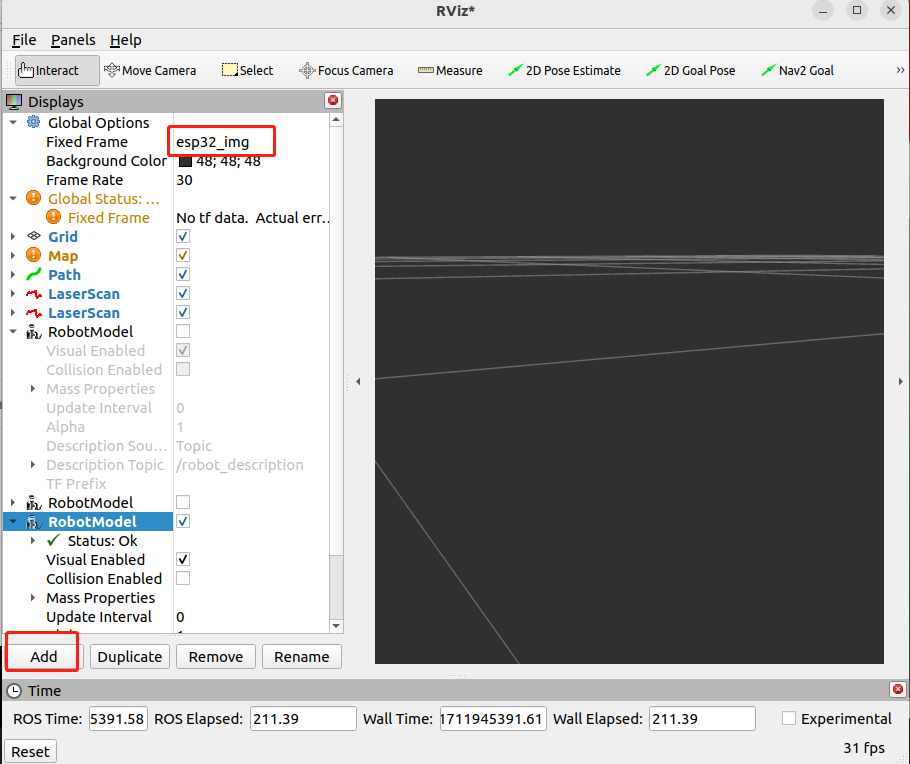
- Under the premise that ROS2 obtains the camera image, open the installed rviz software
xrviz2 #rviz/rviz2
- Replace the topic of fixed frame with /esp32_img
- Then load the image of this topic
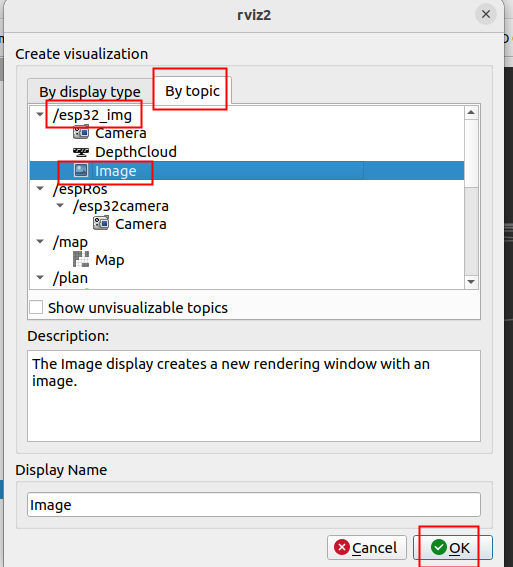
- Finally, rviz displays the image of the camera
4.matters needing attention
- If the host actively disconnects the agent, the ROS Wifi image transmission module needs to be manually powered off and restarted before it can be restored and connected to the agent
- This port of 9999 will be used for proxy entry, so I should avoid using this port in my future development
- The use of proxies can only be configured through STA (Local Area Network) mode.