yahboom
HomeLearn
Solution
Blog
Online Store
About Us
EN/中文
Tiny:bit Pro📖
0.First Trial and Assemble
  • 1.0 Installation Video
  • 1.1 First Trial
1.Preparation before programming
  • 1.Online programming
  • 2.Offline programming
  • 3.Python Programming
  • 4.Import Tiny:bit library
  • 5.Tiny:bit MicroPython API
  • 6.How to download program
2.Lighting with Tiny bit
  • 3.1 LED light
  • 3.2 RGB Searching light
  • 3.3 RGB light exchange lighting
  • 3.4 LED light exchange lighting
  • 3.5 Breathing light
3.Singing withTiny bit
  • 4.1 Playing internal music
  • 4.2 Play Merry Christma with lights
4.Running with Tiny bit
  • 5.1 Advance
  • 5.2 CarRun
  • 5.3 Control speed
  • 5.4 Dancer
  • 5.5 Route plan
5.Playing with Tiny bit
  • 6.1 Measuring worker
  • 6.2 Distance control light
  • 6.3 Ultrasonic obstacle avoidanc
  • 6.4 Magic hand
  • 6.5 Radar detector
  • 6.6 Playing black paino
  • 6.7 Tracking
  • 6.8 Voice control light
  • 6.9 Coward
  • 6.10 Musical rhythm
  • 6.11 Listener
  • 6.12 Wobble when touch
  • 6.13 Spinning top
  • 6.14 Frog beating
  • 6.15 Adventure car
6.Interacting with Tiny bit
  • 7.1 IR Control
  • 7.2 Android bluetooth APP control
  • 7.3 iOS bluetooth APP control
  • 7.4 Handle remote control
7.MicroPython course
  • 1.Hello,World
  • 2.Display built-in image
  • 3.Display custom image
  • 4.Display custom animation
  • 5.Button game
  • 6.Play built-in music
  • 7.Car Headlights
  • 8.Drive Motor
  • 9.Tracking
  • 10.Sound sensor
  • 11.Ultrasonic
  • 12.IR control
  • 13.LED light
8.AI vision course
1. Preparation
  • 3.12.1 K210 Identification Information and Adjust
  • 1. K210 module download code
  • 1.2 Parsing K210 protocol data
  • 1.3 microbit connection use
2. Basic course
  • 2.1 Color recognition
  • 2.2 Barcode recognition
  • 2.3 QR code recognition
  • 2.4 Machine code recognition
  • 2.5 Object recognition
  • 2.6 Learning and classification
  • 2.7 Mask warning
  • 2.8 Facial recognition
  • 2.9 Handwriting digit recognition
3. Tinybit course
  • 3.1 Color response
  • 3.2 Barcode recognition
  • 3.3 QR code recognition
  • 3.4 Object detection
  • 3.5 Signposting action
  • 3.6 Mask Testing
  • 3.7 Face Detection
  • 3.8 Handwritten digital control
  • 3.9 Color patrol
  • 3.10 Machine code following
  • 3.11 Color tracking
  • 3.12.2 Autopilot
9.Charging and Battery
  • Charging and Battery
Download
  • APP(Android/iOS)
  • Code
  • Manual
  • Hardware Info
  • APP communication protocol
  • RoadSign File
  • Bluetooth Remote Control with ultrasonic V2.hex
  • Bluetooth Remote ControlV1.5.hex
  • Bluetooth Remote Control with ultrasonicV1.5.hex
  • IR control V1.5.hex
  • IR control V1.5.hex
  • IR control V2.hex
  • Tiny:bit V1 MicroPython Library
  • Tiny:bit V2 MicroPython Library
  • Tiny:bit MicroPython API
Download ZIP

Welcome to Tiny:bit Pro repository

9.Tracking


! Note: This experiment must be done indoors to reduce the interference of sunlight on the infrared sensor.

Learning goal:

This lesson learns how to use tracking sensor by Python programming.

Code:
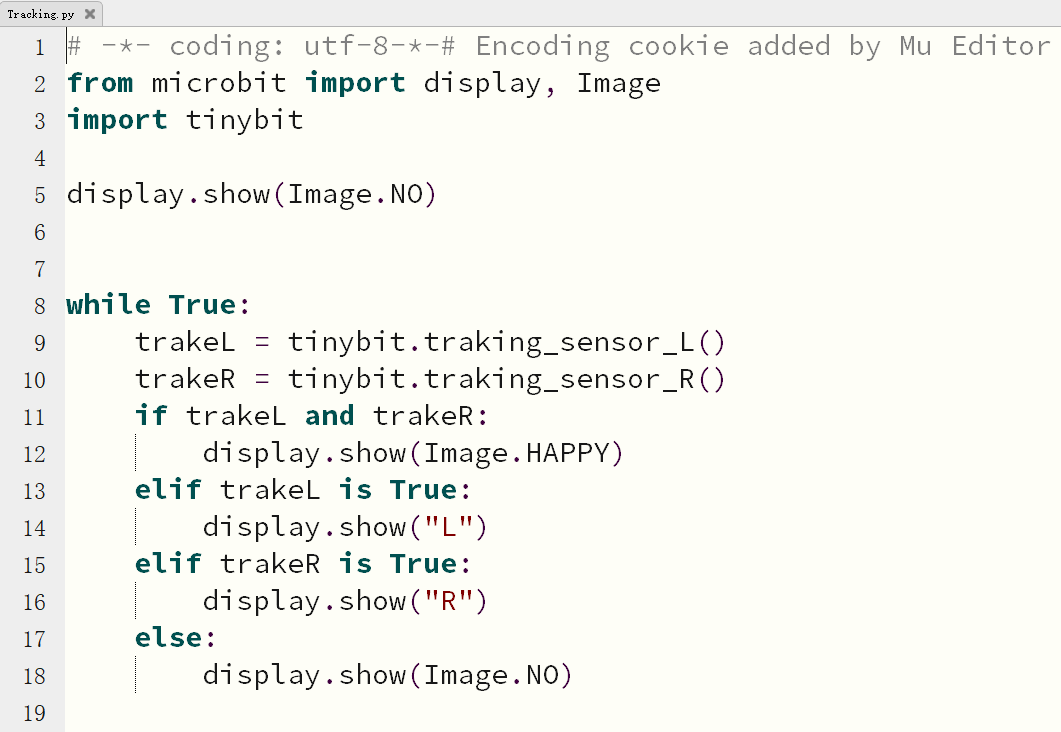
image.png

1) Import the library needed for this lesson from micro:bit, display is used for dot matrix display, Image calls the built-in image, pin12 is the pin of the body colorful lights, neopixel drives the body colorful lights, and tinybit controls the car.

2) display.show (Image.NO): Display a “X” on micro:bit dot matrix.

3) trakeL = tinybit.traking_sensor_L():Read the data from the left tracking sensor, return True when a black line is detected, return False when a white line is detected, and save the read result to the variable trakeL.

4) trakeR = tinybit.traking_sensor_R():Read the data from the right tracking sensor, return True when a black line is detected, return False when a white line is detected, and save the read result to the variable trakeR.

5) When trakeL and trakeR are True at the same time, that is, black lines are detected on both sides, a smiling face is displayed; if a black line is detected on the left, L is displayed; if a black line is detected on the right, R is displayed; When there is a black line, the character X is displayed.

Programming and downloading:

1.You should open the Mu software, and enter the code in the edit window, , as shown below.

Note! All English and symbols should be entered in English, and the last line must be a space.
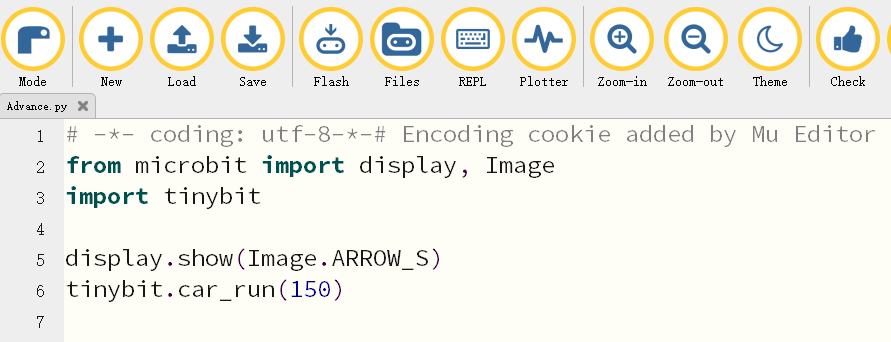
image.png 

2.You can click the “Check” button to check if our code has an error. If a line appears with a cursor or an underscore, the program indicating this line is wrong.
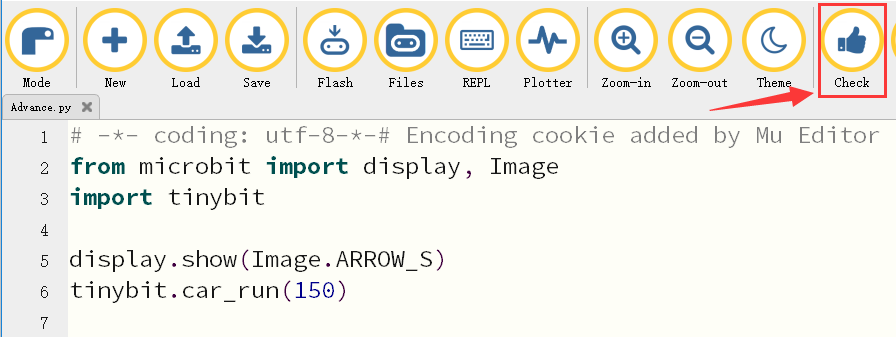
image.png 

3.Click “REPL” button,check whether the tinybit library has been downloaded. If not, please refer to the [preparation before class]---> [Python programming]
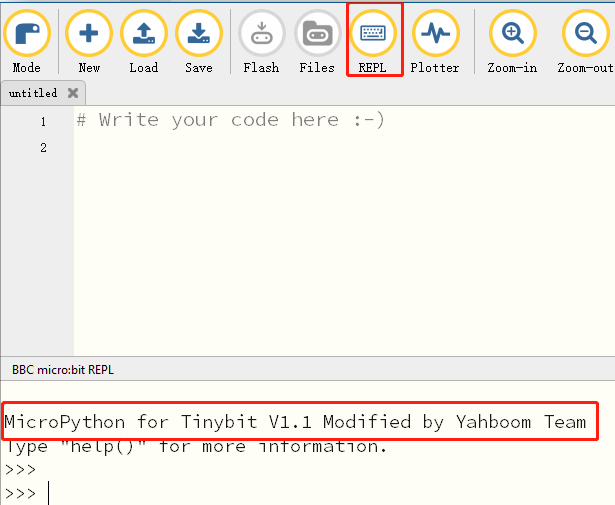
image.png 

4.Click the “Flash” button to download the program to micro:bit board.
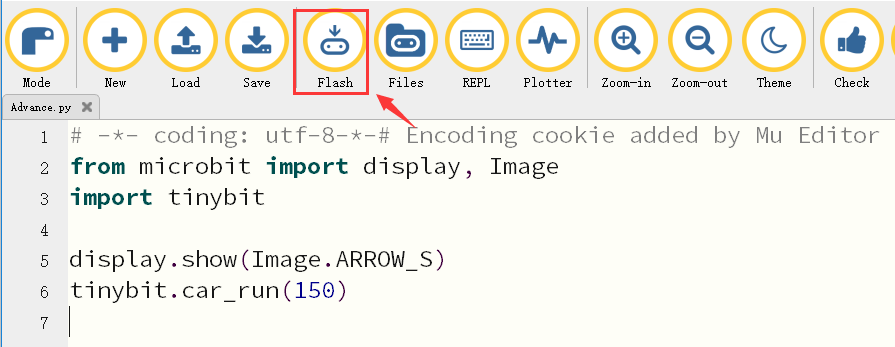
image.png 

If the program is wrong or the experimental phenomenon is wrong after downloading, please confirm whether you have downloaded the Buildingbit libraryhex file we provided to the micro: bit board.

For the specific method of adding library files, please refer to 【1.Preparation before class】---【Python programming】

Experimental phenomena:

After download is complete, open the power switch.

When a black line is detected by the left line sensor, “L” is displayed on the LED dot matrix. When a black line is detected by the right sensor, “R” is displayed on the LED dot matrix. When a black line is detected on both sides at the same time, a smile is displayed.

When the black line is no detected, “X” is displayed.


Drive Motor
Sound sensor

COMPANY

  • About us
  • Team Style
  • Blog

LEARNING & EXPLORATION

  • Tutorials
  • Edge AI hardware
  • Educational robots
  • Embedded intelligent hardware

WHERE TO BUY

  • Yahboom Online Store
  • Amazon
  • Alibaba
  • AliExpress
  • Mercado

TECHNOLOGY SUPPORT

  • Email: support@yahboom.com

BE A DISTRIBUTOR

  • Email: sales@yahboom.com
QR Code
QR Code

Copyright © 2017-2026 Yahboom. All Rights Reserved.

EN/中文