yahboom
HomeLearn
Solution
Blog
Online Store
About Us
EN/中文
Tiny:bit Pro📖
0.First Trial and Assemble
  • 1.0 Installation Video
  • 1.1 First Trial
1.Preparation before programming
  • 1.Online programming
  • 2.Offline programming
  • 3.Python Programming
  • 4.Import Tiny:bit library
  • 5.Tiny:bit MicroPython API
  • 6.How to download program
2.Lighting with Tiny bit
  • 3.1 LED light
  • 3.2 RGB Searching light
  • 3.3 RGB light exchange lighting
  • 3.4 LED light exchange lighting
  • 3.5 Breathing light
3.Singing withTiny bit
  • 4.1 Playing internal music
  • 4.2 Play Merry Christma with lights
4.Running with Tiny bit
  • 5.1 Advance
  • 5.2 CarRun
  • 5.3 Control speed
  • 5.4 Dancer
  • 5.5 Route plan
5.Playing with Tiny bit
  • 6.1 Measuring worker
  • 6.2 Distance control light
  • 6.3 Ultrasonic obstacle avoidanc
  • 6.4 Magic hand
  • 6.5 Radar detector
  • 6.6 Playing black paino
  • 6.7 Tracking
  • 6.8 Voice control light
  • 6.9 Coward
  • 6.10 Musical rhythm
  • 6.11 Listener
  • 6.12 Wobble when touch
  • 6.13 Spinning top
  • 6.14 Frog beating
  • 6.15 Adventure car
6.Interacting with Tiny bit
  • 7.1 IR Control
  • 7.2 Android bluetooth APP control
  • 7.3 iOS bluetooth APP control
  • 7.4 Handle remote control
7.MicroPython course
  • 1.Hello,World
  • 2.Display built-in image
  • 3.Display custom image
  • 4.Display custom animation
  • 5.Button game
  • 6.Play built-in music
  • 7.Car Headlights
  • 8.Drive Motor
  • 9.Tracking
  • 10.Sound sensor
  • 11.Ultrasonic
  • 12.IR control
  • 13.LED light
8.AI vision course
1. Preparation
  • 3.12.1 K210 Identification Information and Adjust
  • 1. K210 module download code
  • 1.2 Parsing K210 protocol data
  • 1.3 microbit connection use
2. Basic course
  • 2.1 Color recognition
  • 2.2 Barcode recognition
  • 2.3 QR code recognition
  • 2.4 Machine code recognition
  • 2.5 Object recognition
  • 2.6 Learning and classification
  • 2.7 Mask warning
  • 2.8 Facial recognition
  • 2.9 Handwriting digit recognition
3. Tinybit course
  • 3.1 Color response
  • 3.2 Barcode recognition
  • 3.3 QR code recognition
  • 3.4 Object detection
  • 3.5 Signposting action
  • 3.6 Mask Testing
  • 3.7 Face Detection
  • 3.8 Handwritten digital control
  • 3.9 Color patrol
  • 3.10 Machine code following
  • 3.11 Color tracking
  • 3.12.2 Autopilot
9.Charging and Battery
  • Charging and Battery
Download
  • APP(Android/iOS)
  • Code
  • Manual
  • Hardware Info
  • APP communication protocol
  • RoadSign File
  • Bluetooth Remote Control with ultrasonic V2.hex
  • Bluetooth Remote ControlV1.5.hex
  • Bluetooth Remote Control with ultrasonicV1.5.hex
  • IR control V1.5.hex
  • IR control V1.5.hex
  • IR control V2.hex
  • Tiny:bit V1 MicroPython Library
  • Tiny:bit V2 MicroPython Library
  • Tiny:bit MicroPython API
Download ZIP

Welcome to Tiny:bit Pro repository

3.6 Mask Testing

3.6 Mask Testing

3.6 Mask Testing1. Learning Objectives2. preparation before class3. Programming Methods4. Blocks5. Code6. Download code7. Experimental Phenomena

1. Learning Objectives

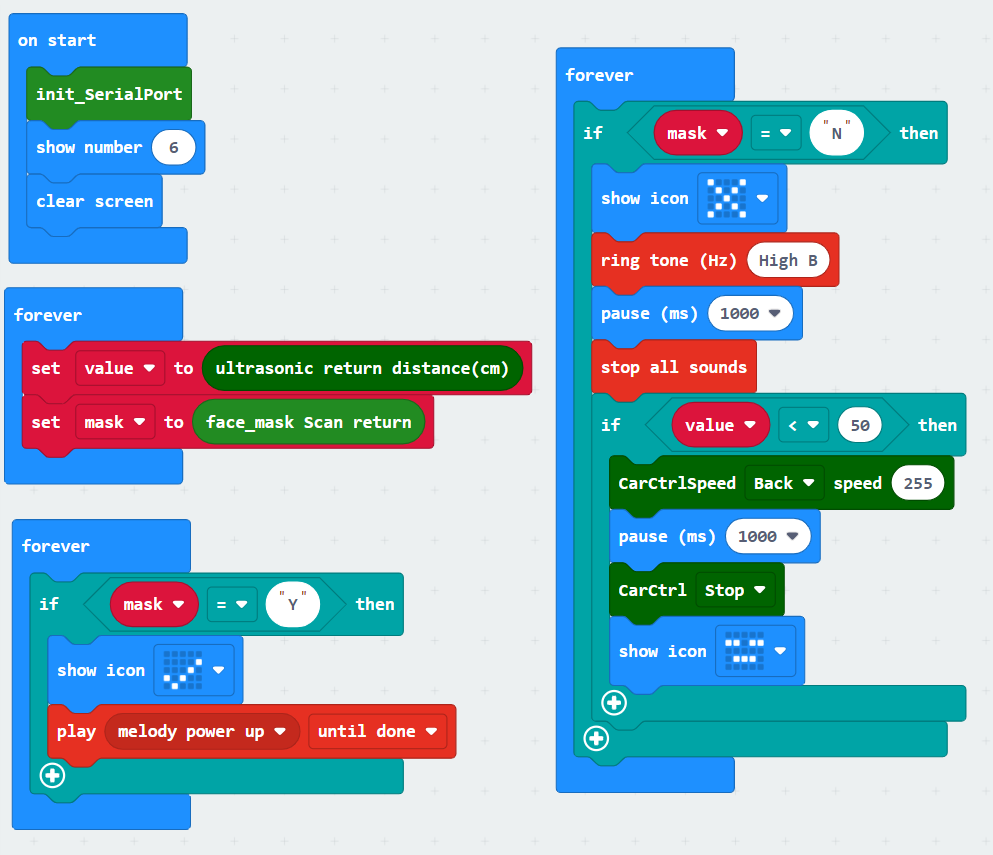
In this course, we mainly learn how to let the K210 vision module perform mask recognition. When it is recognized that no mask is worn, the buzzer will issue a warning, and the LED dot matrix of the car will display "×", When the ultrasound detects approaching, the car backs up. When it is recognized that wearing a mask, the LED dot matrix of the car will display "✔" and make a cheerful sound.

2. preparation before class

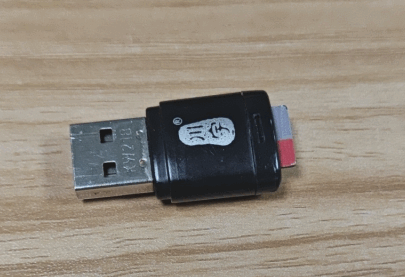
  1. Take out the TF card from k210 vision module and insert it into the card reader.
01

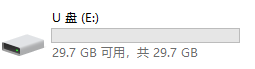
  1. Plug the card reader into the computer, and wait for the computer to recognize the USB disk.
02

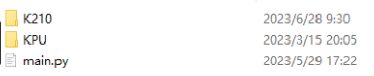
  1. Then, enter the TF card. You will see following content.
03

  1. Go to the k210 folder, find the 2.7_3.6_face_mask_detect.py file from the folder and copy it to the root directory.
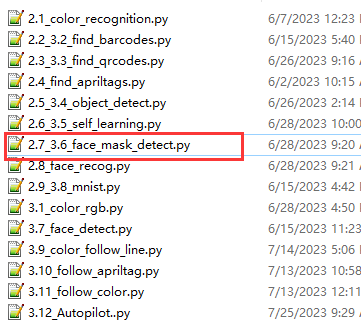
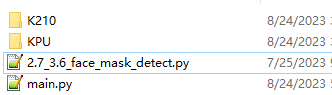
04

05

  1. Delete the original main.py file.

    Then, re-name the 2.7_3.6_face_mask_detect.py file as the main.py file.
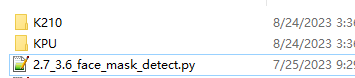
06

  1. After re-name, pull out the card reader, remove the TF card and insert it back into the k210 vision module.


3. Programming Methods

Online programming: first copy this URL https://makecode.microbit. and enter the online programming interface.

Click Extension, copy the package URL: https://github.com/YahboomTechnology/K210-Module.git to the input field, click Confirm to add package,

Click Extension again, copy the package URL: https://github.com/YahboomTechnology/Tiny-bitLib to the input field, click Confirm to add the package.

Finally you can use the K210 Vision Module package and Tinybit's building blocks.

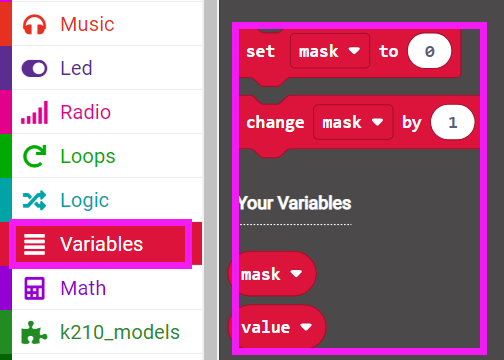
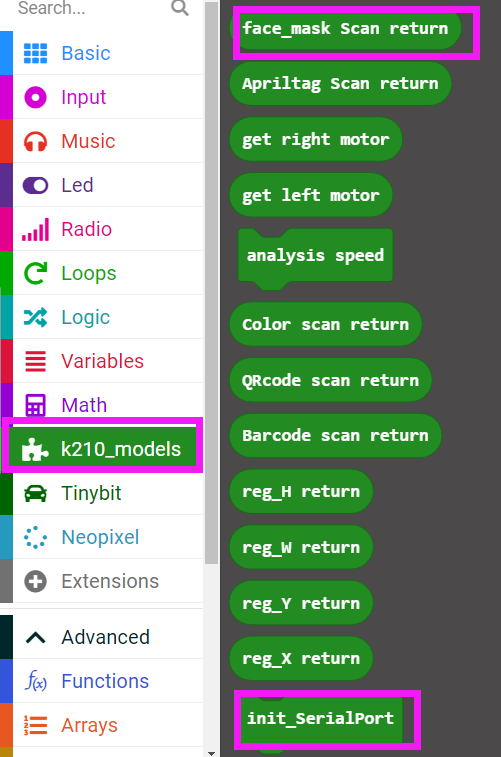
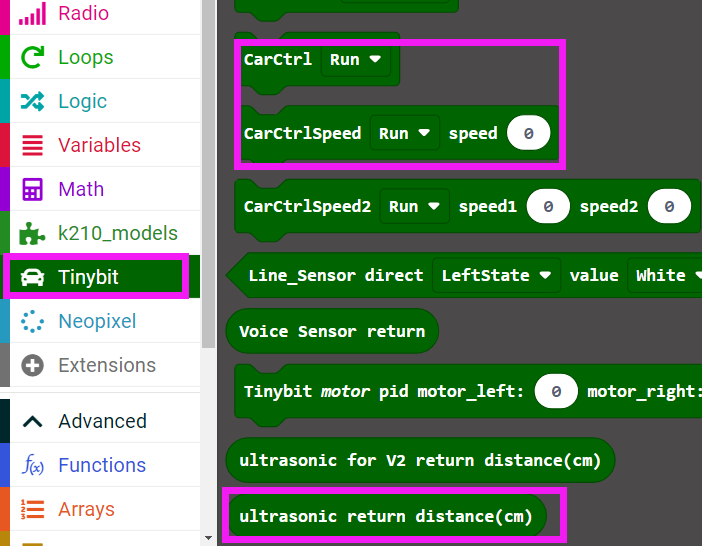
4. Blocks
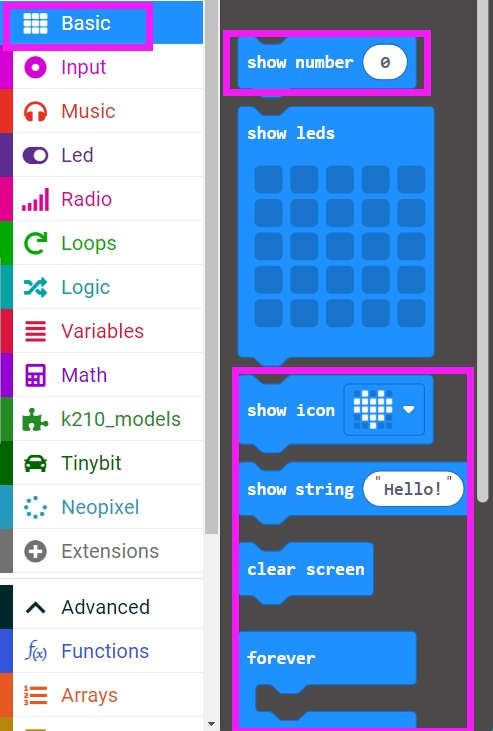
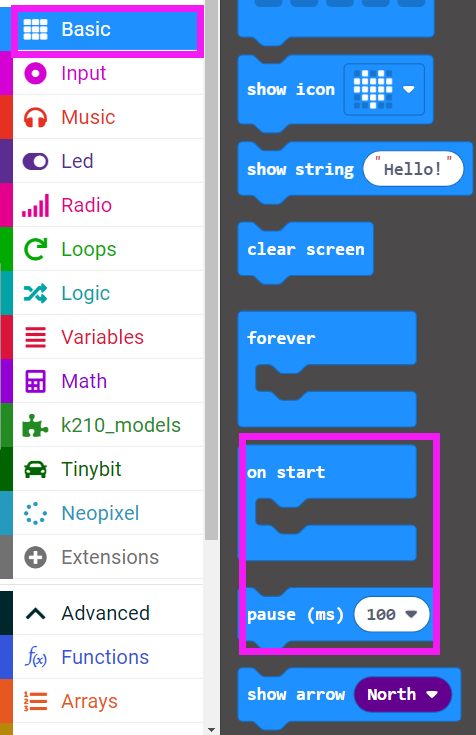
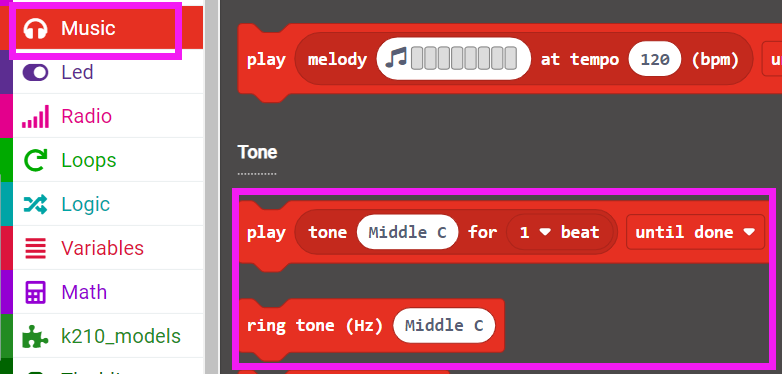
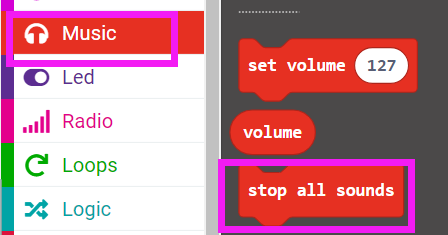
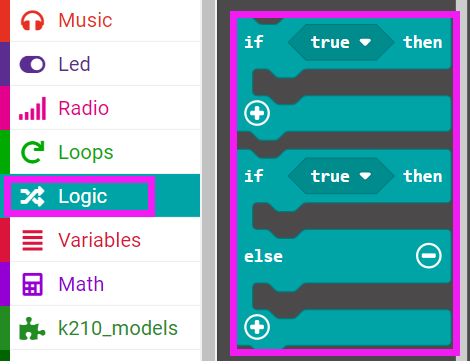
08

09

10

11

12

13

14

15


5. Code

16

6. Download code

Connect the Micro:bit board to the computer via microusb cable, the computer will pop up a USB disk.

Then, select the k210_Mask_detection.hex file and right click to send it to the Micro:bit U disk.

Wait until sending is complete and unplug the Micro:bit usb cable. Plug the Micro:bit board into the car.

7. Experimental Phenomena

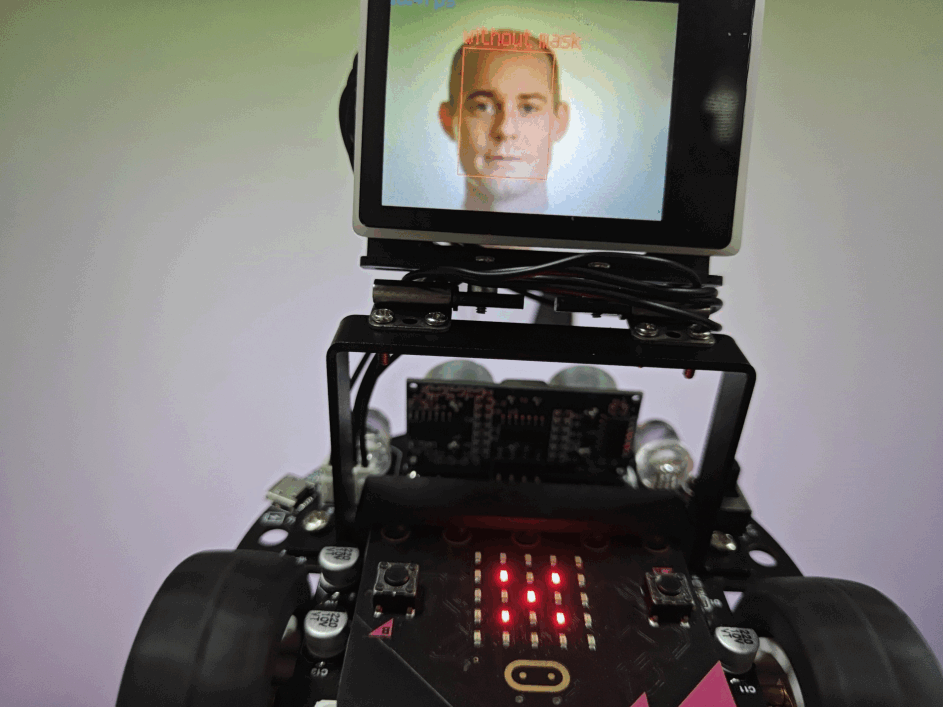
After starting the car, we can see the number 6 displayed on the dot matrix of the microbit.

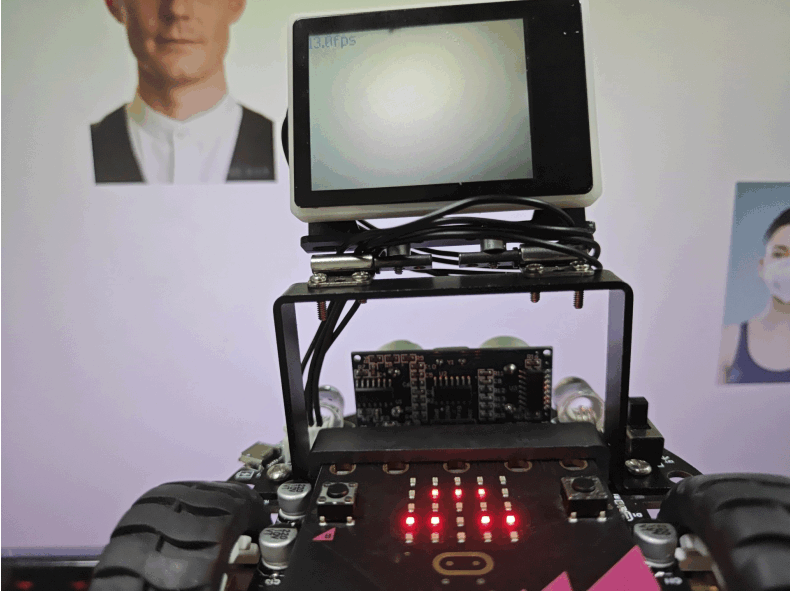
Wait for the screen to display the camera image, and then use the camera to capture the face.

When wearing a mask, a green box and "with mask" will be displayed, the LED dot matrix of the microbit will display "√", and the car will play cheerful music;

When not wearing a mask, the red frame and "without mask" will be displayed, the LED dot matrix of the microbit will display "×", the buzzer of the car will alarm, when the alarm is reached, the car will back up, and "--__-- will be displayed .
18

19

20

Signposting action
Face Detection

COMPANY

  • About us
  • Team Style
  • Blog

LEARNING & EXPLORATION

  • Tutorials
  • Edge AI hardware
  • Educational robots
  • Embedded intelligent hardware

WHERE TO BUY

  • Yahboom Online Store
  • Amazon
  • Alibaba
  • AliExpress
  • Mercado

TECHNOLOGY SUPPORT

  • Email: support@yahboom.com

BE A DISTRIBUTOR

  • Email: sales@yahboom.com
QR Code

Copyright © 2017-2026 Yahboom. All Rights Reserved.

EN/中文