Welcome to T-mini Plus LiDAR repository
1.Preparation
Preparation before use
1. Install sdk driver
Based on the specifications of the lidar you purchased, locate the compressed file labeled "YDLidar-SDK" in the provided source code package. Extract the "YDLidar-SDK" folder; this folder contains the SDK files for this lidar. Since using the ROS function package for this lidar requires the SDK to be installed beforehand, the "YDLidar-SDK" folder contains the lidar's driver files. Open a terminal in this folder and type:
mkdirbuildcd buildcmake..make -j4sudo make installIf no errors are reported during operation, the driver is successfully installed.
2. Create a new workspace and compile function packages
- (Recommended) The first method is to decompress ydlidar_ws in the source code to your own root directory, and then compile it directly using catkin_make.
xxxxxxxxxxcd ydlidar_wscatkin_make
After the compilation is passed, add the path of the workspace to .bashrc.
xxxxxxxxxxsudo gedit ~/.bashrc
Copy the following content to the end of the file,
xxxxxxxxxxsource ~/ydlidar_ws/devel/setup.bash --extend
- The second method is to create a self-named workspace. Take the name oradar_ws as an example and enter it in the terminal.
xxxxxxxxxxmkdir oradar_wscd oradar_wsmkdir srccd srccatkin_init_workspace
Then copy the decompressed source code function package under ydlidar_ws/src to the oradar_ws/src directory, and then use catkin_make to compile in the oradar_ws directory.
xxxxxxxxxxcd oradar_wscatkin_make
After the compilation is passed, add the path of the workspace to .bashrc.
xxxxxxxxxxsudo gedit ~/.bashrc
Copy the following content to the end of the file,
xxxxxxxxxxsource ~/oradar_ws/devel/setup.bash --extend
3. Bind radar port name
Open the terminal in the root directory of the Raspberry Pi and enter the following command,
xxxxxxxxxxcd /etc/udev/rules.d/sudo vi usb.rulesThen copy the following content into it,
xxxxxxxxxxKERNEL=="ttyUSB*", ATTRS{idVendor}=="10c4", ATTRS{idProduct}=="ea60", MODE:="0777", SYMLINK+="ydlidar"
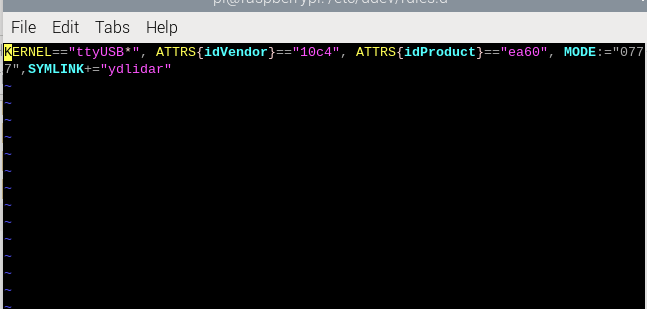
Then re-plug the lidar serial port and enter ll /dev/ydlidar in the terminal.

The above content indicates that the binding is successful. The end is not necessarily 0 and changes according to the order in which the devices are inserted.
Then open our docker script and add it
xxxxxxxxxxvi run_ros1.sh
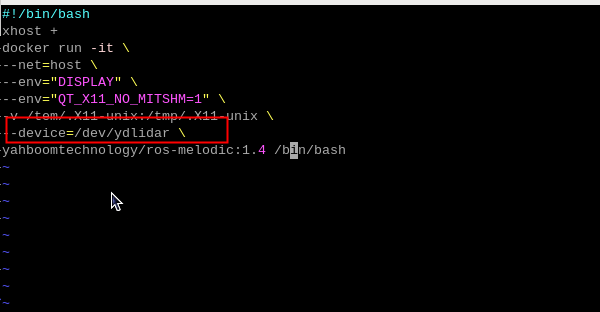
4. Drive lidar
First go into the docker we provide, open a terminal in the Raspberry Pi directory and enter,
xxxxxxxxxx./run_ros1.sh
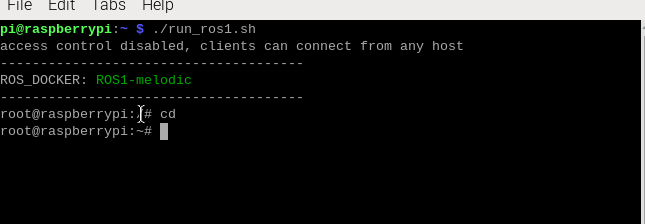
After that, enter the following statement to open the lidar and display it in rviz,
xxxxxxxxxxroslaunch ydlidar_ros_driver lidar_view.launch
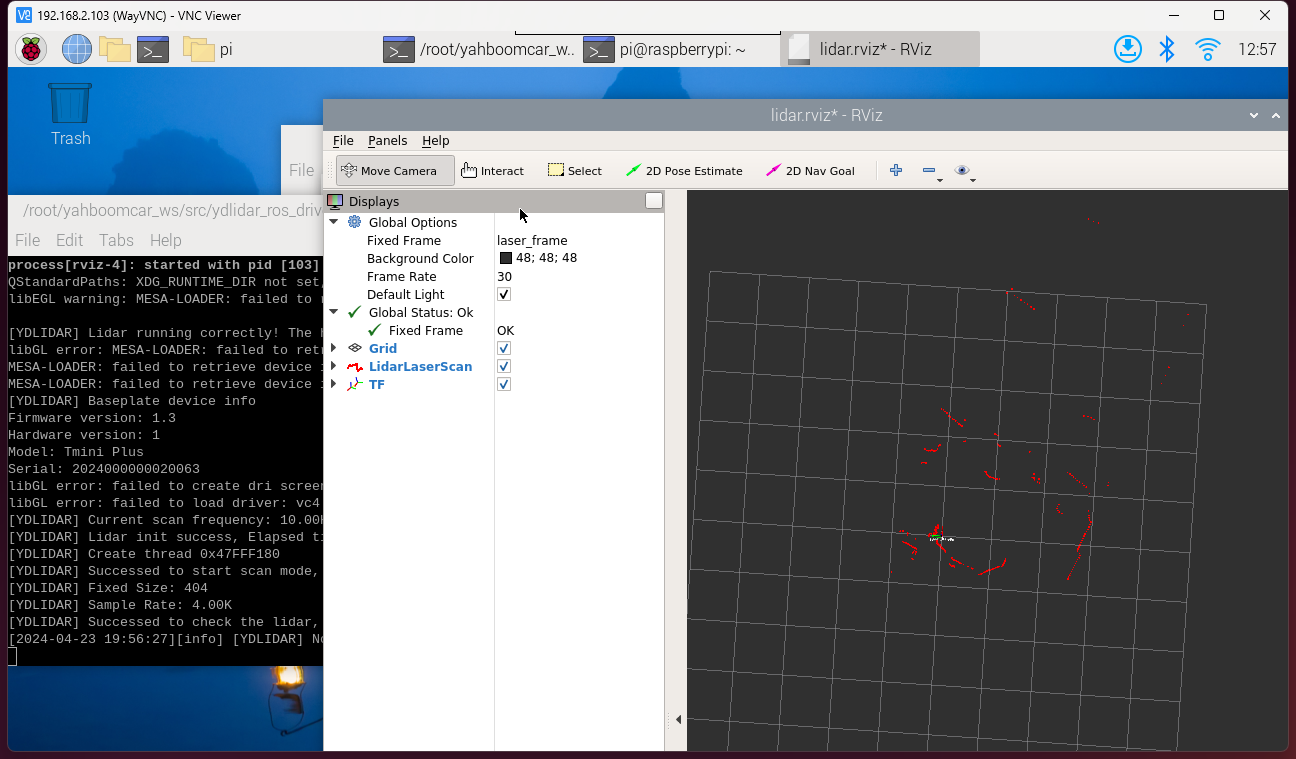
When the above screen appears, it means that all preparations have been completed.