Welcome to IMU Sensor Module repository
For Raspberry Pi 5
Viewing IMU Data on Raspberry Pi
Viewing IMU Data on Raspberry Pi1. Connecting the Device2. Check Device Status3. Installing the Driver Library3.1 Downloading the Python Driver Library File3.2 Transferring Files3.3 Installing Driver Libraries4. View IMU data5. Precautions
1. Connecting the Device
This tutorial uses a Raspberry Pi 5 motherboard and the official 64-bit image as an example.
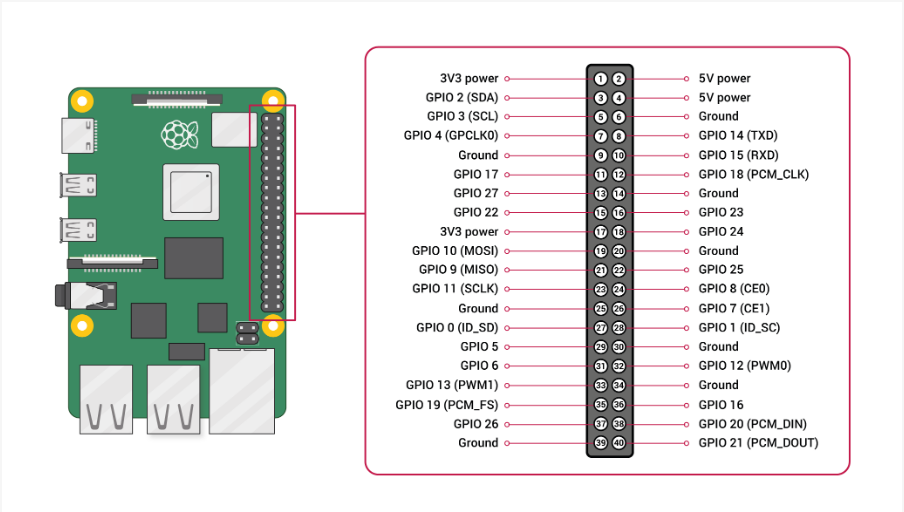
Connect the IMU attitude sensor to the I2C port of the Raspberry Pi 5 as shown in the diagram below.
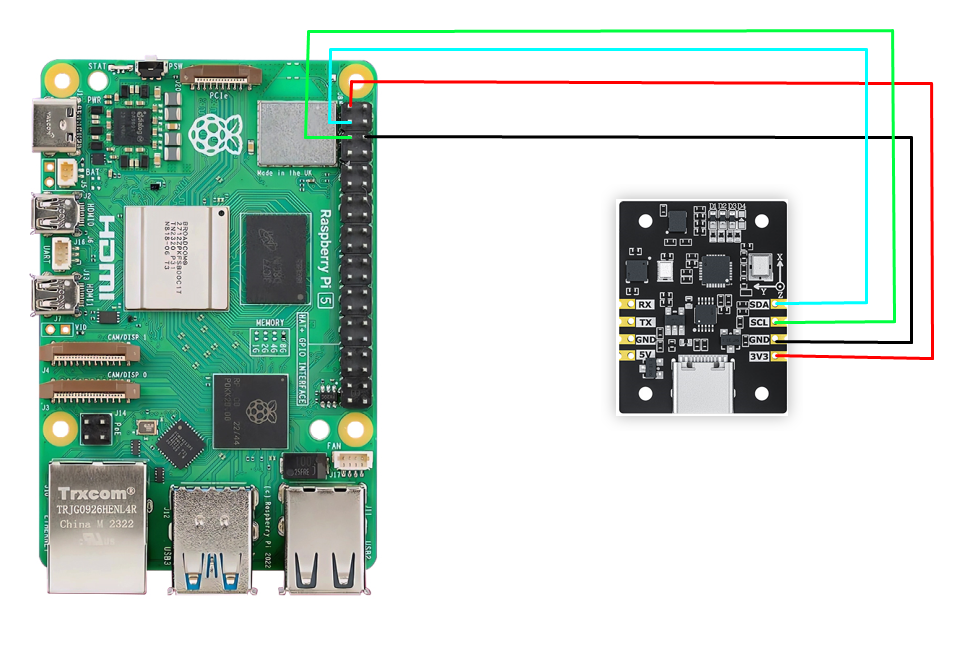
| IMU Attitude Sensor | Raspberry Pi 5 (Physical Pins) |
|---|---|
| SDA | 3 |
| SCL | 5 |
| GND | GND |
| 3.3V | 3.3V |
2. Check Device Status
First, install I2Ctool. Enter the following in the terminal:
xxxxxxxxxxsudo apt-get updatesudo apt-get install -y i2c-tools
Check I2C Devices
xxxxxxxxxxsudo i2cdetect -y -r -a 1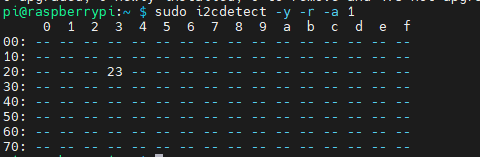
3. Installing the Driver Library
3.1 Downloading the Python Driver Library File
The latest version of the driver library, named YbImuLib.zip, is provided in the data folder.

3.2 Transferring Files
Drag the driver library compressed file onto the Jetson desktop using WinSCP software.
The driver library file can be deleted after successful installation.
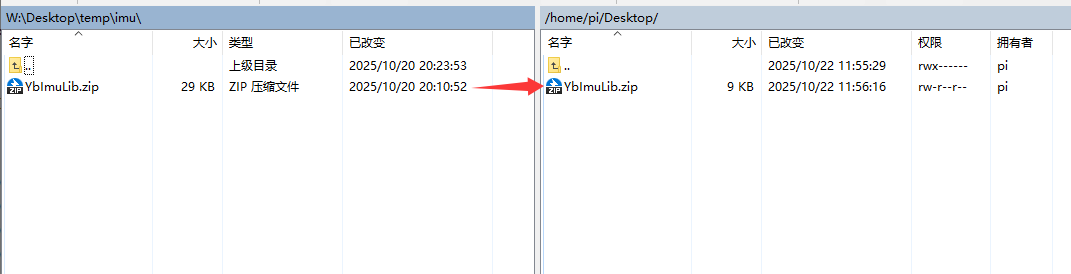
If you are unfamiliar with using WinSCP to transfer files, please refer to the following webpage for detailed WinSCP installation and operation instructions:
3.3 Installing Driver Libraries
Open the terminal on your Jetson Nano and enter the following command to extract the files.
Access the desktop and check if the file exists; the target file is highlighted in the red box.
xxxxxxxxxxcd ~/Desktop && ls
Unzip the file
xxxxxxxxxxunzip YbImuLib.zip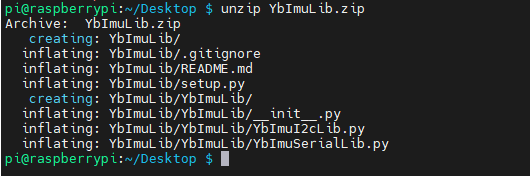
Enter the driver library folder
xxxxxxxxxxcd YbImuLibRun the installation command. If you see the installation version number displayed at the end, the installation was successful. This command will overwrite any previously installed Rosmaster_Lib driver library.
xxxxxxxxxxsudo python3 setup.py install
Install required libraries
xxxxxxxxxxsudo pip3 install pyserialsudo pip3 install smbus24. View IMU data
Refer to 3.2 File Transfer, use WinSCP to transfer the YbImu_ReadData_I2C.py file to the Raspberry Pi 5, and then run the command
xxxxxxxxxxpython3 YbImu_ReadData_I2C.py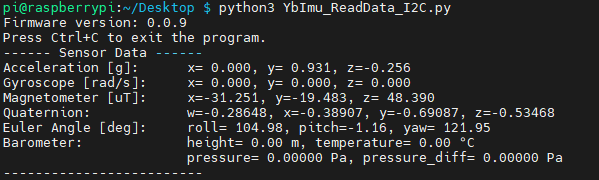
Note: The above data reads are from a 9-axis IMU. Data from the 6-axis IMU is not included (no magnetometer or barometer data). Data from the 9-axis IMU is not included (no barometer data).
5. Precautions
The I2C pins on the Raspberry Pi 5 need to be enabled beforehand.
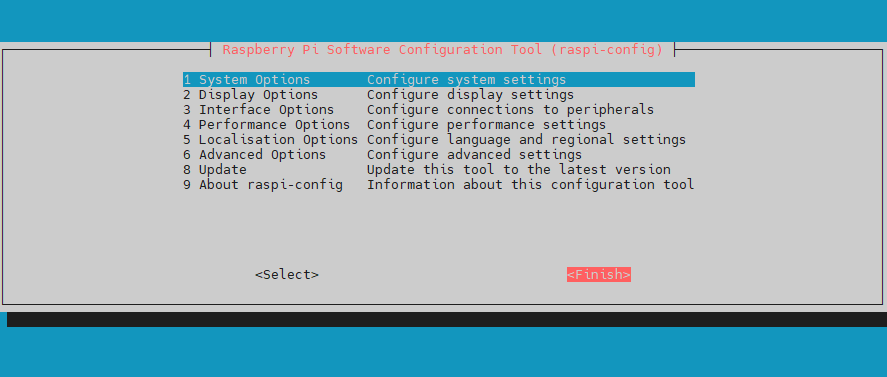
To enable raspi, follow these steps:
Run the command in the terminal:
xxxxxxxxxxsudo raspi-config
Use the arrow keys to select the desired option and press Enter.
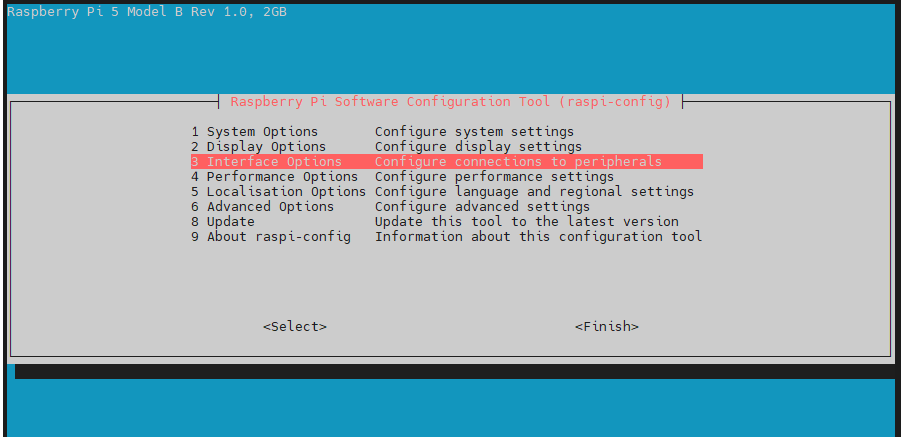
Select I2C and press Enter.
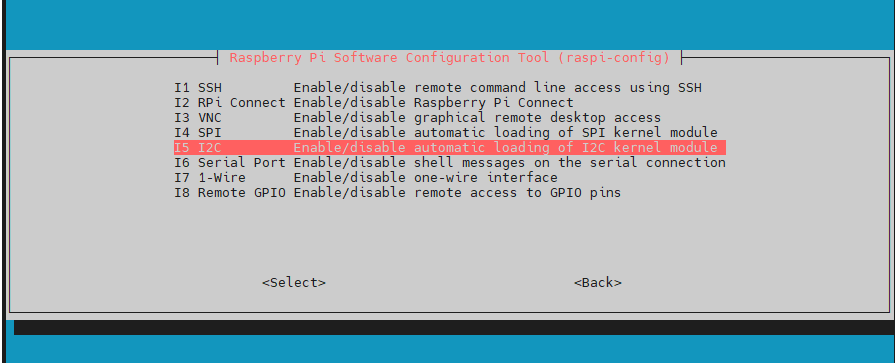
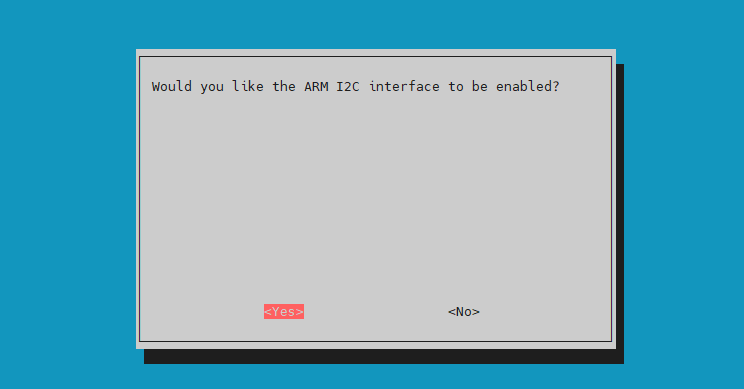
After selecting I2C, press Enter, use the arrow keys to select Yes, and then press Enter to confirm.
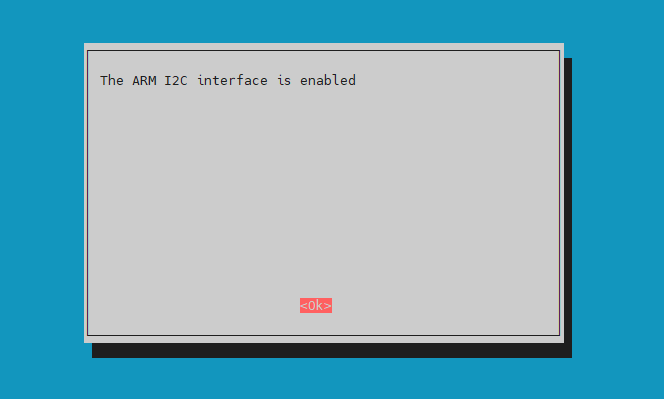
Press Enter to confirm.
Use the arrow keys to select Finish, then press Enter to exit the configuration.