Welcome to IMU Sensor Module repository
1. IMU data printing
IMU Data Printing
IMU Data Printing1. Connecting the Device2. Binding Device ID2.1 Device Viewing Commands2.2 Establishing Port MappingIntroduction to Rule File Syntax2.3 Verification and Viewing3. Installing the Driver Library3.1 Downloading the File3.2 Installing the Driver LibraryUnzipInstall LibraryInstall other necessary libraries4. IMU ROS environment configuration4.1 Creating and compiling a workspace4.2 Printing IMU Data5. Raspberry Pi 5, RDK X5 series, Jetson series5.1 Installing Docker5.2 Importing the Docker Image5.3 Start the Docker Image5.4 Print IMU Data
This tutorial uses Ubuntu 20.04 and ROS1 version Noetic as an example.
1. Connecting the Device
Connect the IMU attitude sensor to the host controller's USB port using a Type-C cable.
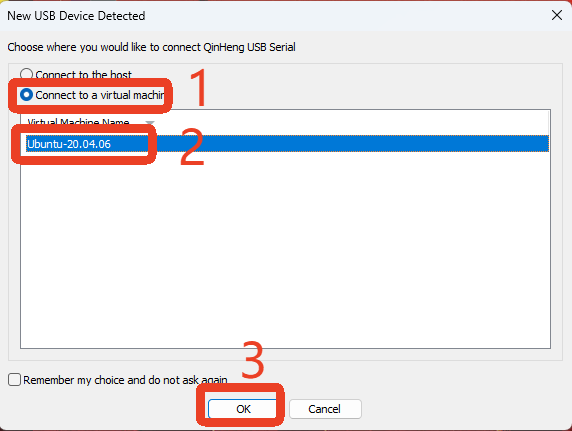
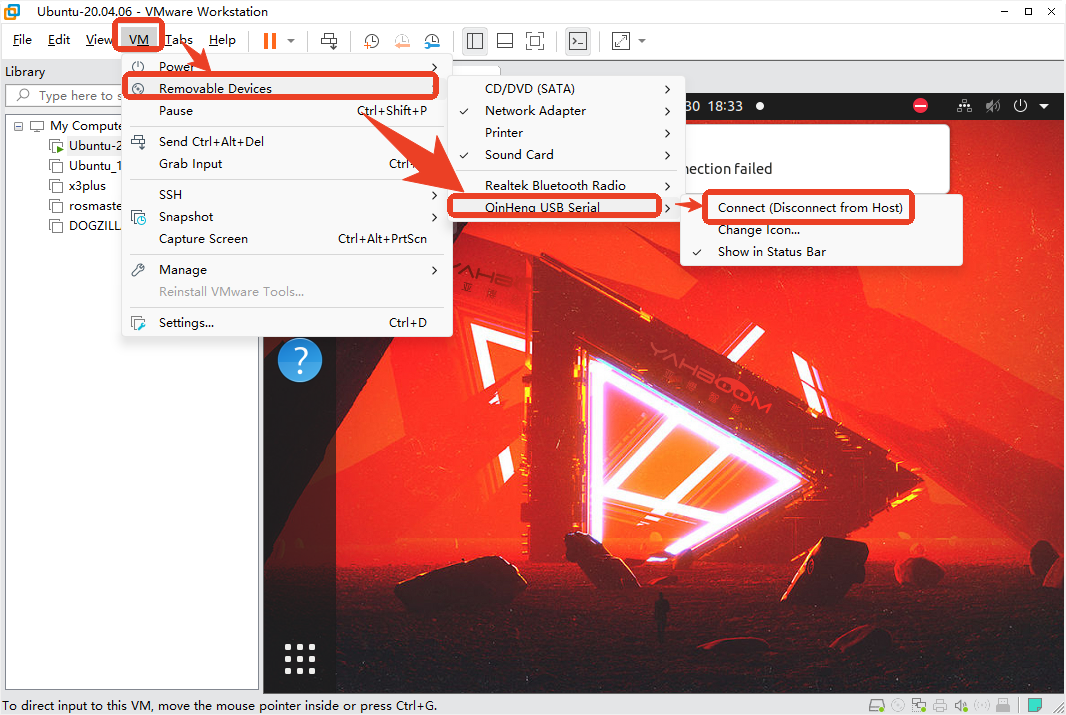
If using a virtual machine, refer to the following steps:
Virtual machine displays a pop-up window
Virtual machine does not display a pop-up window
2. Binding Device ID
2.1 Device Viewing Commands
View Device ID
lsusb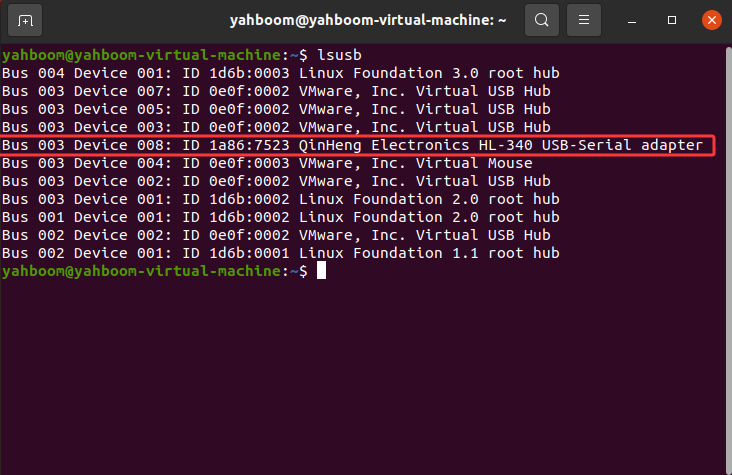
View Device Number
xxxxxxxxxxll /dev/ttyU*
2.2 Establishing Port Mapping
Enter the rules.d directory
xxxxxxxxxxcd /etc/udev/rules.d/Create a new file named myimu.rules and write the following content:
xxxxxxxxxxsudo gedit myimu.rulesIf it prompts that the gedit command cannot be found, run:
xxxxxxxxxxsudo apt install gedit -y
Write the following content:
xxxxxxxxxxKERNEL=="ttyUSB*", ATTRS{idVendor}=="1a86", ATTRS{idProduct}=="7523", MODE:="0777", SYMLINK+="myimu"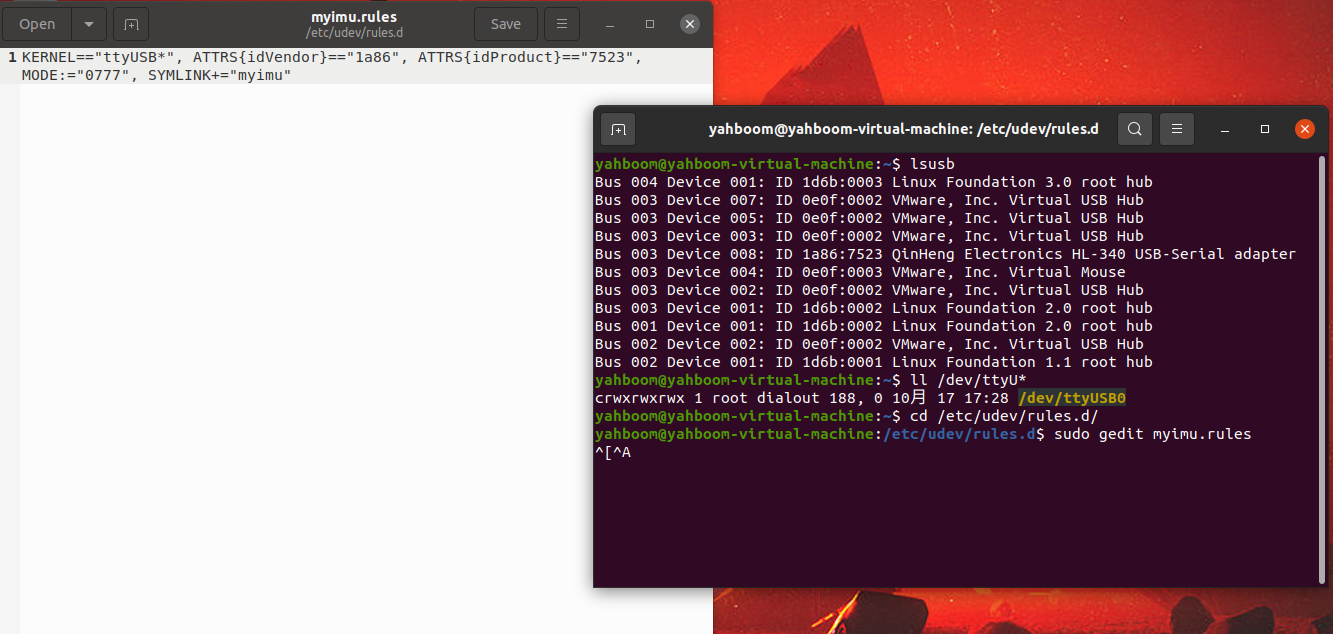
Save and exit to apply the rule
xxxxxxxxxxsudo udevadm triggersudo service udev reloadsudo service udev restartReplug and replug the USB device. Done!
Introduction to Rule File Syntax
xKERNEL=="ttyUSB*", ATTRS{idVendor}=="1a86", ATTRS{idProduct}=="7523", MODE:="0777", SYMLINK+="myimu"Analysis
xxxxxxxxxxKERNEL # The device name matching the eventATTR{filename} # The sysfs attribute of the device matching the event. ... idVendor # Manufacturer IDidProduct # Product IDSYMLINK # Creates a symbolic link for the device file under /dev/. This gives the device an alias.MODE # Sets permissions for the device.2.3 Verification and Viewing
xxxxxxxxxxll /dev/my*
3. Installing the Driver Library
3.1 Downloading the File
The latest version of the driver library, named YbImuLib.zip, is provided in the data folder.

3.2 Installing the Driver Library
Copy the YbImuLib.zip file to the virtual machine.
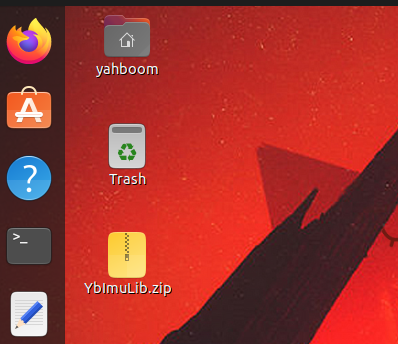
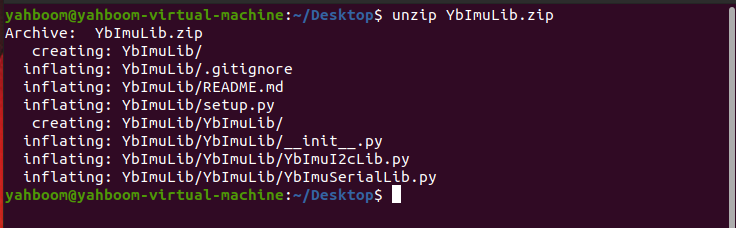
Unzip
xxxxxxxxxxunzip YbImuLib.zip
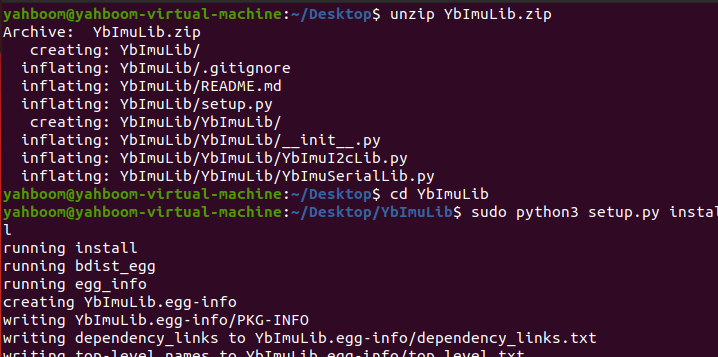
Install Library
xxxxxxxxxxcd YbImuLib
Run the installation command. If you see the installation version number at the end, the installation was successful. This command will overwrite any previously installed Rosmaster_Lib driver library.
xxxxxxxxxxsudo python3 setup.py install
Install other necessary libraries
xxxxxxxxxxsudo pip3 install pyserialsudo pip3 install smbus2
4. IMU ROS environment configuration
4.1 Creating and compiling a workspace
Open the command terminal, return to the home directory, and run the following command:
Create a new workspace
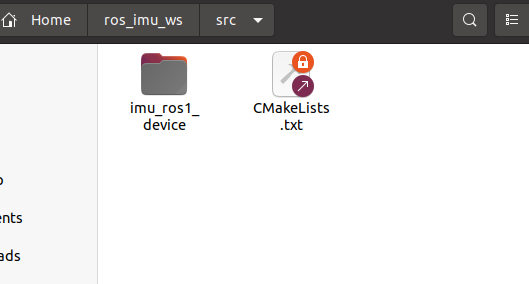
xxxxxxxxxxmkdir ros_imu_wscd ros_imu_wsmkdir srccd srccatkin_init_workspaceCopy the imu_ros1_device folder to the ~/ros_imu_ws/src directory
Compile
xxxxxxxxxxcd ~/ros_imu_wscatkin_makeAfter successful compilation, add the workspace path to .bashrc:
xxxxxxxxxxsudo gedit ~/.bashrcCopy the following content to the end of the file:
xxxxxxxxxxsource ~/ros_imu_ws/devel/setup.bash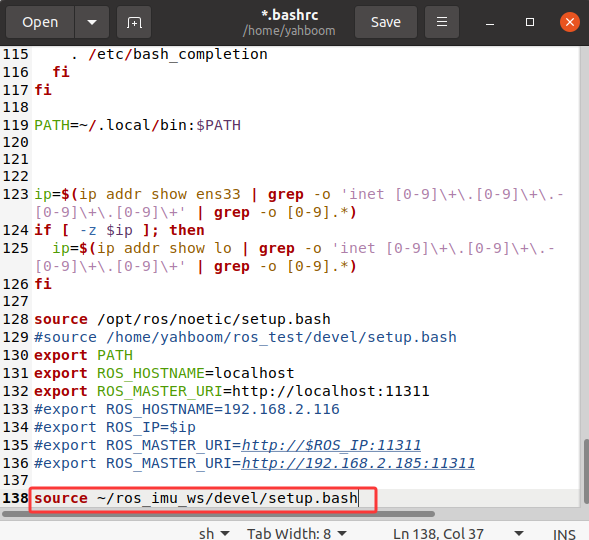
Save and exit, update environment variables
xxxxxxxxxxsource ~/.bashrc4.2 Printing IMU Data
Open a terminal and start roscore
xxxxxxxxxxroscoreOpen another terminal and start the IMU node
xxxxxxxxxxrosrun imu_ros1_device ybimu_driver.pyOpen a second terminal and check the IMU topic
xxxxxxxxxxrostopic list
Print the data for the /imu/data_raw topic
xxxxxxxxxxrostopic echo /imu/data_raw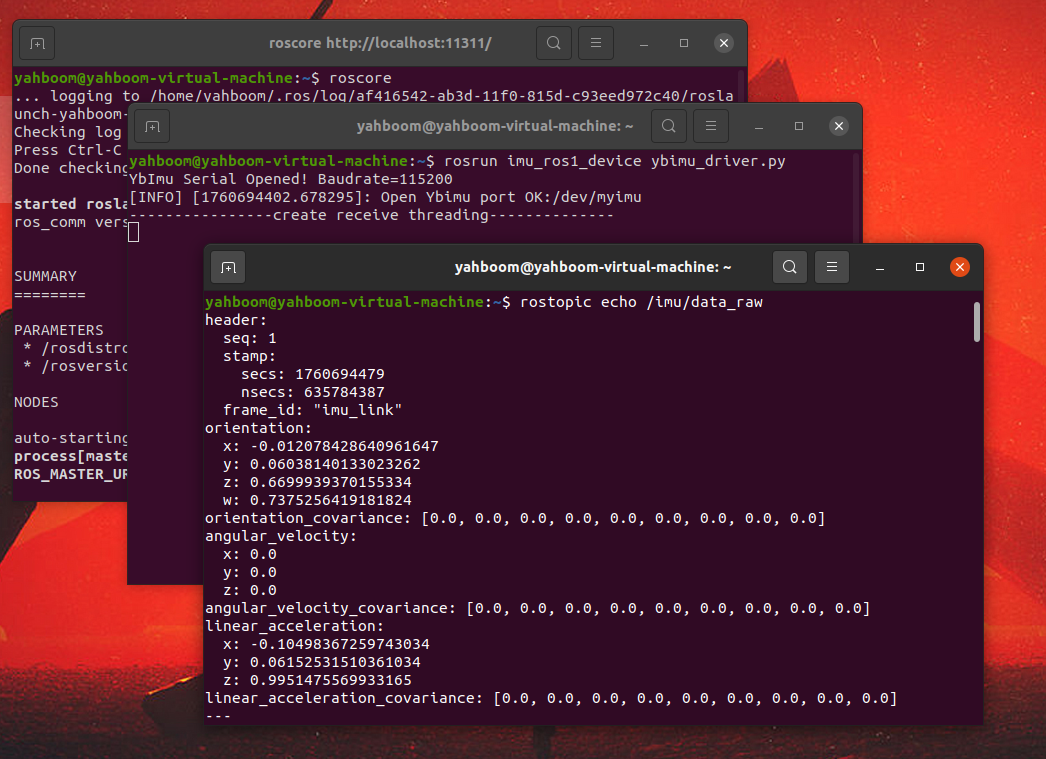
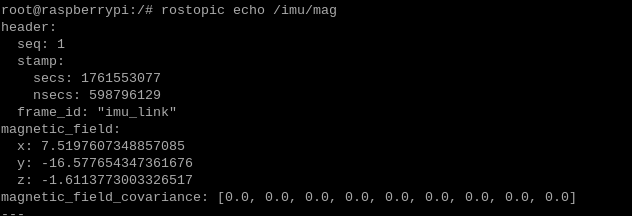
Open a new third terminal and print the topic data /imu/mag
xxxxxxxxxxrostopic echo /imu/mag 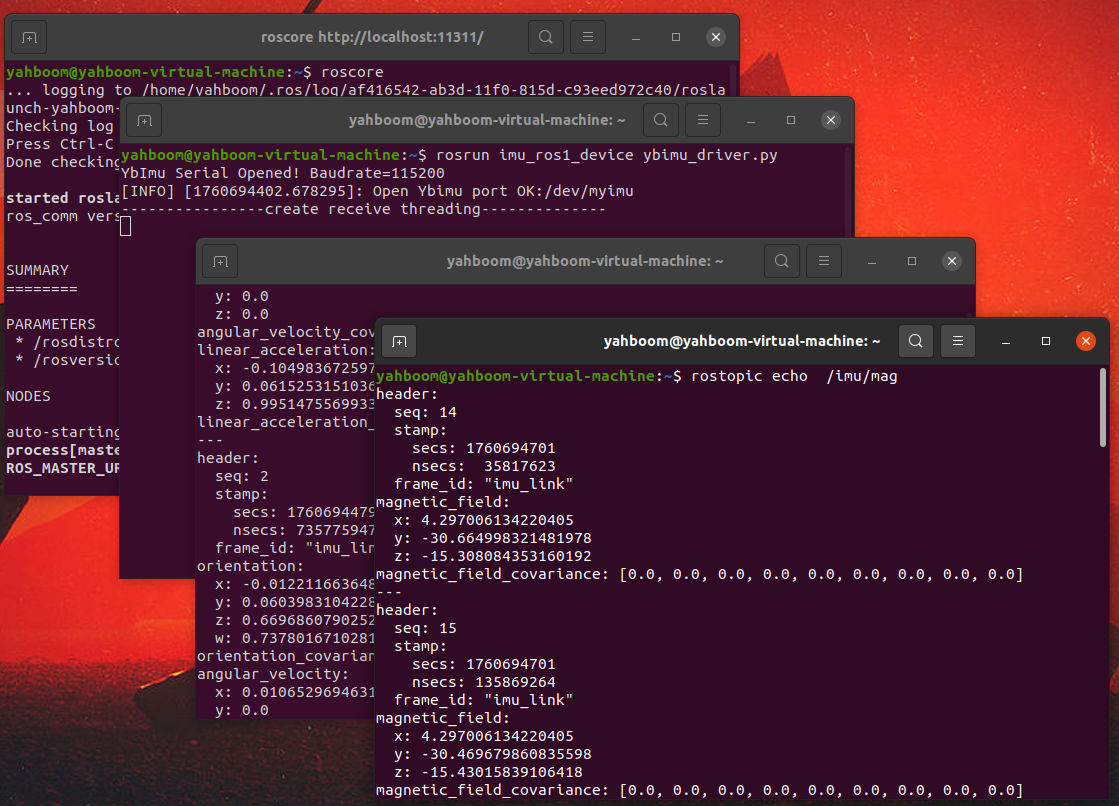
5. Raspberry Pi 5, RDK X5 series, Jetson series
Note: Steps 2. Binding device ID and 3. Installing driver libraries need to be completed beforehand.
5.1 Installing Docker
- Docker official website installation reference manual: https://docs.docker.com/engine/install/ubuntu/
- Use the following command for one-click installation:
Note: Docker installation failure is normal. You can try multiple times, or install it using a proxy. You need to search online for instructions on using a proxy.
xxxxxxxxxxcurl -fsSL https://get.docker.com | bash -s docker --mirror Aliyun
- Check the Docker version
xxxxxxxxxxsudo docker version
5.2 Importing the Docker Image
Upload all files in the ROS1_noetic folder within the Docker image folder in the attached folder to the main controller. Then run the following command to import it.

xxxxxxxxxxdocker load -i ros1_imu.tar
Note: Importing the image takes a long time, please be patient. It is recommended to use a TF card of 64GB or more with at least 30GB of free space to avoid insufficient space causing import failure.
5.3 Start the Docker Image
xxxxxxxxxxsh ros1_noetic.sh
5.4 Print IMU Data
Start roscore
xxxxxxxxxxroscore
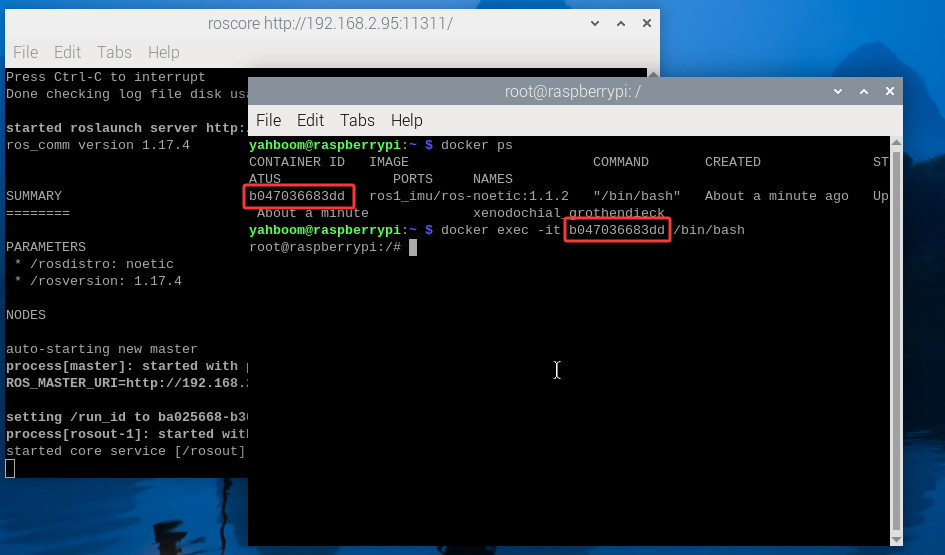
Open a second terminal and view the container ID
xxxxxxxxxxdocker ps
Based on the container ID displayed above, change the container ID in the following command to the actual displayed ID, allowing multiple terminals to access the same Docker container
xxxxxxxxxxdocker exec -it container_id /bin/bash
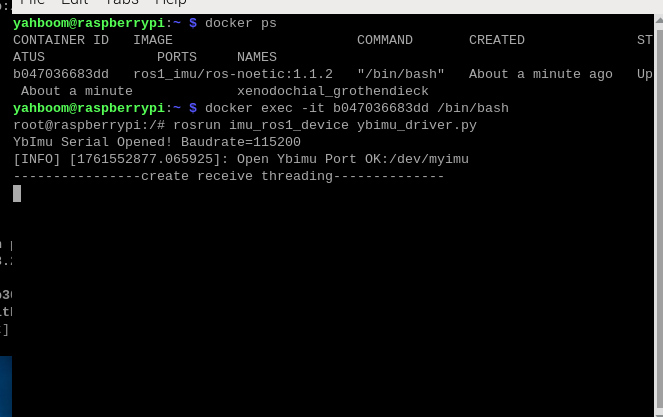
Start the IMU node
xxxxxxxxxxrosrun imu_ros1_device ybimu_driver.py
Open a third terminal, refer to the second terminal for multi-terminal access to the same Docker container.
xxxxxxxxxxdocker ps
xxxxxxxxxxdocker exec -it container_id /bin/bash
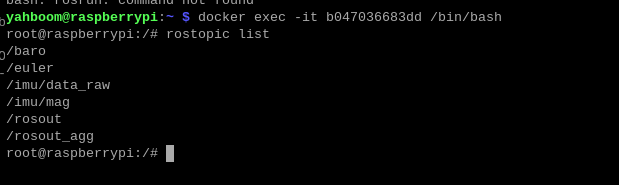
Check IMU topics
xxxxxxxxxxrostopic list
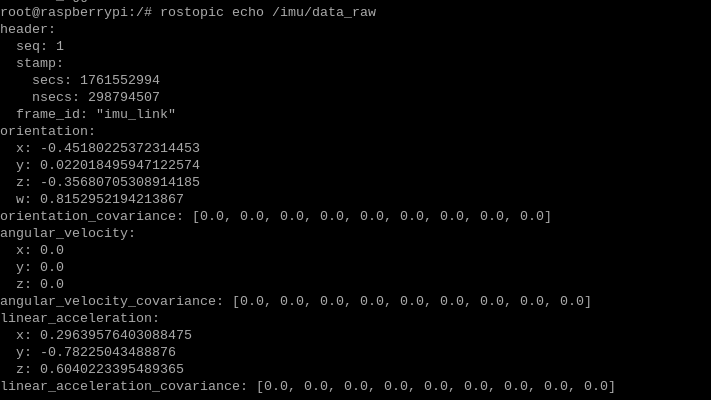
Print /imu/data_raw topic data
xxxxxxxxxxrostopic echo /imu/data_raw
Print /imu/mag topic data
xxxxxxxxxxrostopic echo /imu/mag