Welcome to IMU Sensor Module repository
3. IMU-integrated radar mapping and navigation
IMU Fusion Radar Mapping and Navigation
IMU Fusion Radar Mapping and Navigation1. Source Code Explanation2. Radar Mapping2.1 Start the chassis (robot side)2.2 Map creation command (robot side)2.3 Enabling the Visual Interface (Virtual Machine)2.4 Controlling the Robot2.5 Map Saving3.1 Start the Chassis (Robot Side)3.2 Start the Navigation and Obstacle Avoidance Function (Robot Side)3.3 Enabling the Visual Interface (Virtual Machine)3.4 UsageGmappingcartographerNavigation and obstacle avoidance
1. Source Code Explanation
We provide two sets of IMU function source code: one is the source code for the IMU driver only, and the other is the source code for the IMU fusion radar mapping and navigation example.
imu_ros1_device: This is the source code for the IMU driver only.
yahboomcar_ws: This is the source code for the IMU fusion radar mapping and navigation example.
Generally, the imu_ros1_device package is sufficient for installation on your own motherboard. The other packages shown in the examples require some dependencies, and errors may occur during installation and compilation. Users need to resolve environment dependencies themselves. The source code here is for reference only. It will not run without the corresponding vehicle and radar equipment. The source code is implemented using our company's Rosmaster X3 vehicle product. Please be aware of this.
2. Radar Mapping
Note: This lesson uses Rosmaster-X3 as an example. Users need to modify the code according to their own motion model and debug it themselves. Depending on the vehicle model, you only need to set the purchased model in the 【.bashrc】 file. Examples include X1 (standard 4WD), X3 (McLux), X3plus (McLux robotic arm), R2 (Ackerman differential), etc. This section uses X3 as an example.
Open the【 .bashrc】 file:
xxxxxxxxxxsudo vim .bashrc
Find the 【ROBOT_TYPE】 parameter and modify it accordingly:
xxxxxxxxxxexport ROBOT_TYPE=X3 # ROBOT_TYPE: X1 X3 X3plus R2
2.1 Start the chassis (robot side)
xxxxxxxxxxroslaunch yahboomcar_nav laser_bringup.launch
2.2 Map creation command (robot side)
xxxxxxxxxxroslaunch yahboomcar_nav yahboomcar_map.launch use_rviz:=false map_type:=gmapping
- 【use_rviz】 parameter: Whether to enable RViz visualization.
- 【map_type】 parameter: Set the mapping algorithm 【gmapping】.
map_typecan be eithergmappingorcartographer.
If using the Cartographer algorithm for mapping, run the following commands:
xxxxxxxxxxroslaunch yahboomcar_nav yahboomcar_map.launch use_rviz:=false map_type:=cartographer
2.3 Enabling the Visual Interface (Virtual Machine)
gmapping algorithm
xxxxxxxxxxroslaunch yahboomcar_nav view_map.launch
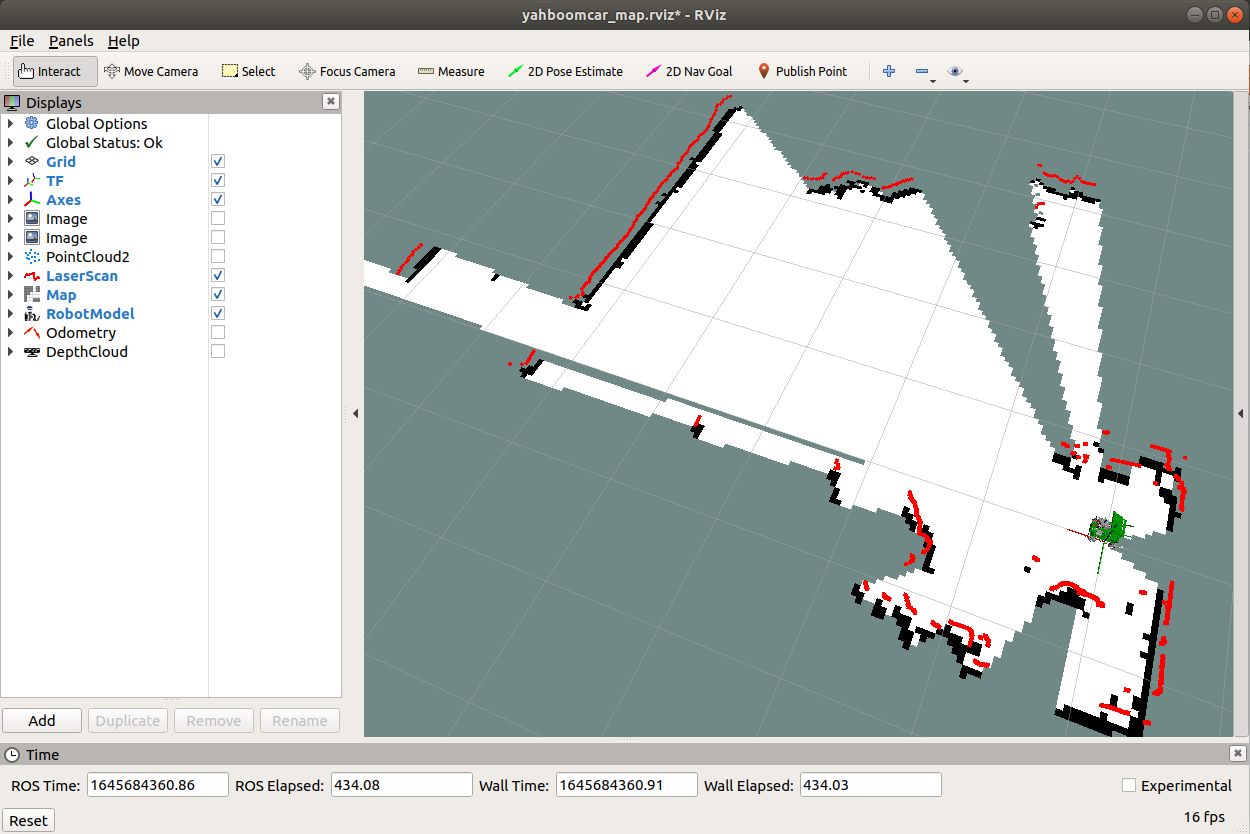
cartographer algorithm
xxxxxxxxxxroslaunch yahboomcar_nav view_cartographer.launch
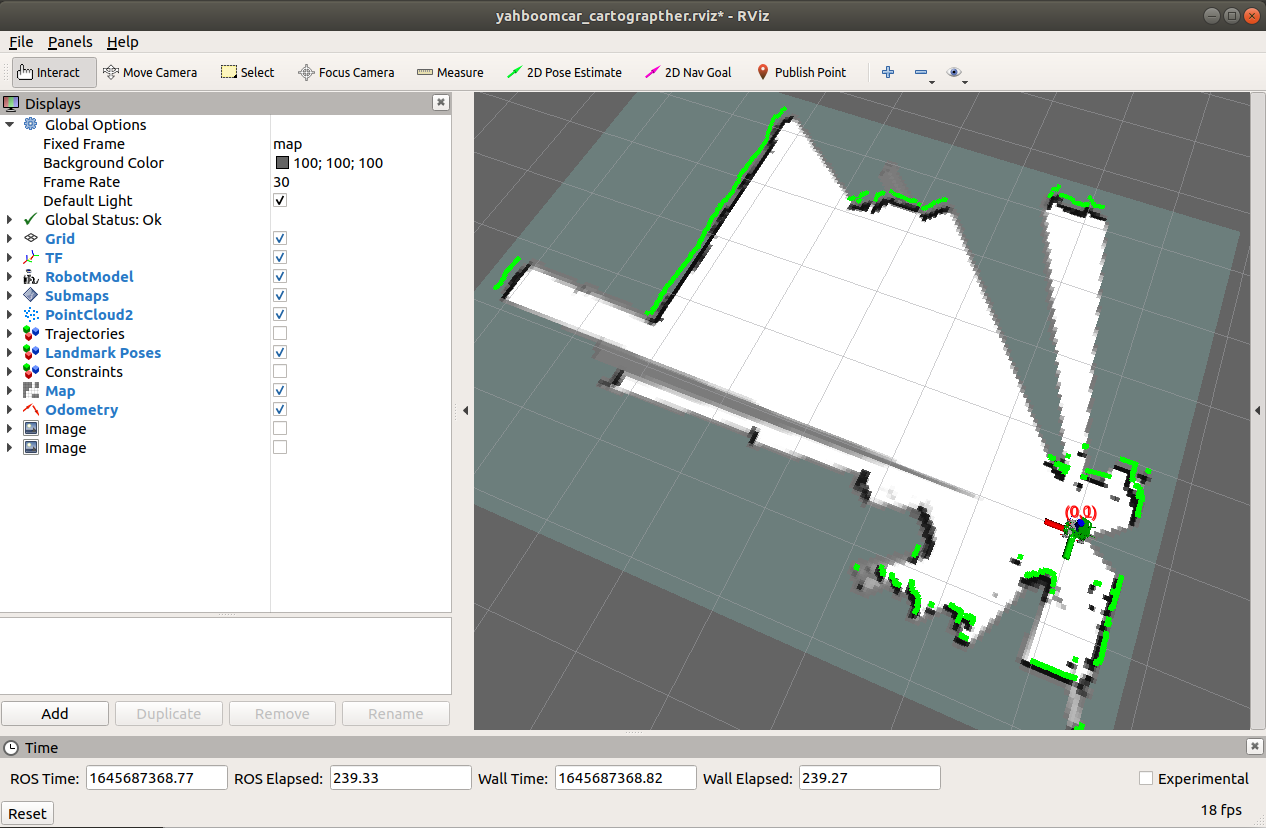
2.4 Controlling the Robot
Keyboard Control
xxxxxxxxxxroslaunch yahboomcar_ctrl yahboom_keyboard.launch
2.5 Map Saving
gmapping algorithm
xxxxxxxxxxrosrun map_server map_saver -f ~/yahboomcar_ws/src/yahboomcar_nav/maps/my_map # First method`bash ~/yahboomcar_ws/src/yahboomcar_nav/maps/map.sh # Second method
cartographer algorithm
xxxxxxxxxxbash ~/yahboomcar_ws/src/yahboomcar_nav/maps/carto_map.sh
The map will be saved to the ~/yahboomcar_ws/src/yahboomcar_nav/maps/ folder, containing one PGM image and one YAML file.
map.yaml
xxxxxxxxxximage: map.pgmresolution: 0.05origin: [-15.4,-12.2,0.0]negate: 0occupied_thresh: 0.65free_thresh: 0.196
Parameter Explanation:
- image: Path to the map file, can be an absolute or relative path
- resolution: Map resolution, meters per pixel
- origin: 2D pose (x, y, yaw) of the bottom left corner of the map. Here, yaw is the counter-clockwise rotation (yaw=0 means no rotation). Currently, many parts of the system ignore the yaw value.
- negate: Whether to reverse the meaning of white/black, free/occupied (the interpretation of the threshold is not affected)
- occupied_thresh: Pixels with an occupation probability greater than this threshold are considered fully occupied.
- free_thresh: Pixels with an occupation probability less than this threshold are considered completely free. ## 3. Navigation and Obstacle Avoidance
Depending on the vehicle model, simply set the purchased model in the 【.bashrc】 file. Examples include X1 (standard 4WD), X3 (McLux), X3plus (McLux robotic arm), R2 (Ackerman differential), etc. Let's take X3 as an example.
Open the 【.bashrc】 file:
xxxxxxxxxxsudo vim .bashrc
Find the 【ROBOT_TYPE】 parameter and modify it accordingly:
xxxxxxxxxxexport ROBOT_TYPE=X3 # ROBOT_TYPE: X1 X3 X3plus R2
3.1 Start the Chassis (Robot Side)
xxxxxxxxxxroslaunch yahboomcar_nav laser_bringup.launch
3.2 Start the Navigation and Obstacle Avoidance Function (Robot Side)
xxxxxxxxxxroslaunch yahboomcar_nav yahboomcar_navigation.launch use_rviz:=false map:=house
- 【use_rviz】 parameter: Whether to enable rviz.
- 【map】 parameter: Map name, the map to load. Note that map should be changed to the name saved when creating the map.
3.3 Enabling the Visual Interface (Virtual Machine)
xxxxxxxxxxroslaunch yahboomcar_nav view_navigate.launch

3.4 Usage
1) Single-Point Navigation
- Use the 【2D Pose Estimate】 tool in the 【rviz】 tool to set the initial pose until the position of the car in the simulation matches the actual position of the car.
- Click the 【2D Nav Goal】 tool in the 【rviz】 tool, then select a target point on the map where there are no obstacles. Release the mouse to start navigation. Only one target point can be selected; navigation stops when the target point is reached.
2) Multi-point Navigation
- Similar to the first step of single-point navigation, set the robot's initial pose.
- Click the "Publish Point" tool in the rviz tool, then select a target point on the map where there are no obstacles. Release the mouse to start navigation. You can click "Publish Point" again and select points; the robot will then navigate between points.
- Using the "2D Pose Estimate" tool in the rviz tool to set the robot's initial pose automatically disables multi-point navigation.
For information on algorithms, please refer to the following links:
Gmapping
Gmapping: http://wiki.ros.org/gmapping/
map_server: https://wiki.ros.org/map_server
cartographer
Cartographer: https://google-cartographer.readthedocs.io/en/latest/
Cartographer ROS: https://google-cartographer-ros.readthedocs.io/en/latest/
map_server: https://wiki.ros.org/map_server
Navigation and obstacle avoidance
navigation: http://wiki.ros.org/navigation/
navigation/Tutorials: http://wiki.ros.org/navigation/Tutorials/RobotSetup
costmap_2d: http://wiki.ros.org/costmap_2d
nav_core: http://wiki.ros.org/nav_core
global_planner: http://wiki.ros.org/global_planner
dwa_local_planner: http://wiki.ros.org/dwa_local_planner
teb_local_planner: http://wiki.ros.org/teb_local_planner
move_base: http://wiki.ros.org/move_base