yahboom
HomeLearn
Solution
Blog
Online Store
About Us
EN/中文
ROS Robot Expansion Board📖
1.Expansion board STM32 driver
  • 0. Precautions
  • 1.1 Expansion Board Introduction_V3.0
  • 1.1 Expansion Board Introduction_V1.0
  • 1.2 STM32 Development environment
  • 1.3 Button to control the buzzer to whistle
  • 1.4 FreeRTOS application
  • 1.5 Serial communication
  • 1.6 SBUS model aircraft remote control
  • 1.7 CAN bus communication
  • 1.8 RGB colorful light bar
  • 1.9 Timer interrupt to control PWM servo
  • 1.10 Control serial port servos
  • 1.11 Nine-axis attitude sensor to obtain data
  • 1.12 Control the forward and reverse rotation of the motor
  • 1.13 The timer captures the encoder data
  • 1.14.1 Robot kinematics analysis theory
  • 1.14.2 Mecanum wheel kinematics analysis
  • 1.15 PID control robot movement
  • 1.16 OLED character display
2.Python basic control
  • 2.0 Bind PCB port devices
  • 2.1 Update the firmware of the expansion board
  • 2.2 Turn off the self-starting large program at startup
  • 2.3 Install the Rosmaster driver library
  • 2.4 Buzzer whistle
  • 2.5 Control PWM servo
  • 2.6 RGB colorful light bar special effects display
  • 2.7 Control the forward and reverse rotation of the motor
  • 2.8 Control the movement of the robot
  • 2.9 Control Serial Servo
3.ROS1 Basic Course
  • 1.ROS introduction
  • 2.ROS installation
  • 3.ROS common command tools
  • 4.ROS workspace
  • 5.ROS function package
  • 6.ROS node
  • 7.ROS topic publisher
  • 8.ROS topic subscribers
  • 9.ROS service client
  • 10.ROS service server
  • 11.ROS action client
  • 12.ROS action server
  • 13.ROS custom message reception
  • 14.ROS-launch file
  • 15.ROS-TF transformation
  • 16.ROS parameter service
  • 17.ROS-rviz use
  • 18.ROS-rqt tool usage
  • 19.Topic message recording and playback
  • 20.urdf model introduction
  • 21.gazebo introduction
  • 22.ROS distributed communication
4.ROS1 robot control
  • 0. Bind PCB port devices
  • 1. Package Use the tutorial
  • 2. Package Description
  • 3. Robot keyboard control
  • 4. Robot state estimation
  • 5. Robot imu calibration
  • 6. Robot URDF Model
5.ROS2 Basic Course
  • 1.Introduction to ROS2
  • 2.ROS2 install Humble
  • 3.ROS2 development environment
  • 4.ROS2 workspace
  • 5.ROS2 function package
  • 6.ROS2 node
  • 7.ROS2 topic communication
  • 8.ROS2 service communication
  • 9.ROS2 action communication
  • 10.ROS2 custom interface message
  • 11.ROS2 parameter service case
  • 12.ROS2 meta-function package
  • 13.ROS2 distributed communication
  • 14.ROS2 DDS
  • 15.ROS2 time related API
  • 16.ROS2 common command tools
  • 17.ROS2 rviz2 use
  • 18.ROS2 rqt toolbox
  • 19.ROS2 Launch startup file configuration
  • 20.ROS2 recording and playback tool
  • 21.ROS2 URDF model
  • 22.ROS2 Gazebo simulation platform
  • 23.ROS2 TF2 coordinate transformation
6.ROS2 robot control
  • 0. Bind PCB port devices
  • 1. Package Use the tutorial
  • 2. Robot information release
  • 3. Robot keyboard control
  • 4. Robot state estimation
  • 5. Robot calibration
  • 6. URDF model
7.RDK X3 course
  • 1. Update the firmware of the expansion board
  • 2. Turn off the self-starting large program at startup
  • 3. Install the Rosmaster driver library
  • 4. Buzzer whistle
  • 5. Control PWM servo
  • 6. RGB colorful light bar special effects
  • 7. Control motor forward reverse
  • 8. Control robot movement
  • 9. Control Serial Servo
Download
  • Rules_File
  • Hardware Info
  • Code
  • 3D Model File
  • RDK Code
  • ROS2_Basic_VM
Download ZIP

Welcome to ROS Robot Expansion Board repository

2. Robot information release

2、Robot information release

After the program runs, the ROS expansion board will return real-time data, including voltage and IMU data. Connecting the car encoder can also obtain the speed of the car.

1、start mode

Taking our company's Rosmaster-X3 as an example, the terminal enters the following command to start,

ros2 run yahboomcar_bringup Mcnamu_driver_X3
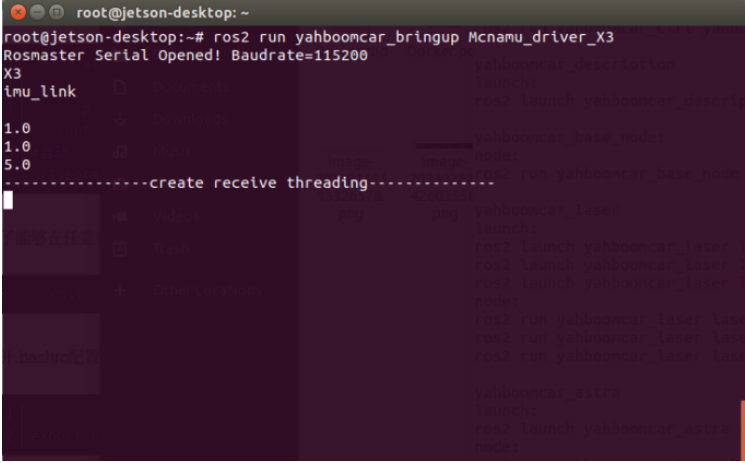
image-20230529205227219

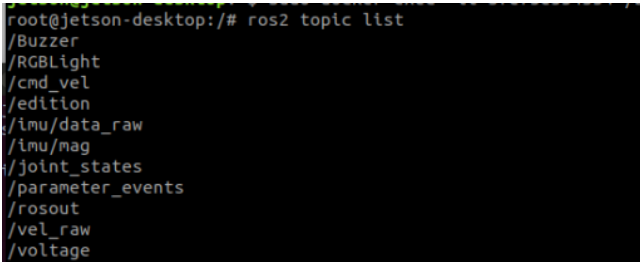
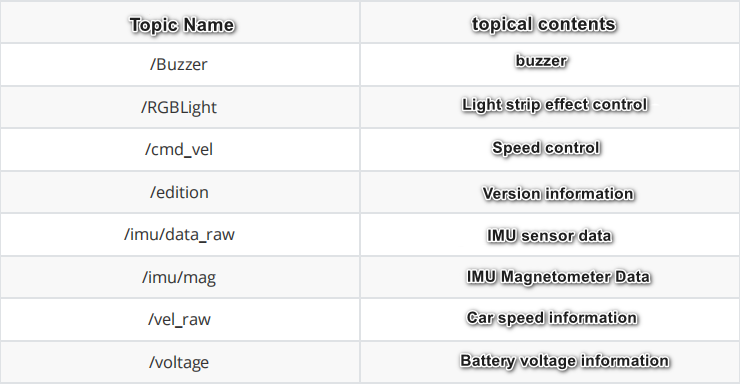
2、View topic nodes

Enter the command at the terminal,

xxxxxxxxxx
ros2 topic list

image-20230529205315888

image-20230529205330021

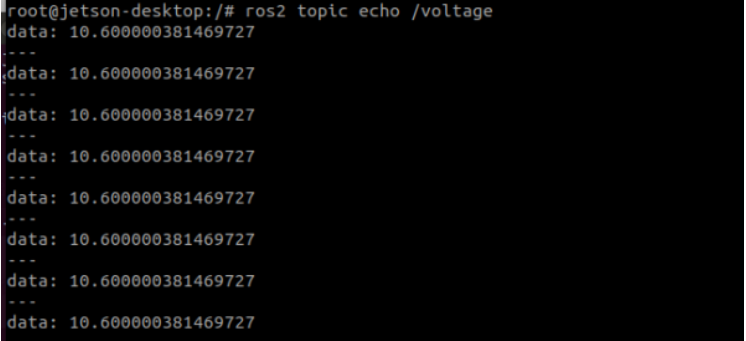
3、Reading Topic Data

If you want to read the voltage value, you need to enter the following command at the terminal,

xxxxxxxxxx
ros2 topic echo /voltage

image-20230529205428526

4、Publish topic data

To publish/cmd_ Taking speed data as an example, terminal input,

xxxxxxxxxx
ros2 topic pub /cmd_vel geometry_msgs/msg/Twist "{linear: {x: 0.5, y: 0.0, z:0.0}, angular: {x: 0.0, y: 0.0, z: 0.2}}"
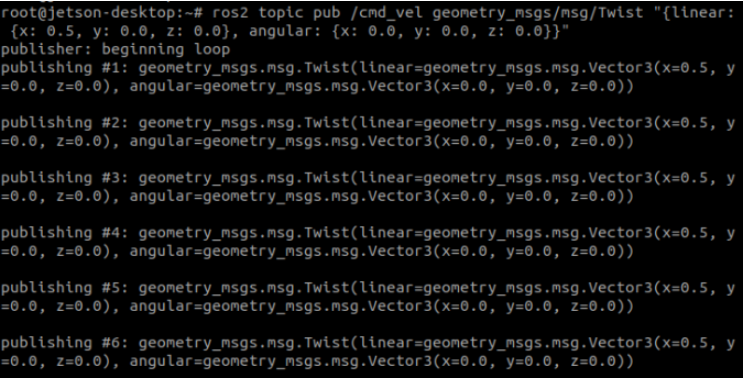
image-20230529205545401

5、Source code parsing

xxxxxxxxxx
from Rosmaster_Lib import Rosmaster #Import Driver Library
self.car = Rosmaster() #Instantiating Rosmaster objects
#create subcriber 创建订阅者
self.sub_cmd_vel =
self.create_subscription(Twist,"cmd_vel",self.cmd_vel_callback,1)
self.sub_RGBLight =
self.create_subscription(Int32,"RGBLight",self.RGBLightcallback,100)
self.sub_BUzzer =
self.create_subscription(Bool,"Buzzer",self.Buzzercallback,100)
#create publisher  
self.EdiPublisher = self.create_publisher(Float32,"edition",100)
self.volPublisher = self.create_publisher(Float32,"voltage",100)
self.staPublisher = self.create_publisher(JointState,"joint_states",100)
self.velPublisher = self.create_publisher(Twist,"vel_raw",50)
self.imuPublisher = self.create_publisher(Imu,"/imu/data_raw",100)
self.magPublisher = self.create_publisher(MagneticField,"/imu/mag",100)
#Call the library to read the information of the ROS expansion board
edition.data = self.car.get_version()*1.0
battery.data = self.car.get_battery_voltage()*1.0
ax, ay, az = self.car.get_accelerometer_data()
gx, gy, gz = self.car.get_gyroscope_data()
mx, my, mz = self.car.get_magnetometer_data()
vx, vy, angular = self.car.get_motion_data()
#Publish topic data
self.imuPublisher.publish(imu)
self.magPublisher.publish(mag)
self.volPublisher.publish(battery)
self.EdiPublisher.publish(edition)
self.velPublisher.publish(twist)
#Subscriber callback function
def cmd_vel_callback(self,msg)
def RGBLightcallback(self,msg)
def Buzzercallback(self,msg):

Please refer to the following path code for detailed code:~/driver_ws/src/yahboomcar_bringup/yahboomcar_bringup/Mcnamu_driver_X3.py

Package Use the tutorial
Robot keyboard control

COMPANY

  • About us
  • Team Style
  • Blog

LEARNING & EXPLORATION

  • Tutorials
  • Edge AI hardware
  • Educational robots
  • Embedded intelligent hardware

WHERE TO BUY

  • Yahboom Online Store
  • Amazon
  • Alibaba
  • AliExpress
  • Mercado

TECHNOLOGY SUPPORT

  • Email: support@yahboom.com

BE A DISTRIBUTOR

  • Email: sales@yahboom.com
QR Code

Copyright © 2017-2026 Yahboom. All Rights Reserved.

EN/中文