yahboom
HomeLearn
Solution
Blog
Online Store
About Us
EN/中文
Roboduino V2📖
0.Instruction manual
  • Instruction manual
1.Get started quickly
  • 01.Assembly of the Car
  • 02.Remote Control Car
  • 03.Common Problem Analysis
  • 04. Lithium Battery Pack and Charger Usage Guidelines
  • 05. Important Notes (Read Before Starting)
2.Environment Construction
  • 01.Serial port driver installation
  • 02.Arduino IDE Installation
  • 03.Arduino IDE usage
  • 04.Using third-party libraries
  • 05.Program compilation and upload
3.Basic car course
  • 01.RGB Control
  • 02.Serial Print
  • 03.KEY Read
  • 04.Buzzer control
  • 05.Logo Breath
  • 06.Servos Control
  • 07.Motor Control
  • 08.Ultrasonic Ranging
  • 09.Track Print
  • 10.Infrared Remote Print
  • 11.WIFI Camera
4.Advanced car course
  • 01.RGB Breath
  • 02.Play Music
  • 03.KEY Control RGB
  • 04.KEY Control Buzzer
  • 05.Serial Parse Data
  • 06.Parse Data Control Motor
  • 07.Parse Data Control RGB
  • 08.Parse Data Control Buzzer
  • 09.Parse Data Control Servo
5.Car motion control
  • 00.Mecanum wheel motion principle
  • 01.Car Vertical Movement
  • 02.Car Diagonal Movement
  • 03.Car Sideways Movement
  • 04.Car Rotational Movement
  • 05.Car Patrol
6.Comprehensive gameplay of car
  • 01.Car tracking
  • 02.Car Obstacle Avoid
  • 03.Car Follow Hand
  • 04.Car tracking Avoid
  • 05.Car Infrared Remote
  • 06.WiFi Control Car
  • 07.IR WiFi Control Car
7.AI vision course
  • 1. Cat(dog) detection
  • 2. Color recognition
  • 3. QR code instructions
  • 4. Person Recognition
  • 5. Face Detection
  • 6. Color Follows
  • 7. Face following
8.Expand peripherals
  • 01.Digital Tube Display
  • 02.Color Recognition
Download
  • Code
  • Library
  • Hardware manual
  • Software
  • 3D Model
  • Instruction Manual
Download ZIP

Welcome to Roboduino V2 repository

05.Program compilation and upload

Program compilation and upload

Program compilation and uploadDevice connectionHardware connectionSoftware connectionProgram CompilationProgram Upload

Before compiling and downloading the program, we need to connect the Arduino Uno development board in advance.

Device connection

Hardware connection

Use a Type-B data cable to connect the Arduino Uno and the computer.

Software connection

Open the "Arduino IDE" software and select the model and serial port number corresponding to the development board:

Development board selection: Click Tools → Board → Arduino AVR Boards → Arduino Uno

Serial port number selection: Click Tools → Port → COM3

xxxxxxxxxx
Please select the serial port device according to the serial port number recognized by your system. The device manager in the lower right corner will prompt how to find the serial port corresponding to Arduino Uno.
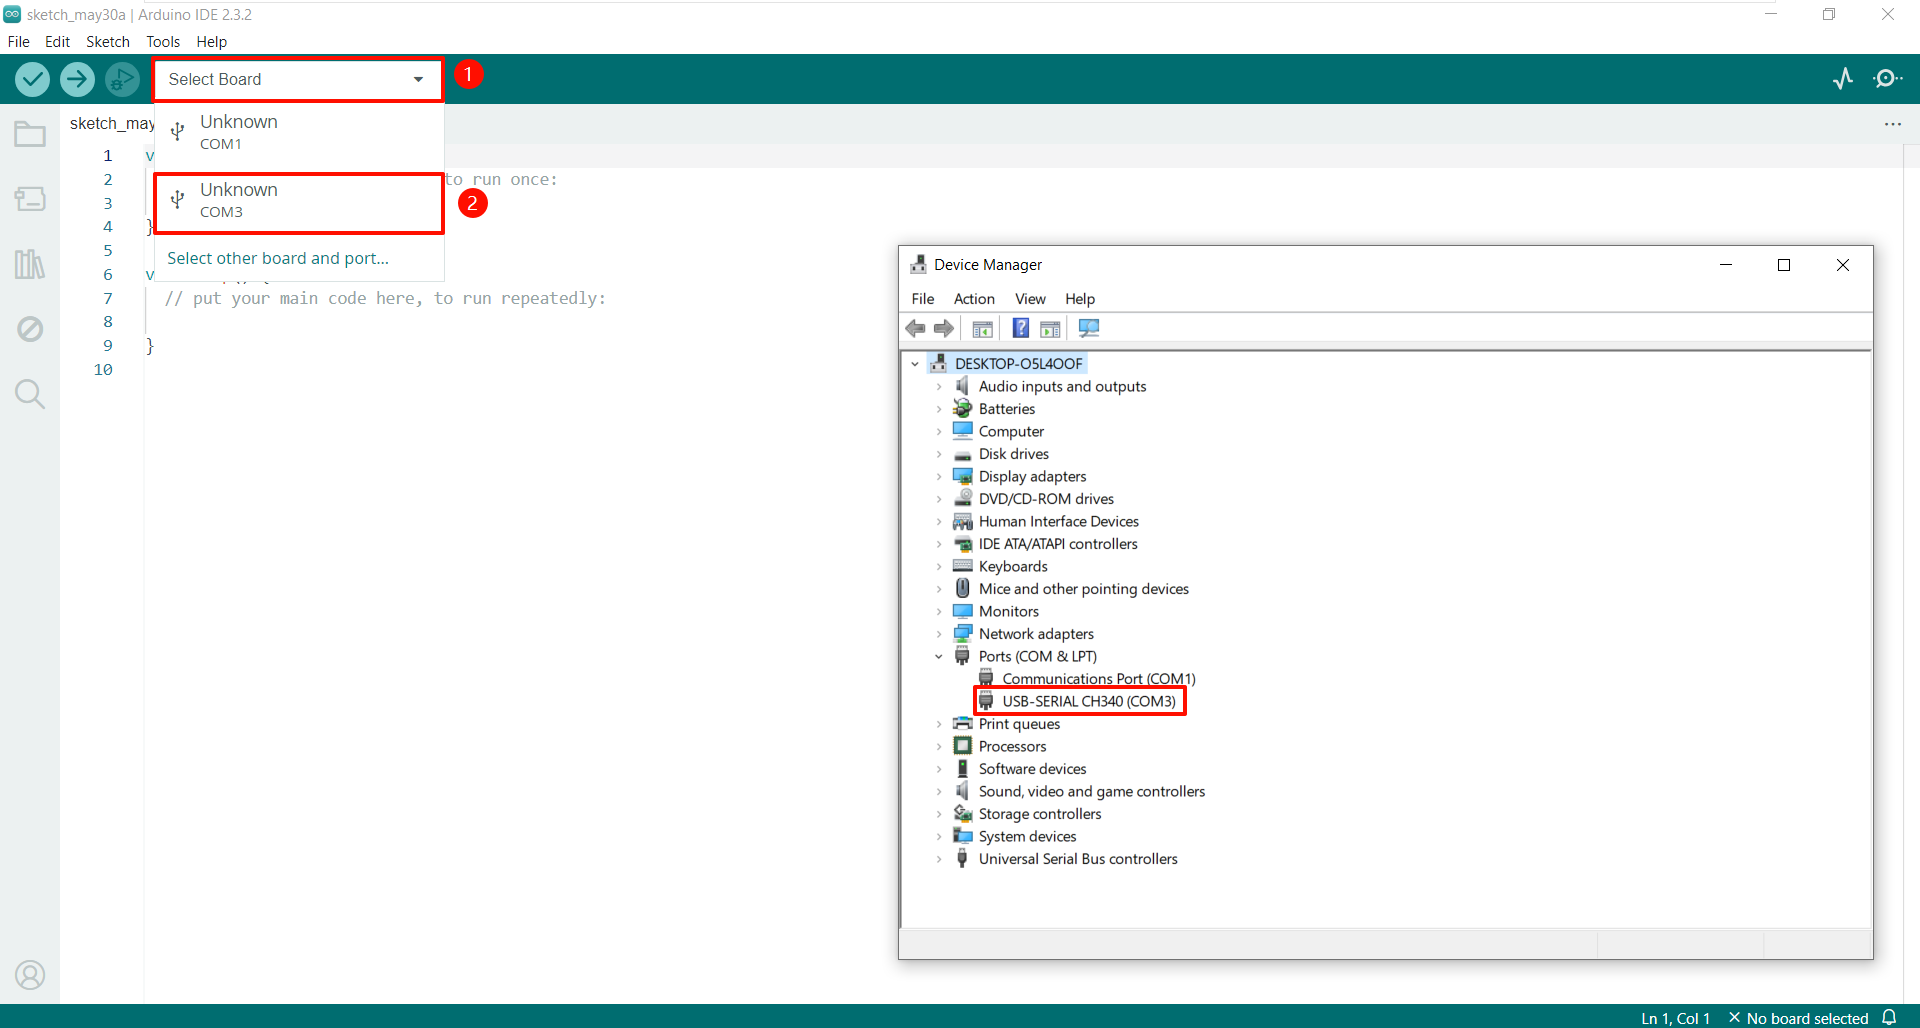
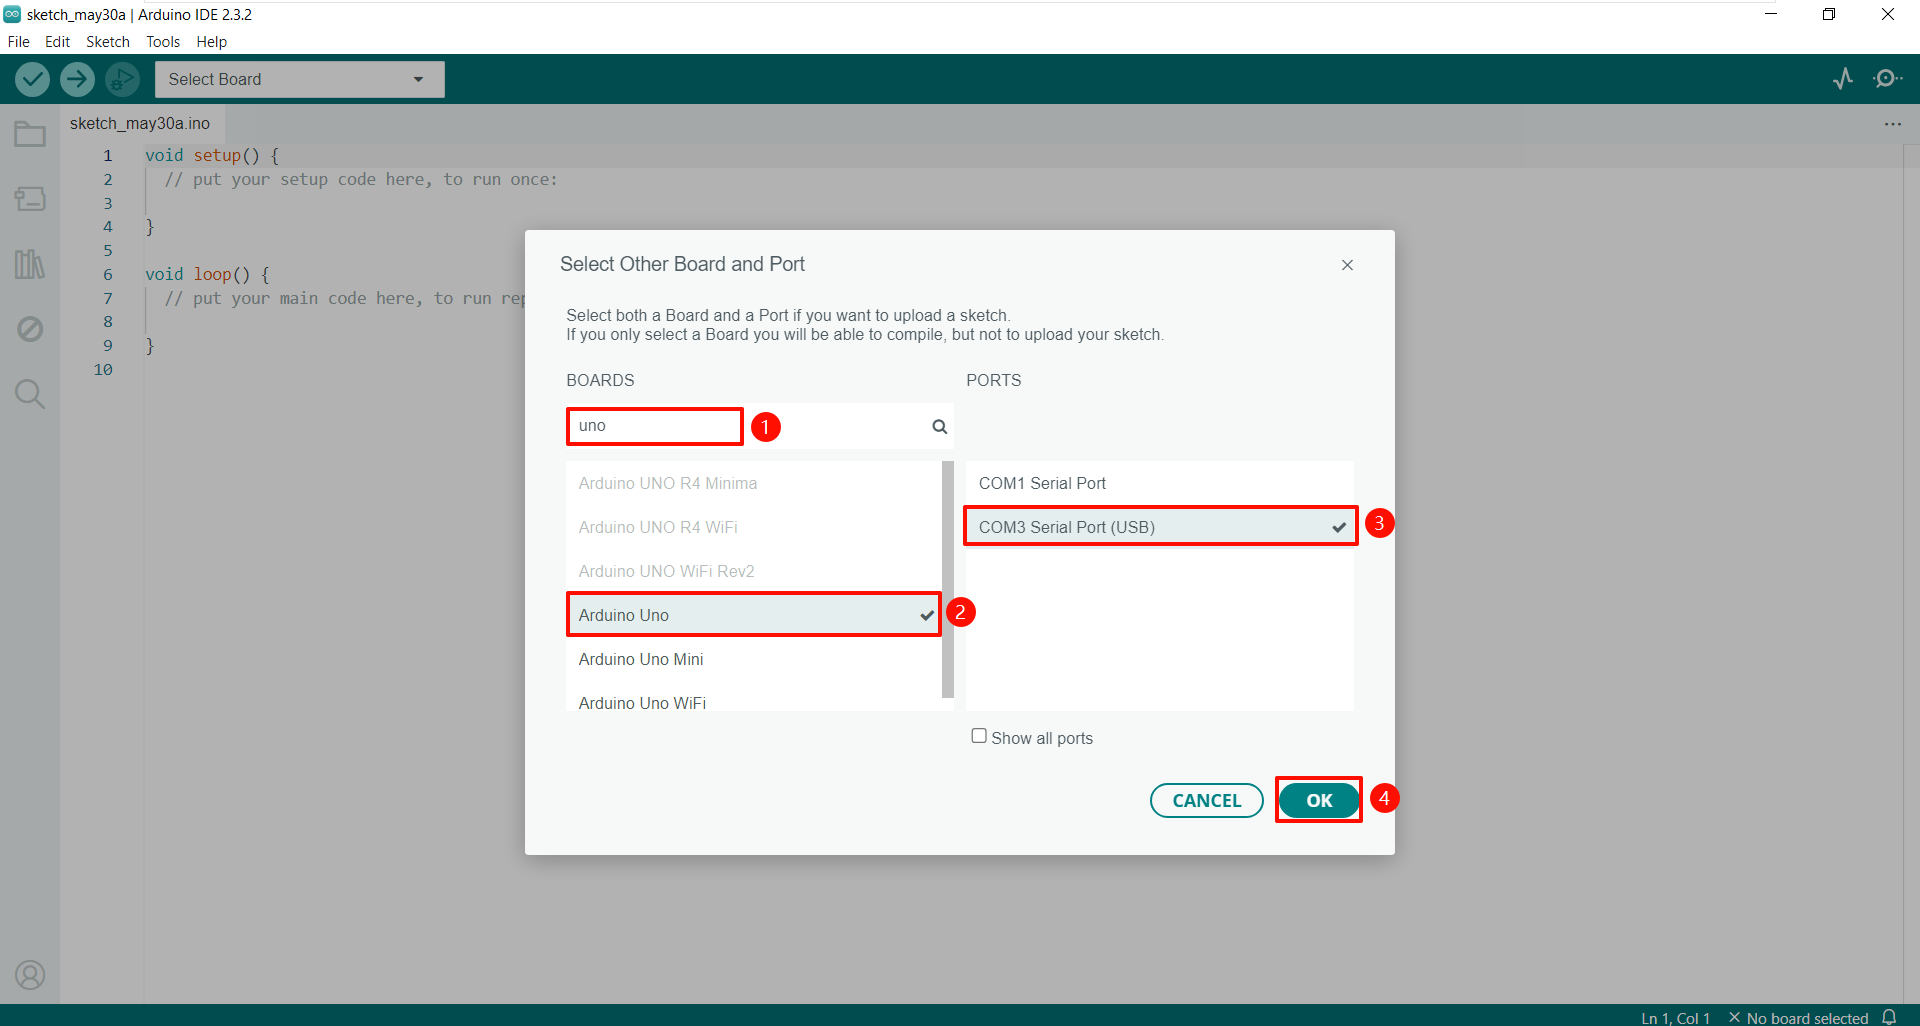
image-20240612193707878

image-20240612193717221

Program Compilation

After the program is written, we need to compile it first. After the compilation is successful, we can proceed to the next step of program download.

xxxxxxxxxx
Compilation can detect whether there are syntax errors in the code!
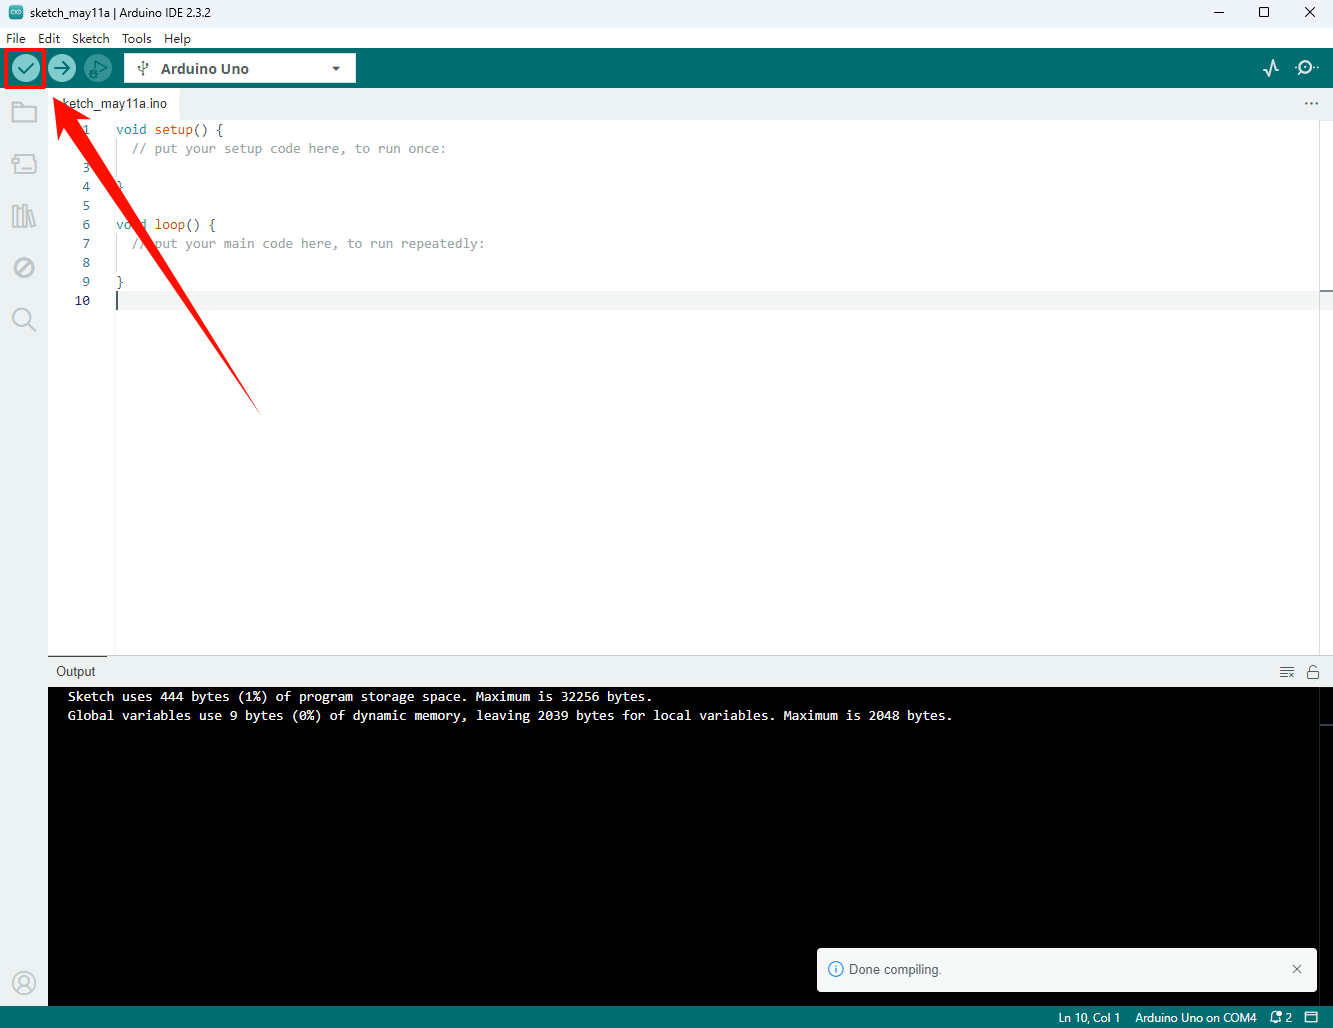
image-20240612193733825

Program Upload

Click Program Upload, the program will be uploaded to the Arduino Uno development board we connected before, and the upload completion prompt will appear after the program is successfully uploaded!
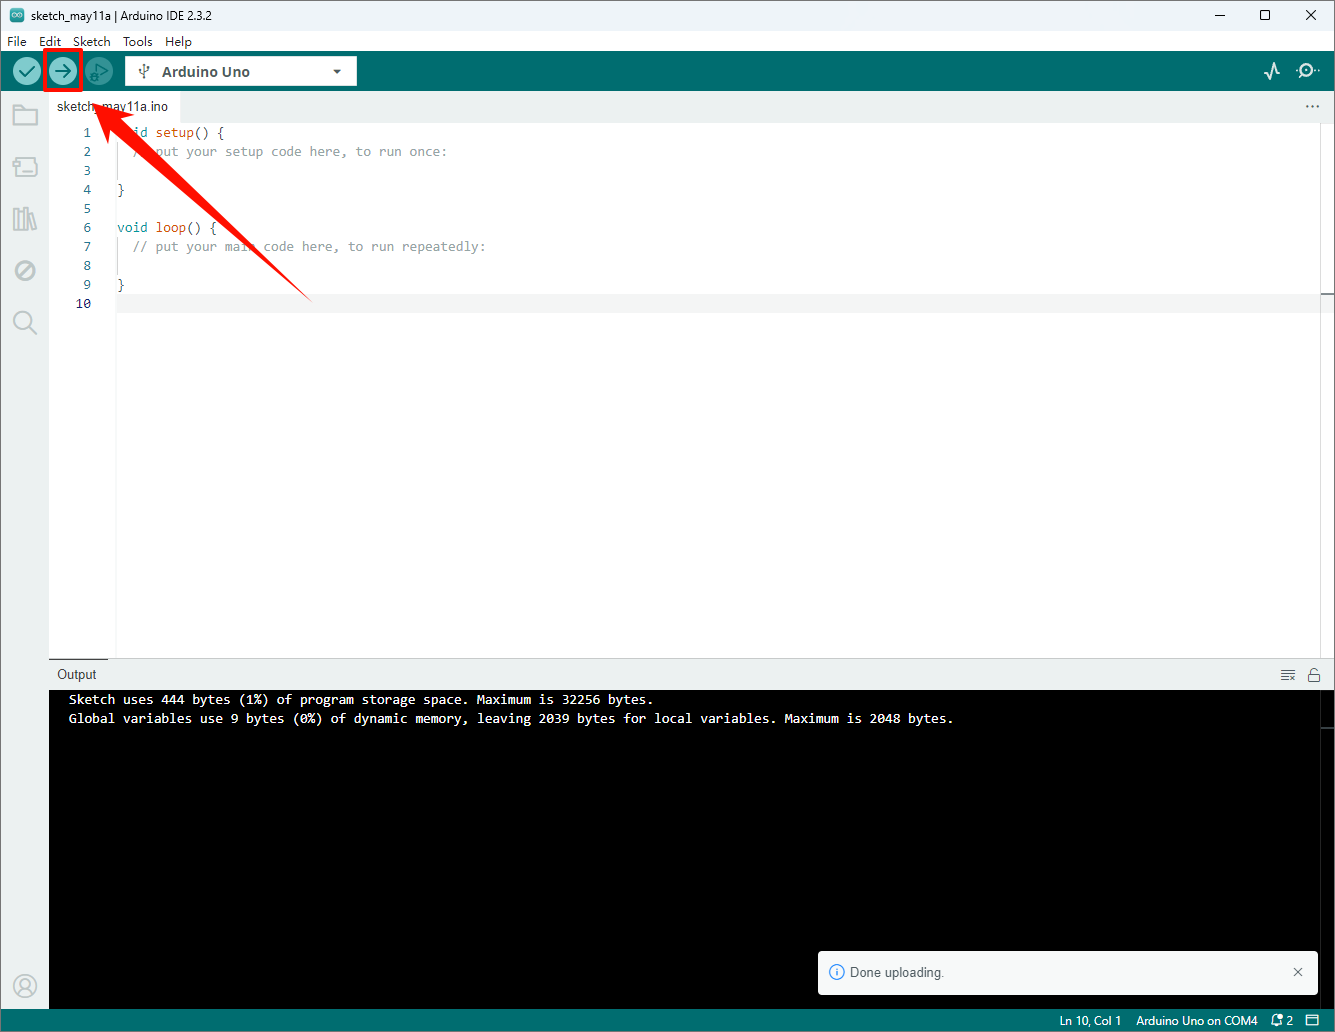
image-20240612193739473


Using third-party libraries
RGB Control

COMPANY

  • About us
  • Team Style
  • Blog

LEARNING & EXPLORATION

  • Tutorials
  • Edge AI hardware
  • Educational robots
  • Embedded intelligent hardware

WHERE TO BUY

  • Yahboom Online Store
  • Amazon
  • Alibaba
  • AliExpress
  • Mercado

TECHNOLOGY SUPPORT

  • Email: support@yahboom.com

BE A DISTRIBUTOR

  • Email: sales@yahboom.com
QR Code

Copyright © 2017-2026 Yahboom. All Rights Reserved.

EN/中文