Welcome to Roboduino V2 repository
01.Digital Tube Display
Digital Tube Display
Digital Tube DisplayDevice connectionHardware connectionSoftware connectionDigital tube (common negative)Digital tube installationCode analysisExperimental results
Use Arduino Uno to drive the digital tube to display the current count value (increase by 1 every 1 second).
Device connection
Hardware connection
Use a type B data cable to connect Arduino Uno and the computer.
Software connection
Open the "Arduino IDE" software and select the model and serial port number corresponding to the development board.
Digital tube (common negative)
The driver chip used by the 4-bit digital tube module is tm1650:
Digital I2C base address: 0x34
Digital register I2C base address: 0x24
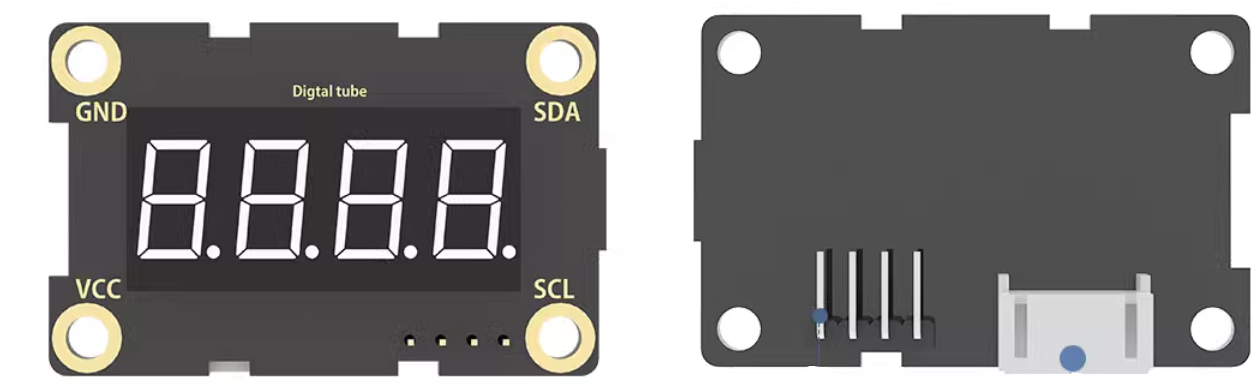
| Function pin | Function |
|---|---|
| VCC | Power supply interface: 3.3V, 5V |
| SDA | I2C data transmission interface |
| SCL | I2C timing transmission interface |
| GND | Ground interface |
Digital tube installation
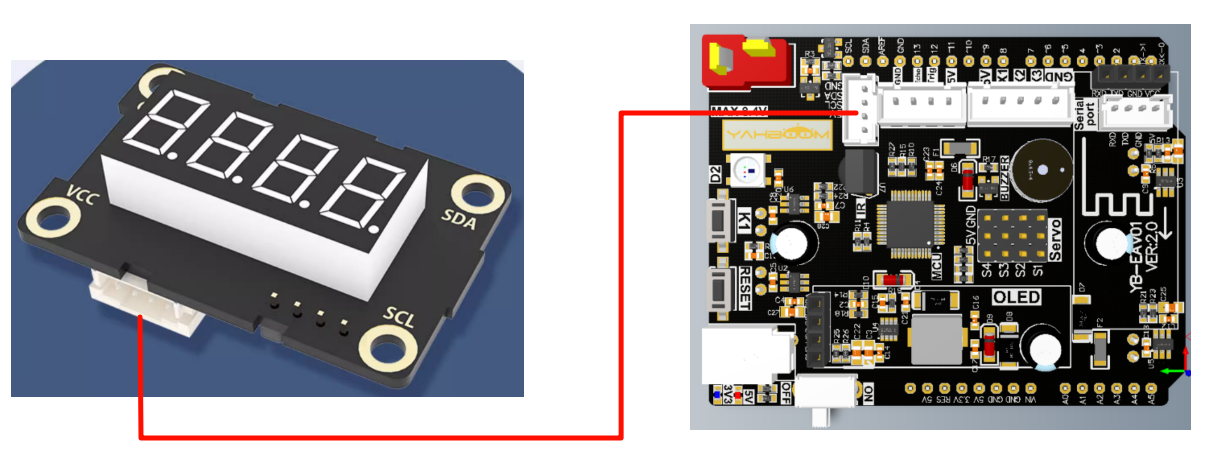
We use it with a car here. You can directly use the PH2.0 interface cable that comes with the digital tube module to connect the car expansion board.
Code analysis
Here we only briefly introduce the code content. For detailed code, please refer to the corresponding code file. The code file is provided in the download area!
Include
Wire和TM1650library
x#include <Wire.h> // 包含用于I2C通信的库 Include Wire library#include <TM1650.h> // 包含用于TM1650显示模块的库 Include TM1650 library
Create a TM1650 object to control the nixie
xTM1650 Digital_Tube; // 创建一个TM1650对象,用于控制数码管 Create a TM1650 object to control the nixie
Initialization Code
xxxxxxxxxxvoid setup() {Wire.begin(); // 初始化I2C通信 Initialize I2C communicationDigital_Tube.init(); // 初始化数码管模块 Initializes the nixie moduleDigital_Tube.displayOff(); // 关闭数码管显示 Turn off the nixie displayDigital_Tube.setBrightness(1); // 设置数码管的亮度,参数范围:0-7 Set the brightness of the nixie tube. The parameter range is 0-7}
Looping code
xvoid loop() {for (unsigned int uTimeCount = 0; uTimeCount <= 9999; uTimeCount++) {Digital_Tube.displayOn(); // 打开数码管显示 Open the nixie displaychar numberString[5]; // 定义一个字符数组,用于存储数字字符串 Defines a character array for storing numeric stringssprintf(numberString, "%04d", uTimeCount); // 格式化数字并存储到字符数组中,确保数字为4位 Format the number and store it in a character array, making sure the number is 4 digitsDigital_Tube.displayString(numberString); // 将格式化后的数字字符串显示在数码管上 Displays the formatted string of numbers on the nixie tubedelay(1000); // 控制显示的更新速率 Controls the display update rateDigital_Tube.displayOff(); // 关闭数码管显示 Turn off the nixie display}}
Experimental results
After compiling the program successfully, upload the code to the Arduino Uno development board.
After the program is started, the number displayed on the digital tube increases by 1 every 1 second, and the maximum number displayed is 9999!
xxxxxxxxxxThe burning program cannot use other programs to occupy the serial port or an external serial communication module (for example: WiFi camera module), otherwise the program cannot be burned or an error message will be prompted!