Welcome to K210 Module repository
12. Multiple color recognition
12、Multiple color recognition
12、Multiple color recognition1.1 Experimental Objectives1.2 experimentation1.3、Experimental effect1.4、Experimental Summary2.1、Add new colors for recognition2.2、Obtain the LAB threshold that requires color increase
1.1 Experimental Objectives
This lesson mainly focuses on various color recognition functions. Based on the LAB value of the color, objects of different colors (red, yellow, blue, green) are framed without the need for collection The reference code path for this experiment is: CanMV\05-AI\multi_color_recognition.py
1.2 experimentation
The factory firmware of the module has already integrated the AI visual algorithm module. If you have downloaded other firmware, please burn it back to the factory firmware before conducting experiments.
Import relevant libraries and initialize cameras and LCD displays
ximport sensorimport imageimport timeimport lcd
lcd.init()sensor.reset()sensor.set_pixformat(sensor.RGB565)sensor.set_framesize(sensor.QVGA)sensor.skip_frames(time = 100)sensor.set_auto_gain(False)sensor.set_auto_whitebal(False)
clock = time.clock()Writing threshold ranges for color lab values
xxxxxxxxxxcolor_thresholds = [ (31, 69, 27, 58, 14, 36),# Red (14, 61, -39, -6, 0, 14), # Green (14, 66, 1, 38, -56, -12),# Blue (49, 77, -8, 52, 16, 60),# Yellow]color_strings = ['Red', 'Green', 'Blue', 'Yellow']Create a new while loop to recognize the colors of the images captured by the camera and display the recognition results on the screen
xxxxxxxxxxwhile True: clock.tick() img = sensor.snapshot() for color_idx, threshold in enumerate(color_thresholds): blobs = img.find_blobs([threshold], pixels_threshold=100, area_threshold=100, merge=True, margin=10) if blobs: for blob in blobs: color_new = (255 , 255,255) if color_idx == 0 : color_new = (255 , 0,0) elif color_idx == 1: color_new = ( 0,255 ,0) elif color_idx == 2: color_new = ( 0,0,255) elif color_idx == 3: color_new = ( 255,255,0) img.draw_rectangle(blob.rect(), color=color_new,thickness = 3) img.draw_cross(blob.cx(), blob.cy(), color=color_new) img.draw_string(blob.cx() + 10, blob.cy() - 10, color_strings[color_idx], color=color_new) lcd.display(img) print(clock.fps())1.3、Experimental effect
Connect the K210 module to the computer via a microUSB data cable, click the connect button in the CanMV IDE, and after the connection is completed, click the run button to run the routine code. You can also download the code as main.py and run it on the K210 module.
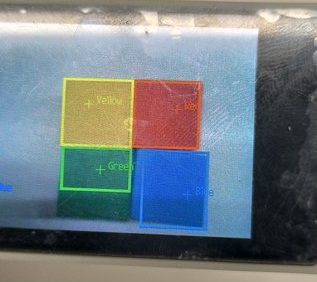
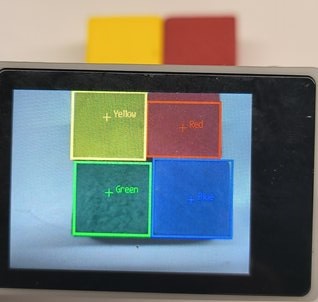
After the system initialization is completed, the LCD displays the camera image and begins to recognize the image, displaying the recognized colors on the screen.
The following image is the result recognized by the OV2640 camera
The following image is the result recognized by the GC2145 camera
1.4、Experimental Summary
The main function of multi color recognition is to analyze the LAB value of colors, and then compare it with the LAB value of colors collected by the camera for analysis. If it meets the requirements, draw a box and label the corresponding color to indicate recognition. This method has a significant impact on the ambient light of the recognized color, and the value of LAB may vary depending on the ambient light. Below, we will explain how to modify the value of LAB based on the ambient light, or add DIY colors beyond the tutorial.
2.1、Add new colors for recognition
Just add the color and threshold you want to recognize in the program source code, and the following pseudocode needs to be modified by yourself
xxxxxxxxxxcolor_thresholds = [ (31, 69, 27, 58, 14, 36),# Red # Green (14, 61, -39, -6, 0, 14), (14, 66, 1, 38, -56, -12),# Blue (49, 77, -8, 52, 16, 60),# Yellow (The value of LAB that needs to be added)#DIY's LAB value needs to be modified by oneself]color_strings = ['Red', 'Green', 'Blue', 'Yellow','Custom colors that need to be added'] #Self modification required2.2、Obtain the LAB threshold that requires color increase
If you need to obtain the LAB threshold for new colors, or modify the LAB value of colors based on ambient light. All can be obtained through the tools of CanMV IDE.
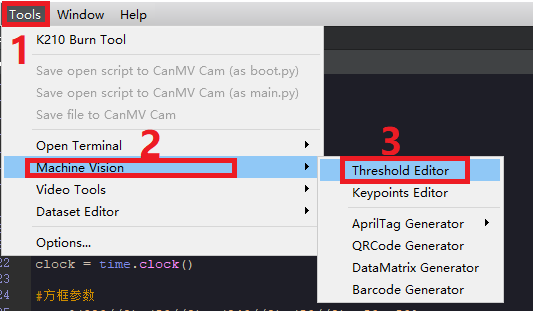
Double click on the CanMV IDE to open it, click on "Tools ->Machine Vision ->Threshold Editor", and select the Threshold Editor tool.
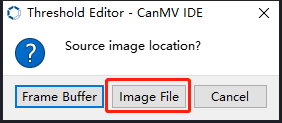
Click on "Image File" You can also click on the frame buffer (this method of obtaining LAB values is not explained in this tutorial, please note that k210 needs to be connected to cammv, and cammv cannot disable the frame buffer)
Choose and prepare images that contain new colors that need to be added, or images that recognize colors based on the current ambient light (try to choose images with a clean background and no interference from other colors)

Drag the slider until all recognized color areas are white and all other areas are black. Record the obtained LAB threshold
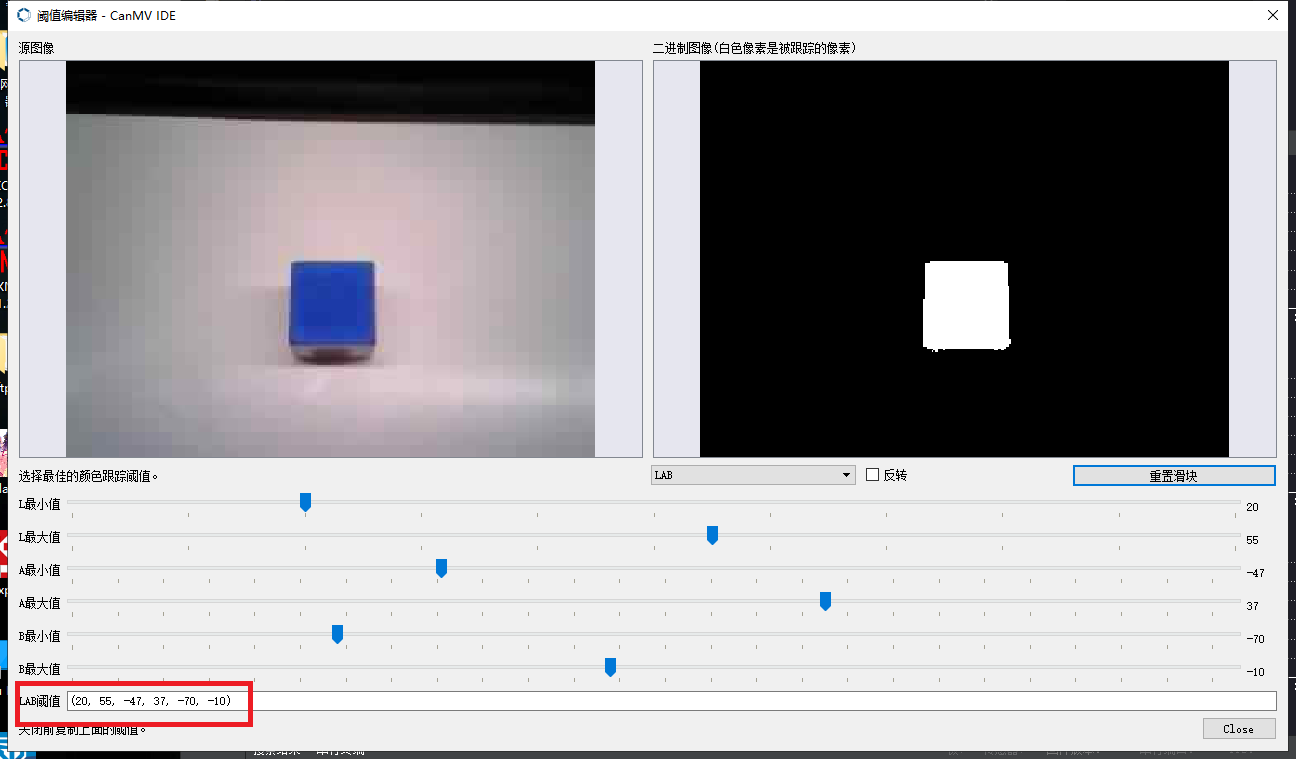
Simply put the obtained threshold into the source code and make modifications according to the instructions in 2.1