yahboom
HomeLearn
Solution
Blog
Online Store
About Us
EN/中文
K210 Module📖
0.Camera changes
  • Precautions for camera changes
1.K210-AI-Camera introduction
  • 1.K210 main chip introduction
  • 2.K210 visual recognition module introduction
  • 3.Module pin assignments
  • 4.MicroPython Introduction
  • 5. FAQ analysis
  • 6.Bracket installation
2.Development Environment Setup
  • 1.To install the serial port assistant
  • 2.Install CanMV IDE development software
  • 3.Flashcard factory firmware
  • 4.IDE import routine
  • 5.Call custom py library
  • 6.MicroPython API documentation
3.Basic experimental routines
  • 1.Lighting the RGB light experiment
  • 2.Key features of the experiment
  • 3.Timer experiment
  • 4.PWM breathing light experiment
  • 5.LCD display experiment
  • 6.The touchpad read the coordinates of the experiment
  • 7.The camera shows the experimental
  • 8.Memory card read and write files of the experiment
  • 9.External interface experimental
4.Graphical manipulation routines
  • 1.Draw graphics
  • 2.Button and the click event
  • 3.Slider
  • 4.Chart animation
  • 5.Multi-label layout
5.AI visual experiments routines
  • How to import the model file into memory cardnew
  • 1.Color recognition
  • 2.Barcode recognition
  • 3.QR code recognition
  • 4.Apriltags recognition
  • 5.Face detection
  • 6.Face feature detection
  • 7.Mask detection
  • 8.Face recognition
  • 9.Object detection
  • 10.Self-learning classification
  • 11.Handwritten digit recognition
  • 12. Multiple color recognition
  • 13. Human body detectionnew
  • 14. Yolo hand detectionnew
  • 15. License Plate Recognitionnew
  • 16. Autonomous training modelnew
6.Extended routines (sold separately)
6.1.For STM32 Car
  • 10. stm_ K210 Autonomous Learning Classification
  • 1.automatic driving
  • 2.color follow
  • 3.Handwriting digital operation
  • 4.Color reaction
  • 5.Road sign indicating the operation
  • 6.Following the apriltag
  • 7.QR code instruction
  • 8.PTZ tracking color
  • 9.PTZ tracking face
6.2.1 arduino_k210
  • 1.ard_k210-Color recognition
  • 2.ard_k210-Bar code identification
  • 3.ard_k210-QR code identification
  • 4.ard_ K210-mechanical code identification
  • 5.ard_ K210-Face Detection
  • 6. ard_ K210-facial feature detection
  • 7. ard_ K210-mask detection
  • 8. ard_ K210-facial recognition
  • 9. ard_ K210-object detection
  • 10. ard_ K210 Autonomous Learning Classification
  • 11. ard_ K210 Handwritten Digit Recognition
6.2 K210 as a coprocessor
  • ReadMe
6.2.2 stm32_k210
  • 1.stm_ K210 color recognition
  • 2. stm_ K210 barcode recognition
  • 3. stm_ K210 QR code recognition
  • 4. stm_ K210 mechanical code identification
  • 5. stm_ K210 Face Detection
  • 6.stm_ K210 facial feature detection
  • 7. stm_ K210 mask detection
  • 8. stm_ K210 facial recognition
  • 9. stm_ K210 object detection
  • 11. stm_ K210 Handwritten Digit Recognition
6.2.3 microbit_k210
  • 1.microbit_ K210 color recognition
  • 2.microbit_ K210 barcode recognition
  • 3.microbit_ K210 QR code recognition
  • 4.microbit_ K210 mechanical code identification
  • 5. microbit_ K210 Face Detection
  • 6. microbit_ K210 facial feature detection
  • 7. microbit_ K210 mask detection
  • 8. microbit_ K210 facial recognition
  • 9. microbit_ K210 object detection
  • 10. microbit_ K210 autonomous classification learning
  • 11. microbit_ K210 Handwritten Digit Recognition
6.2.4 pico_k210
  • 1. pico_ K210 color recognition
  • 2. Pico_ K210 barcode recognition
  • 3. Pico_ K210 QR code recognition
  • 4. pico_ K210 machine code recognition
  • 5. pico_ K210 Face Detection
  • 6. pico_ K210 facial feature detection
  • 7. pico_ K210 mask recognition
  • 8. pico_ K210 facial recognition
  • 9. pico_ K210 object detection
  • 10. pico_ K210 Autonomous Learning Classification
  • 11. pico_ K210 Handwritten Digit Recognition
6.2.5 MSPM0G3507_k210
  • 1.MSPM0_K210 color recognition
  • 2.MSPM0_K210 barcode recognition
  • 3.MSPM0_K210 QR code recognition
  • 4.MSPM0_K210 mechanical code recognition
  • 5.MSPM0_K210 face detection
  • 6.MSPM0_K210 facial feature detection
  • 7.MSPM0_K210 mask detection
  • 8.MSPM0_K210 face recognition
  • 9.MSPM0_K210 Object Detection
  • 10.MSPM0_K210 Self-study classification
  • 11.MSPM0_K210 handwritten digit recognition
6.2.6 MSPM0G3519_k210
  • 1. MSPM0_K210 Color Recognitionnew
  • 2. MSPM0_K210 Barcode Recognitionnew
  • 3. MSPM0_K210 QR Code Recognitionnew
  • 4. MSPM0_K210 Mechanical Code Recognitionnew
  • 5. MSPM0_K210 Face Detectionnew
  • 6. MSPM0_K210 Facial Feature Detectionnew
  • 7. MSPM0_K210 Mask Detectionnew
  • 8. MSPM0_K210 Face Recognitionnew
  • 9. MSPM0_K210 Object Detectionnew
  • 10. MSPM0_K210 Self-study Classificationnew
  • 11. MSPM0_K210 Handwritten Digit Recognitionnew
6.3 For 24 channel servo drive board
  • 1. 2DOF PTZ Color Tracking
  • 2. 2DOF Face Tracking
  • 3. 2DOF Fruit sorting
6.4 For autopilot map
  • 1.k210 model training
  • 2.Assembly and wiring of stm32 car
  • 3.Recognize left and right sign
  • 4.Identify and remove speed limit
  • 5.Identify parking spaces and park
  • 6.STM32 car autopilot
6.5.1 For MSPM0G3507_Wheeled Chassis Kit
  • 1.MSPM0-Automatic Driving
  • 2.MSPM0-Color follow
  • 3.MSPM0-Number recognition
  • 4.MSPM0-Color reaction
  • 5.MSPM0-Road signs
  • 6.MSPM0-Machine code following
  • 7.MSPM0-QR code recognition
6.5.2 For MSPM0G3519_Wheeled Chassis Kit
  • 1.MSPM0-Automatic Drivingnew
  • 2.MSPM0-Color follownew
  • 3.MSPM0-Number recognitionnew
  • 4.MSPM0-Color reactionnew
  • 5.MSPM0-Road signsnew
  • 6.MSPM0-Machine code followingnew
  • 7.MSPM0-QR code recognitionnew
6.5.3 For STM32_Wheeled Chassis Kit
  • 1.STM32-Automatic Driving
  • 2.STM32-Color follow
  • 3.STM32-Number recognition
  • 4.STM32-K210-Color Reaction
  • 5.STM32-Road signs
  • 6.STM32-Machine code following
  • 7.STM32-QR code recognition
Download
  • Driver development software
  • AI model
  • Source code
  • Instruction manual
  • Hardware_3DModelFile
  • K210_Chip_Data
Download ZIP

Welcome to K210 Module repository

10.Self-learning classification

10 Self-learning classification

10 Self-learning classification10.1 experimental goals10.2 Preparation before the experiment10.3 experimental procedure10.4 experimental results10.5 experiment summary

10.1 experimental goals

This lesson mainly learns the K 210 self-learning classification function, takes out three different objects, takes pictures from different angles, and K 210 classifies them.

The reference code path for this experiment is :CanMV\05-AI\self_learning.py

10.2 Preparation before the experiment

Please first import the model file into the memory card, and then insert the memory card into the memory card slot of the K210 module.

10.3 experimental procedure

The factory firmware of the module has integrated the AI vision algorithm module. If you have downloaded other firmware, please burn it back to the factory firmware before doing the experiment.

  1. Import the relevant libraries, initialize the camera and LCD display, and load the model file:/sd/KPU/self_learn_classifier/mb-0.25.kmodel。
kpu = KPU()
print("ready load model")
kpu.load_kmodel("/sd/KPU/self_learn_classifier/mb-0.25.kmodel")
  1. The whole routine is divided into three states, the first state (INIT) is the initialization state, the second state (CLASSIFY) is the classification state, and the third state (TRAIN) is the training state. Each state corresponds to a loop function running the program content.
xxxxxxxxxx
if state_machine.current_state == STATE.INIT:
        loop_init()
    elif state_machine.current_state == STATE.CLASSIFY:
        loop_classify()
    elif state_machine.current_state == STATE.TRAIN_CLASS_1 \
            or state_machine.current_state == STATE.TRAIN_CLASS_2 \
            or state_machine.current_state == STATE.TRAIN_CLASS_3:
        loop_capture()
  1. The main function of the loop function content of the initialization state is to display prompt information, press BOOT briefly to proceed to the next step, and press the BOOT key long to restart.
​x
def loop_init():
    if state_machine.current_state != STATE.INIT:
        return

    img_init.draw_rectangle(0, 0, lcd.width(), lcd.height(), color=(0, 0, 255), fill=True, thickness=2)
    img_init.draw_string(65, 90, "Self Learning Demo", color=(255, 255, 255), scale=2)
    img_init.draw_string(5, 210, "Short press:  next", color=(255, 255, 255), scale=1)
    img_init.draw_string(5, 225, "Long press:    restart", color=(255, 255, 255), scale=1)
    lcd.display(img_init)
  1. The content of the loop function of the training state, the main function is to display the training category and the progress of the operation. In the training state, you need to press the BOOT button several times to proceed to the next step. By default, a total of three classes are trained, and each class needs to take 5 pictures.
xxxxxxxxxx
def loop_capture():
    global central_msg, bottom_msg
    img = sensor.snapshot()
    if central_msg:
        img.draw_rectangle(0, 90, lcd.width(), 22, color=(0, 0, 255), fill=True, thickness=2)
        img.draw_string(55, 90, central_msg, color=(255, 255, 255), scale=2)
    if bottom_msg:
        img.draw_string(5, 208, bottom_msg, color=(0, 0, 255), scale=1)
    lcd.display(img)
  1. The main function of the loop function content of the classification state is to analyze and compare, classify which category the current camera picture belongs to, and display the corresponding category and recognition score.
xxxxxxxxxx
def loop_classify():
    global central_msg, bottom_msg
    img = sensor.snapshot()

    scores = []
    feature = kpu.run_with_output(img, get_feature=True)
    high = 0
    index = 0
    for j in range(len(features)):
        for f in features[j]:
            score = kpu.feature_compare(f, feature)
            if score > high:
                high = score
                index = j
    if high > THRESHOLD:
        bottom_msg = "class:{},score:{:2.1f}".format(index + 1, high)
    else:
        bottom_msg = None

    # display info
    if central_msg:
        print("central_msg:{}".format(central_msg))
        img.draw_rectangle(0, 90, lcd.width(), 22, color=(0, 255, 0), fill=True, thickness=2)
        img.draw_string(55, 90, central_msg, color=(255, 255, 255), scale=2)
    if bottom_msg:
        print("bottom_msg:{}".format(bottom_msg))
        img.draw_string(5, 208, bottom_msg, color=(0, 255, 0), scale=1)
    lcd.display(img)


10.4 experimental results

Since the BOOT button is required, do not run it directly in the CanMV IDE, the CanMV IDE cannot detect the BOOT button at present, please download the code as a main.py to the K210 module to run.

Wait for the boot to complete, the LCD screen displays 'Self Learing Demo', prompts you to press to enter the next state, long press to restart. At this point, press the BOOT button once to enter the next state.
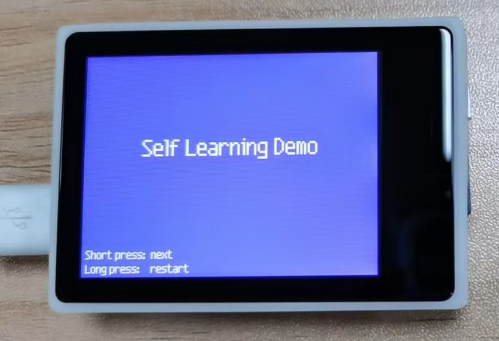
image-20230220180943588

Start training the first object. Press the BOOT button once to go to the next step and start collecting object image materials.
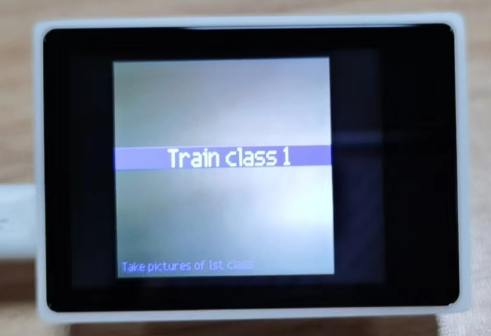
image-20230220181139263

Put the first object to be identified in the camera's field of view, you can see 'Class 1: P1' displayed in the lower left corner of the screen, press the BOOT button, and record the first stock image of category 1. where Class represents the category serial number, and P represents the picture serial number.
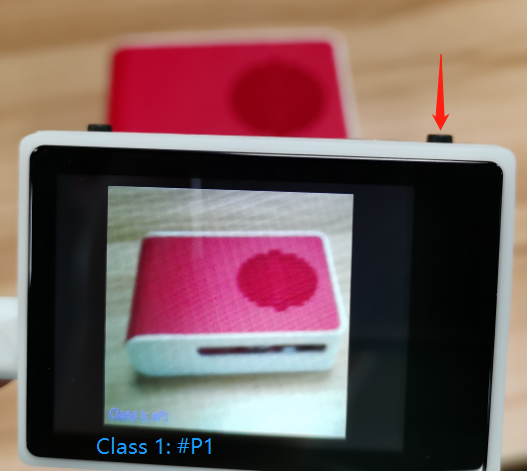
image-20230221101046907

Change the shooting angle slightly, and then press the BOOT button again to capture the second footage. When five images have been collected, the category 1 collection ends.
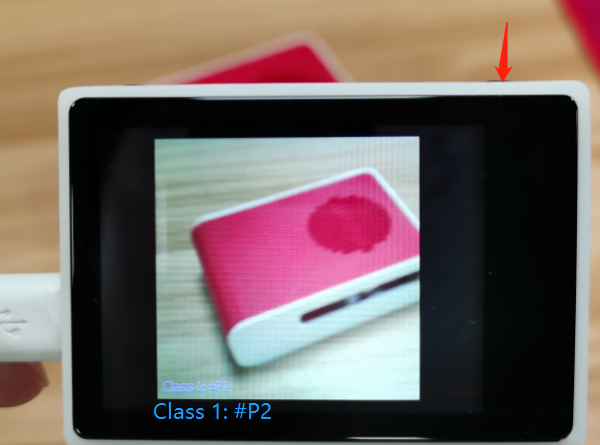
image-20230221101916608

Next, enter the collection process of category 2, press the BOOT button to start collecting the material images of category 2, the steps are the same as those of category 1.
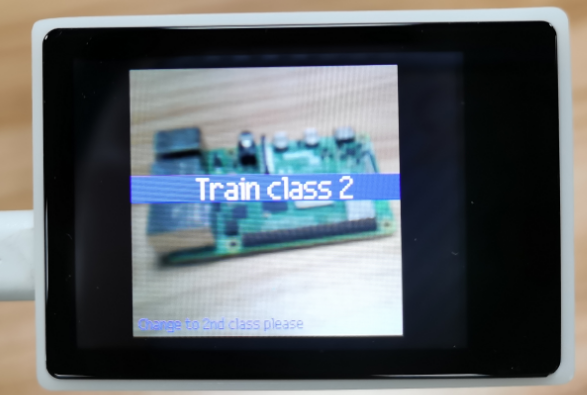
image-20230221102417387

After collecting five stock images in category 2, go to category 3 to collect five stock images.
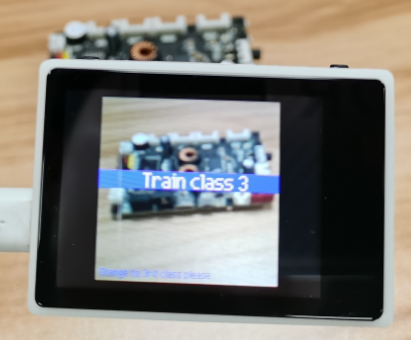
image-20230221102608448

After the collection is completed, it automatically enters the classification state. A 'Classificatiion' display in the middle of the screen indicates that it has entered the classification state, and pressing the BOOT button again will automatically disappear the prompt.
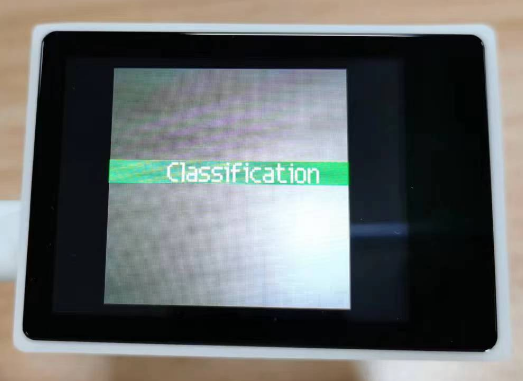
image-20230221102953391

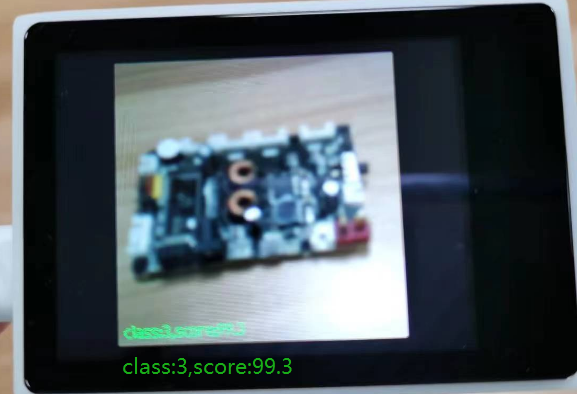
At this point, the camera will shoot one of the three categories just trained, and the corresponding category ordinal number and score will be displayed in the lower left corner of the screen.
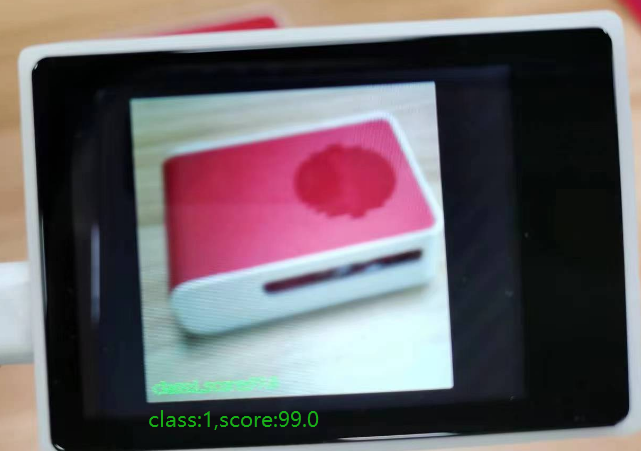
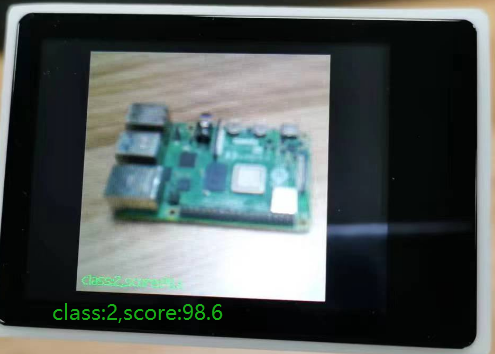
image-20230221104149942

image-20230221104054504

image-20230221104356720

If the recognition is not good, or the image acquisition is wrong, you can press reset once, or press and hold the BOOT button to restart.


10.5 experiment summary

Face recognition needs to use a memory card to load the model file, so you need to import the model file into the memory card in advance, and then insert the memory card into the memory card slot of the K 210 module, if the model file in the memory card cannot be read, an error will be reported.

Since face recognition requires the BOOT button, do not run the face recognition code in the CanMV IDE, download the code as a main.py to the K210 chip, and then press the reset button to start running.

When training object classification, it is best to train objects that are different from the background color, so that the accuracy will be better. Due to the limited number of pictures collected, classified products generally take the front side as an example, and the reverse side may not be recognized.

Object detection
Handwritten digit recognition

COMPANY

  • About us
  • Team Style
  • Blog

LEARNING & EXPLORATION

  • Tutorials
  • Edge AI hardware
  • Educational robots
  • Embedded intelligent hardware

WHERE TO BUY

  • Yahboom Online Store
  • Amazon
  • Alibaba
  • AliExpress
  • Mercado

TECHNOLOGY SUPPORT

  • Email: support@yahboom.com

BE A DISTRIBUTOR

  • Email: sales@yahboom.com
QR Code

Copyright © 2017-2026 Yahboom. All Rights Reserved.

EN/中文