Welcome to 310 Motor repository
6. Engineering experience and migration
Engineering experience and migration
Engineering experience and migration1、Engineering Experience1.1、Open the project1.2、Program download2、Engineering migration2.1、Notes2.2、Adding files2.3、Compiling project2.4、Downloading the program
Engineering experience: Use the project files we provide to experience the development board matching function
Project migration: Porting our underlying driver code files to self-developed project files
Example in this tutorial:3.1 RGB Searchlight
xxxxxxxxxxOnly the project source code in Chapter 3 is used here as a demonstration. For details on how to write the code, please refer to the [3. Development Board Basics Tutorial: RGB Searchlight] tutorial
1、Engineering Experience
1.1、Open the project
Project file location
Demo project file path:the "Project source" folder of the Chapter 3 tutorial
In the later stage, you can locate the project source code according to the sequence number and name of the tutorial (the project source code is all named in English). There will be a corresponding [project source code] folder under the same level directory of each chapter of the tutorial, and you can see the corresponding project source code when you enter the folder.

Open the project file
Unzip the project file in the directory of English path , open the project file with STM32CubeIDE, open the project file and select . Project file
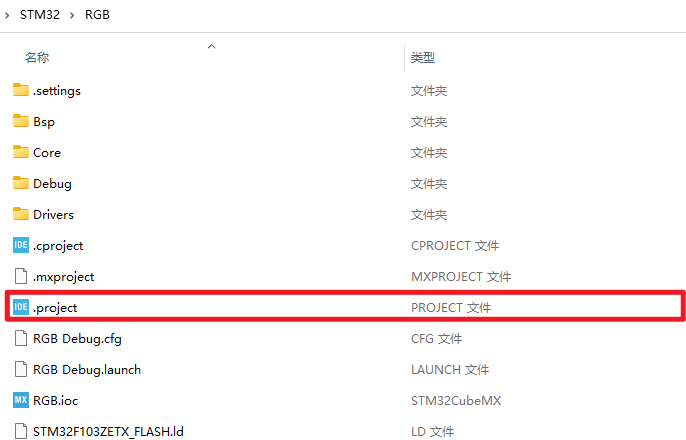
xxxxxxxxxxYou can create a STM32 folder on your desktop and select the STM32 folder as your workspace when opening the project files
1.2、Program download
Refer to the tutorial [2.6 Program Download and Simulation] in this chapter, which introduces the serial port download program and ST-Link download program. You can choose one of them to download the program.
xxxxxxxxxxIt is recommended to use the serial port to download the program, and you can directly use the Type-C data line to burn the program
2、Engineering migration
In order to facilitate users to develop new functions by themselves in the later stage, we write the peripheral application code in the BSP folder, and the code automatically generated by STM32CubeIDE is not modified and processed.
Project file used:RGB project
New project file:Demo project
xxxxxxxxxxRGB工程是【3.1 RGB探照灯】的工程源码
2.1、Notes
If you find yourself porting program code function abnormal, please provide the project source code we shall prevail
We provide basic methods for engineering porting, but we do not provide technical support for user-written code
2.2、Adding files
When creating a new Demo project file, refer to the project configuration content in the [3.1 RGB Searchlight] tutorial, and configure the peripheral and initialize the code generation of the new project file.
Tip : The only difference between my Demo project and RGB project is the project name. Everything else is the same.
Copy the BSP folder
Copy the BSP folder in the RGB project source folder to the Demo project folder you created
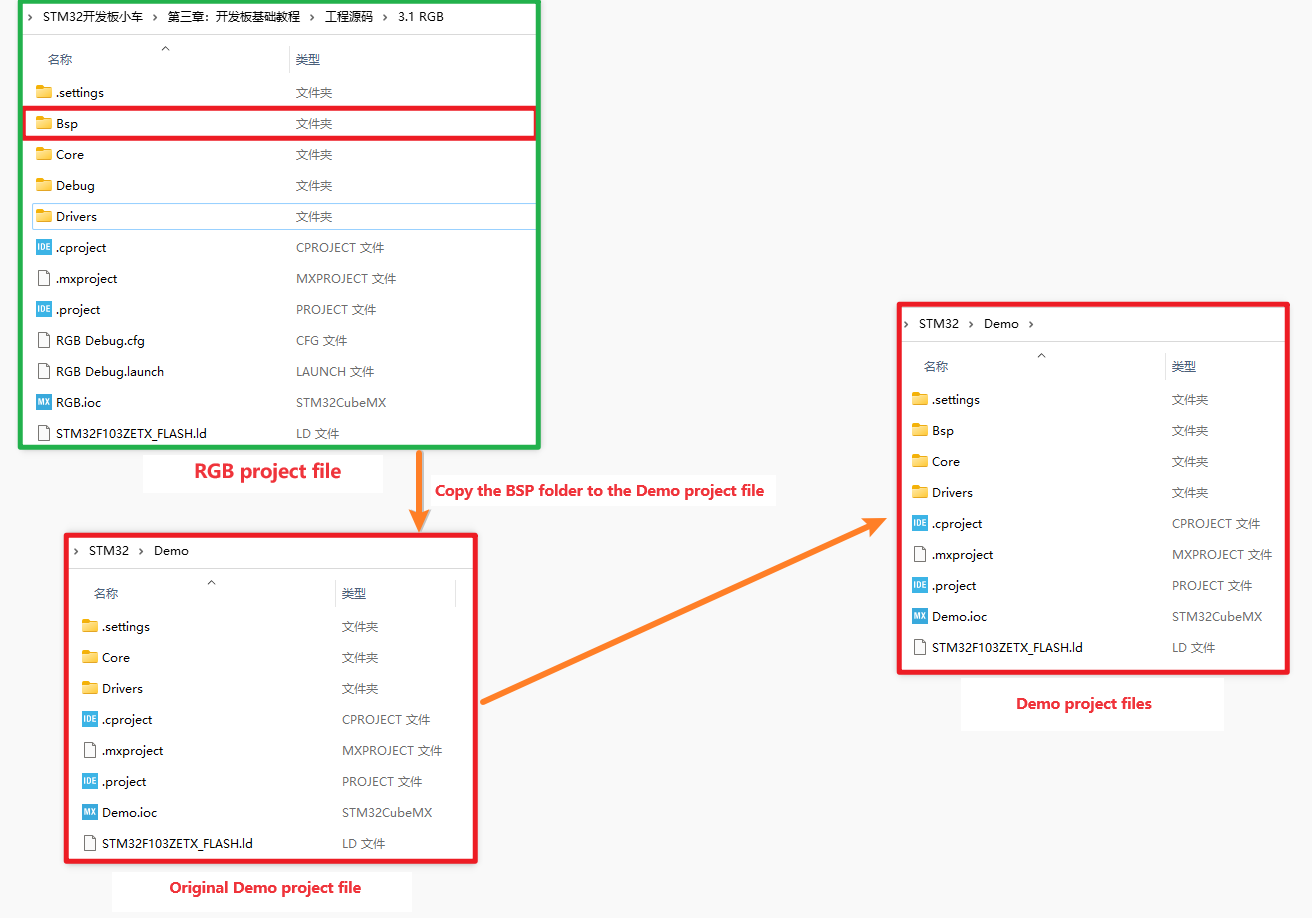
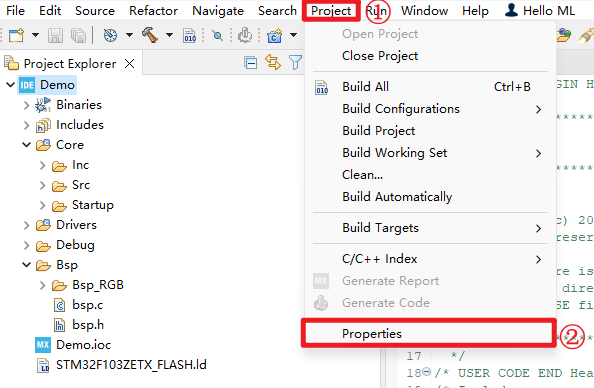
Adding file paths
Properties
Includes
Add.h file path: Bsp and Bsp_RGB folder
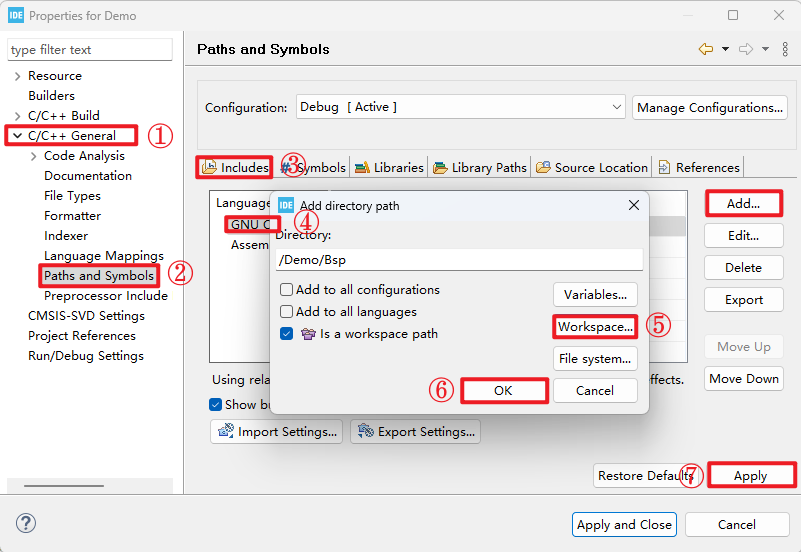
In the same way, add the Bsp_RGB folder
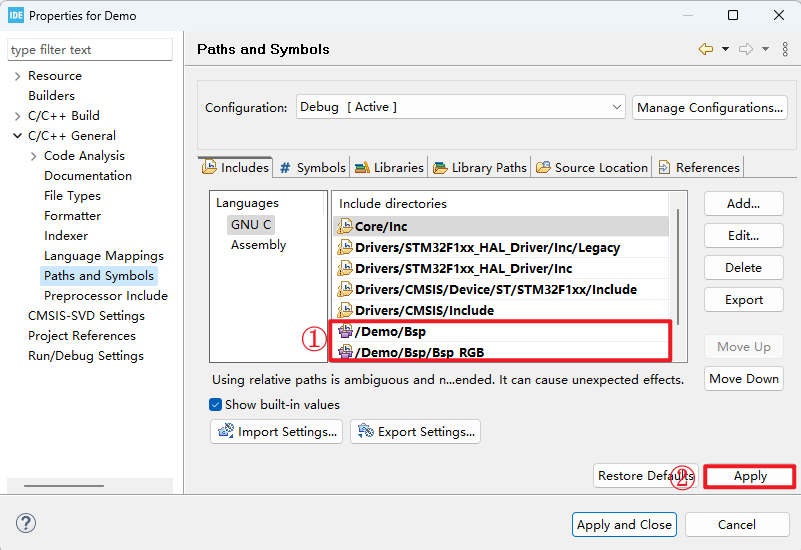
xxxxxxxxxxThe next step is to add the header path to the project, all the above steps
Source Location
Add.c folder path: Bsp folder path
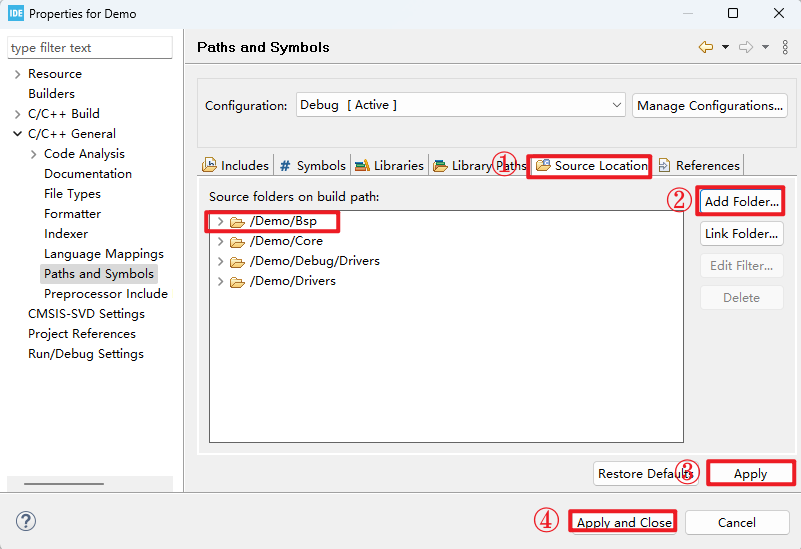
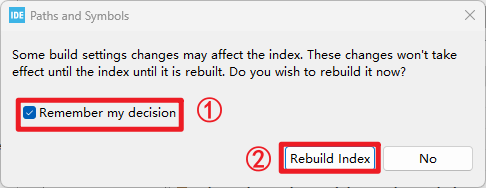
xxxxxxxxxxIf you get a compilation error during this process, you can be prompted to add the resource folder path
2.3、Compiling project
Compiling project
Write the bsp.h file into the main.c file and compile the project. If there are no warnings and errors, it means that there is no obvious problem with the migration.
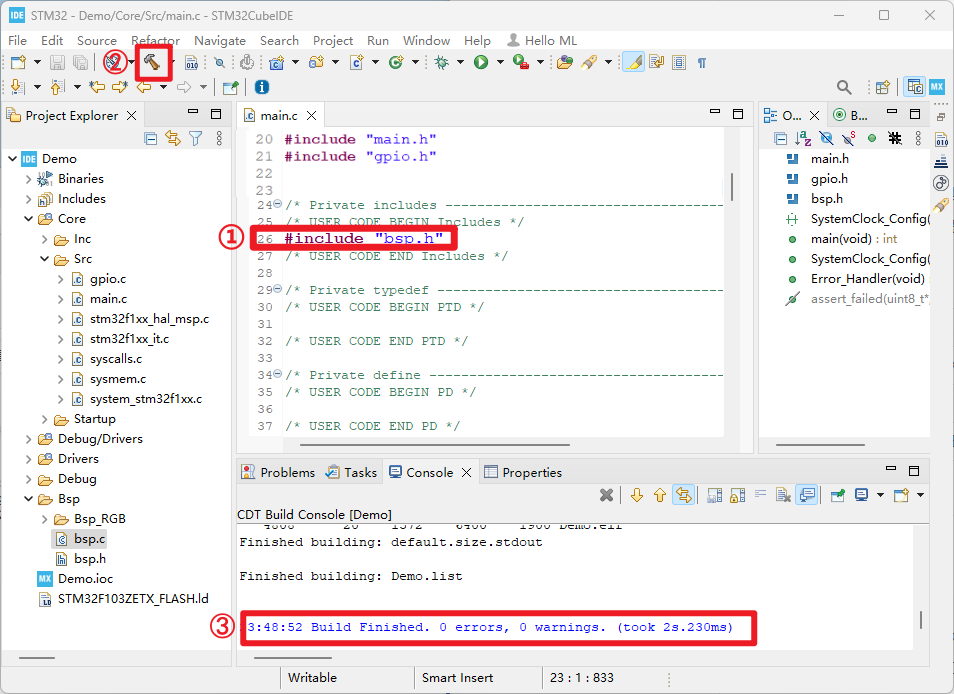
Add feature code
Tip:Since this project file is simple, you only need to add the following two lines to the main.c file
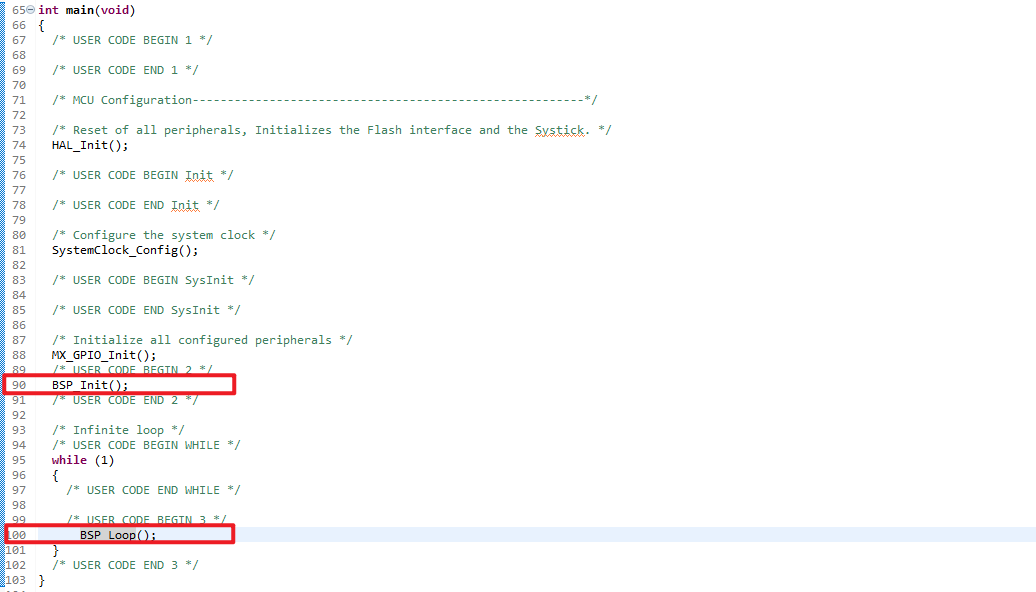
2.4、Downloading the program
After successful translation of the program, you can download the program to the development board through the serial port or ST-Link, and verify whether the program function is normal
For the detailed download program tutorial, refer to the tutorial [2.6 Program download and Simulation] in this chapter, which introduces the serial port download program and ST-Link download program. You can choose one of them to download the program.