yahboom
HomeLearn
Solution
Blog
Online Store
About Us
EN/中文
310 Motor📖
1.Hardware parameter
  • Hardware parameter
2.ROS robot control board tutorials
  • 3.0 ReadMe
  • 3.1 Control motor
  • 3.2 Timer got encoder data
  • 3.3 PID control robot movement
  • 3.4 4WD Robot kinematics analysis
  • 3.5 Ackerman Robot kinematics analysis
  • 3.6 Mecanum wheel kinematics analysis
3.STM32 smart car tutorials
0. Get started quickly
  • 14.Infrared sensor obstacle avoidance
  • 0. Installation Instructions
  • 1. Version configuration
  • 2. Smart car installation video
  • 3. Precautions for use
1. Introduction to STM32 board
  • 1. Learn about STM32
  • 2. Introduction to STM32 development board
  • 3. Development board pin assignment
  • 4. Introduction to HAL library and LL library
2. Development environment
  • 1. Common development tools
  • 2. STM32CubeMX Install - Use
  • 3. STM32CubeIDE Install - Use
  • 4. Common Driver Installation
  • 5. Program download and simulation
  • 6. Engineering experience and migration
3. Car expansion tutorial
  • 1.Servo control
  • 2.Basic use ultrasonic servo PTZ
  • 3.Motor control
  • 4.OLED display light sensitivity value
  • 5.Infrared sensor
  • 6.Four-way tracking module
  • 7.Infrared remote control
  • 8.Ultrasonic ranging
  • 9.PS2 controller test
  • 10.Car line patrol
  • 11.Ultrasonic follow
  • 12.Ultrasonic obstacle avoidance
  • 13.Ultrasonic obstacle avoidance (servo PTZ version)
  • 15.Infrared remote control
  • 16.PS2 handle remote control
4.2-channel motor drive module tutorial
  • 2.1 Introduction of Module
  • 2.2 For STM32
  • 2.3 For Arduino
  • 2.4 For RaspberryPi
  • 2.5 For RaspberryPi Pico
  • 2.6 For jetson nano
  • 2.7 For MSPM0G3507
  • 2.8 For MSPM0G3519new
5.4-channel motor drive tutorials
Introduction and debugging
  • 0.Motor introduction and usage
  • 1.Introduction to 4-channel motor drive board
  • 2.Control command
  • 3.PC host
USART communication
  • For Arduino
  • For Jetson NANO
  • For MSPM0G3507
  • For MSPM0G3519new
  • For PICO2
  • For RDK X5
  • For RPi5
  • For STM32
IIC communication
  • For Arduino
  • For ESP32
  • For ESP32
  • For Jetson NANO
  • For MSPM0G3507
  • For MSPM0G3519new
  • For PICO2
  • For RDK X5
  • For RPi5
  • For STM32
Download
  • Motor_3D_Model_File
  • Annex_ROSRobotControlBoard
  • Annex_STM3RobotCar
  • Annex_2-channelMotorDriveModule
  • Annex_4-channelMotorDriveModule
Download ZIP

Welcome to 310 Motor repository

2.5 For RaspberryPi Pico

RaspberryPi Pico

1. Preparation

Connect the motor drive board and Raspberry Pi Pico according to the wiring diagram, connect the battery to the power input interface on motor drive module.
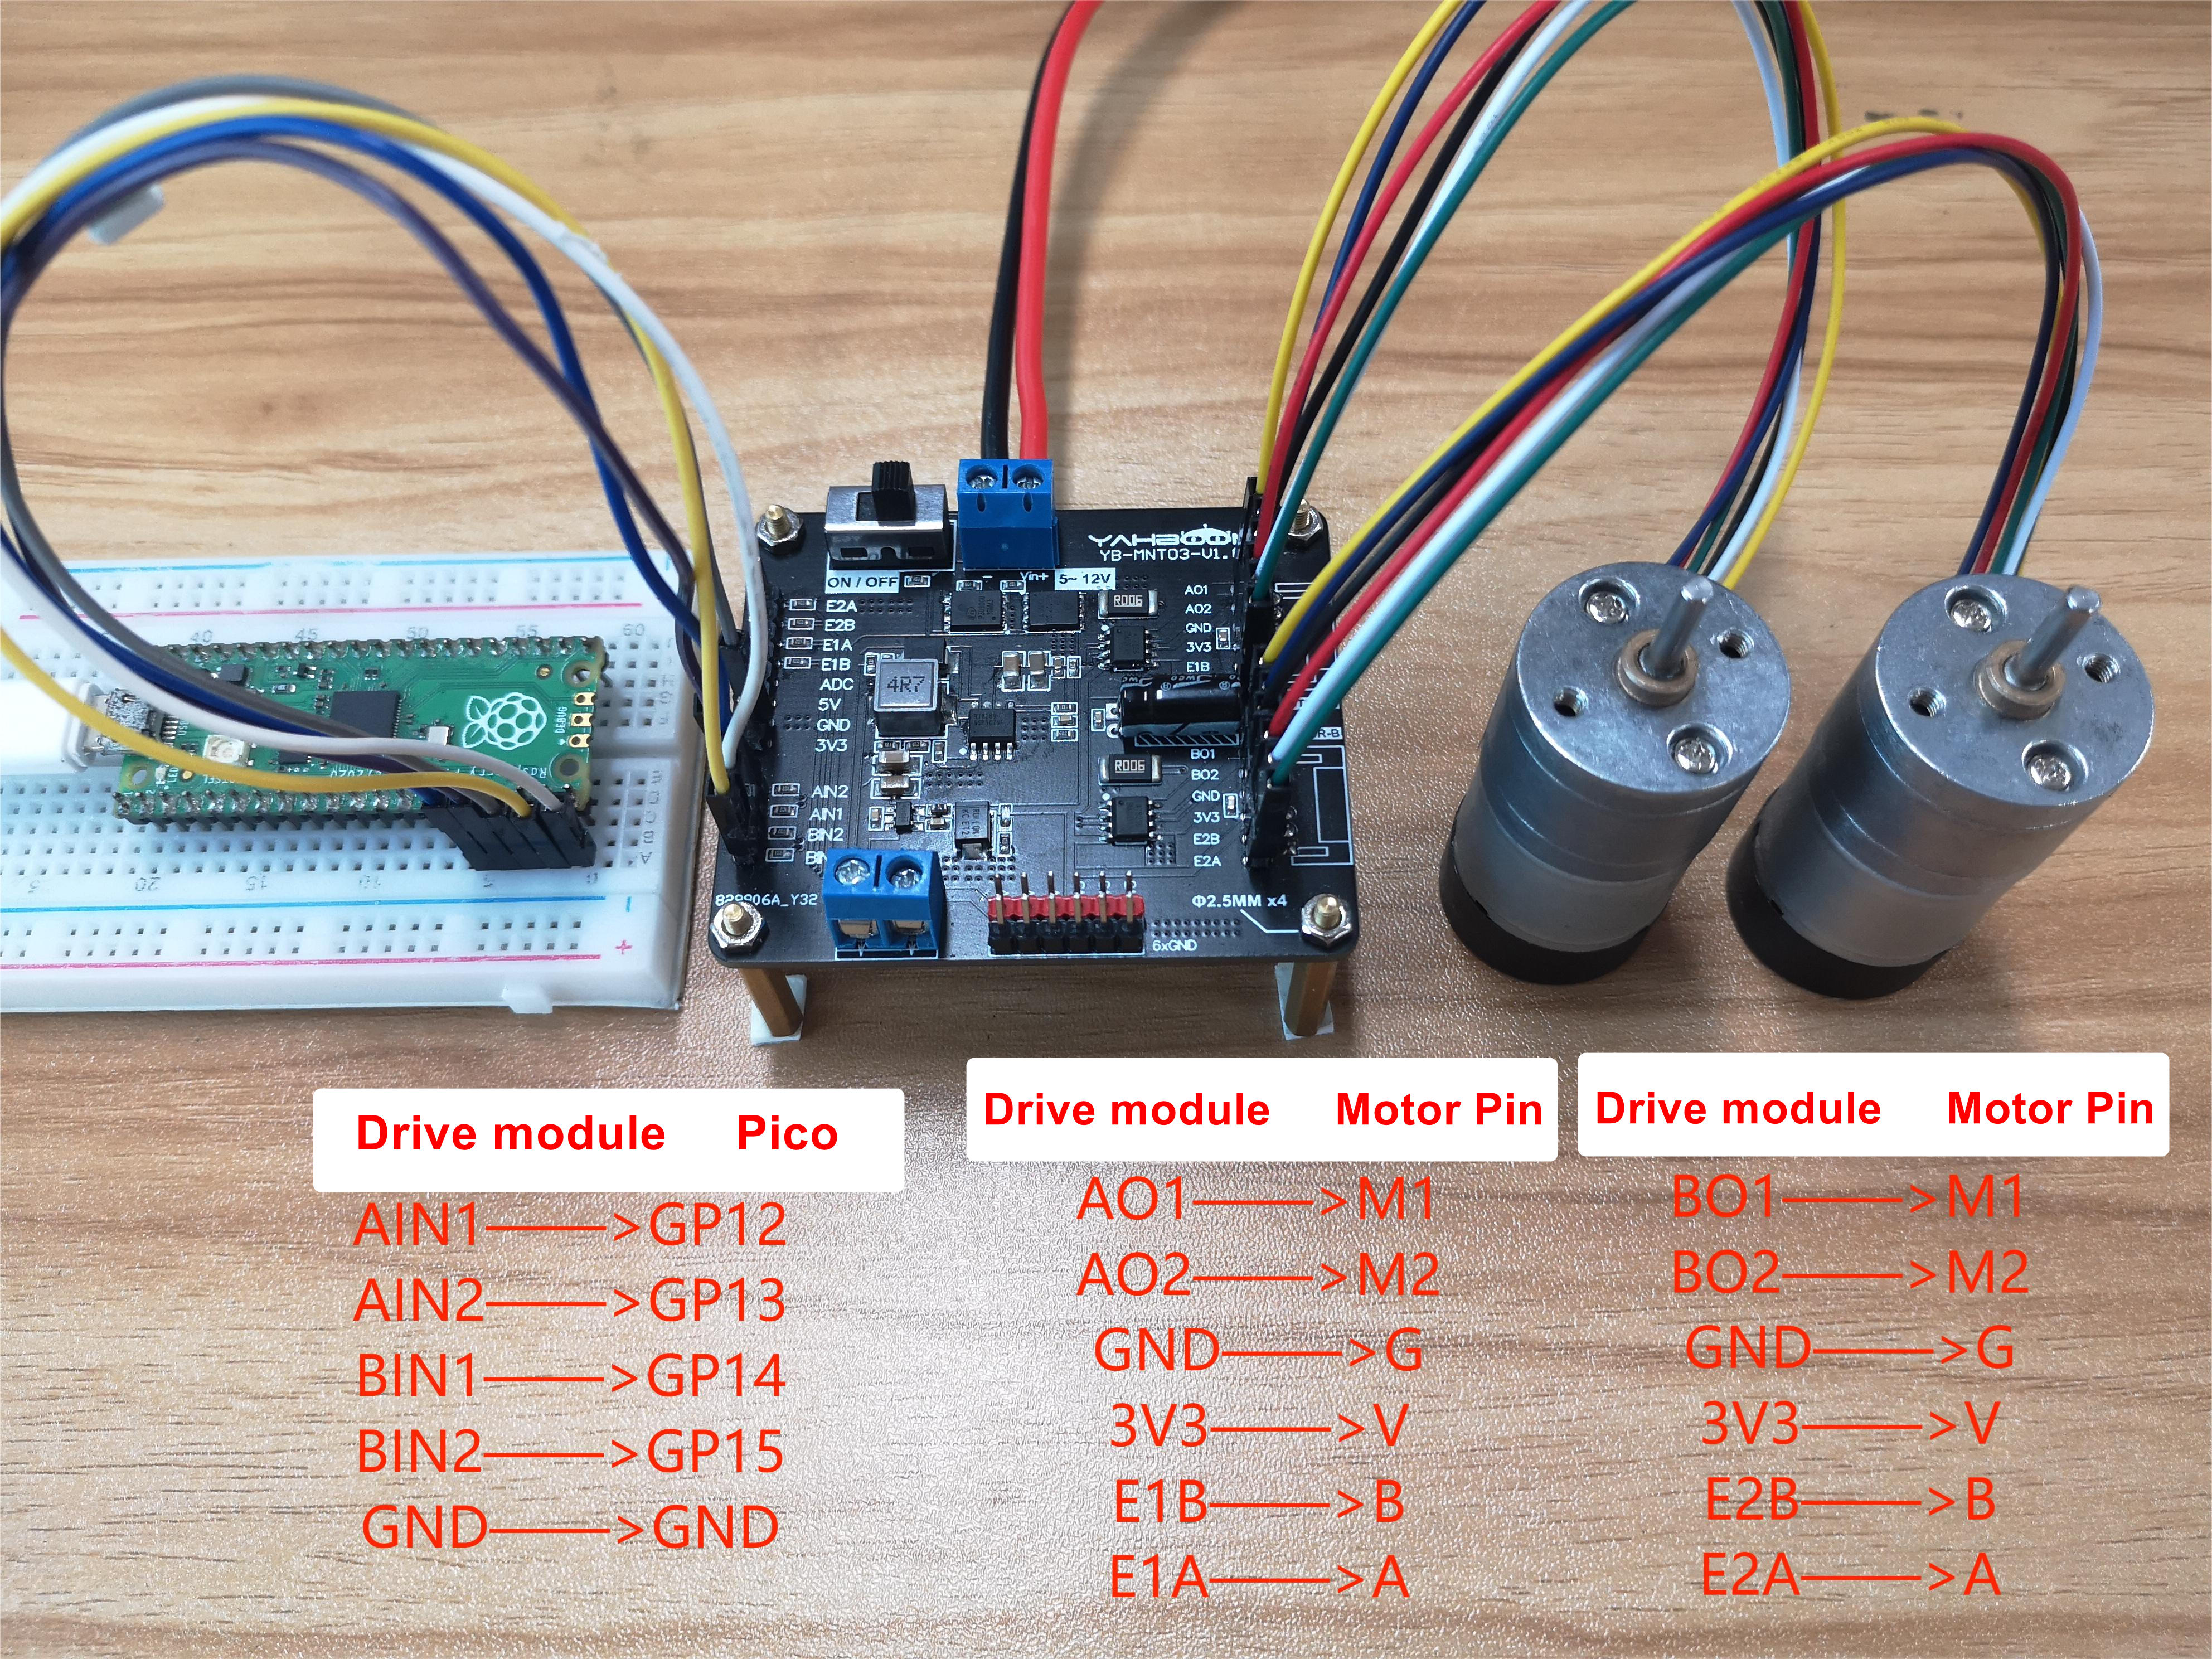
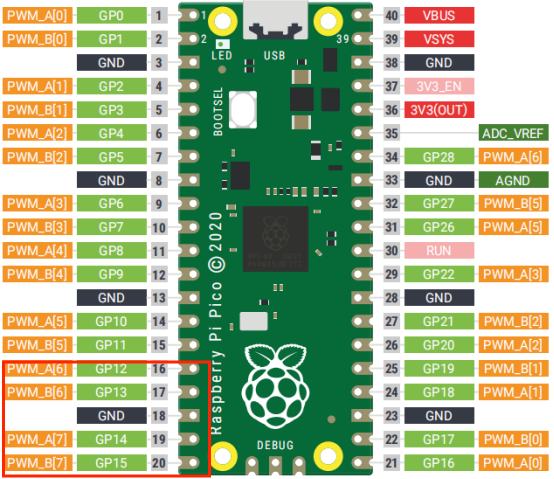
pico接线图

引脚

Note: The motor interface wire sequence of the dual motor drive board should correspond to the motor pin! Otherwise, the motor drive plate will be damaged.

Note: The motor interface wire sequence of the dual motor drive board.
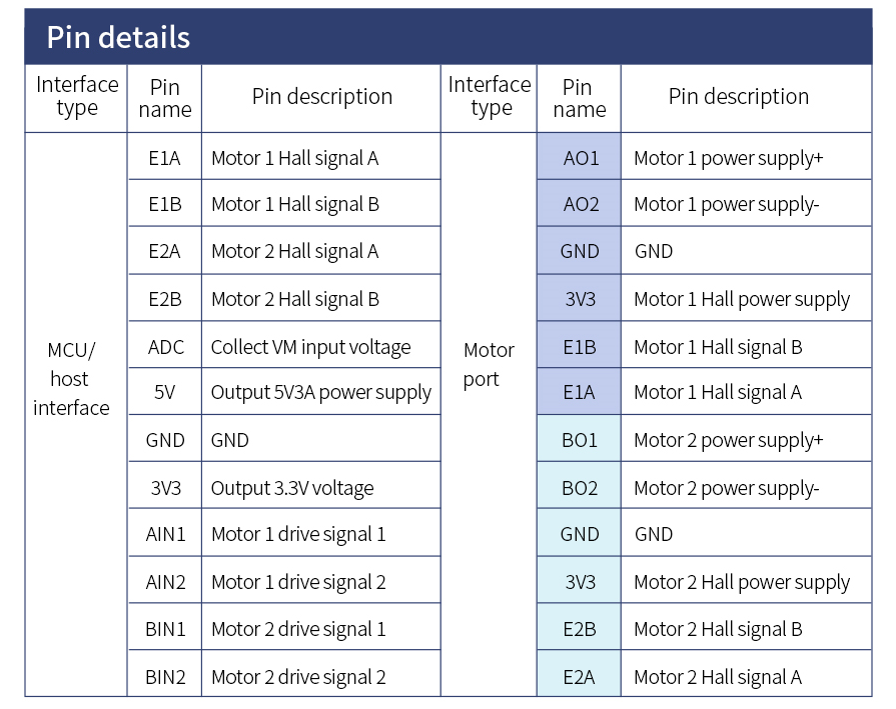
image-20230215160150782


2. Code
​x
import utime  #Import Library
from machine import Pin, PWM 
AIN1 = PWM(Pin(12))  #Set pin
AIN2 = PWM(Pin(13))
BIN1 = PWM(Pin(14))
BIN2 = PWM(Pin(15))
AIN1.freq(500)#Set AIN1 frequency
AIN2.freq(500)#Set frequency
BIN1.freq(500)#Set frequency
BIN2.freq(500)#Set frequency
#Set duty cycle PWM_PulseWidth[i]/65535(i=0~4):100%,75%,50%,25%,0%
#PWM_PulseWidth= [65535,49151,32767,16383,0]
def forward(i):  
    AIN1.duty_u16(i)#The motor rotates according to the set duty ratio
    AIN2.duty_u16(0)
    BIN1.duty_u16(i)
    BIN2.duty_u16(0)
def stop():  #Motor stop
    AIN1.duty_u16(0)
    AIN2.duty_u16(0)
    BIN1.duty_u16(0)
    BIN2.duty_u16(0)
def test(): #Test function, set the duty cycle to 49151, that is, 75%. Customers can set it according to their needs
    forward(49151)
    utime.sleep(4)
    stop()

test()#Run the test program, and the drive motor stops after 4s


3. Experimental result

Download the program to Raspberry Pi Pico. The motor starts to rotate for 4s, and then stops rotating.

For RaspberryPi
For jetson nano

COMPANY

  • About us
  • Team Style
  • Blog

LEARNING & EXPLORATION

  • Tutorials
  • Edge AI hardware
  • Educational robots
  • Embedded intelligent hardware

WHERE TO BUY

  • Yahboom Online Store
  • Amazon
  • Alibaba
  • AliExpress
  • Mercado

TECHNOLOGY SUPPORT

  • Email: support@yahboom.com

BE A DISTRIBUTOR

  • Email: sales@yahboom.com
QR Code
QR Code

Copyright © 2017-2026 Yahboom. All Rights Reserved.

EN/中文