Welcome to 310 Motor repository
15.Infrared remote control
Infrared remote control
Infrared remote control1. Software-Hardware2. Brief principle1. Hardware schematic diagram2.Physical connection diagram3. Control principle3. Main functions4. Experimental Phenomenon
This tutorial is a comprehensive experiment combining multiple peripherals. You can first understand a single peripheral before performing this experiment.
1. Software-Hardware
STM32F103CubeIDE
STM32 Robot Development Board
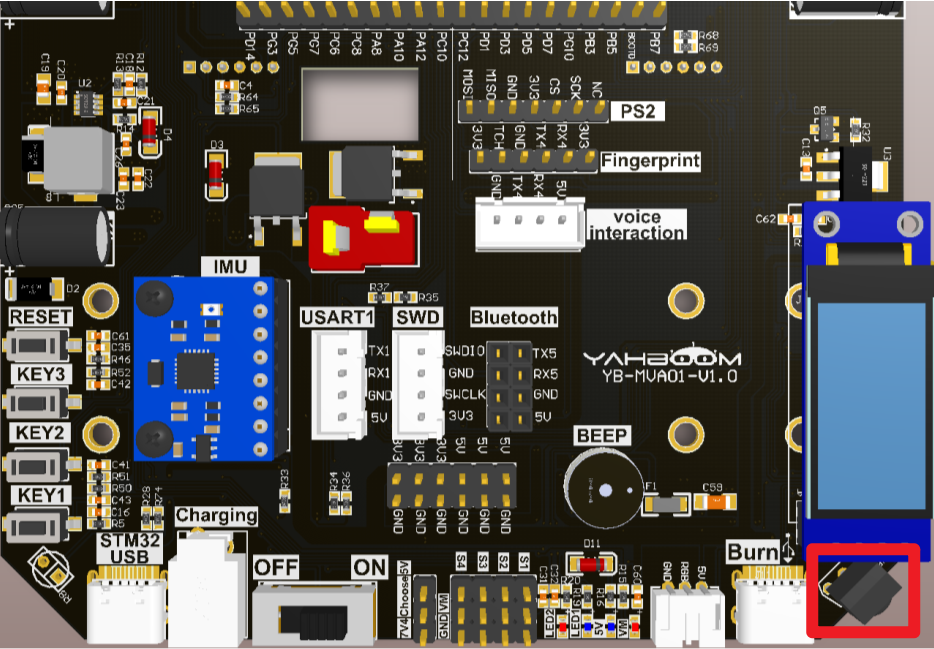
Buzzer, RGB, LED, IR Receiver (HS0038B): Onboard
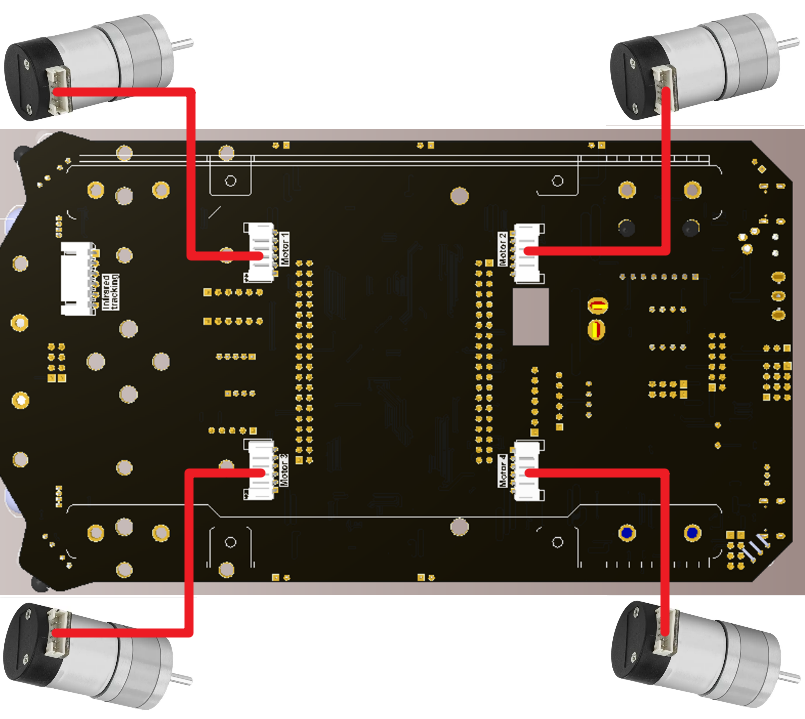
310 motor*4: external
Type-C data cable or ST-Link
Download programs or simulate the development board
2. Brief principle
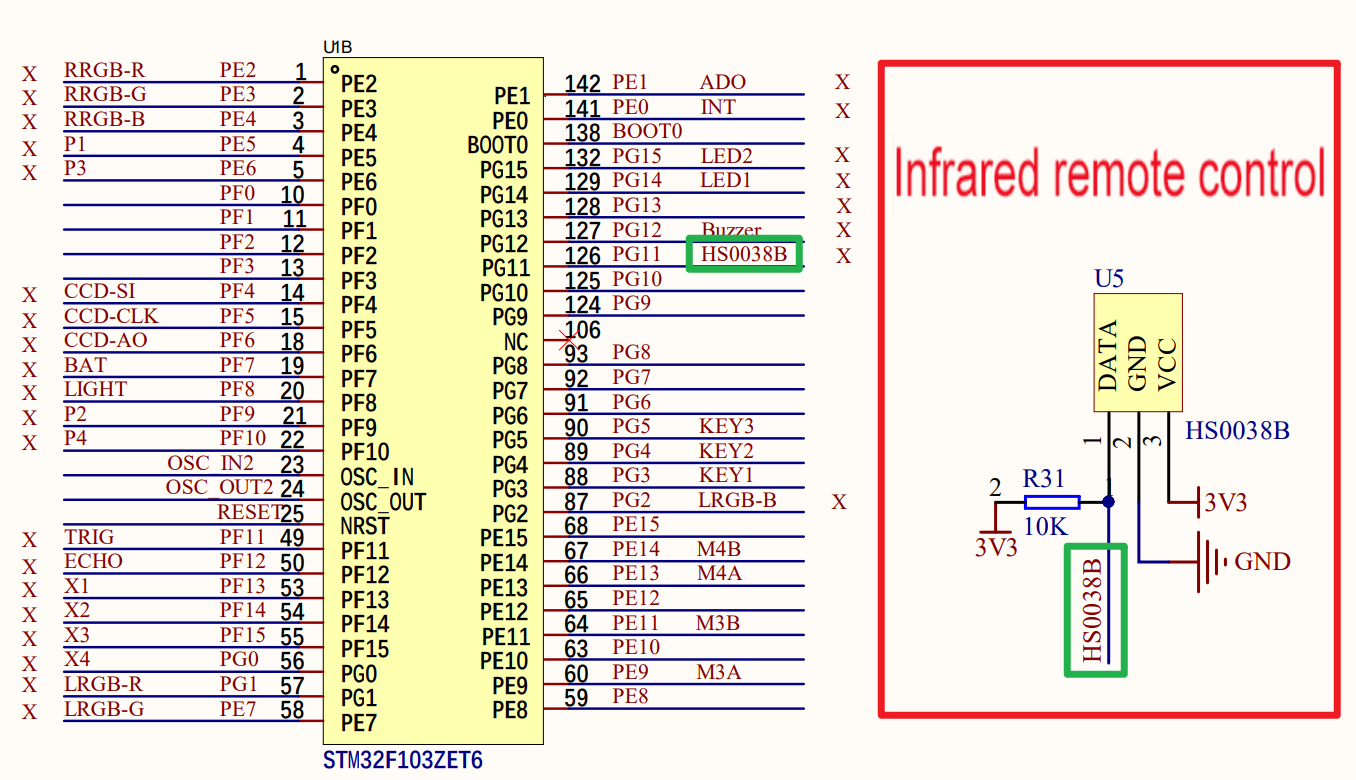
1. Hardware schematic diagram
Since there are many modules involved, here we mainly introduce the infrared receiver (HS0038B)
2.Physical connection diagram
- Motor Wiring
xxxxxxxxxxFor battery pack assembly, please see [5. Smart Car Experiment: Car Line Patrol]
3. Control principle
Control different states (key values) of different cars according to the key values of the remote control.
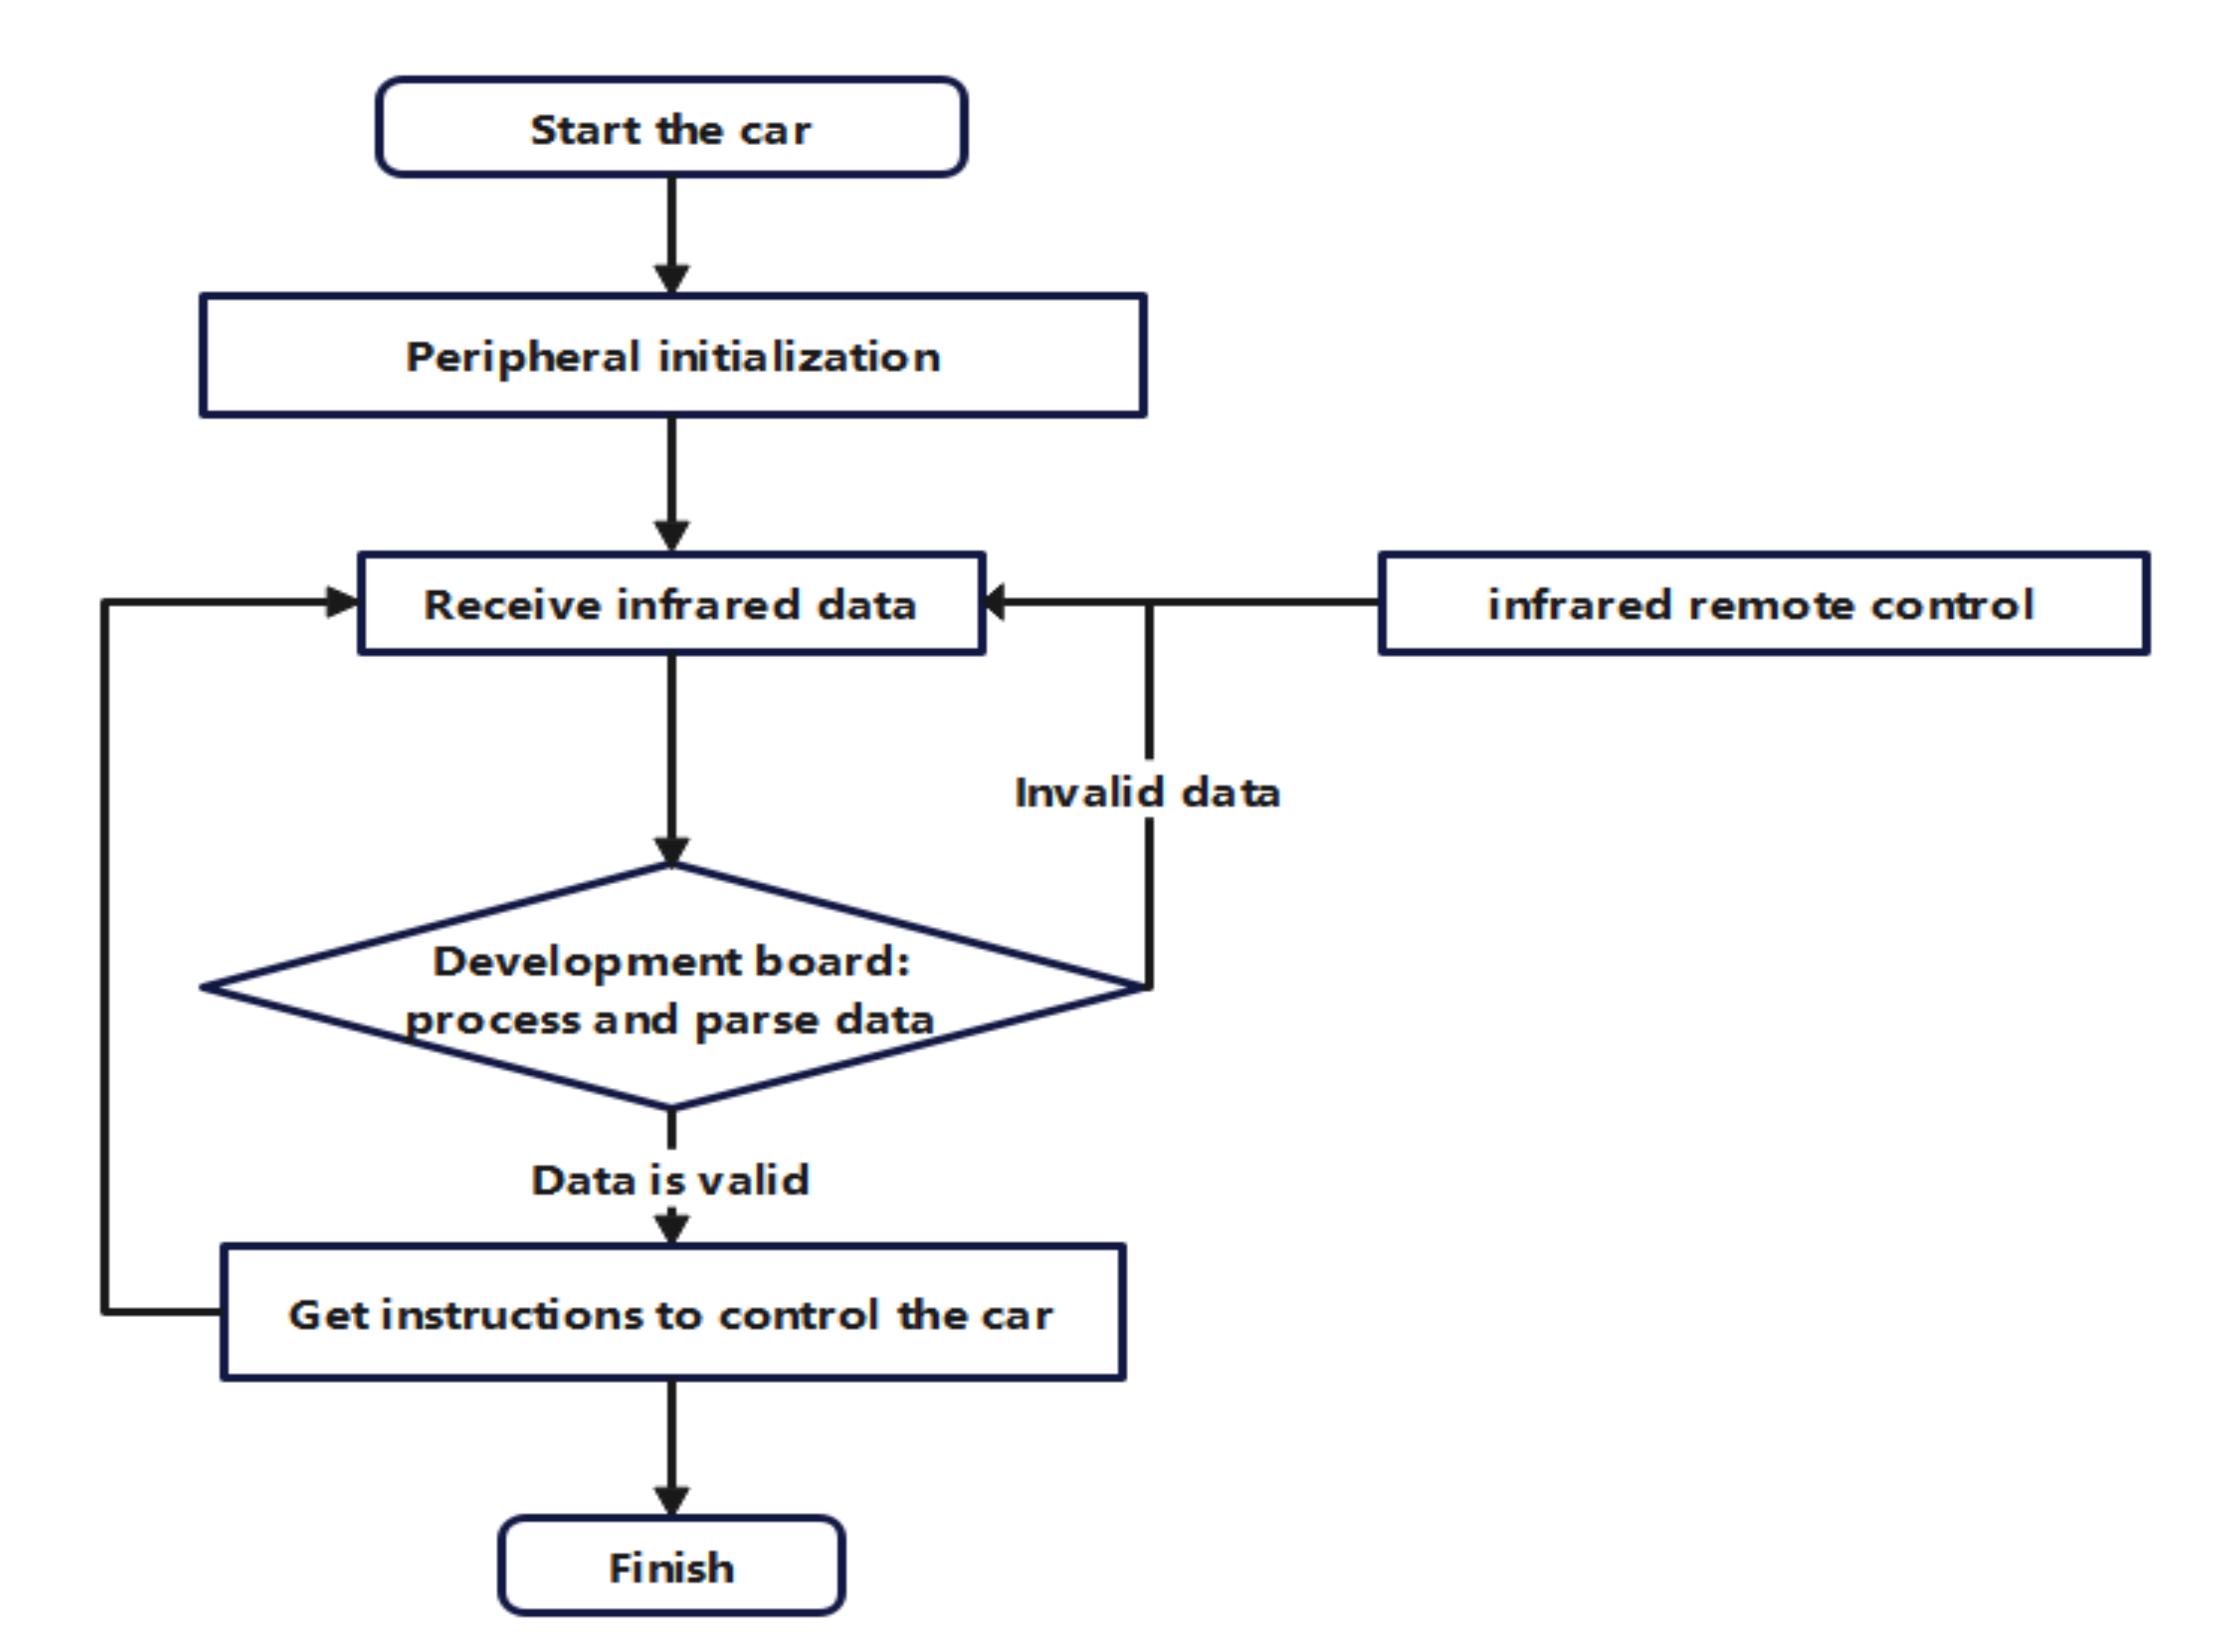
xxxxxxxxxxUse an external interrupt to receive the data sent by the infrared, and parse this data through the function:Pressing different key values on the infrared remote control will receive different data. We control different functions of the car based on this data (Switch statement is used in the program);Different key values correspond to different functions, and there are also some undefined keys that can be defined by yourself.
- Program flow chart
- Infrared remote control
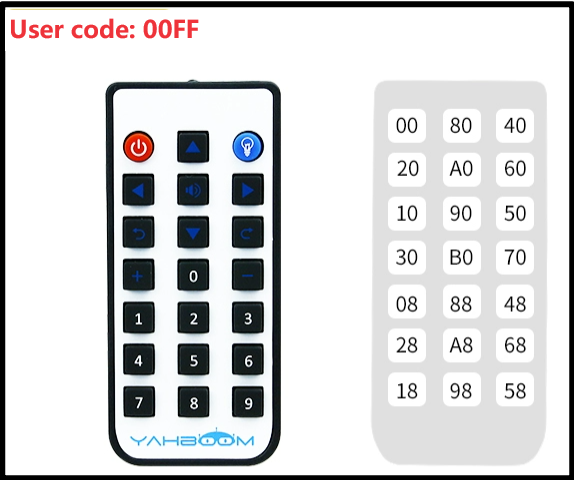
| Remote control (key value) | Function (customizable) | Actual function of this tutorial code |
|---|---|---|
| 0x00 | IR_POWER | Turn off all peripherals |
| 0x80 | IR_UP | Control the car to move forward for 3s |
| 0x40 | IR_LIGHT | Control RGB lights (press once to turn on, press again to turn off) |
| 0x20 | IR_LEFT | Control the car to turn left for 3 seconds |
| 0xA0 | IR_BEEP | Control the buzzer (press once to turn on, press again to turn off) |
| 0x60 | IR_RIGHT | Control the car to turn right for 3 seconds |
| 0x10 | IR_LEFT_SPIN | Control the car to turn left for 3s |
| 0x90 | IR_DOWN | Control the car to move backward for 3s |
| 0x50 | IR_RIHGT_SPIN | Control the car to turn right for 3 seconds |
| 0x30 | IR_ADD | Control car acceleration |
| 0x70 | IR_SUB | Control the car to slow down |
| 0xB0 | IR_0 | Control the car to stop |
| 0x08 | IR_1 | Control LED1 (press once to turn on, press again to turn off) |
| 0x88 | IR_2 | Control LED2 (press once to turn on, press again to turn off) |
| 0x48 | IR_3 | Undefined |
| 0x28 | IR_4 | Undefined |
| 0xA8 | IR_5 | Undefined |
| 0x68 | IR_6 | Undefined |
| 0x18 | IR_7 | Undefined |
| 0x98 | IR_8 | Undefined |
| 0x58 | IR_9 | Undefined |
| 0xFF | CLR_CLR |
3. Main functions
xxxxxxxxxxThe functions introduced before will not be introduced again!
Function: Irrmote_car
| Function prototype | void Irrmote_car(void) |
|---|---|
| Function description | Infrared remote control car |
| Input parameters | None |
| Return value | None |
4. Experimental Phenomenon
After successfully downloading the program, press the RESET button on the development board and use the infrared remote control to control the car!
xxxxxxxxxxFor program download, please refer to [2. Development environment construction and use: program download and simulation]
Phenomenon:
Pressing different buttons according to the buttons on the remote control will activate different functions of the car.
For experimental phenomena, you can see [Infrared Remote Control_Experimental Phenomenon.mp4]