Welcome to PALMSLAM repository
5. Robot charging and battery considerations
Precautions for using batteries and chargers
- It is strictly forbidden to connect devices that exceed the product's usage load.
- It is strictly forbidden to use batteries or chargers not provided by Yahboom.
- When the battery is low, the expansion board buzzer sounds an alarm. At this time, you need to turn off the power and then charge the battery.
- Please turn off the main power switch on the expansion board when charging the battery. Do not use the battery while charging to prevent the charger or battery from exploding.
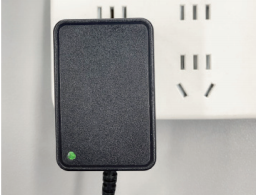
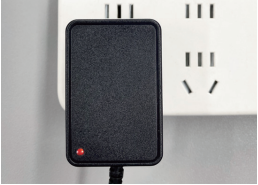
- When charging, the charger indicator lights up red, indicating that it is charging, and the charger indicator lights up green, indicating that the battery is fully charged. The battery should be supervised when charging, and the charger should be unplugged as soon as possible after charging is completed to avoid battery overcharge.
- After use, the main power switch should be turned off. When the device is not used for a long time, keep the battery voltage at about 7V, remove the bottom battery compartment, unplug the battery cable, take out the lithium battery pack and put it in the battery safety area. Do not mix with metal objects, and the insulating film wrapped outside cannot be torn off.
- Keep away from heat sources, fire sources, and any liquids. Do not use it in moisture or rain. A humid environment may cause short circuit damage to the product.
- If the lithium battery pack or battery charger smokes or gets hot (in severe cases, the outer packaging will crack), you should quickly disconnect the power strip or disconnect the main switch, then quickly unplug the charger, and take out the battery and place it in an open area.
- When the lithium battery pack or battery charger catches fire or smokes, please use sand or dry powder fire extinguisher to put out the fire, and then quickly evacuate to a safe area.
- If the lithium battery pack or battery charger is damaged, severely heated, deformed, discolored, has an odor or any other abnormal phenomenon, it must not be used, and contact Yabo or other agents in time for processing.
- Please use it in an environment with a temperature of 0℃ to 35℃. The stability of the lithium battery pack or battery charger may decrease at other temperatures.
- It is strictly forbidden to intentionally puncture, short-circuit, reverse, privately weld, impact, crush, or throw the battery pack or battery charger.
- It is forbidden to use the product in an environment with strong static electricity and strong magnetic fields, otherwise it will cause product damage.
- It is strictly forbidden to modify or modify the hardware circuit board without permission.
- Do not allow children to use lithium battery packs or battery chargers without adult supervision. Batteries should be stored out of reach of children.
Battery parameters
Nominal voltage: 7.4V
Power supply voltage: 5.6V~8.4V
Battery capacity: 2000mAh
Battery cell: 18650*2
Rated current: 15A(7.5C)
Maximum discharge current: 20A(10C)
Protection circuit: overcharge protection, over-discharge protection, overcurrent protection, short circuit protection
Battery weight: about 115g
Battery size: 67*37*22mm
Discharge cable length: 15cm(AWG14)
Charging cable length: 10cm
Robot charging
Insert the charger that comes with the product into the power strip. The charger indicator light turns green.
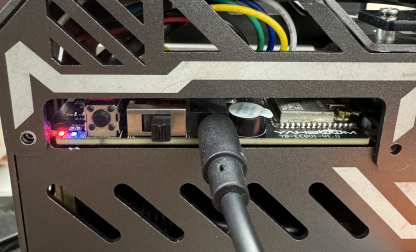
Turn off the robot's main power switch. Find the charging port on the robot expansion board and plug the charger's charging connector into the charging port on the expansion board.
When the charger is charging the robot, the charger indicator light turns red.
Wait for the battery to be fully charged and the indicator light turns green. Unplug the charger connector and charger and place the charger in a safe area.