Welcome to PALMSLAM repository
5. SLAM Cartographer
Cartographer
Note: The virtual machine needs to be in the same LAN as the car, and the ROS_DOMAIN_ID needs to be consistent. You can check [Expansion Board Parameter Configuration] to set the IP and ROS_DOMAIN_ID on the board.
1. Introduction to Cartographer
Cartographer is a 2D and 3D SLAM (simultaneous localization and mapping) library supported by Google's open source ROS system. The mapping algorithm is based on graph optimization (multi-threaded backend optimization, problem optimization built by cere). It can combine data from multiple sensors (such as LIDAR, IMU and camera) to synchronously calculate the position of the sensor and draw the environment around the sensor.
The source code of cartographer mainly includes three parts: cartographer, cartographer_ros and ceres-solver (backend optimization).
Cartographer uses the mainstream SLAM framework, which is a three-stage feature extraction, closed-loop detection, and backend optimization. A certain number of LaserScans form a submap, and a series of submaps form a global map. The short-term cumulative error of using LaserScan to build submaps is not large, but the long-term process of using submaps to build a global map will have a large cumulative error, so closed-loop detection is needed to correct the position of these submaps. The basic unit of closed-loop detection is submap, and closed-loop detection uses scan_match strategy.
The focus of cartographer is the creation of submaps that integrate multi-sensor data (odometry, IMU, LaserScan, etc.) and the implementation of scan_match strategy for closed-loop detection.
cartographer_ros runs under ROS and can receive various sensor data in the form of ROS messages. After processing, it is published in the form of messages for easy debugging and visualization.
2. Program Function Description
The car connects to the agent and runs the program. The map building interface will be displayed in rviz. The handheld radar moves in parallel. This algorithm needs to move slowly until the map is built. Then run the command to save the map.
3. Start and connect the agent
If you use the factory virtual machine system, you can enter in the terminal:
sh ~/start_agent_computer.sh
If you use a third-party virtual machine system, you need to install the docker development environment first, and open the terminal and enter:
xxxxxxxxxxsudo docker run -it --rm -v /dev:/dev -v /dev/shm:/dev/shm --privileged --net=host microros/micro-ros-agent:humble udp4 --port 8090 -v4
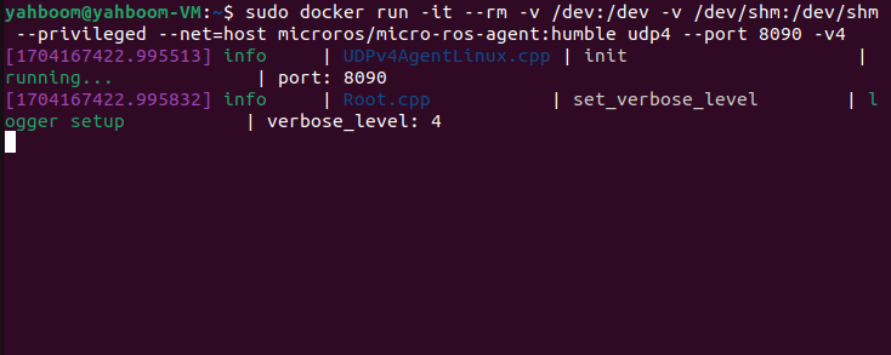
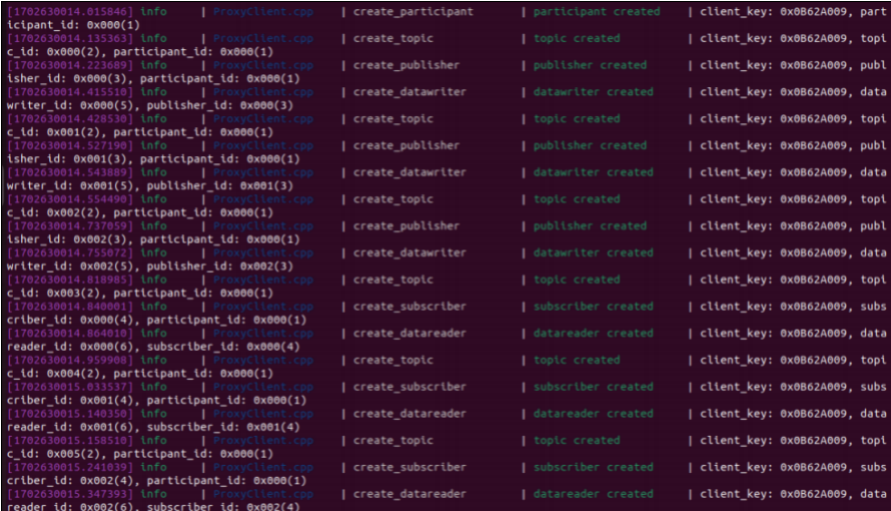
Then, turn on the car switch and wait for the car to connect to the proxy. The connection is successful as shown in the figure below.
4. Start the program
4.1 Run the command
If it is the Raspberry Pi desktop version and the Jetson Nano desktop version, you need to enter docker in advance and enter the terminal.
xxxxxxxxxxsh ros2_humble.sh
When the following interface appears, it means that you have successfully entered docker.

Then enter in docker separately, (see the [Enter the same docker terminal] section)
xxxxxxxxxxros2 launch yahboomcar_bringup yahboomcar_bringup_launch.py ••#underlying data programros2 launch yahboomcar_nav display_launch.py ••#map visualizationros2 launch yahboomcar_nav map_cartographer_launch.py ••#map node#save mapros2 launch yahboomcar_nav save_map_launch.pyTake the matching virtual machine as an example, terminal input,
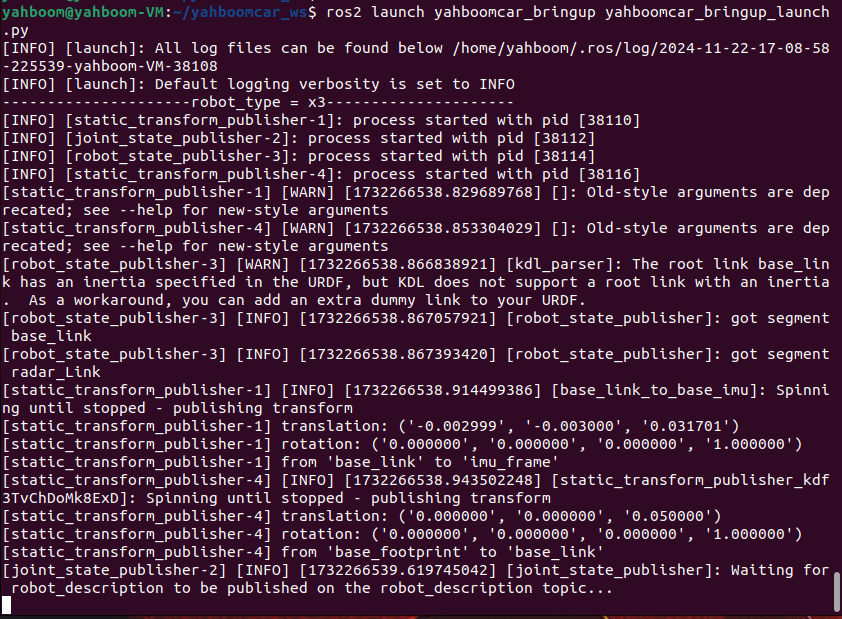
xxxxxxxxxxros2 launch yahboomcar_bringup yahboomcar_bringup_launch.py
First, start the car to process the underlying data program
Then, start rviz, visualize the map, and input in the terminal.
xxxxxxxxxxros2 launch yahboomcar_nav display_launch.py
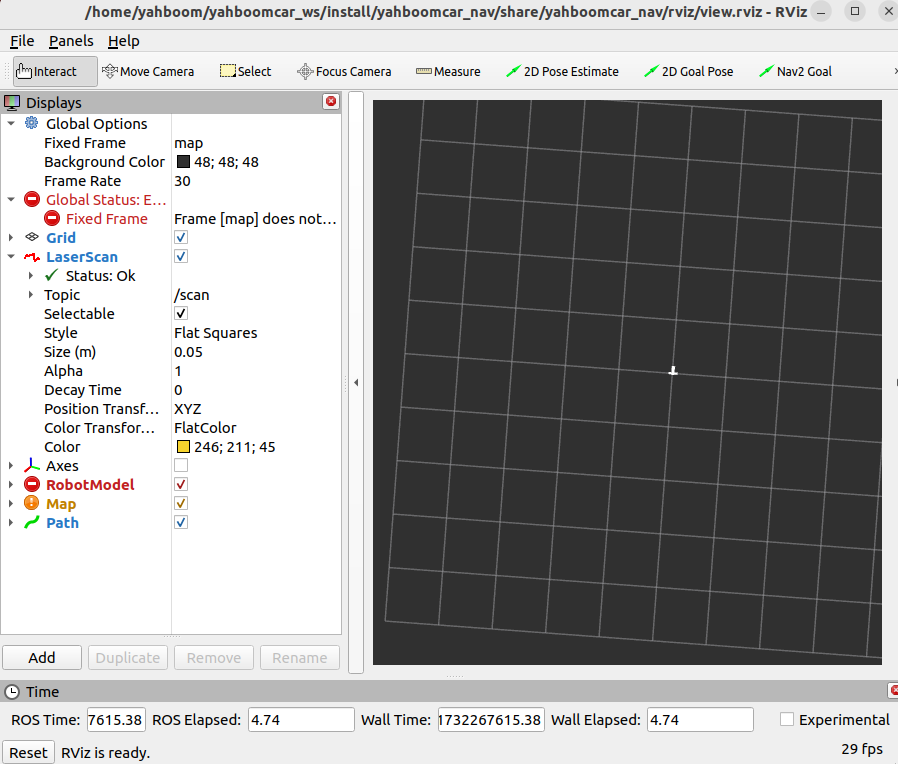
At this time, the map node has not been run, so there is no data. Next, run the map node and input in the terminal,
xxxxxxxxxxros2 launch yahboomcar_nav map_cartographer_launch.py
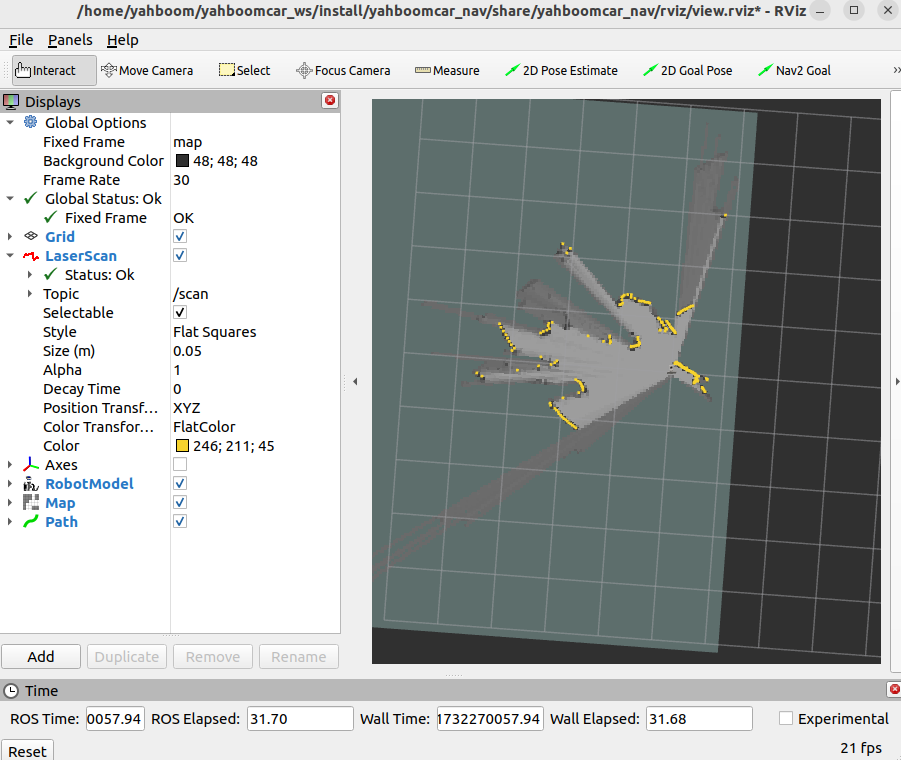
Then hold the handheld radar and walk slowly and parallelly through the area that needs to be mapped. After the map is built, enter the following command to save the map and input in the terminal,
xxxxxxxxxxros2 launch yahboomcar_nav save_map_launch.py
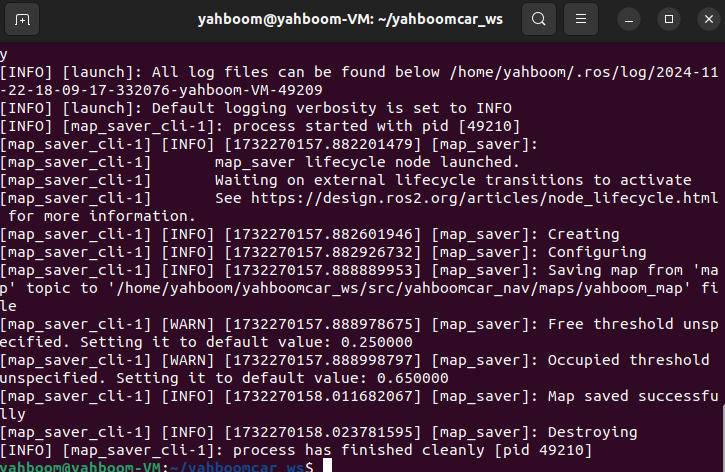
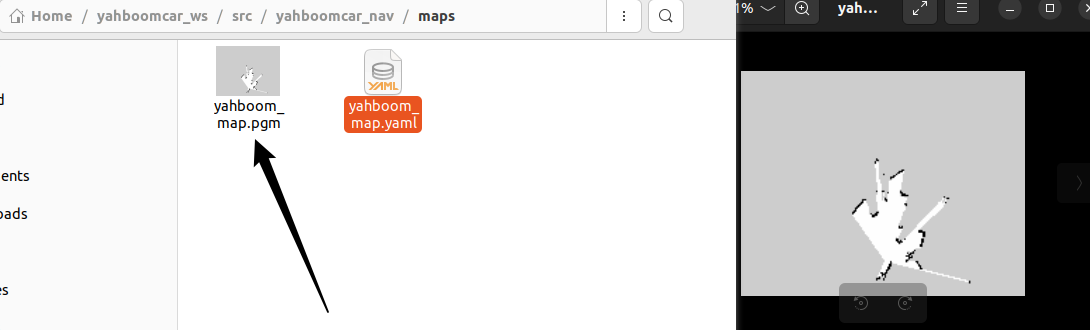
A map named yahboom_map will be saved. This map is saved in,
Take the matching virtual machine as an example code path:
xxxxxxxxxx/home/yahboom/yahboomcar_ws/src/yahboomcar_nav/maps
Two files will be generated, one is yahboom_map.pgm and the other is yahboom_map.yaml. Check the contents of yaml.
xxxxxxxxxximageyahboom_map.pgmmodetrinaryresolution0.05origin-10 -10 0negate0occupied_thresh0.65free_thresh0.25- image: the image representing the map, i.e. yahboom_map.pgm
- mode: this property can be one of trinary, scale or raw, depending on the selected mode, trinary mode is the default mode
- resolution: the resolution of the map, meters/pixels
- 2D pose (x,y,yaw) of the lower left corner of the map, where yaw is rotated counterclockwise (yaw=0 means no rotation). Currently many parts of the system ignore yaw values.
- negate: whether to invert the meaning of white/black and free/occupied (the interpretation of the threshold is not affected)
- occupied_thresh: pixels with an occupied probability greater than this threshold are considered fully occupied.
- free_thresh: pixels with an occupied probability less than this threshold are considered fully free.
The other file is a pdf file,
5. View the node communication graph
Terminal input,
xxxxxxxxxxros2 run rqt_graph rqt_graph
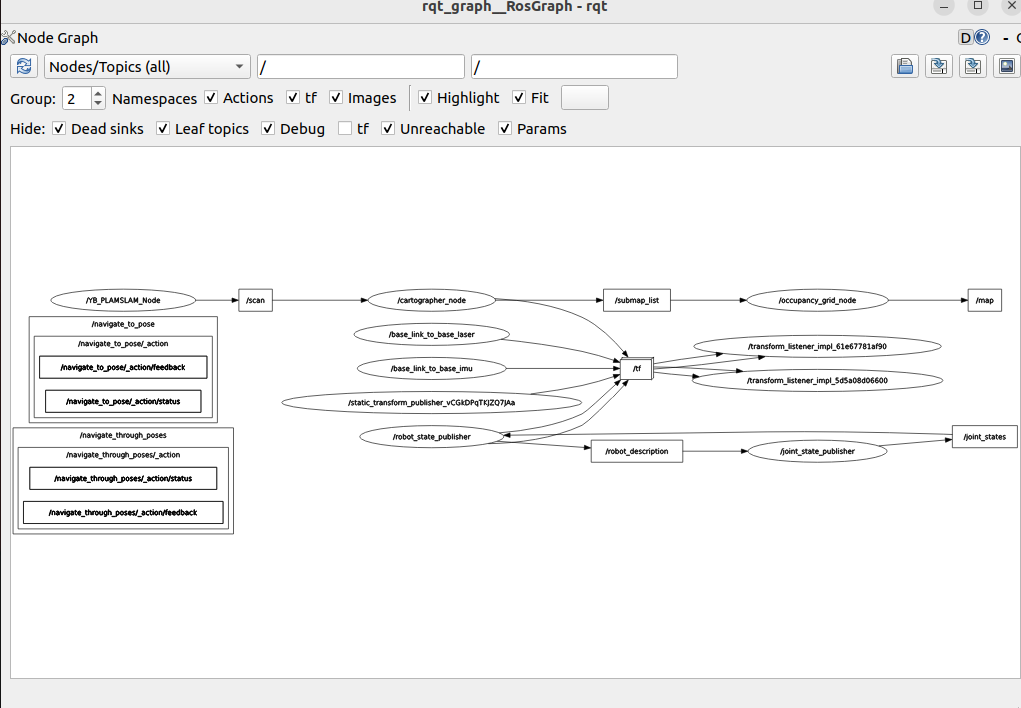
If it is not displayed at the beginning, select [Nodes/Topics(all)] and click the refresh button in the upper left corner.
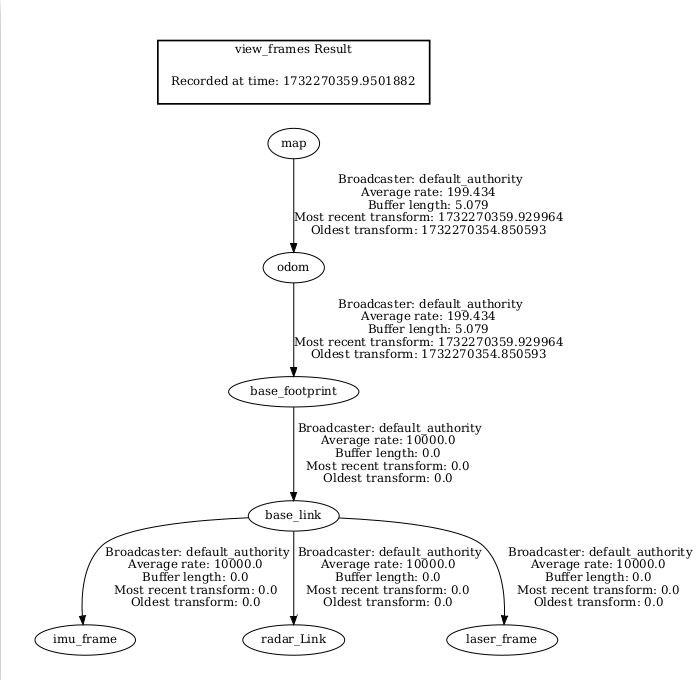
6. View TF tree
Terminal input,
xxxxxxxxxxros2 run tf2_tools view_frames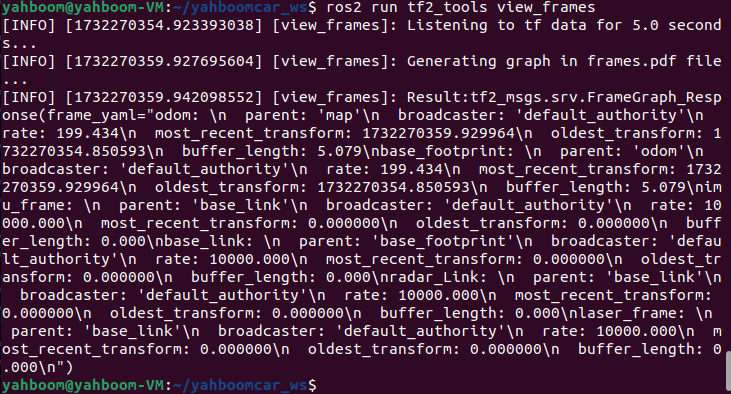
After running, two files will be generated in the terminal directory, namely .gv and .pdf files, and the pdf file is the TF tree.
7. Code analysis
Take the virtual machine as an example, here only the map_cartographer_launch.py for building the map is explained, this file path is,
xxxxxxxxxx/home/yahboom/yahboomcar_ws/src/yahboomcar_nav/launch
map_cartographer_launch.py
ximport osfrom ament_index_python.packages import get_package_share_directoryfrom launch import LaunchDescriptionfrom launch.actions import IncludeLaunchDescriptionfrom launch.launch_description_sources import PythonLaunchDescriptionSourcefrom launch_ros.actions import Node
def generate_launch_description(): package_launch_path =os.path.join(get_package_share_directory('yahboomcar_nav'), 'launch')
cartographer_launch = IncludeLaunchDescription(PythonLaunchDescriptionSource( [package_launch_path, '/cartographer_launch.py']) ) base_link_to_laser_tf_node = Node( package='tf2_ros', executable='static_transform_publisher', name='base_link_to_base_laser', arguments=['-0.0046412', '0' , '0.094079','0','0','0','base_link','laser_frame'] ) return LaunchDescription([cartographer_launch,base_link_to_laser_tf_node])Here, a launch file - cartographer_launch and a node that publishes static transformations - base_link_to_laser_tf_node are run.
** Taking the virtual machine as an example, take a closer look at cartographer_launch.py, which is located at,**
xxxxxxxxxx/home/yahboom/yahboomcar_ws/src/yahboomcar_nav/launch
cartographer_launch.py
xxxxxxxxxximport osfrom ament_index_python.packages import get_package_share_directoryfrom launch import LaunchDescriptionfrom launch.actions import DeclareLaunchArgumentfrom launch_ros.actions import Nodefrom launch.substitutions import LaunchConfigurationfrom launch.actions import IncludeLaunchDescriptionfrom launch.launch_description_sources import PythonLaunchDescriptionSourcefrom launch.substitutions import ThisLaunchFileDir

def generate_launch_description():    use_sim_time = LaunchConfiguration('use_sim_time', default='true')    package_path = get_package_share_directory('yahboomcar_nav')    configuration_directory = LaunchConfiguration('configuration_directory', default=os.path.join(                                                  package_path, 'params'))    configuration_basename = LaunchConfiguration('configuration_basename', default='lds_2d.lua')
    resolution = LaunchConfiguration('resolution', default='0.05')    publish_period_sec = LaunchConfiguration(        'publish_period_sec', default='1.0')
    return LaunchDescription([        DeclareLaunchArgument(            'configuration_directory',            default_value=configuration_directory,            description='Full path to config file to load'),        DeclareLaunchArgument(            'configuration_basename',            default_value=configuration_basename,            description='Name of lua file for cartographer'),        DeclareLaunchArgument(            'use_sim_time',            default_value='false',            description='Use simulation (Gazebo) clock if true'),
        Node(            package='cartographer_ros',            executable='cartographer_node',            name='cartographer_node',            output='screen',            parameters=[{'use_sim_time': use_sim_time}],            arguments=['-configuration_directory', configuration_directory,                       '-configuration_basename', configuration_basename],                       remappings=[('/scan', '/scan')]),
        DeclareLaunchArgument(            'resolution',            default_value=resolution,            description='Resolution of a grid cell in the published occupancy grid'),
        DeclareLaunchArgument(            'publish_period_sec',            default_value=publish_period_sec,            description='OccupancyGrid publishing period'),
        IncludeLaunchDescription(            PythonLaunchDescriptionSource(                [ThisLaunchFileDir(), '/occupancy_grid_launch.py']),            launch_arguments={'use_sim_time': use_sim_time, 'resolution': resolution,                              'publish_period_sec': publish_period_sec}.items(),        ),    ])
Here we mainly run the cartographer_node map building node and occupancy_grid_launch.py, and load the parameter configuration file.
xxxxxxxxxxThe file is located in (taking the supporting virtual machine as an example),/home/yahboom/yahboomcar_ws/src/yahboomcar_nav/paramslds_2d.lua,
xxxxxxxxxxinclude "map_builder.lua"include "trajectory_builder.lua"
options = map_builder = MAP_BUILDER trajectory_builder = TRAJECTORY_BUILDER map_frame = "map" tracking_frame = "base_footprint" published_frame = "base_footprint" odom_frame = "odom" provide_odom_frame = true publish_frame_projected_to_2d = false use_odometry = false use_nav_sat = false use_landmarks = false num_laser_scans = 1 num_multi_echo_laser_scans = 0 num_subdivisions_per_laser_scan = 1 num_point_clouds = 0 lookup_transform_timeout_sec = 0.2 submap_publish_period_sec = 0.3 pose_publish_period_sec = 5e-3 trajectory_publish_period_sec = 30e-3 rangefinder_sampling_ratio = 1. odometry_sampling_ratio = 1. fixed_frame_pose_sampling_ratio = 1. imu_sampling_ratio = 1. landmarks_sampling_ratio = 1.
MAP_BUILDER.use_trajectory_builder_2d = true
TRAJECTORY_BUILDER_2D.use_imu_data = falseTRAJECTORY_BUILDER_2D.min_range = 0.10TRAJECTORY_BUILDER_2D.max_range = 30.0
TRAJECTORY_BUILDER_2D.missing_data_ray_length = 3.TRAJECTORY_BUILDER_2D.use_online_correlative_scan_matching = true TRAJECTORY_BUILDER_2D.motion_filter.max_angle_radians = math.rad(0.3)
POSE_GRAPH.constraint_builder.min_score = 0.65POSE_GRAPH.constraint_builder.global_localization_min_score = 0.7
-- 设置0可关闭全局SLAM-- Set to 0 to disable global SLAMPOSE_GRAPH.optimize_every_n_nodes = 0
return options