Welcome to RDK X3 Board repository
2.2 Remote Login
Remote Login
Remote Login1. Enable SSH service2. Enable VNC service3. Serial port login4. VNC log in5. SSH log in
This section will show you how to log in remotely via the serial port and network (VNC, SSH).
Before logging in remotely via the network, the development board needs to be connected to the network via wired Ethernet or wireless WiFi, and the IP address of the development board needs to be configured. For the IP address information under the two connection methods, please refer to the following description:
- Wired Ethernet: The development board uses static IP mode by default, with an IP address of
192.168.1.10, a mask of255.255.255.0, and a gateway of192.168.1.1 - Wireless WiFi: The IP address of the development board is generally assigned by the router. You can view the IP address of the wlan0 network through the
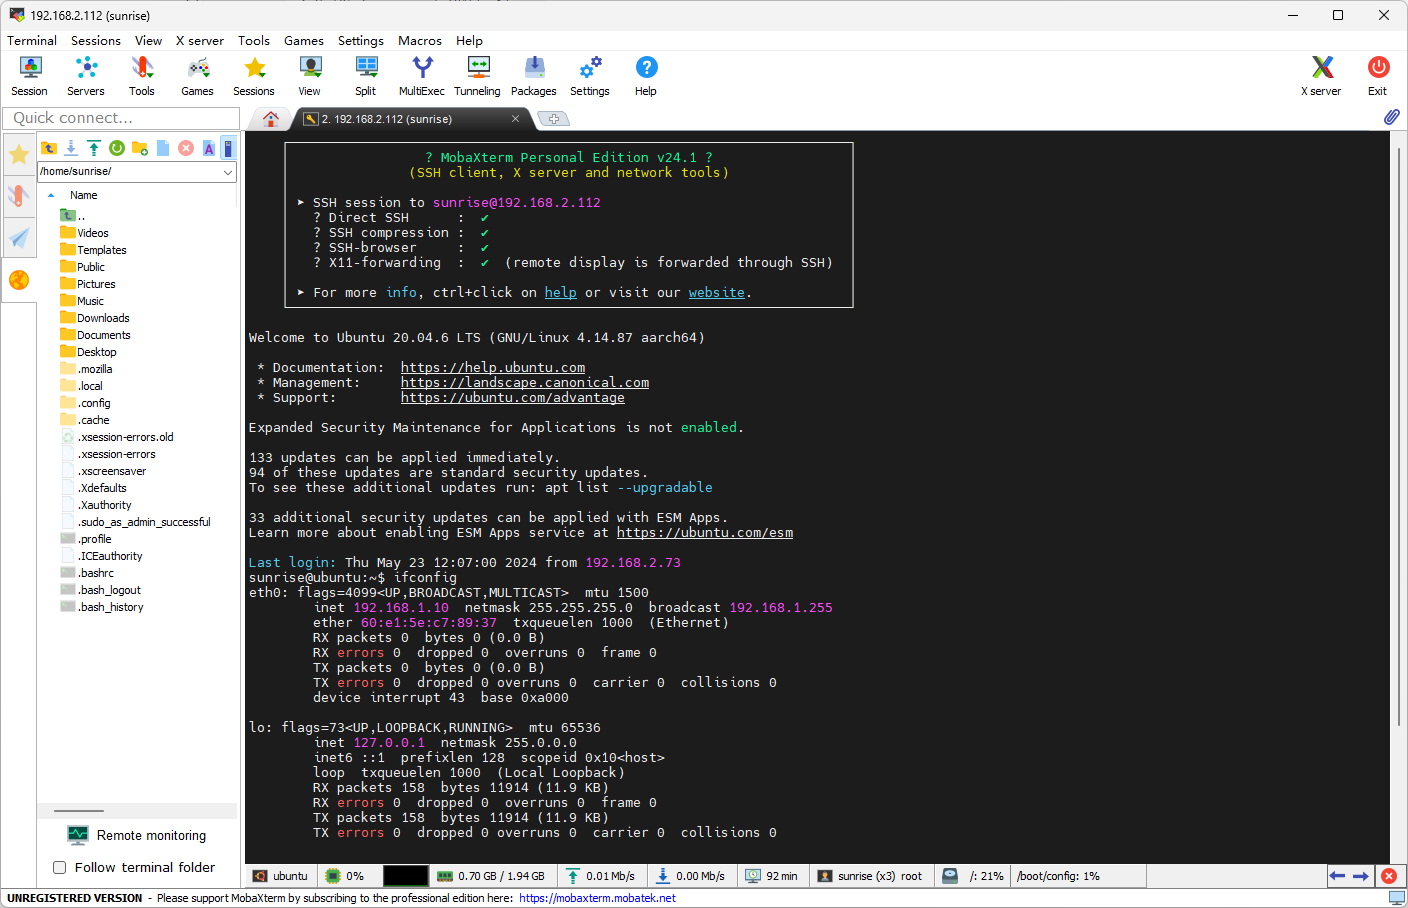
ifconfigcommand in the device command line
1. Enable SSH service
Find the RDK Configuration item on the menu bar and click to open it.
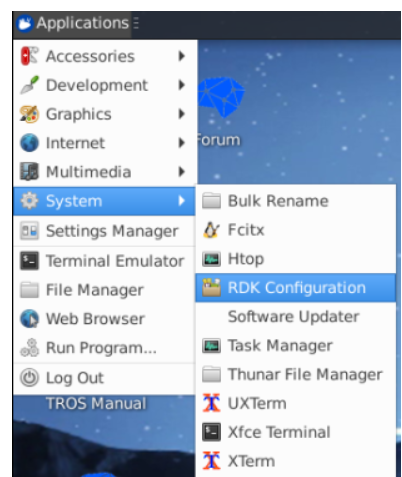
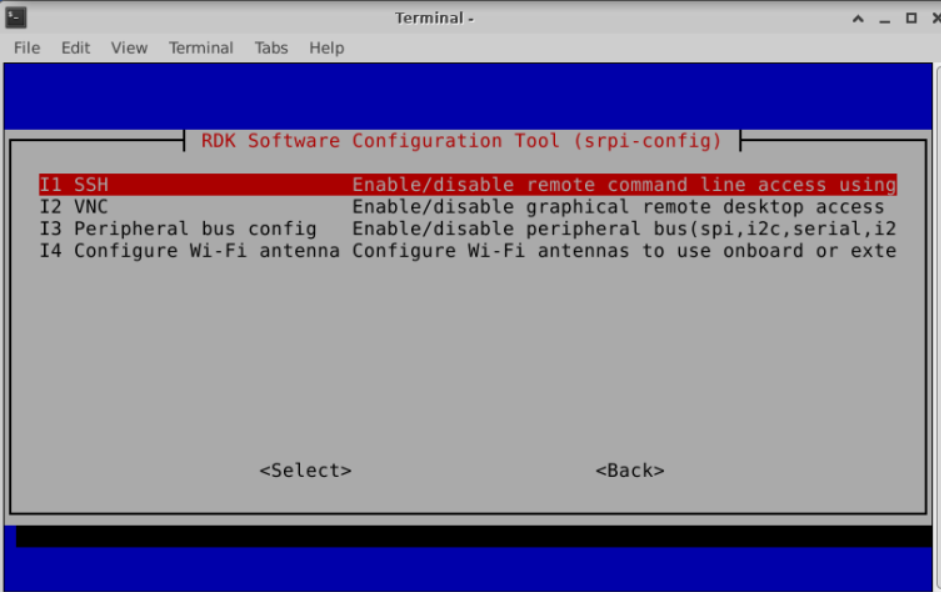
Select Interface Options -> SSH, and enable or disable the SSH service as prompted.
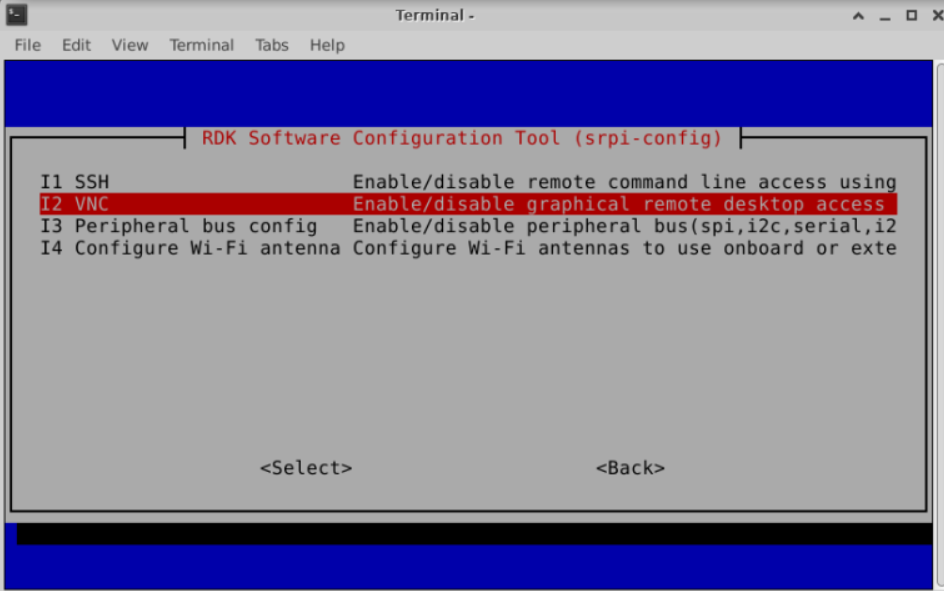
2. Enable VNC service
Find the RDK Configuration item on the menu bar and click to open it.
Select Interface Options -> VNC, and enable or disable the VNC service according to the prompts.
When you choose to enable VNC, you need to set a login password. The password must be an 8-bit string consisting of numbers and characters.
3. Serial port login
Before logging in via the serial port, you need to confirm whether the serial port cable of the development board is correctly connected to the computer.
The connection method is as follows.
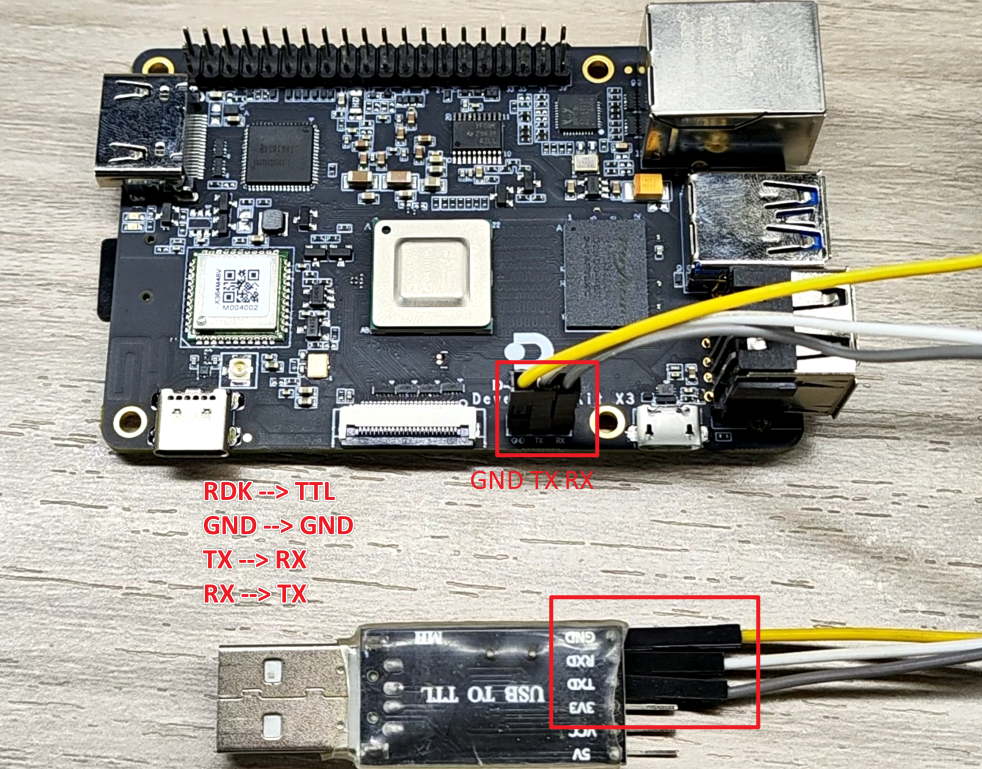
Connect the serial port module to the USB port on the PC. Serial port login requires the use of PC terminal tools. Commonly used tools include Putty, MobaXterm, etc. Users can choose according to their own usage habits.
The port configuration process of different tools is basically similar. The following takes MobaXterm as an example to introduce the process of creating a new serial port connection.
Open the
MobaXtermtool, clickSession, and then selectSerialConfigure the port number, for example,
COM3. The actual serial port number used is based on the serial port number recognized by the PC.Set the serial port configuration parameters.
Baud rate 921600 Data bits 8 Parity None Stop bits 1 Flow Control NO
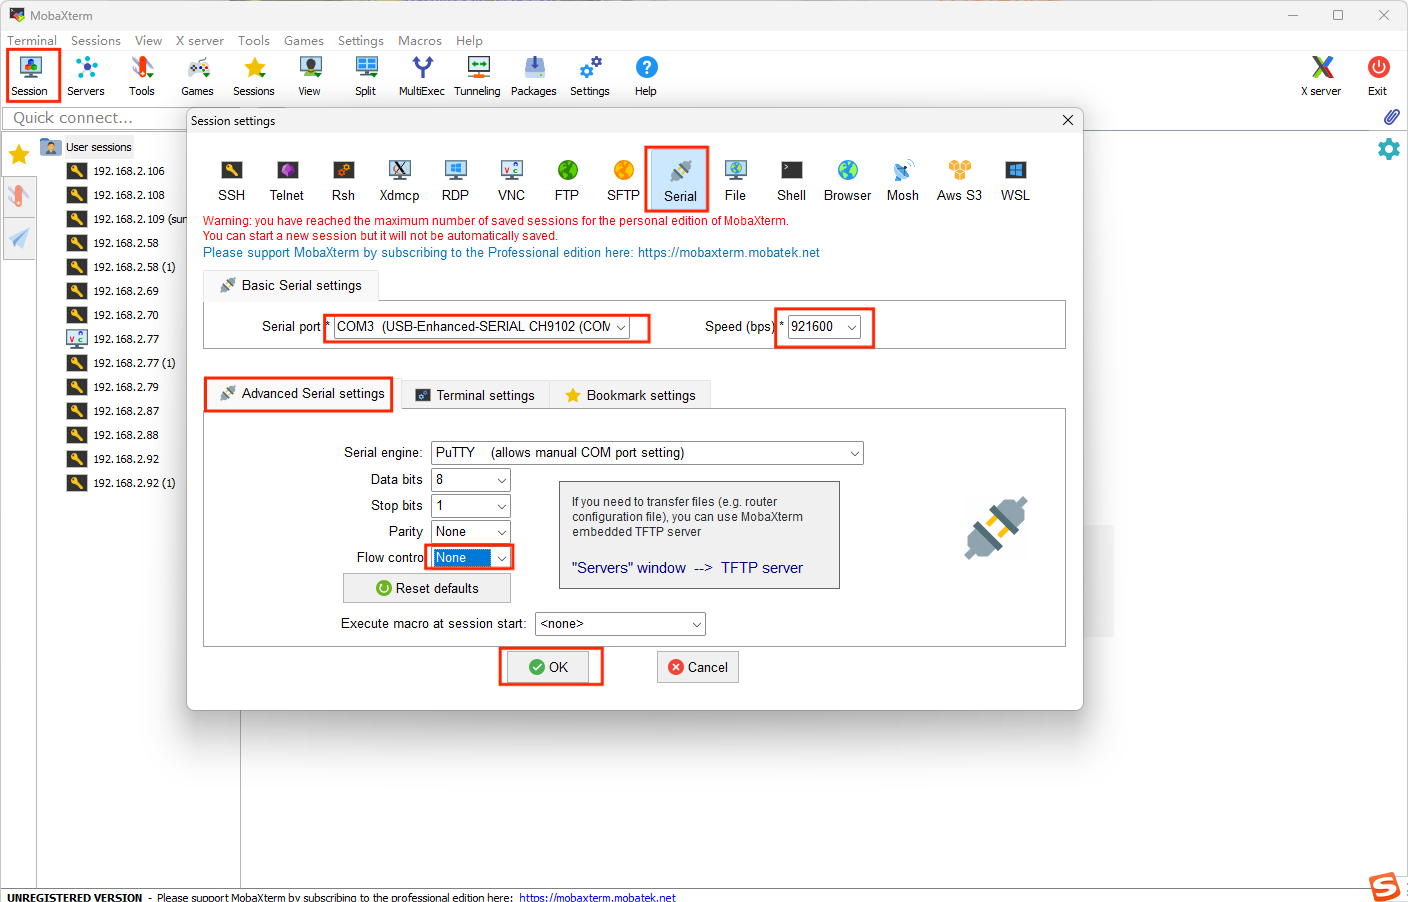
If you cannot find the serial port device here, please download the serial port driver first, unzip [Serial Port Driver_CP210x_USB2UART_Driver.zip] in [Common Software], double-click dpinst64.exe to install the system driver of the serial port module, and then try again.
Click
OK, enter username:root, password:rootto log in to the device.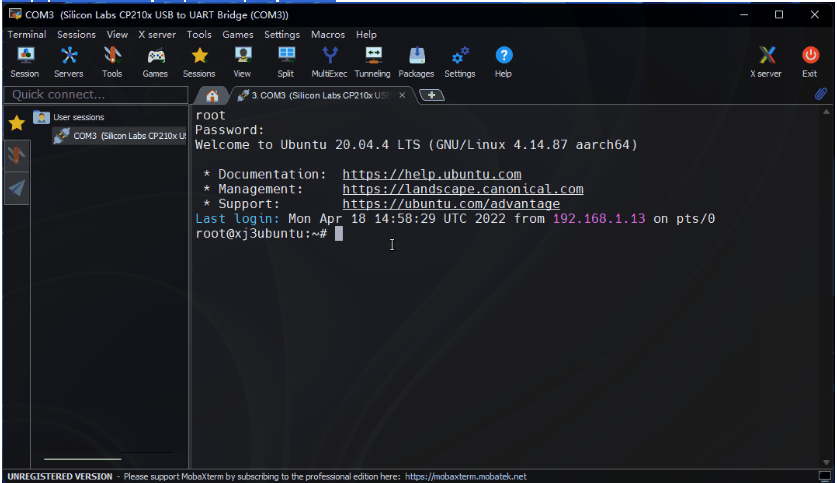
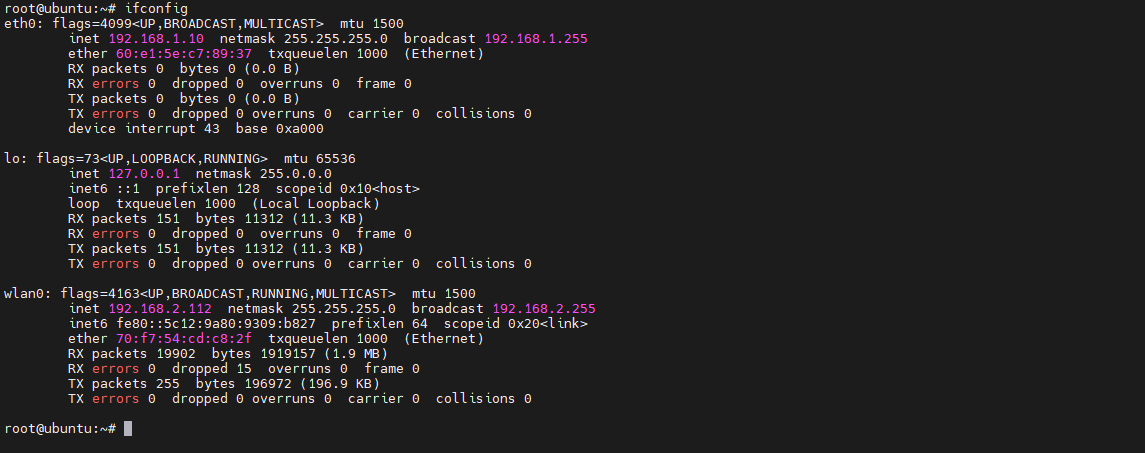
At this point, you can use the
ifconfigcommand to query the IP address of the development board.eth0 and wlan0 represent wired and wireless networks respectively.
4. VNC log in
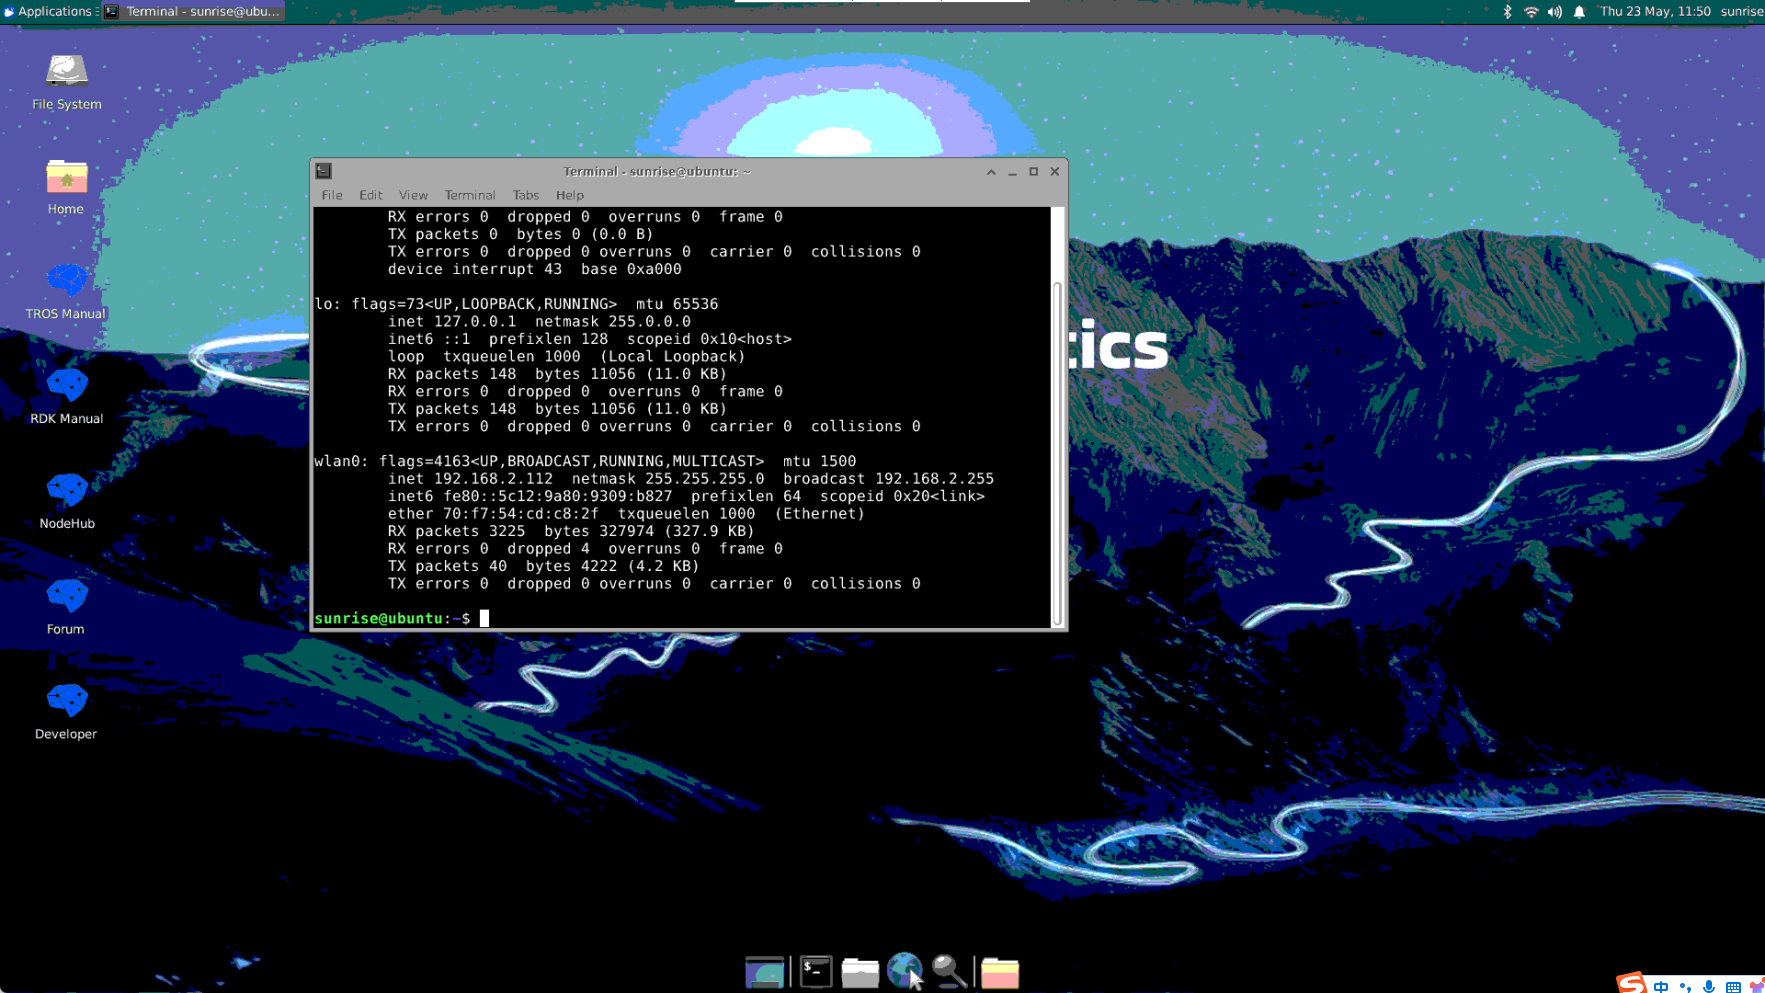
This section is for users who use the Ubuntu Desktop system version. It introduces how to use VNC Viewer to achieve remote desktop login function.
VNC Viewer is a graphical desktop sharing software that can realize remote device login and desktop control on the computer.
This software can preview the development board system desktop through the computer monitor and use the computer's mouse and keyboard for remote operation.
Open
VNC Viewer,Enter the IP address of the development board, fill in the VNC login password set in [Enable VNC service], and click OK to log in.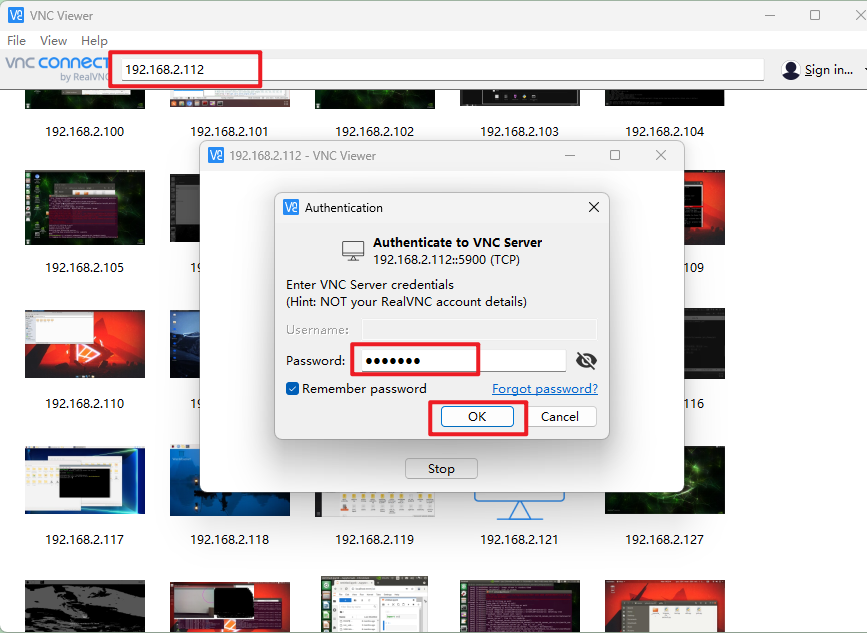
5. SSH log in
In addition to logging into the remote desktop through VNC, you can also log in to the development board through SSH connection.
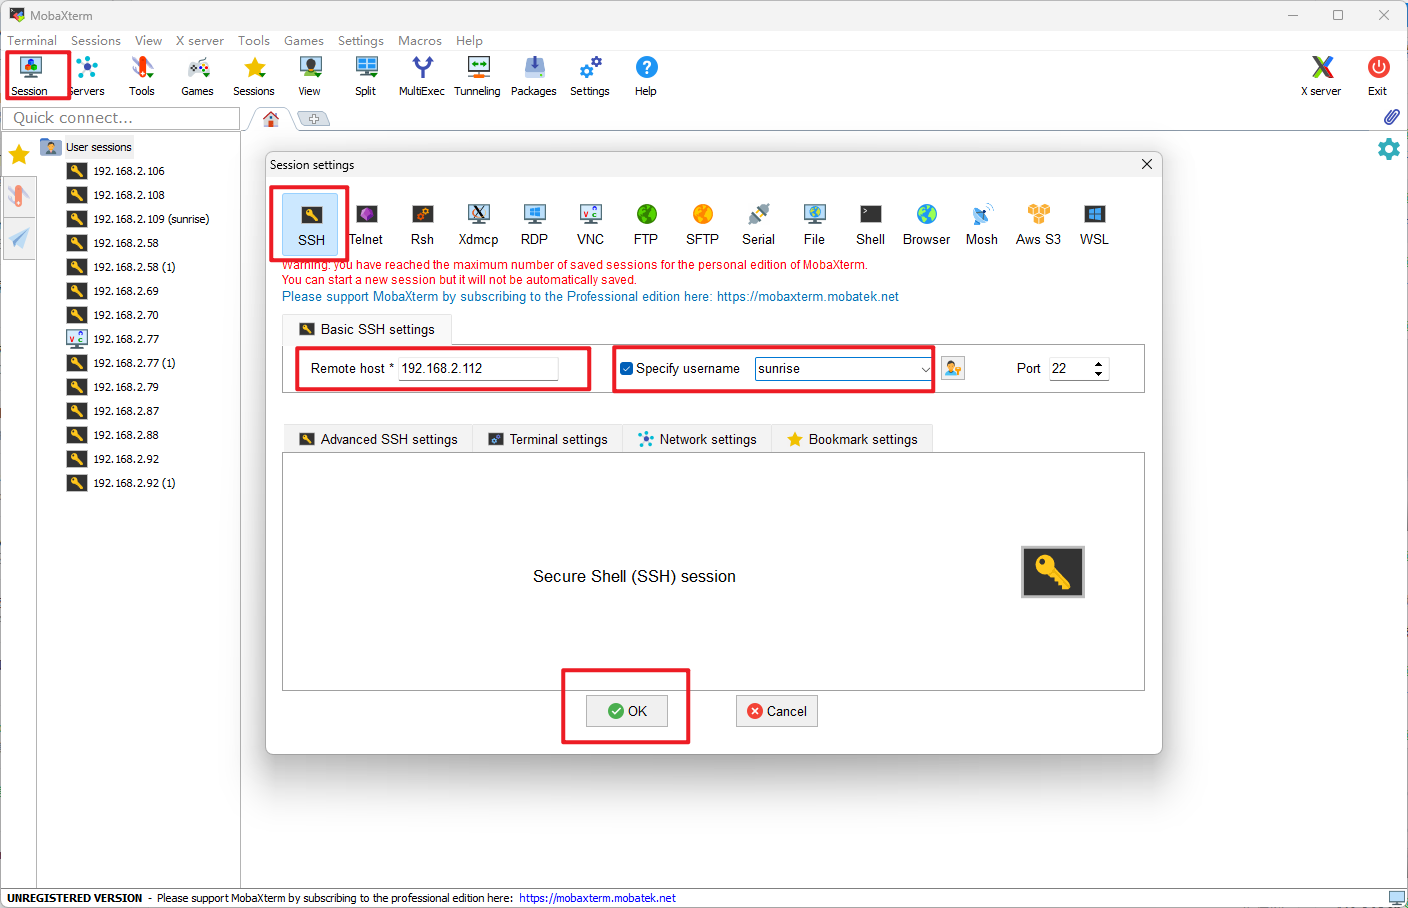
The following takes MobaXterm as an example to introduce the process of creating a new SSH connection:
Open the
MobaXtermtool, clickSession, and then selectSSHEnter the IP address of the development board, for example,
192.168.1.10Select
specify username, entersunrise, and click ok.