Welcome to RDK X3 Board repository
2.4 Configure srpi-config
Configure srpi-config
Configure srpi-config1. Open2. System Options3. Display Options4. Interface Options5. Performance Options6. Localisation Options7. Advanced Options8. Update9. About srpi-config10. Finish button
1. Open
- Open command line
srpi-config is a system configuration tool.
Input following command in the command line to open the configuration tool.
sudo srpi-configsudo is a privilege escalation management command. It must be entered here so that you can perform configuration management with root privileges. The default sunrise account does not have system file modification permissions.
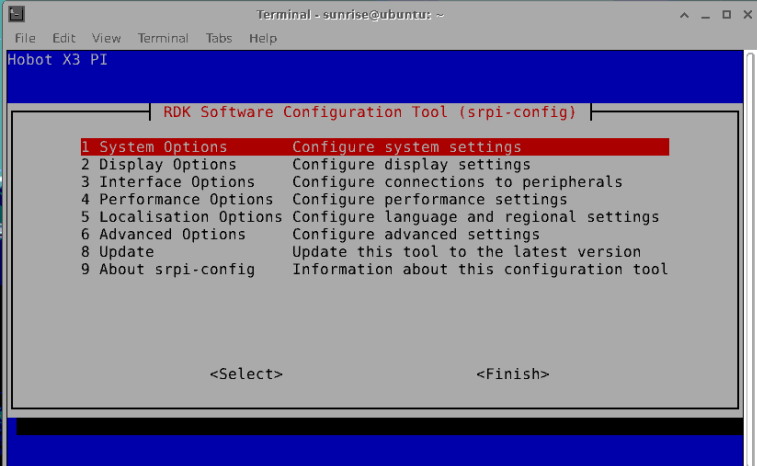
Open the desktop
If you are using a desktop system, you can find the
RDK Configurationapplication in the menu to configure it. The configuration terminal will also open as shown above.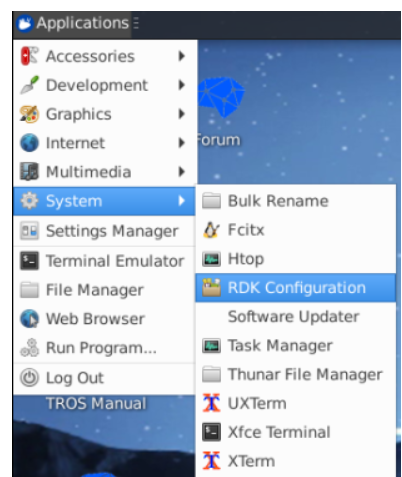
2. System Options
The system options menu allows configuration changes to various parts of the Wi-Fi network, user passwords, hostnames, system login mode, browser selection, and some system-level changes.
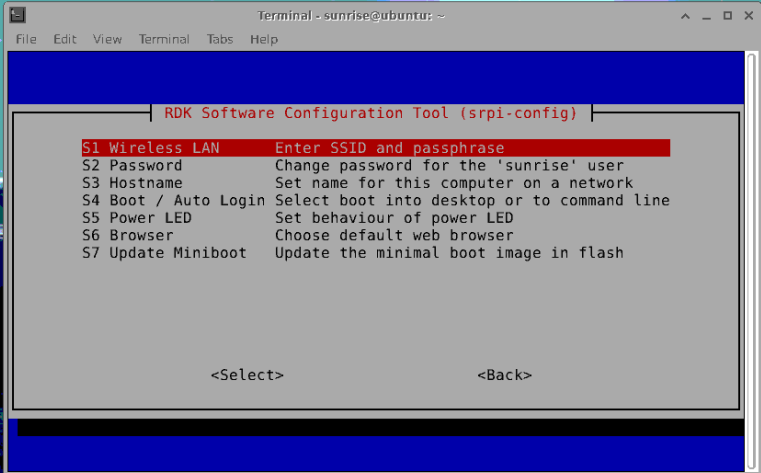
Wireless LAN
Set the SSID and password of your wireless network.
Password
Change the "default" user password. The default account is
sunrise.Hostname
Set the visible name of the current device on the network.
Boot / Auto login
Choose whether to boot to the console or desktop, and whether to log in automatically.
If you choose to log in automatically, you will be logged in as the system default account
sunrise.Power LED
If your RDK model allows it, you can change the behavior of the power LED in this option. The default is off or blinking.
Browser
If you are using a desktop system, you can set the default browser. If not configured,
firefoxis used by default. Users can install thechromiumbrowser through the commandsudo apt install chromium.Update Miniboot
Updates the minimal boot image in flash memory.
3. Display Options
Displays the options menu.
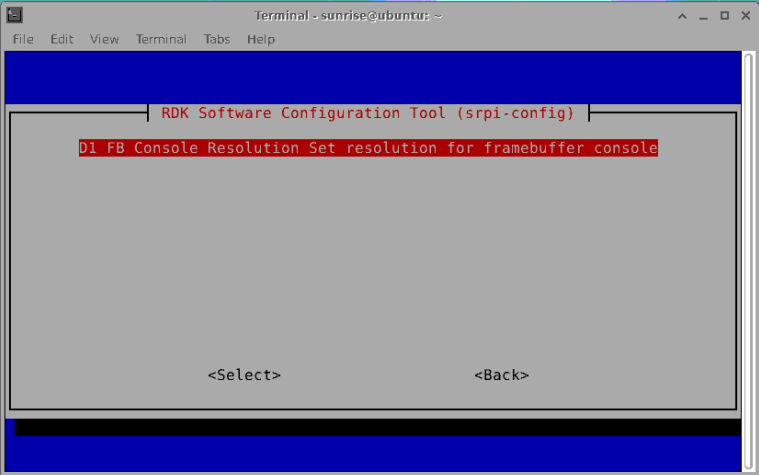
FB Console Resolution
Support setting HDMI display resolution in
Serversystem andconsolemode.
4. Interface Options
Interface options menu, with the following options to enable/disable: SSH, VNC, SPI, I2C, I2S, Serial and other functions.
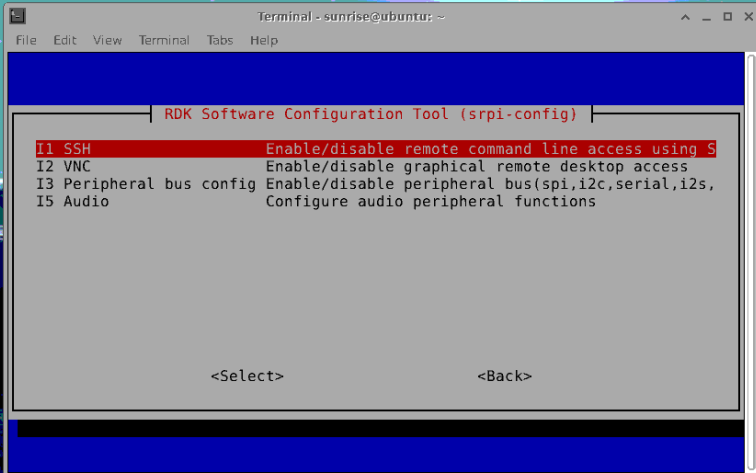
SSH
Enable/disable remote login to the RDK using SSH. By default, SSH is enabled.
VNC
Enable/disable the X11vnc virtual network computing server.
VNC (Virtual Network Console) is the abbreviation of Virtual Network Console. It is a remote control software that can be enabled when remotely accessing a desktop system.
Peripheral bus config
Enable/disable SPI, I2C, Serial Port, I2S and other interfaces on the 40pin interface.
This configuration method will directly modify the
statusof the corresponding bus in the device tree file used, and will take effect after restart.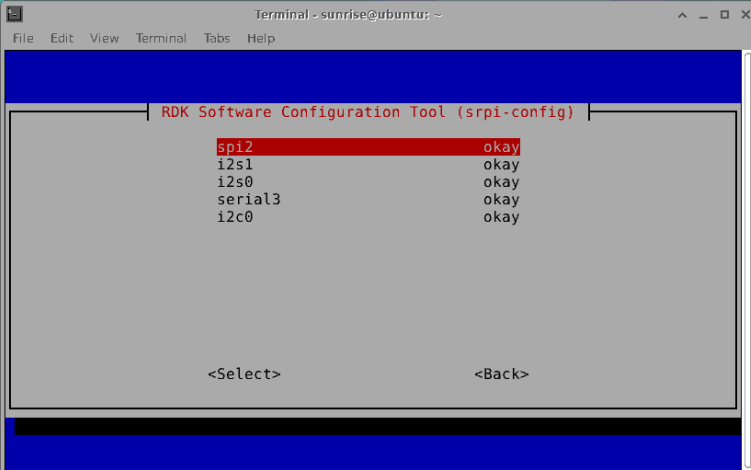
Audio
Configuring audio peripheral functions
5. Performance Options
Performance options, including overclocking, CPU operating mode and fixed frequency settings, adjusting ION memory size, etc.
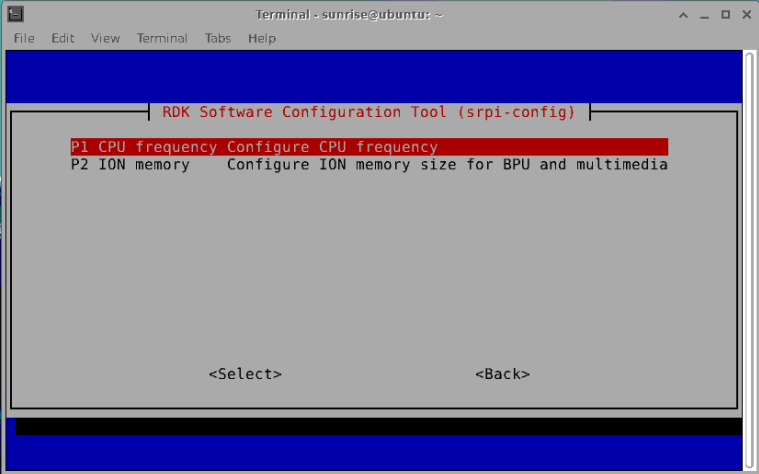
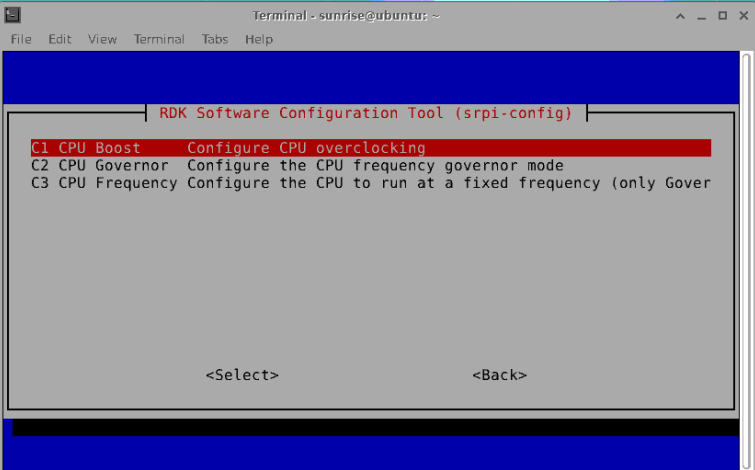
CPU frequency
You can use this tool to overclock the CPU of the RDK. It is generally not recommended to enable it.
If you have done a good job of cooling, you can try to modify this option.
ION memory
This option allows you to configure the usual size of ION memory.
ION memory is the physical memory space reserved for BPU and image and video multimedia functions.
The default configuration size is 672MB. If you need to run a larger algorithm model and encode and decode multiple videos at the same time, please adjust the memory size according to specific needs.
6. Localisation Options
Localization options provide you with the following options to choose from: local language, time zone, keyboard layout.
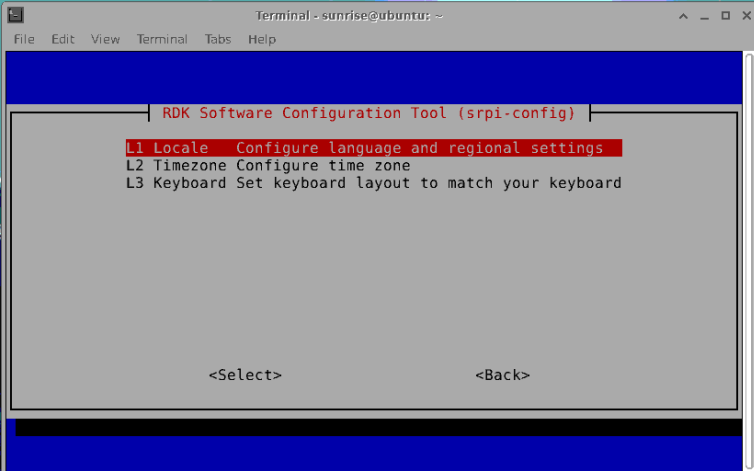
Locale
Select a language environment, for example, configure the Chinese environment
zh_CN.UTF-8, and restart to take effect.Time Zone
Select your local time zone, starting with a region, such as Asia, and then selecting a city, such as Shanghai.
Type a letter to jump down the list to that point in the alphabet.
Keyboard
It takes a long time to read all keyboard types before they appear.
Changes usually take effect immediately, but a reboot may be required.
7. Advanced Options
Advanced options allow you to set options such as disk expansion and network proxy.
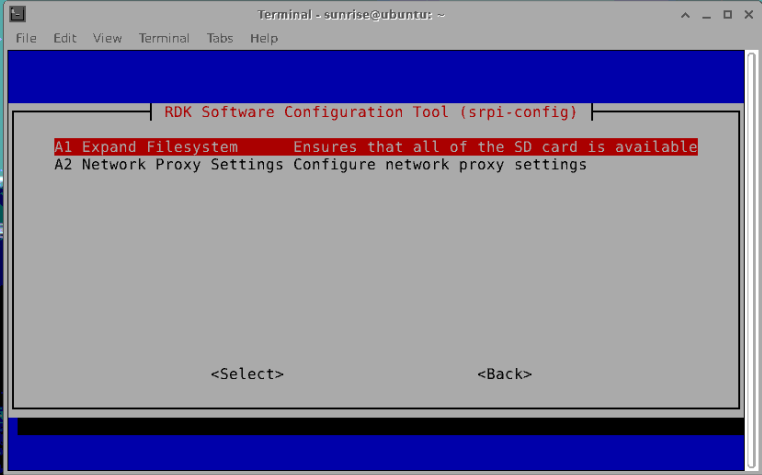
Expand Filesystem
This option will expand the installation to fill the entire TF card, providing more space for the file system.
If the system is copied from another system that has completed initialization configuration, the system's TF card capacity may not be automatically adjusted to the current TF card capacity.
This function can be used to easily complete the expansion.
Network Proxy Settings
Configure the proxy settings for your network.
8. Update
Updated the srpi-config tool to the latest version.
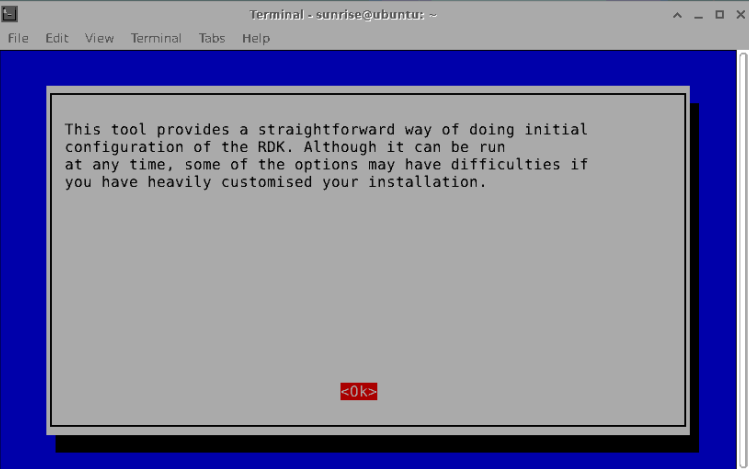
9. About srpi-config
Information about srpi-config
Selecting this option displays the following information.
10. Finish button
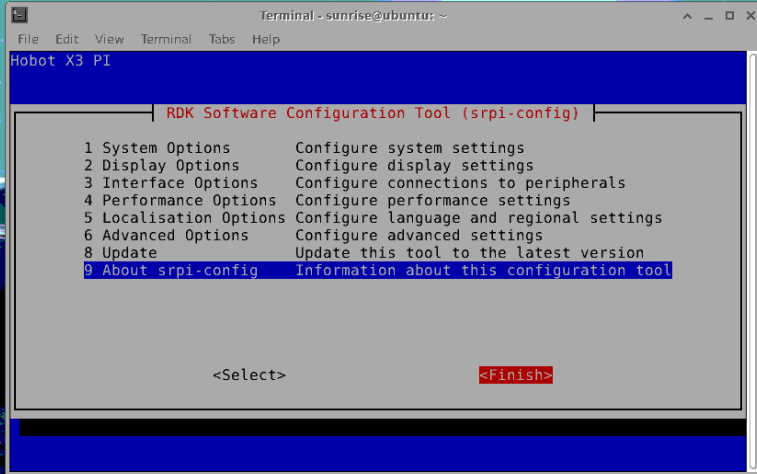
Select the Finish button when you have completed the changes.
You will be asked if you want to reboot. It is best to reboot for the first time.