Welcome to RDK X3 Board repository
3. Camera image encoding
3. Camera image encoding
1. Preparation
This example vio2encoder example implements the MIPI camera image acquisition function, and saves the image locally after encoding.
The user can preview the image on the display.
The example flow chart is as follows.
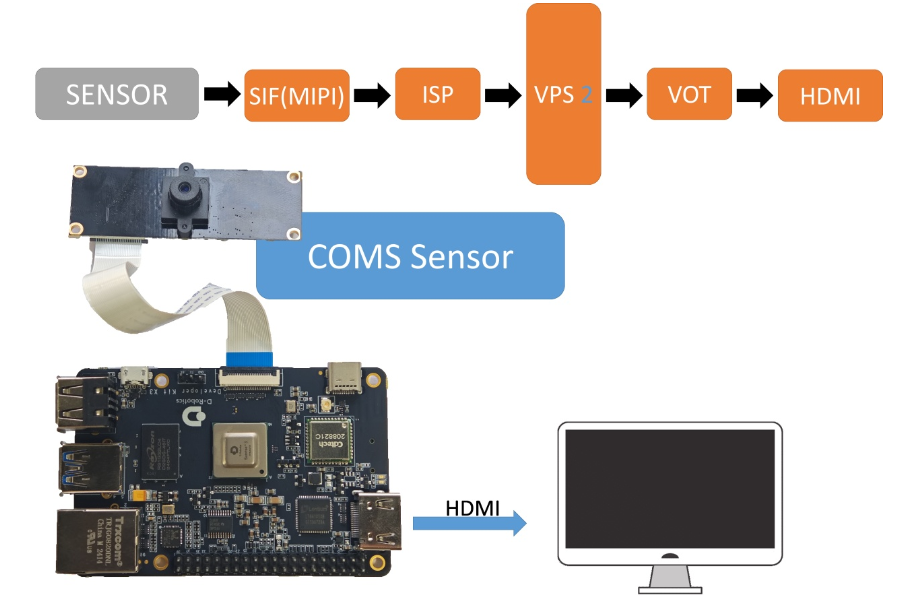
- When the development board is powered off, connect the
MIPIcamera to the development board (blue side facing up). - Connect the development board and the monitor via an HDMI cable
- Power on the development board and log in via the command line
2.Running method
Using following command to execute the program. The sample code is provided in source code form and needs to be compiled and run using the make command.
The steps are as follows.
sunrise@ubuntu:~$ cd /app/cdev_demo/vio2encodersunrise@ubuntu:/app/cdev_demo/vio2encoder$ sudo makesunrise@ubuntu:/app/cdev_demo/vio2encoder$ sudo ./vio2encoder -w 1920 -h 1080 --iwidth 1920 --iheight 1080 -o test.h264Parameter Description.
- -w: Encoded video width
- -h: Encoded video height
- --iwidth: Sensor output width
- --iheight: Sensor output height
- -o: Encoded output path
3. Result
After the program runs correctly, a video file named test.h264 will be generated in the current directory.
The running log is as follows。
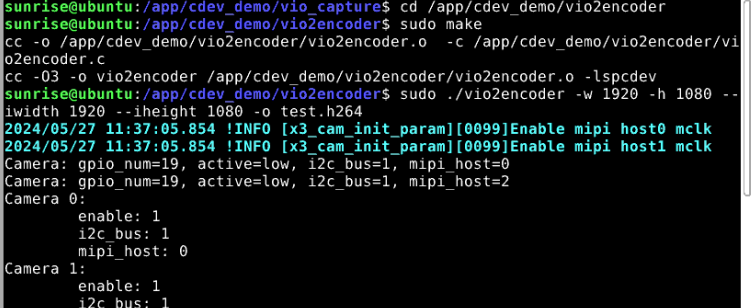
xsunrise@ubuntu:/tmp/nfs/sp_cdev/cdev_demo/vio2encoder$ sudo ./vio2encoder -w 1920 -h 1080 --iwidth 1920 --iheight 1080 -o test.h2642023/03/28 02:27:32.560 !INFO [x3_cam_init_param][0099]Enable mipi host0 mclk2023/03/28 02:27:32.561 !INFO [x3_cam_init_param][0099]Enable mipi host1 mclkCamera: gpio_num=114, active=low, i2c_bus=3, mipi_host=0Camera: gpio_num=114, active=low, i2c_bus=1, mipi_host=1Camera: gpio_num=114, active=low, i2c_bus=0, mipi_host=2Camera 0: enable: 1 i2c_bus: 3 mipi_host: 0Camera 1: enable: 1 i2c_bus: 1 mipi_host: 1Camera 2: enable: 1 i2c_bus: 0 mipi_host: 2cmd=i2ctransfer -y -f 3 w2@0x10 0x0 0x0 r1 2>&1, result=0x02
Found sensor:imx219 on i2c bus 3, use mipi host 0Setting VPS channel-2: src_w:1920, src_h:1080; dst_w:1920, dst_h:1080;Setting VPS channel-1: src_w:1920, src_h:1080; dst_w:1920, dst_h:1080;sp_open_camera success!sp_start_encode success!sp_module_bind(vio -> encoder) success!