Welcome to RDK S600 Developer Kit repository
1.2 System Flashing
System Flashing
System Flashing1. Preparations2. Image Download3. Full System Image Flashing4. Designated Area FlashingDescription of Flashing AreasUsing Xburn for Designated Area Flashing5. Designated Area BackupDescription of Backup AreasUsing Xburn for Designated Area Backup6. Booting the System7. Setting Login Mode
1. Preparations
Before flashing the Ubuntu system image, complete the following preparations:
- Download the
sunrise5_winusb.ziparchive and install the Windows driver - Download the PC flashing tool Xburn
- Prepare a Type-C data cable. Connect one end to the Type-C port on the board and the other end to the PC
The USB driver can be downloaded from the system flashing tools in the network disk attachments.
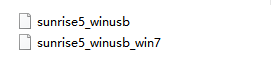
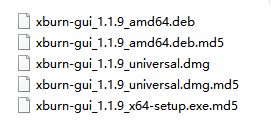
Download the version of the flashing tool compatible with your operating system from the flashing tools folder in the network disk files.
2. Image Download
The RDK S600 kit currently provides the Ubuntu 24.04 system image, which supports Desktop graphical interaction.
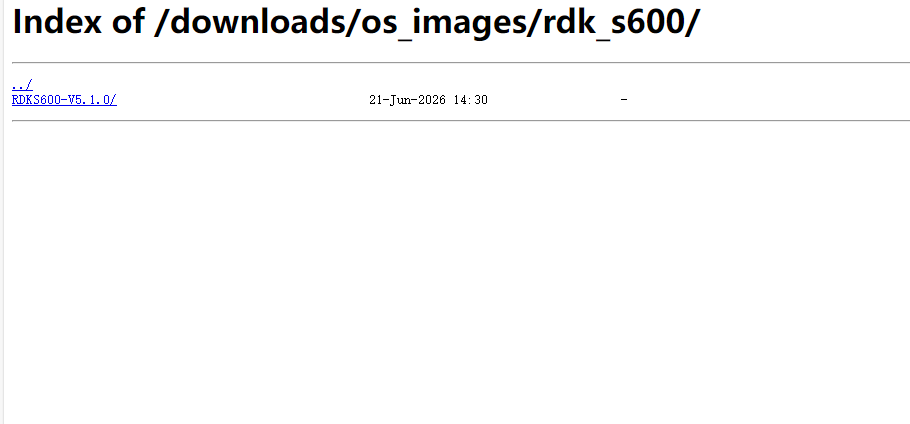
The RDK S600 development board needs to have the system flashed before use.Download the system image from our cloud disk resources, or via this page: Download Images。For RDK S600 firmware images, select the image file labelled LNX on the download page — this is the main board system image.The MCU image is exclusively for the MCU expansion board.The main board must be flashed with the LNX image to boot up properly.
3. Full System Image Flashing
The RDK S600 development kit can use the PC tool Xburn to flash the Ubuntu system. Download the flashing tool from our cloud disk resources, or download it via this page: Flashing Tool。
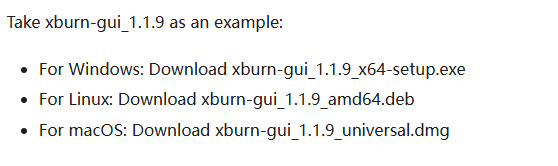
Before using the flashing tool, Windows users need to confirm whether the driver has been installed.Download the
sunrise5_winusb.ziparchive for the USB driveravailable for download here, then follow the steps below to install the driver:- Extract
sunrise5_winusb.zip. - Open the
sunrise5_winusbfolder, right-clickinstall_driver.bat, and select Run as administrator.
- Extract
The full system image flashing process supports two modes: dfu-fastboot and fastboot. These can be selected in the
Download Modeoption on the Xburn tool interface. The differences between the two modes are as follows:Download Mode Connection Type Scenario Notes DFU+Fastboot USB Special cases such as a blank board or system corruption causing the device to become bricked The startup mode must be set to enter the dfustateFastboot USB Updating the system on a non-blank board, covering common flashing scenarios Requires a non-blank board state, and the system must be able to enter ubootmodeDFU+Fastboot Flashing
Prepare the RDK S600 image package. Its structure is shown below.

How to make the RDK S600 enter DFU boot mode
Toggle the
PWR KEYdip switch toOFFto power off.Toggle the
FLASHdip switch toONto enter dfu mode.Toggle the
PWR KEYdip switch toONto power on.If the red
FLSLED lights up, it indicates entry into dfu mode.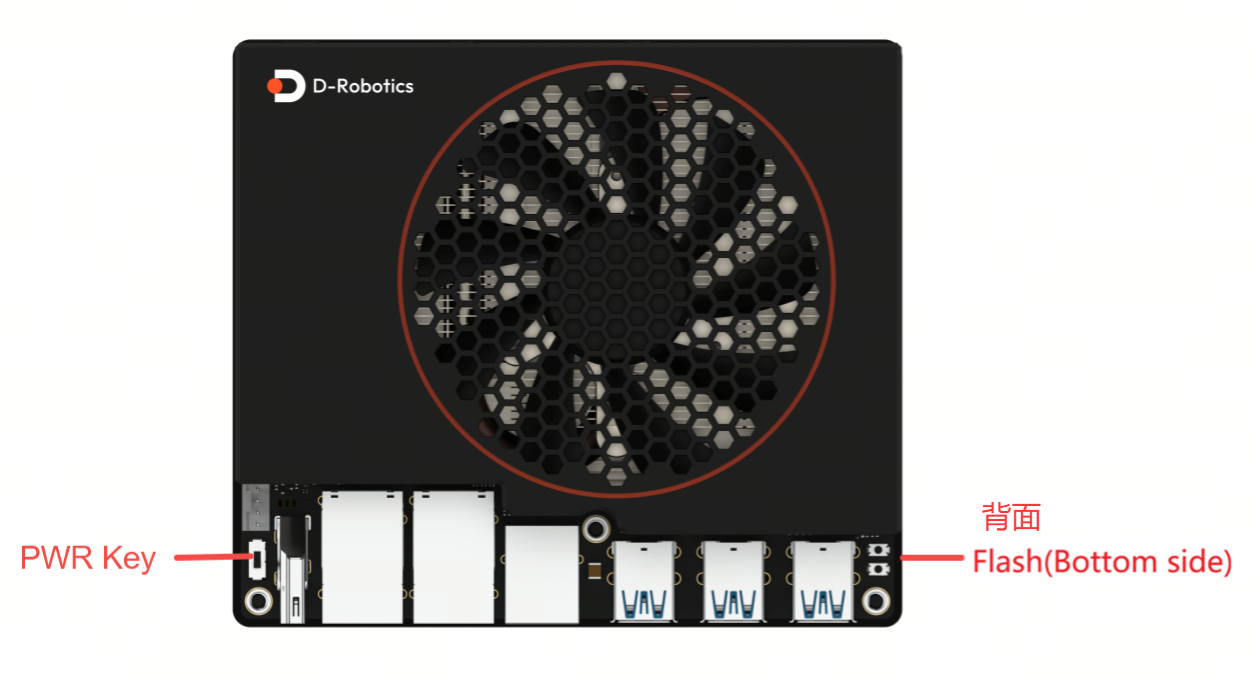
Using Xburn for DFU-Fastboot Flashing
Open Xburn and set the parameters as follows:
- Select Product Model:
RDKS600 - Connection Mode:
usb, Download Mode:DFU+Fastboot - Storage Medium:
ufs, Type:secure
Refer to the settings interface below:
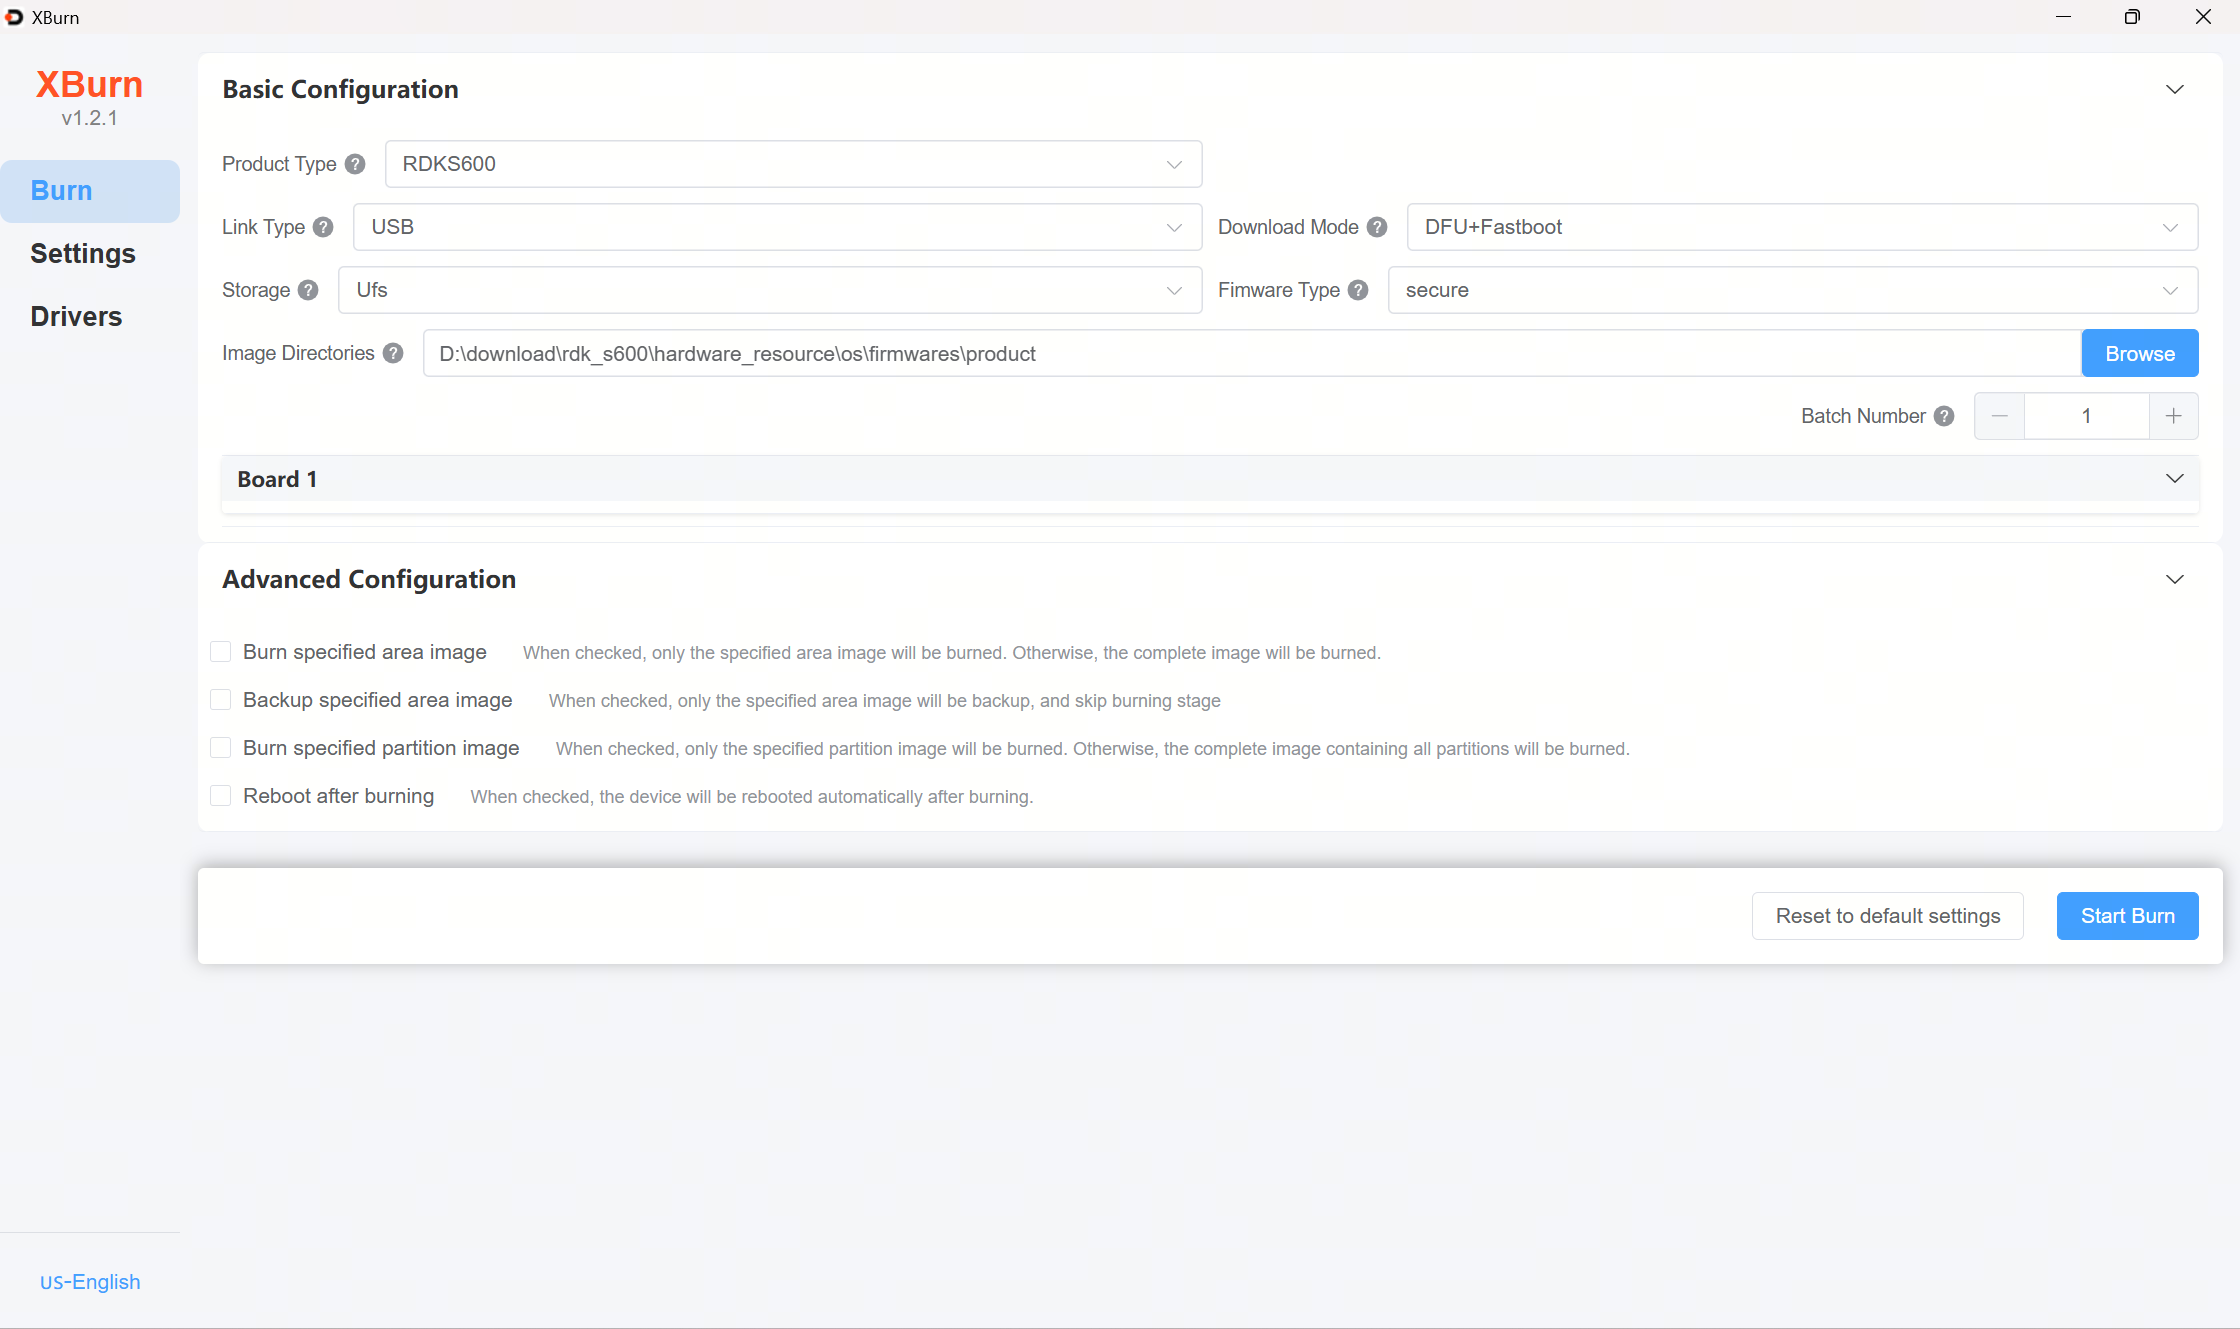
Click Browse to select the product folder containing the firmware.
Click Start Burn. The device enters Fastboot mode and waits for the upgrade to complete.
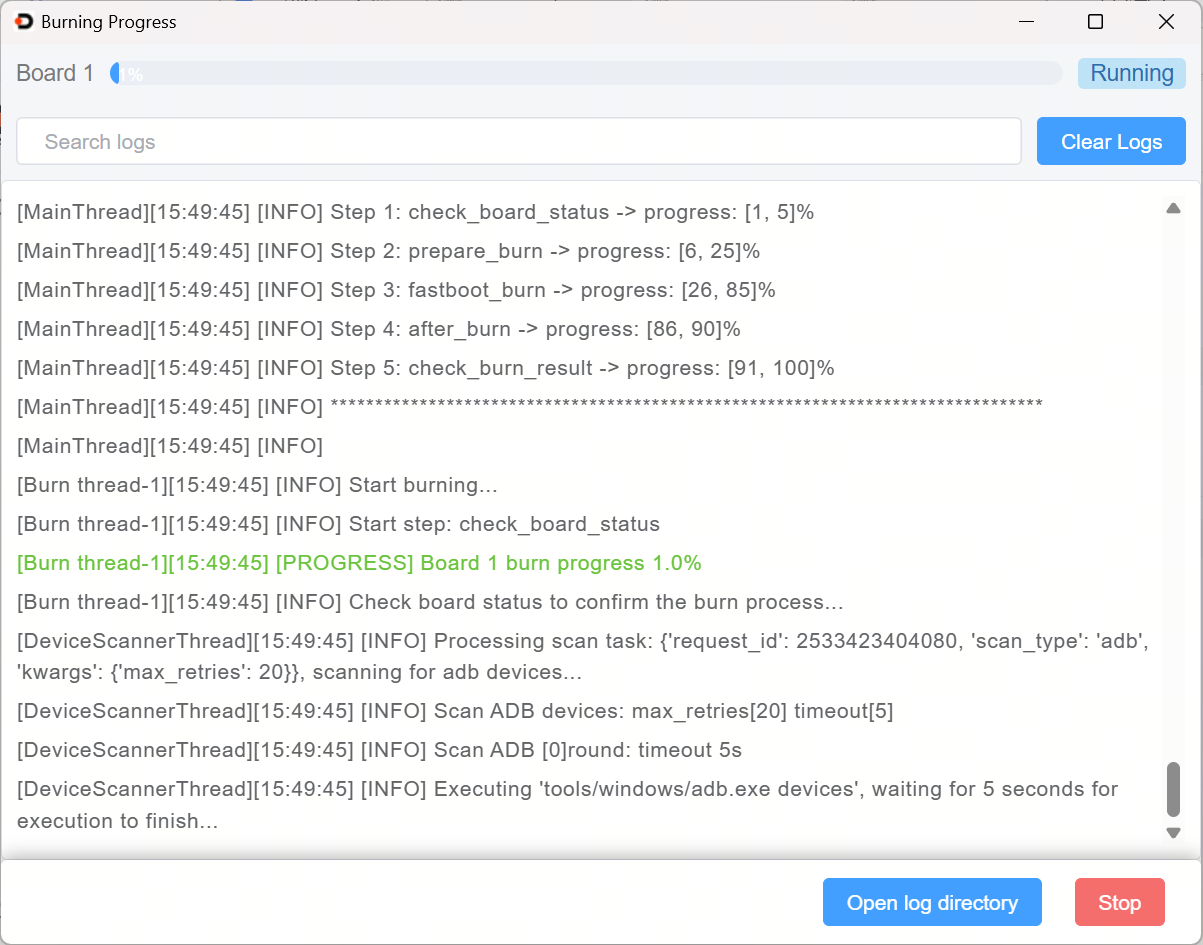
Power cycle the device after the upgrade is complete.
- Select Product Model:
Fastboot Flashing
- Prepare the RDK S600 image package. Its structure is shown below.
How to make the RDK S600 enter Fastboot mode
You can enter Fastboot in two ways:
- Automatic Fastboot Entry: After system startup, an ADB device is automatically generated. Xburn detects the ADB device and sends commands to make the board enter Fastboot.
- Manual Fastboot Entry: After the board starts and enters uboot, type
fastboot 0to enter Fastboot.
Using Xburn for Fastboot Flashing
Open Xburn and set the parameters as follows:
- Product Type:
RDKS600 - Link Type:
usb, Download Mode:Fastboot - Storage:
Ufs, Fimware Type:secure
Refer to the settings interface below:
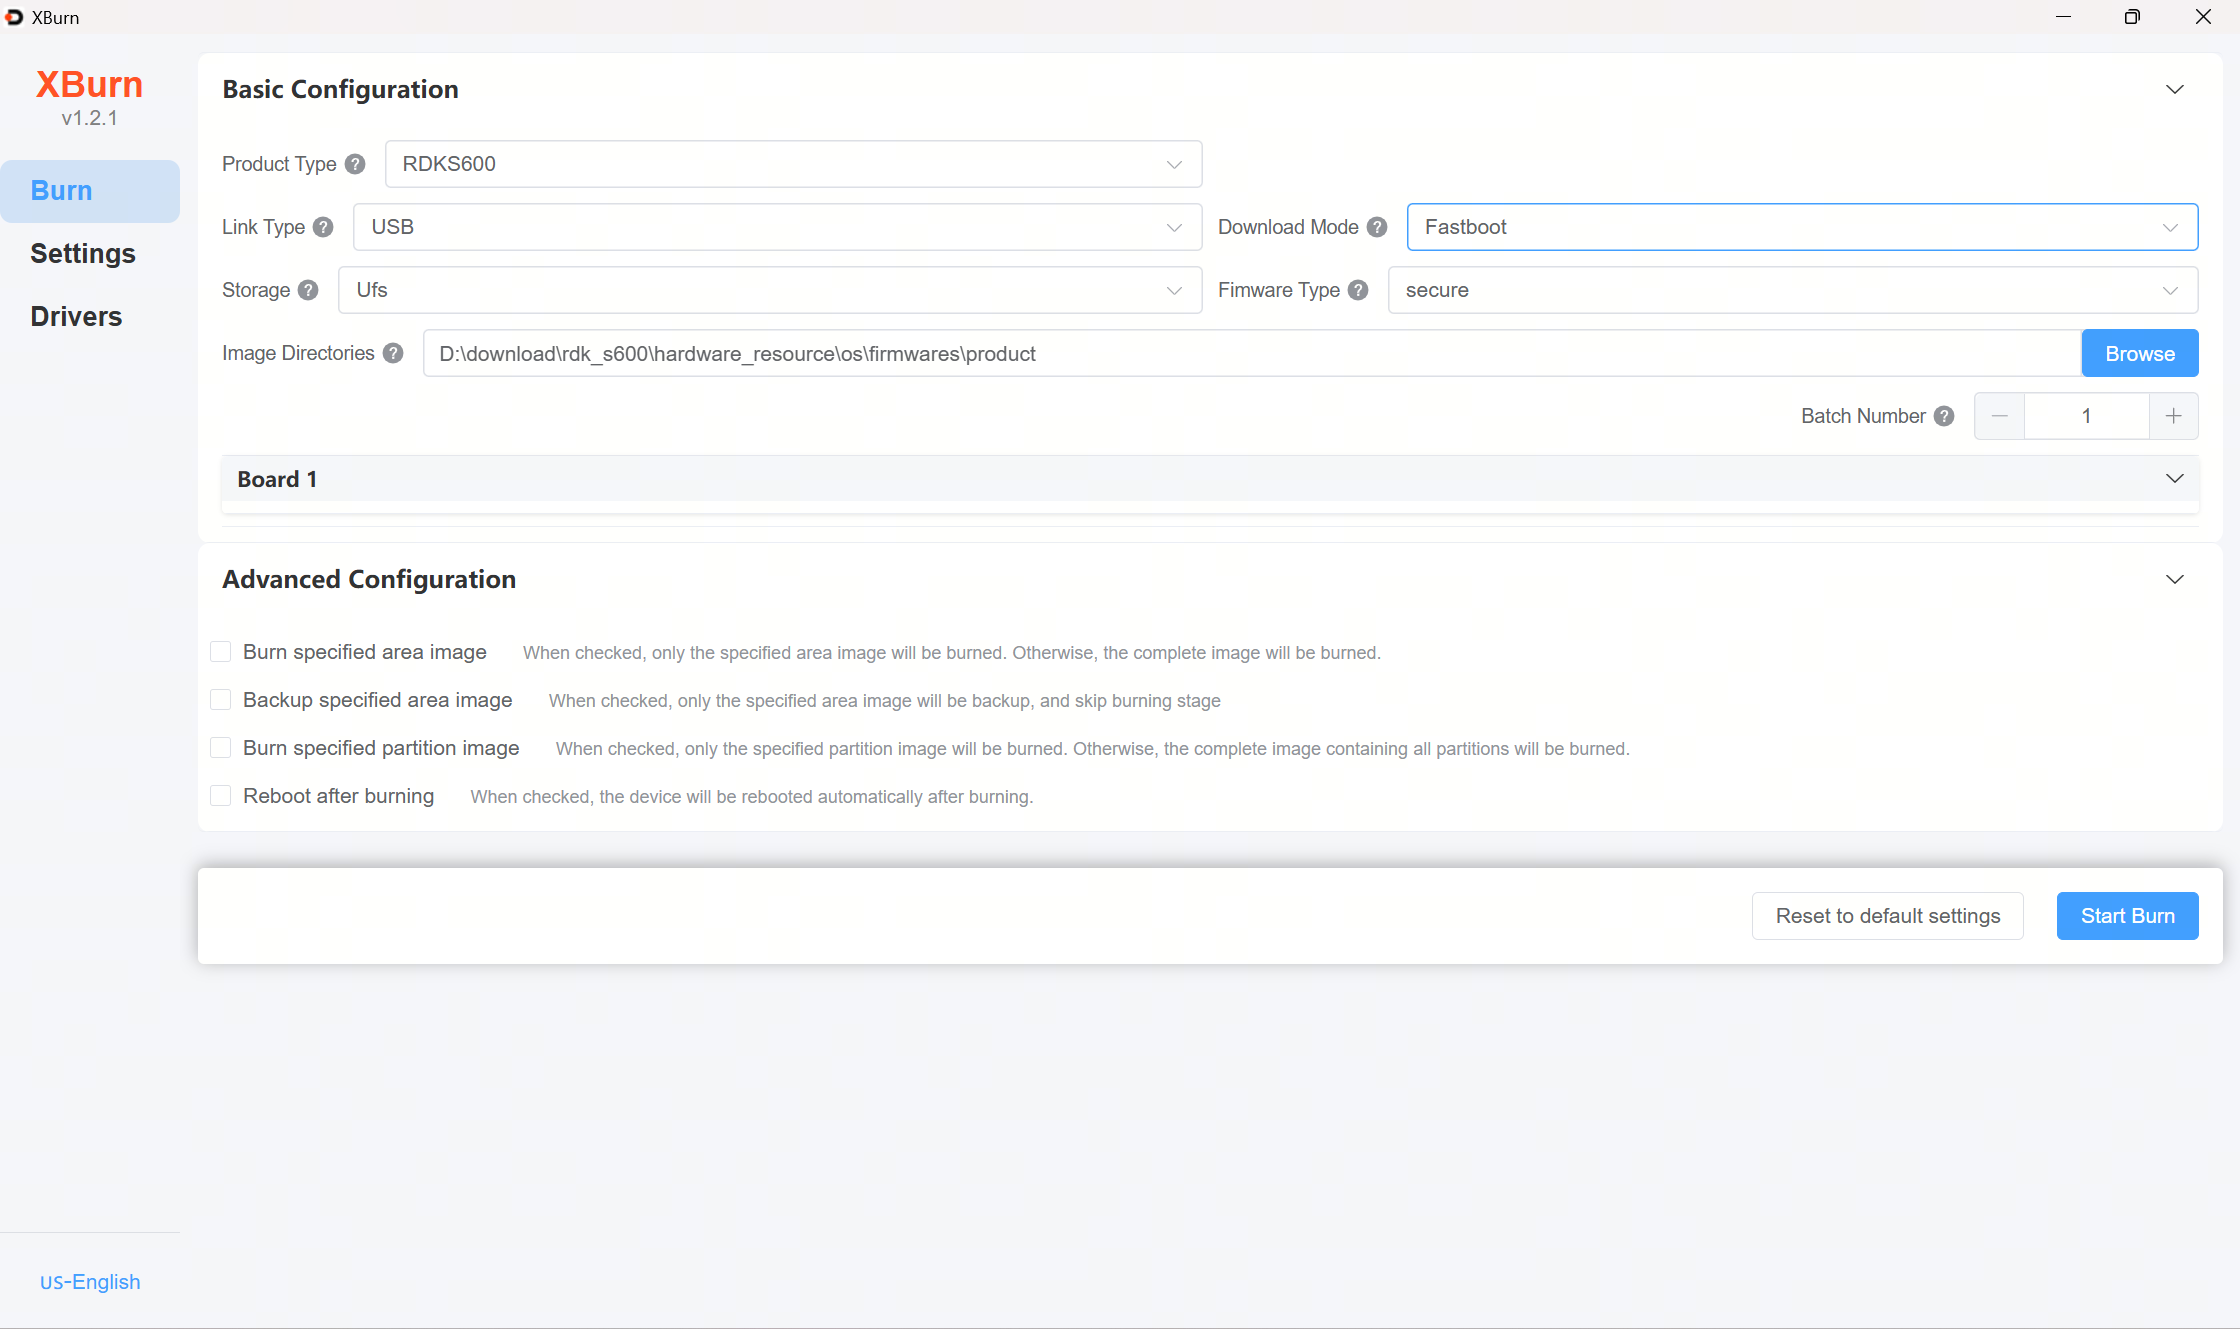
- Product Type:
Click Browse to select the product folder containing the firmware.
Click Start Burn. The device enters Fastboot mode and waits for the upgrade to complete.
Power cycle the device after the upgrade is complete.
4. Designated Area Flashing
Description of Flashing Areas
The RDK S600 supports flashing designated areas via Xburn. The supported flashing areas are as follows:
| Area | Storage Medium | Firmware Content | Image |
|---|---|---|---|
| miniboot_flash | Norflash | Basic boot image on Norflash, including images for system components like HSM/MCU0 | img_packages/disk/miniboot_flash.img |
| miniboot_ufs | ufs | Basic boot image on ufs, including images for system components like BL31/Uboot | img_packages/disk/miniboot_ufs.img |
| ufs | ufs | Complete ufs image, includes miniboot_ufs | img_packages/disk/ufs_disk.img |
Using Xburn for Designated Area Flashing
Take flashing miniboot_flash and miniboot_ufs as an example.
Open Xburn and set the parameters as follows:
- Product Type:
RDKS600 - Link Type:
usb, Download Mode:DFU+Fastboot - Storage:
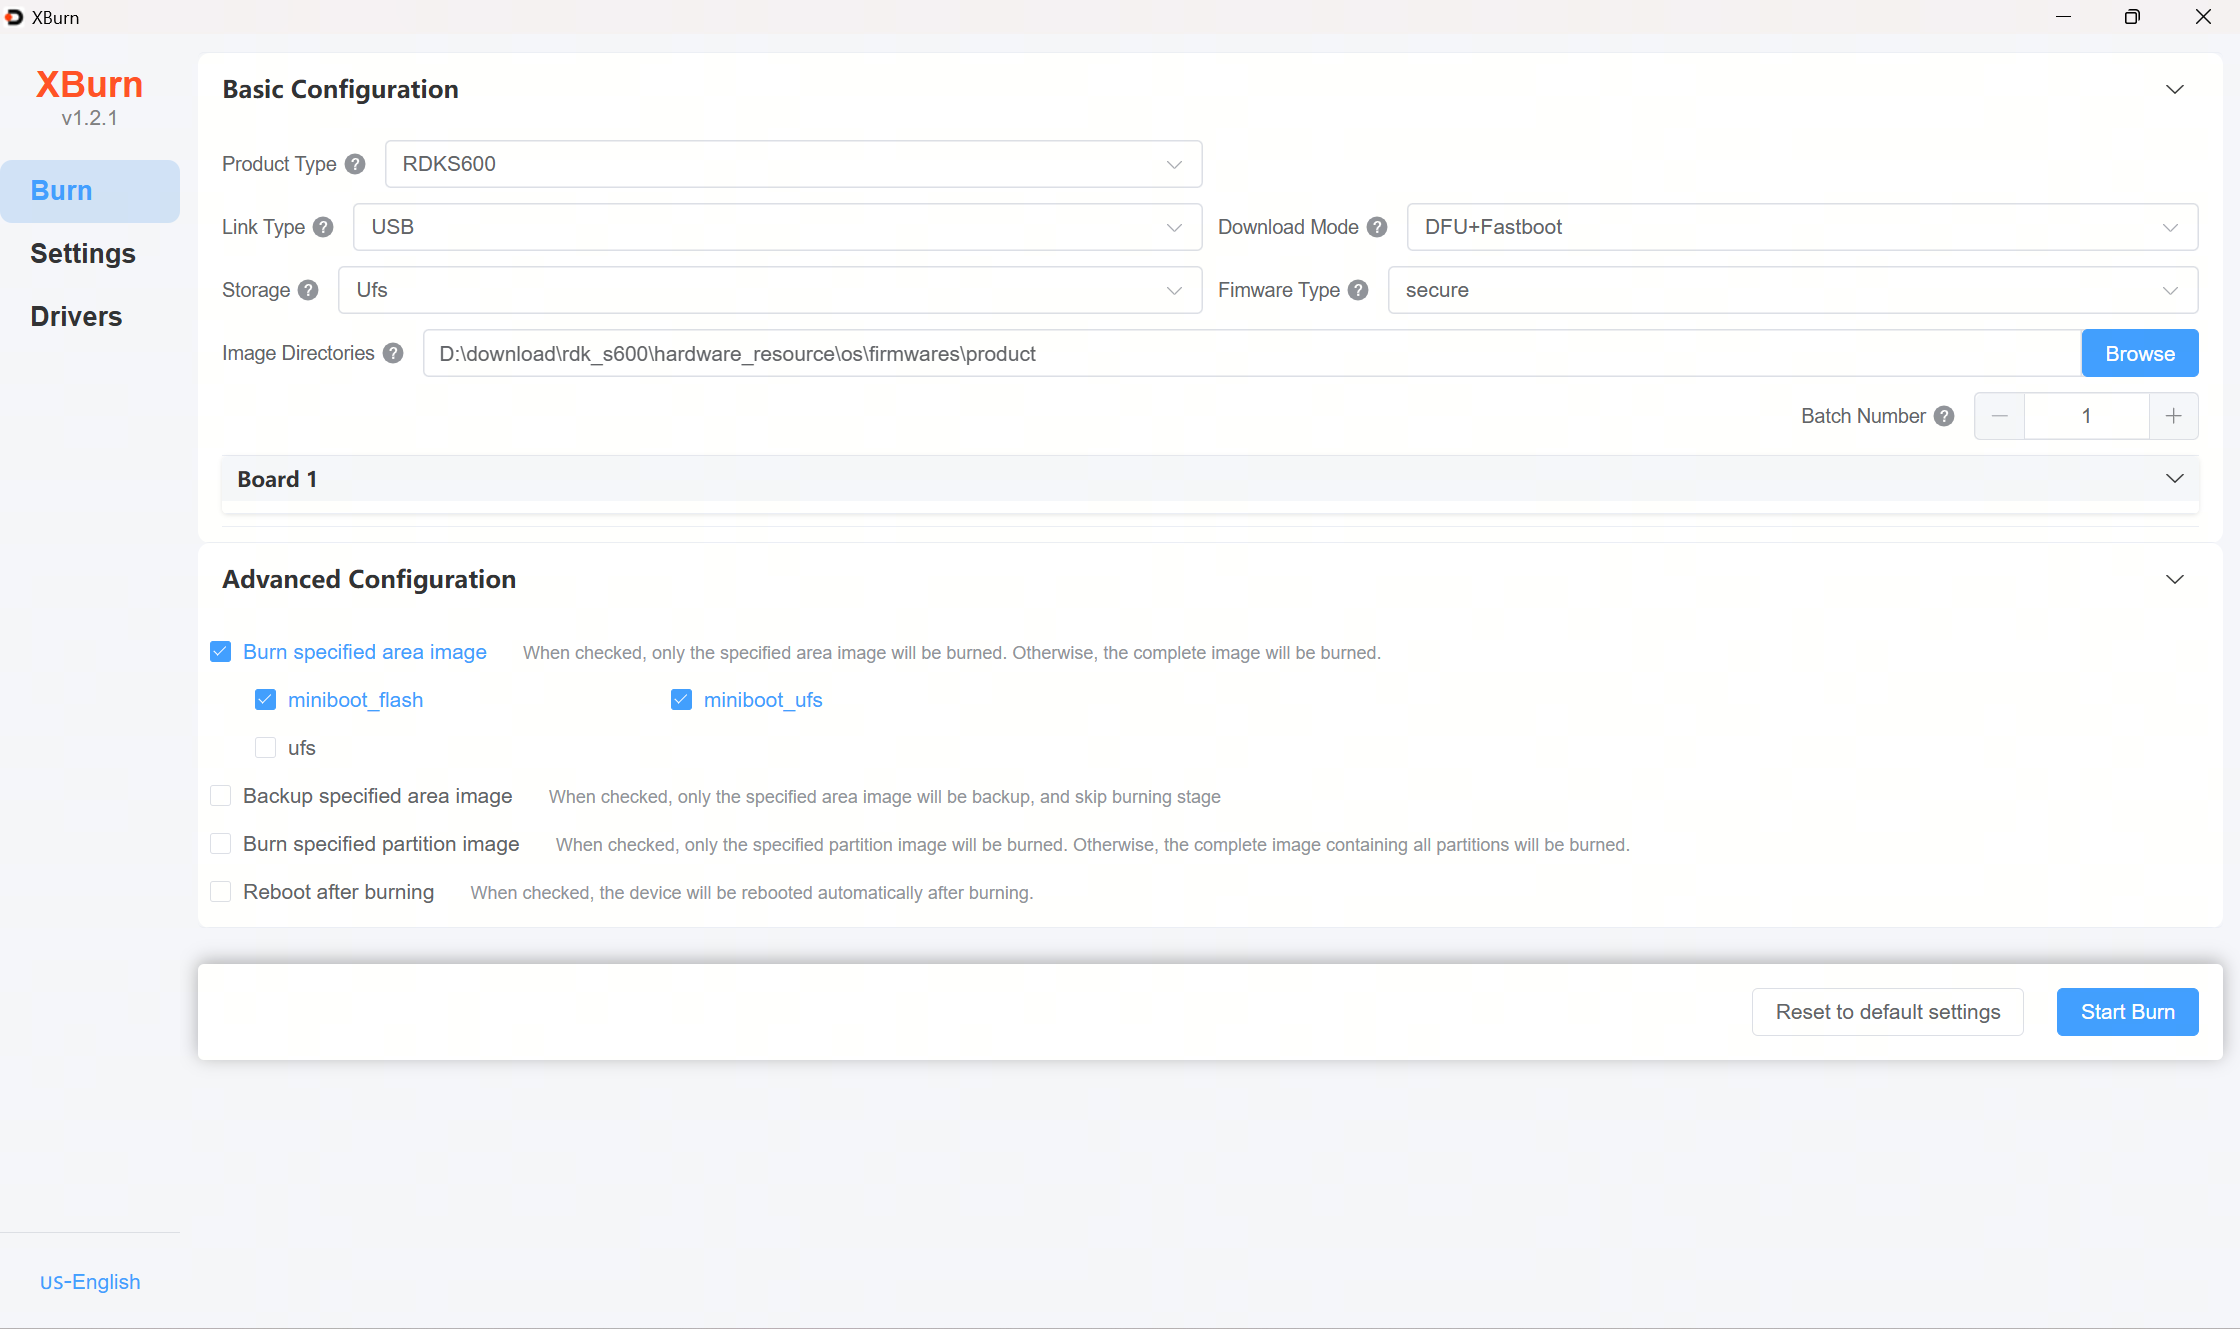
Ufs, Fimware Type:secure - Advanced Configuration: Check
Burn specified area image, checkminiboot_flashandminiboot_ufs
Refer to the settings interface below:
- Click Browse to select the product folder containing the firmware.
- Click Start Burn, power on the device, and wait for the upgrade to complete.
5. Designated Area Backup
Description of Backup Areas
The RDK S600 supports backing up designated areas via Xburn. The supported backup areas are as follows:
| Area | Storage Medium | Firmware Content | Backup Image Path |
|---|---|---|---|
| miniboot_flash | Norflash | Complete Norflash image | img_packages/disk/miniboot_flash_backup.img |
| ufs | ufs | Complete ufs image | img_packages/disk/ufs_disk_backup.img |
Using Xburn for Designated Area Backup
Take backing up miniboot_flash as an example.
Open Xburn and set the parameters as follows:
- Product Type:
RDKS600 - Link Type:
usb, Download Mode:DFU+Fastboot - Storage:
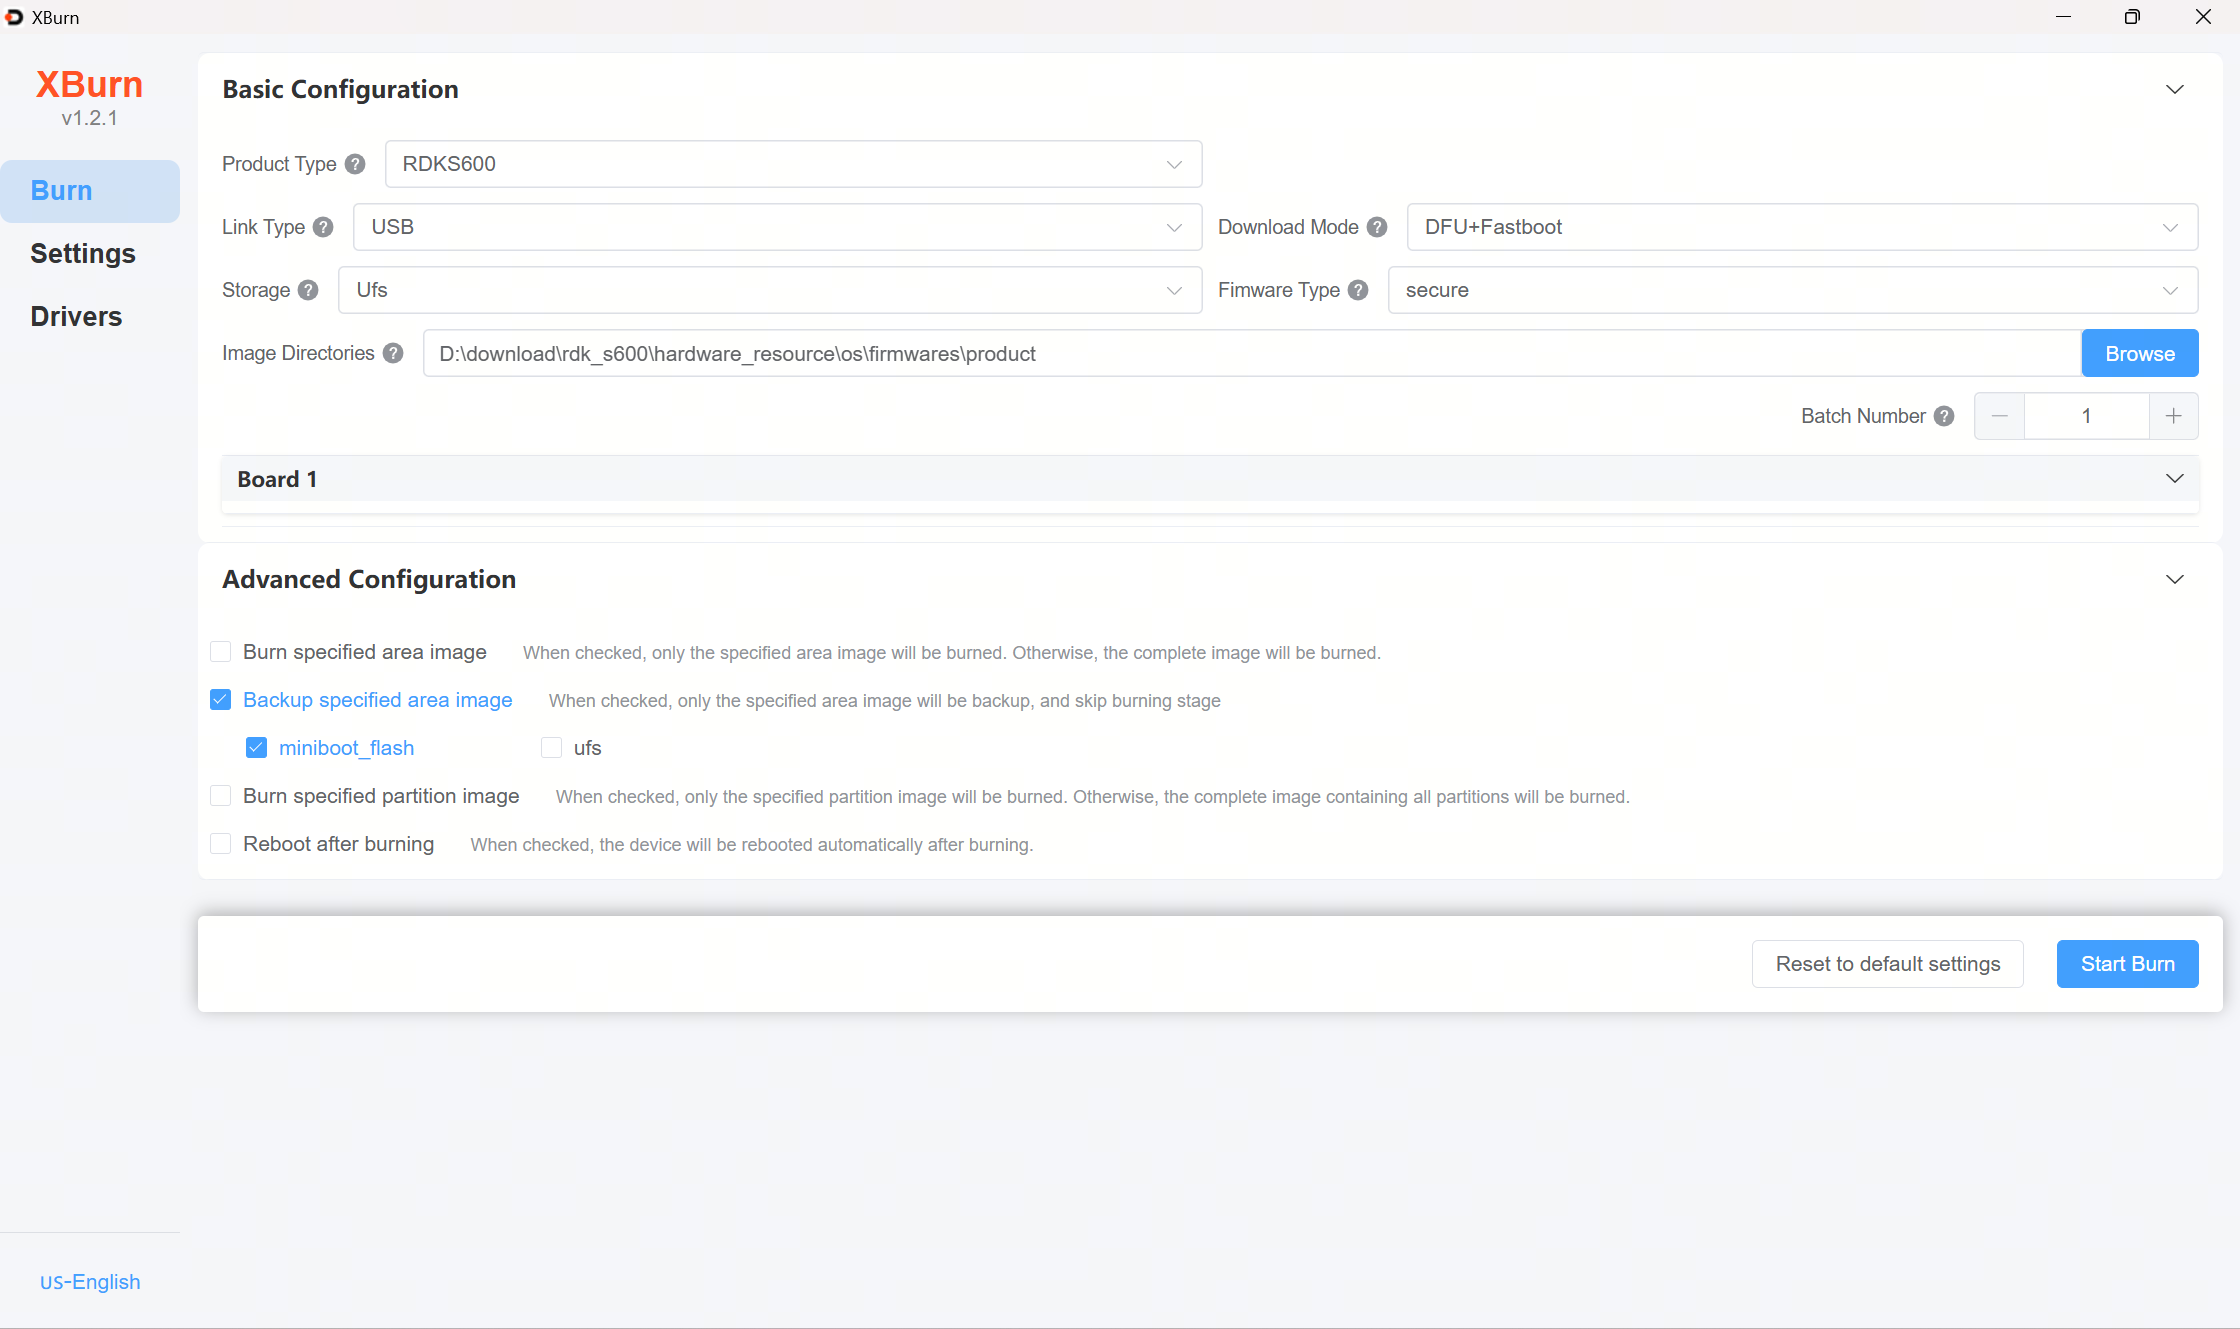
Ufs, Fimware Type:secure - Advanced Configuration: Check
Backup specified area image, checkminiboot_flash
Refer to the settings interface below:
- Click Browse to select the product folder containing the firmware.
- Click Start Burn, power on the device, and wait for the operation to complete.
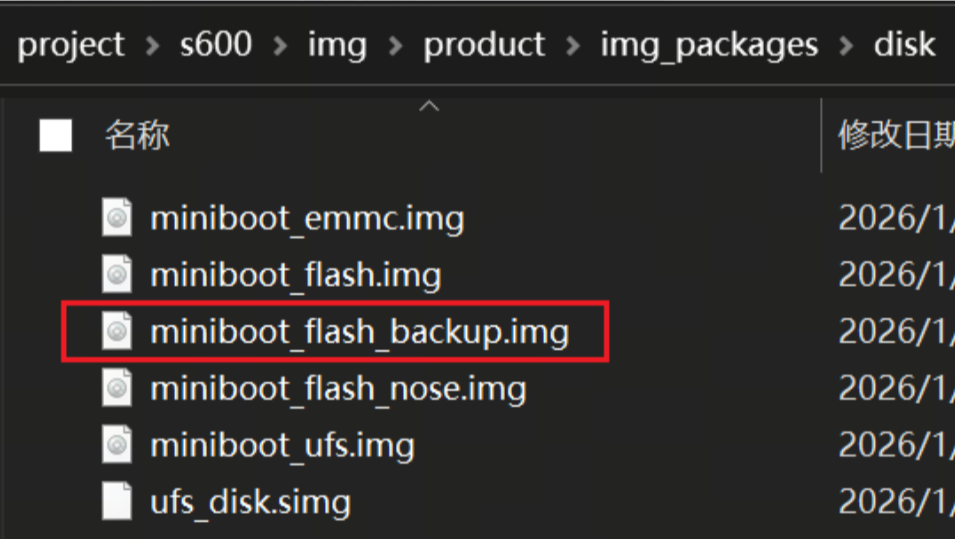
- After the operation is complete, open
img_packages/disk/to view the backup image fileminiboot_flash_backup.img.
Note:
- Backing up entire storage medium data takes a long time. Please wait patiently for the backup to finish.
- If you need to use the backup image, delete the original image first, then rename the new backup image to match the original filename, including the file extension. For example, to use
ufs_disk_backup.img: deleteufs_disk.simg, then renameufs_disk_backup.imgtoufs_disk.simg.
6. Booting the System
First, keep the development board powered off. Connect the development board to a monitor using an HDMI cable. Then, power on the development board.
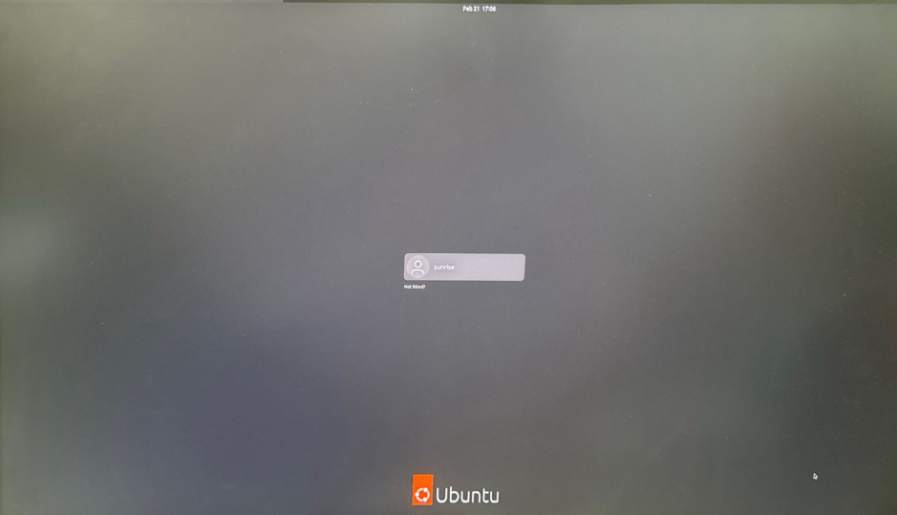
On the first boot, the system will configure the default environment. This process takes about 45 seconds. After configuration, the Ubuntu system desktop will be output on the monitor.
Note:Development Board LED Indicator Description
- Green indicator: Lights up to indicate normal hardware power-on.
If there is no display output for a long time (over 2 minutes) after powering on the development board, it indicates a boot anomaly. Debugging via the serial cable is required to check if the development board is functioning normally.
After the Ubuntu Desktop system finishes booting, the system desktop will be output on the monitor via the Display interface, as shown below:
7. Setting Login Mode
The desktop graphical system supports two login modes:
- Character terminal, automatic login
- Character terminal, manual user login
Modify the serial-getty@ttyS0.service file to set up password-less login as follows:
1.Open serial-getty@.service
# Log in as root uservim /lib/systemd/system/serial-getty@.service# Log in as sunrise usersudo vim /lib/systemd/system/serial-getty@.service2.Change the line containing ExecStart=-/sbin/agetty to:
xxxxxxxxxxExecStart=-/sbin/agetty -a root --keep-baud 921600,115200,38400,9600 %I $TERMParameter explanation: The -a parameter specifies the username for automatic login. -o '-p -- \\u' adds additional customization to the login process: preserves the current environment variables and displays the username in the login prompt.
3.After restarting, the user will be logged in automatically.