Welcome to RDK S600 Developer Kit repository
9.ROS2 action communication
9. ROS2 Action Communication
Note: The accompanying reference video uses the ROS Humble version, for reference only
1. Action Communication Overview
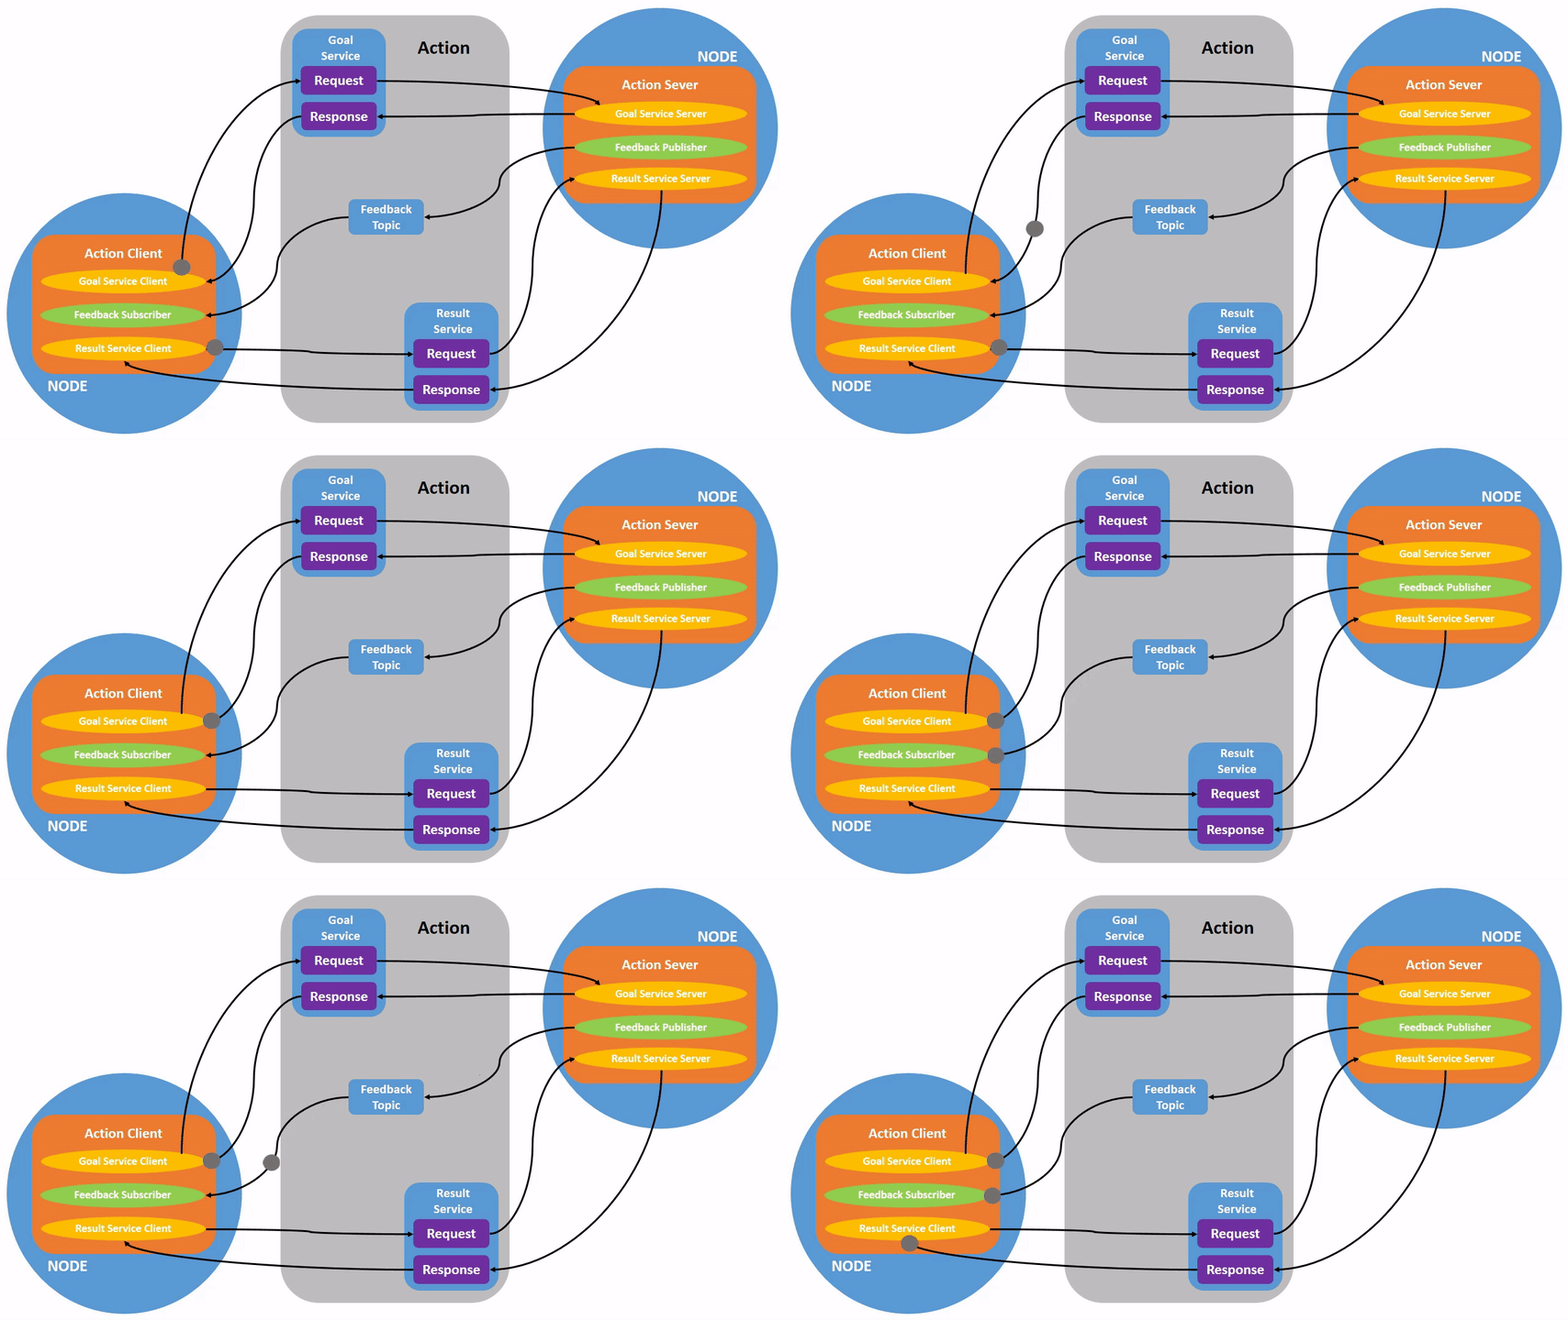
Action communication is a communication model with continuous feedback. In communication, the client sends request data to the server, and the server responds with results to the client. However, during the process from when the server receives the request to when it generates the final response, it continuously sends feedback information to the client.
Action communication client/server model is as follows:
2. Example Introduction
The action client submits an integer N. The action server receives the request data and accumulates all integers from 1 to N, returning the final result to the action client. Moreover, each time it accumulates, it calculates the current progress and sends feedback to the action client.
3. Create New Package
3.1. Create Action Communication Interface Package
Action communication requires creating an action communication interface first:
In the workspace src directory, create the pkg_interfaces package:
ros2 pkg create --build-type ament_cmake pkg_interfaces
Next, create an action folder under the pkg_interfaces package, and create a [Progress.action] file in the action folder with the following content:
xxxxxxxxxxint64 num---int64 sum---float64 progress
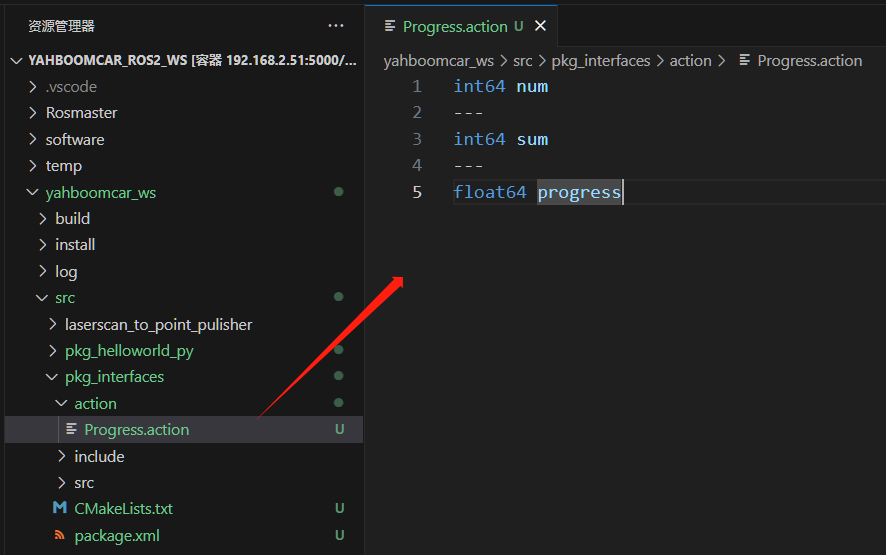
Some dependencies need to be added in package.xml:
xxxxxxxxxx<buildtool_depend>rosidl_default_generators</buildtool_depend><exec_depend>rosidl_default_runtime</exec_depend><depend>action_msgs</depend><member_of_group>rosidl_interface_packages</member_of_group>
Add the following configuration in CMakeLists.txt:
xfind_package(rosidl_default_generators REQUIRED)
rosidl_generate_interfaces(${PROJECT_NAME} "action/Progress.action")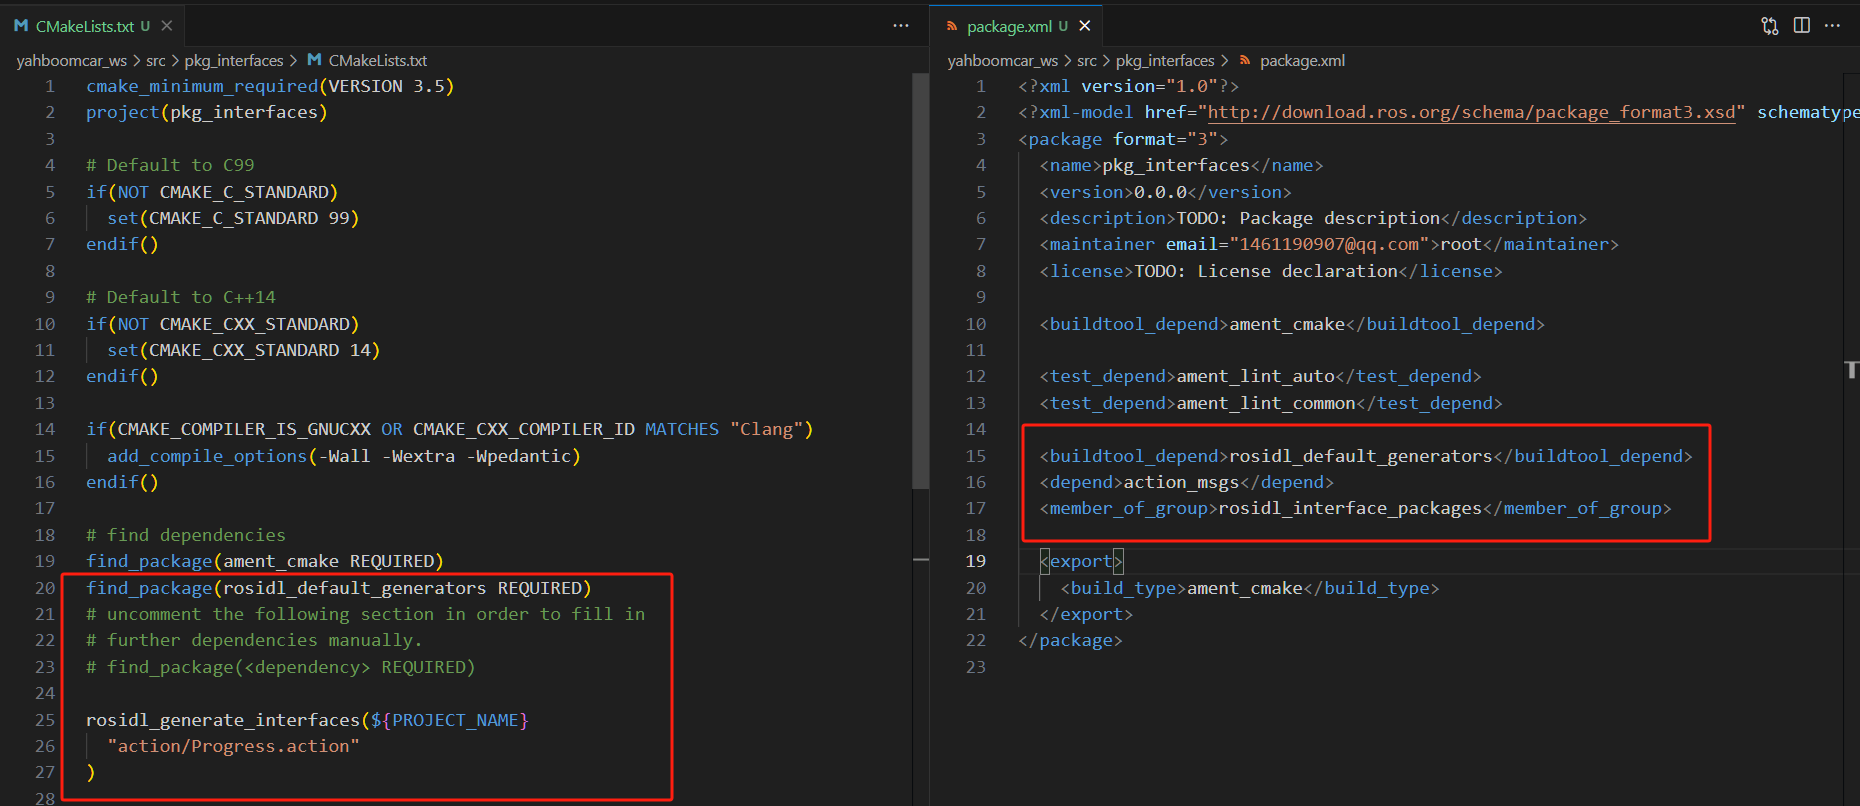
Build the package:
xxxxxxxxxxcolcon build --packages-select pkg_interfaces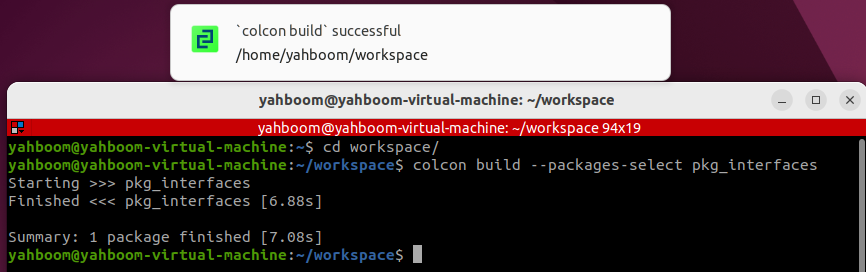
After building, the C++ and Python files corresponding to
Progress.actionwill be generated in the install directory under the workspace. We can also navigate to the workspace in the terminal and use the following command to view the file definition and check if the build is normal:
xxxxxxxxxxsource install/setup.bashros2 interface show pkg_interfaces/action/ProgressUnder normal circumstances, the terminal will output content consistent with the Progress.action file.

3.2. Create Action Communication Package
In the workspace src directory, create the pkg_action package:
xxxxxxxxxxros2 pkg create pkg_action --build-type ament_python --dependencies rclpy pkg_interfaces --node-name action_server_demoAfter executing the above command, the pkg_action package will be created, along with an action_server_demo node, and the related configuration files will already be set up.
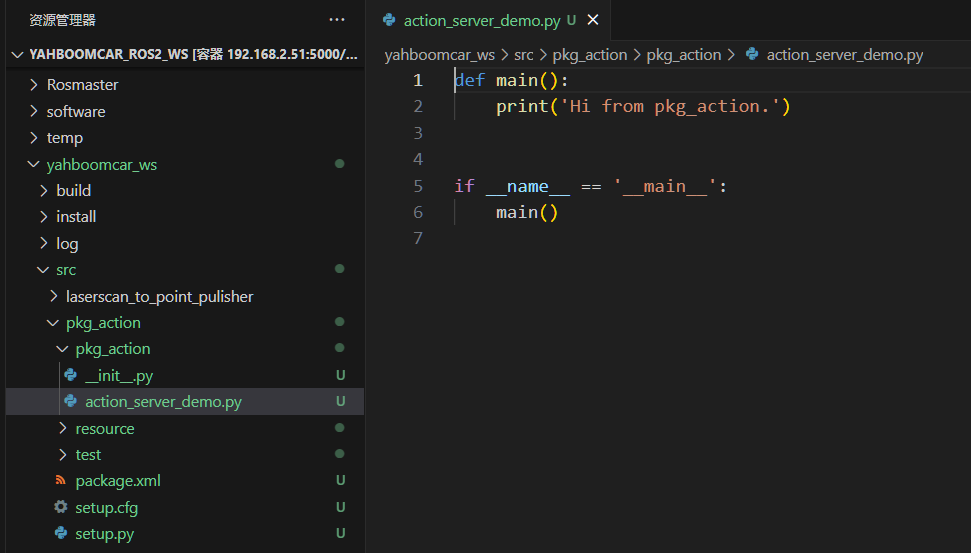
4. Action Server Implementation
4.1 Create Action Server
Next, edit [action_server_demo.py] to implement the action server functionality. Add the following code:
xxxxxxxxxximport timeimport rclpyfrom rclpy.action import ActionServerfrom rclpy.node import Node
from pkg_interfaces.action import Progress

class Action_Server(Node):
    def __init__(self):        super().__init__('progress_action_server')        # Create action server        self._action_server = ActionServer(            self,            Progress,            'get_sum',            self.execute_callback)        self.get_logger().info('Action server started!')
    def execute_callback(self, goal_handle):        self.get_logger().info('Starting task....')

        # Generate continuous feedback;        feedback_msg = Progress.Feedback()
        sum = 0        for i in range(1, goal_handle.request.num + 1):            sum += i            feedback_msg.progress = i / goal_handle.request.num            self.get_logger().info('Continuous feedback: %.2f' % feedback_msg.progress)            goal_handle.publish_feedback(feedback_msg)            time.sleep(1)
        # Generate final response.        goal_handle.succeed()        result = Progress.Result()        result.sum = sum        self.get_logger().info('Task completed!')
        return result

def main(args=None):
    rclpy.init(args=args)    # Call spin function with node object    Progress_action_server = Action_Server()    rclpy.spin(Progress_action_server)    Progress_action_server.destroy_node()    # Release resources    rclpy.shutdown()
4.2 Edit Configuration File
Open setup.py and add to the console_scripts list:
xxxxxxxxxx'action_server_demo = pkg_action.action_server_demo:main',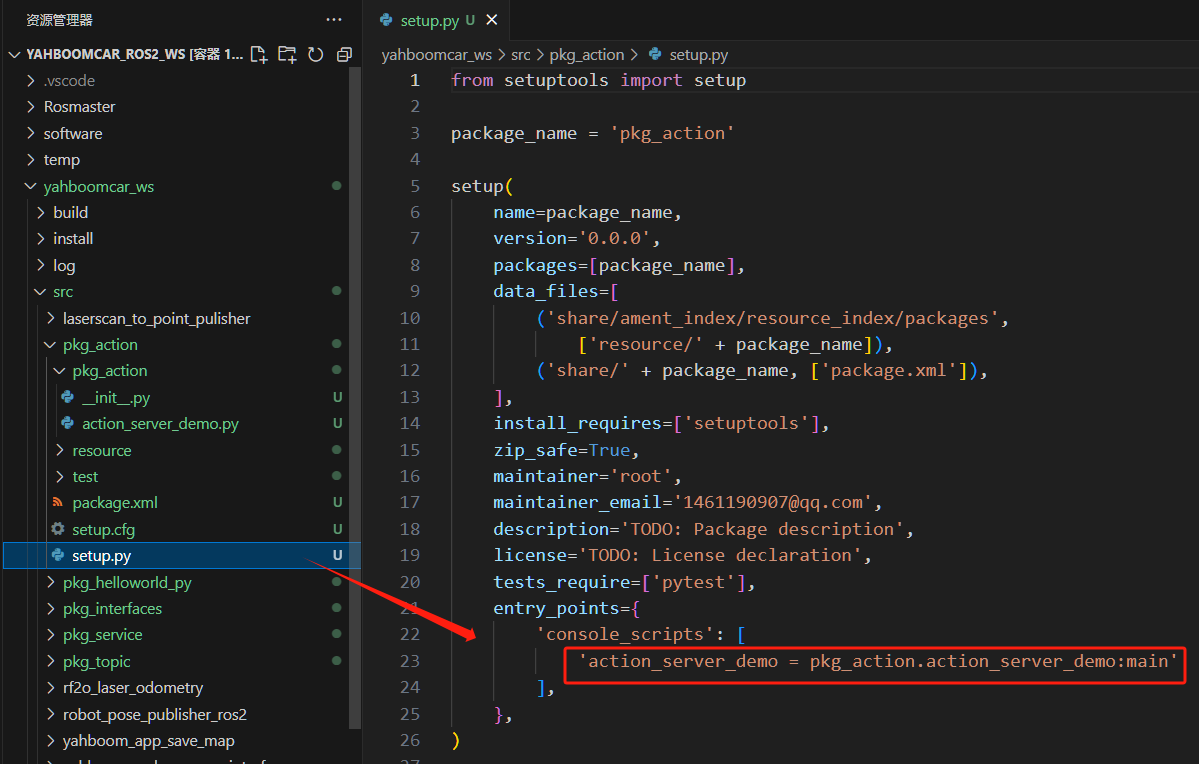
4.3 Build Package
xxxxxxxxxxcolcon build --packages-select pkg_action
4.4 Run Program
xxxxxxxxxxros2 run pkg_action action_server_demo

Enter in another terminal:
xxxxxxxxxxros2 action list
/get_sum is the action we need to call. Use the following command to call it:
xxxxxxxxxxros2 action send_goal /get_sum pkg_interfaces/action/Progress "{num: 10}"
Here we calculate the sum from 1 to 10:
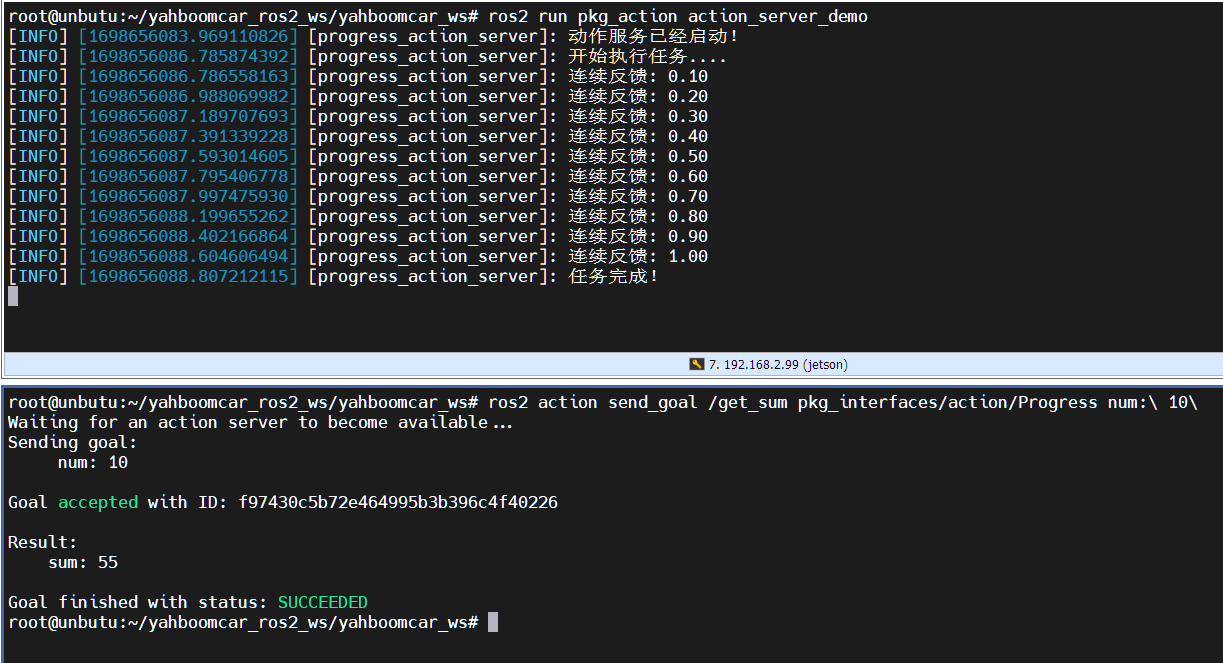
In the image above, the top is the server and the bottom is the client. You can see that during the calculation of the sum from 1 to 10, the server continuously sends feedback on the calculation progress. Finally, it shows task completion, and the client also received the feedback with the sum being 55.
5. Action Client Implementation
5.1 Create Action Client
Create a new file [action_client_demo.py] in the same directory as [action_server_demo.py]:
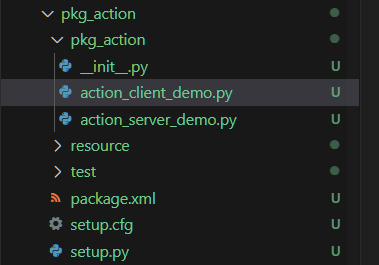
Next, edit [action_client_demo.py] to implement the action client functionality. Add the following code:
xxxxxxxxxximport rclpyfrom rclpy.action import ActionClientfrom rclpy.node import Nodefrom pkg_interfaces.action import Progress
class Action_Client(Node):    def __init__(self):        super().__init__('progress_action_client')        # Create action client;        self._action_client = ActionClient(self, Progress, 'get_sum')
    def send_goal(self, num):        # Send request;        goal_msg = Progress.Goal()        goal_msg.num = num        self._action_client.wait_for_server()        self._send_goal_future = self._action_client.send_goal_async(goal_msg, feedback_callback=self.feedback_callback)        self._send_goal_future.add_done_callback(self.goal_response_callback)
    def goal_response_callback(self, future):        # Handle feedback after goal is sent;        goal_handle = future.result()        if not goal_handle.accepted:            self.get_logger().info('Request rejected')            return
        self.get_logger().info('Request accepted, starting task!')
        self._get_result_future = goal_handle.get_result_async()        self._get_result_future.add_done_callback(self.get_result_callback)
    # Handle final response.    def get_result_callback(self, future):        result = future.result().result        self.get_logger().info('Final calculation result:sum = %d' % result.sum)        # 5. Release resources.        rclpy.shutdown()
    # Handle continuous feedback;    def feedback_callback(self, feedback_msg):        feedback = (int)(feedback_msg.feedback.progress * 100)        self.get_logger().info('Current progress: %d%%' % feedback)

def main(args=None):    rclpy.init(args=args)    action_client = Action_Client()    action_client.send_goal(10)    rclpy.spin(action_client)
5.2 Edit Configuration File
Open setup.py and add to the console_scripts list:
xxxxxxxxxx'action_client_demo = pkg_action.action_client_demo:main'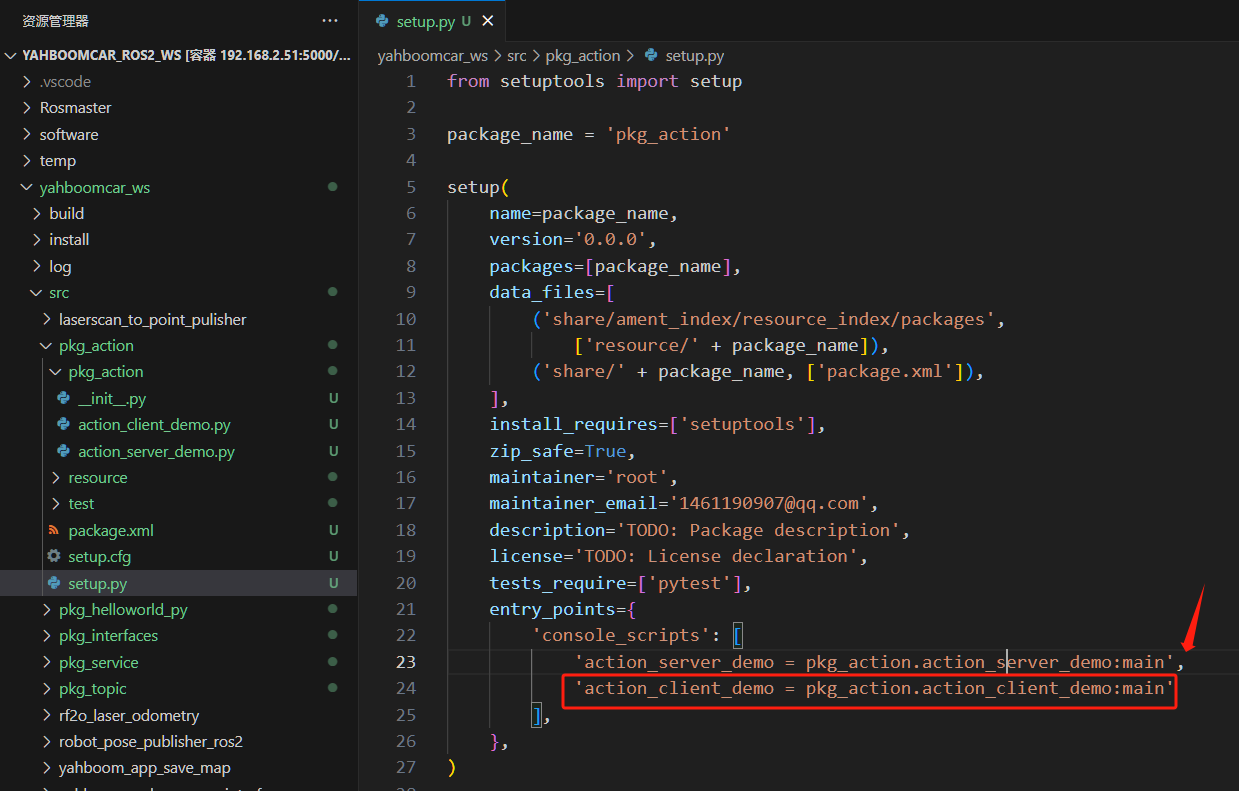
5.3 Build Package
xxxxxxxxxxcolcon build --packages-select pkg_action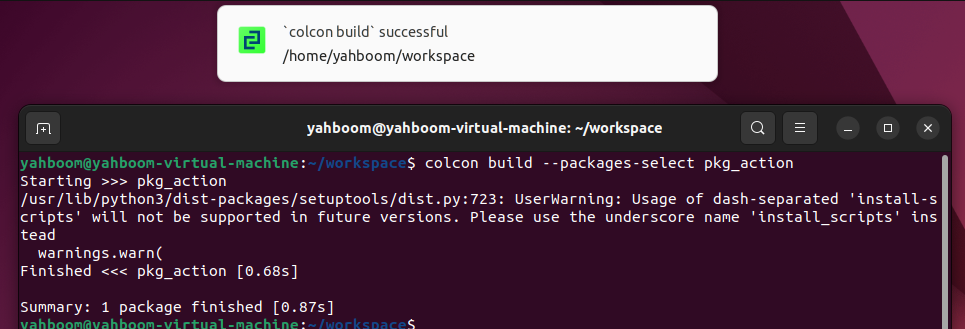
5.4 Run Program
Split terminal and execute:
xxxxxxxxxx# Start action server noderos2 run pkg_action action_server_demo# Start action client noderos2 run pkg_action action_client_demo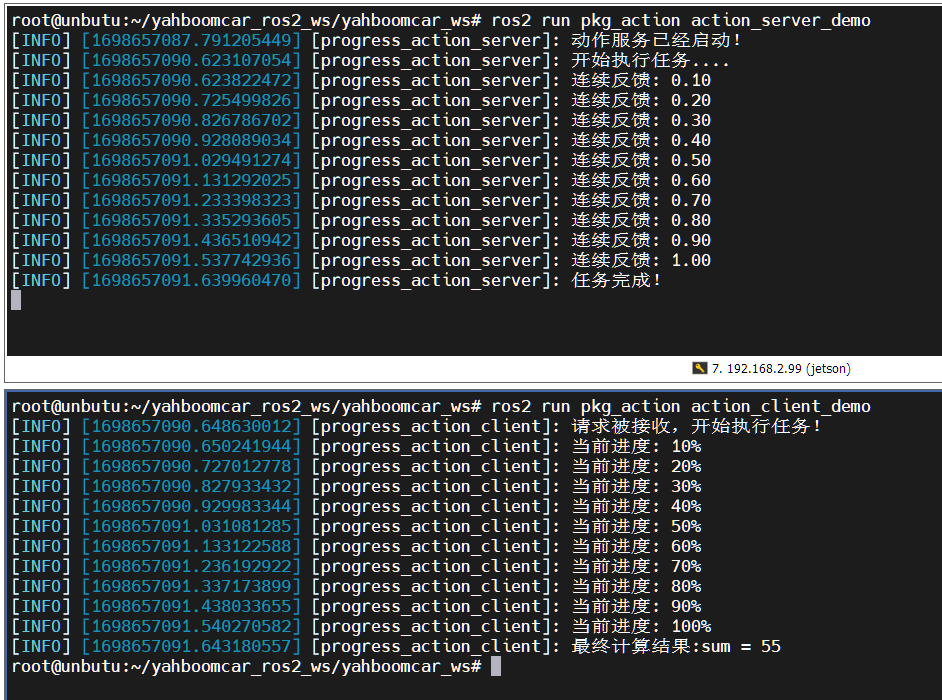
In the image above, the top is the server and the bottom is the client. Here we calculate the sum from 1 to 10. You can see that during the calculation, the server continuously sends feedback on the calculation progress. Finally, it shows task completion, and the client received the feedback with the sum being 55.