Welcome to MSPM0G3519 Development Board repository
8. ADC Acquisition
ADC Acquisition
ADC Acquisition1. Learning ObjectivesADC PrincipleADC Basic Parameters2. Hardware Setup3. Experiment Steps1. Open SYSCONFIG Configuration Tool2. ADC Parameter Configuration3. ADC Acquisition Channel Configuration4. Serial Parameter Configuration5. Write Program6. Compile4. Program Analysis5. Experimental Phenomena
1. Learning Objectives
Understand basic ADC knowledge.
Learn the basic use of ADC and display the acquired values on the serial assistant.
ADC Principle
ADC (analog to digital converter) is used to convert analog signals (such as voltage) into digital signals. Analog signals change continuously, while digital signals are discrete binary numbers. ADC converts analog signals to digital data through sampling and quantization, so that processors or microcontrollers can perform subsequent processing. According to conversion principles, they are mainly divided into successive approximation, dual-slope, and voltage-to-frequency conversion types.
MSPM0G3519 uses successive approximation (SAR) ADC, which is a common ADC working principle. Its basic idea is to gradually approach the digital representation of the input signal by comparing the size relationship between the analog signal and the reference voltage. In the successive approximation ADC, the input signal and reference voltage are compared through a differential amplifier to generate a differential voltage. Then, this differential voltage is input to a gradually approaching digital quantizer, which compares it with a series of reference voltages at each approximation stage. At each approximation stage, the quantizer compares the input signal with an intermediate voltage point and selects a higher or lower reference voltage as the reference for the next approximation stage based on the comparison result. This process continues until the quantizer finally approaches a digital output value.
ADC Basic Parameters
Resolution:
Resolution represents the accuracy of ADC converter output, usually measured in bits (bit), such as 8-bit, 10-bit, 12-bit, etc. Higher resolution means the ADC can represent more discrete digital values, thereby providing higher accuracy.
MSPM0G3519 supports 8-bit, 10-bit, and 12-bit resolution. Users can select the appropriate resolution for configuration based on their needs.
Sample Rate:
Sample rate (also called conversion rate) represents the rate at which ADC samples the analog input signal, usually expressed in samples per second (SPS). It indicates how many analog-to-digital conversions the ADC can perform per second.
MSPM0G3519 has a sample rate of 4Msps (4 million samples per second), suitable for high-frequency signal acquisition and real-time data processing.
Voltage Reference:
The ADC voltage reference is a reference voltage used to compare with the analog input signal to finally achieve conversion from analog signal to digital signal. The accuracy and stability of the voltage reference are crucial to the ADC conversion accuracy.
MSPM0G3519
supports three voltage reference configurations:
Internally configurable reference voltage: 1.4V and 2.5V dedicated ADC reference voltage (VREF).
MCU power supply voltage (VDD) as the reference voltage.
External reference voltage provided through VREF+ and VREF- pins. If the voltage reference is not configured, the MCU power supply voltage (VDD) is used as the reference voltage by default.
Sampling Range:
Sampling range represents the voltage range of analog input signals that ADC can acquire, which is closely related to the reference voltage setting. The range is as follows: VREF- ≤ ADC ≤ VREF+
VREF-: The set reference voltage negative terminal, usually 0V.
VREF+: The set reference voltage positive terminal, determined by software configuration.
These parameters together determine the ADC performance, including its accuracy, response speed, and input voltage range.
2. Hardware Setup
MSPM0G3519 uses a 12-bit successive approximation ADC. It has 17 multiplexed channels for conversion. The 17 external channels each correspond to a pin on the microcontroller. This pin is not fixed. For details, please refer to the pin diagram or data manual.
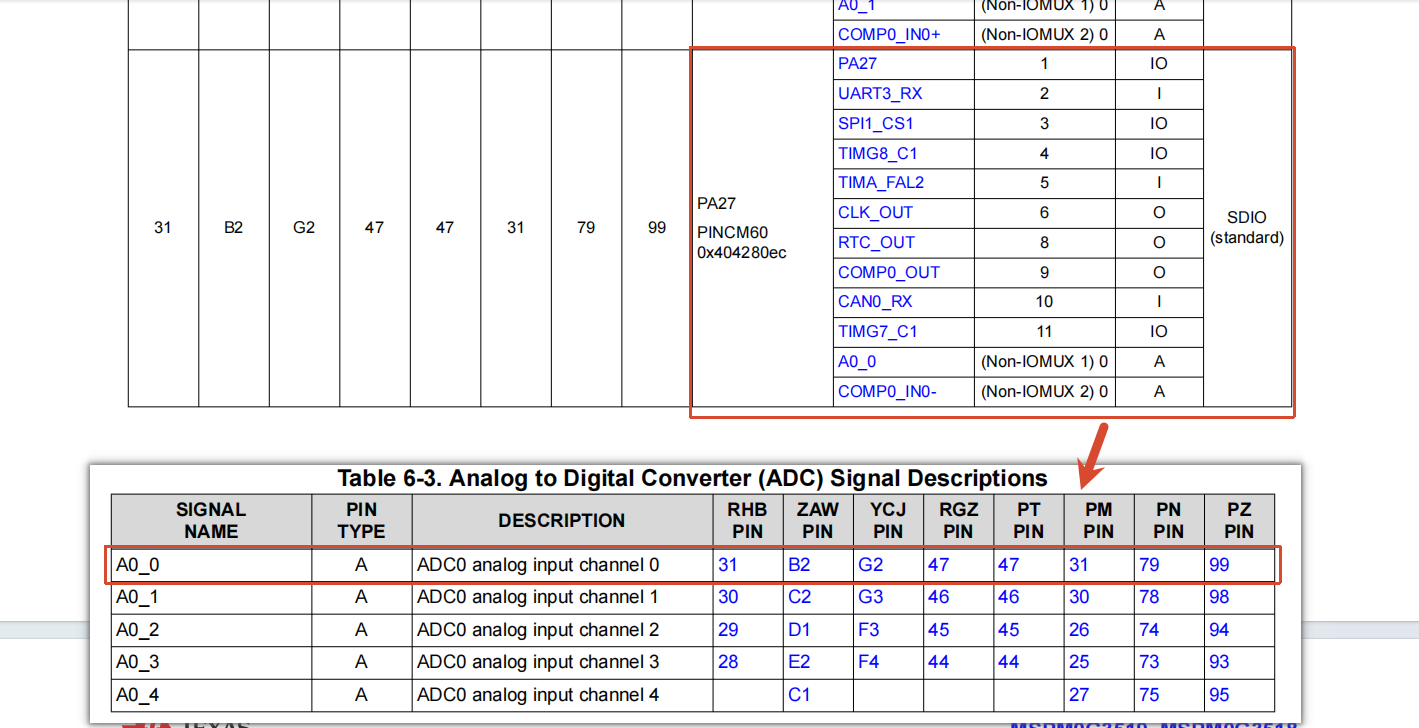
Various channel A/D conversions can be configured in single or sequence conversion mode.
Single Conversion Mode: After each ADC conversion is completed once, the ADC automatically stops and stores the result in the ADC data register.
Repeated Single Conversion Mode: When the ADC completes one conversion, it automatically starts another conversion, continuously performing conversions until stopped by an external trigger or software trigger.
Multi-channel Sequential Single Conversion Mode: Used for sequential conversion of multiple input channels. In this mode, the ADC samples and converts multiple channels sequentially according to the configured channel acquisition order.
Multi-channel Sequential Repeated Conversion Mode: Used for sequential repeated conversion of multiple input channels. In this mode, the ADC performs repeated sampling and conversion of multiple channels sequentially according to the configured channel acquisition order.
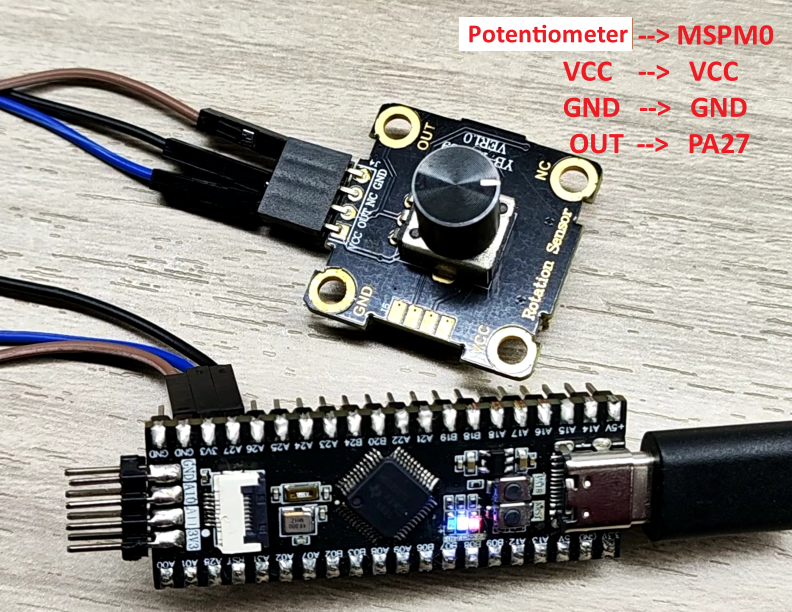
This case acquires the PA27 pin voltage through ADC. The potentiometer module and Dupont wires needed for the ADC acquisition experiment need to be purchased separately. You can also use other input voltage methods.
3. Experiment Steps
This case uses PA27 pin voltage acquisition as the experimental case. Through ADC acquisition of its voltage changes, implement serial port printing of voltage status.
1. Open SYSCONFIG Configuration Tool
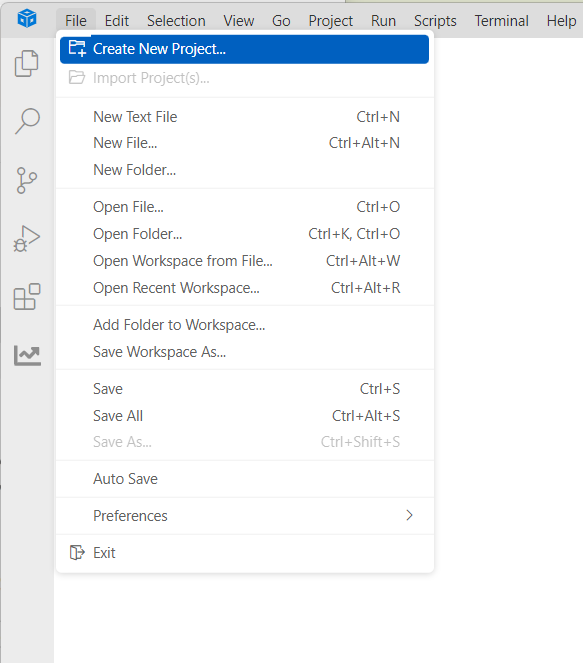
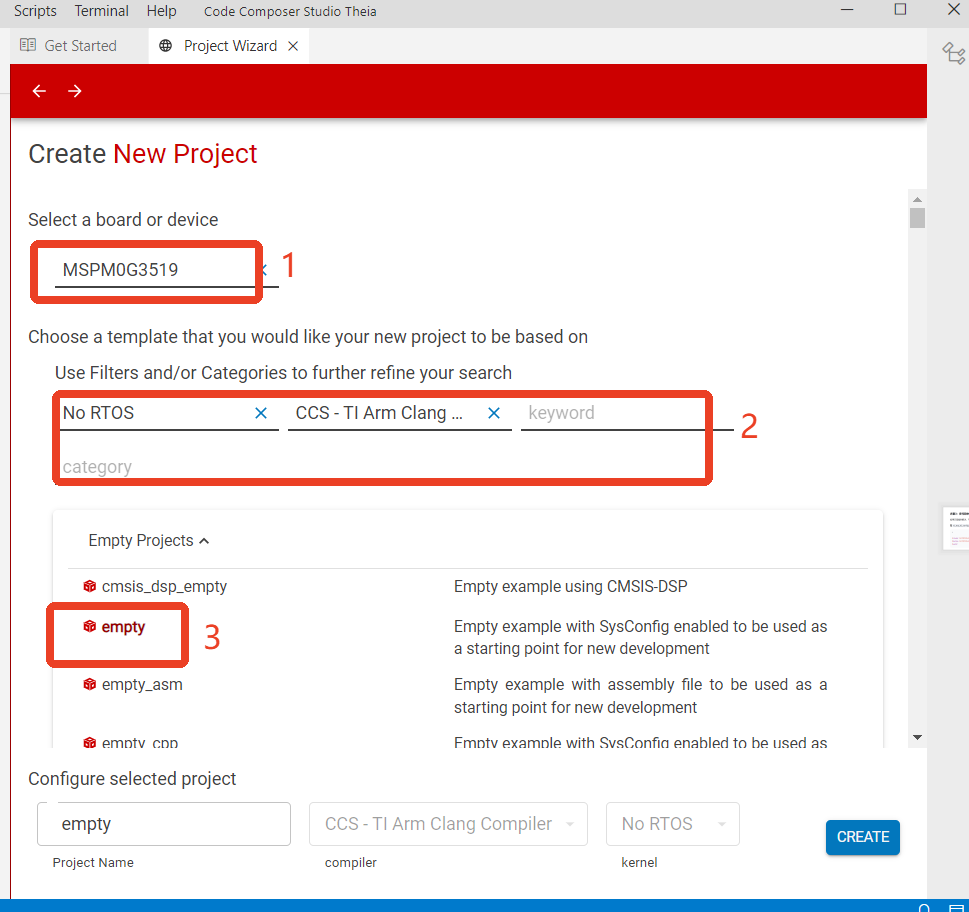
Create a new empty project empty in CCS.
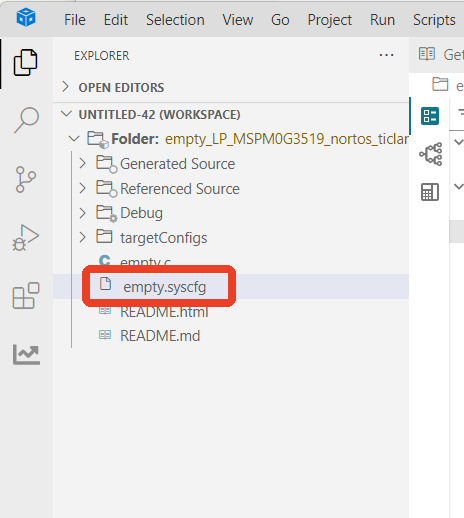
Find and open the empty.syscfg file in the left workspace of CCS.
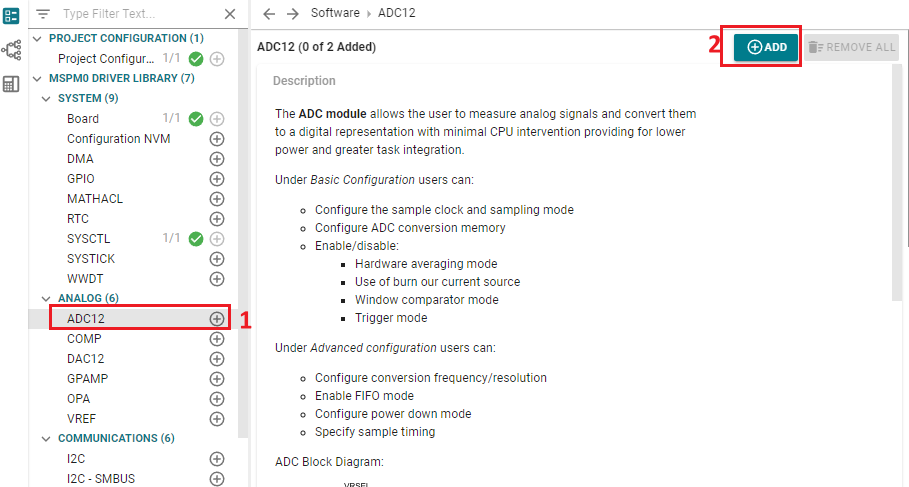
In SYSCONFIG, select MCU peripherals on the left, find the ADC12 option and click to enter. Click ADD in ADC12 to add an ADC peripheral.
2. ADC Parameter Configuration
The configuration here uses 32MHz ADC frequency, 4MHz sample rate, single repeated conversion mode, software-triggered ADC start sampling, and binary right-aligned data format.
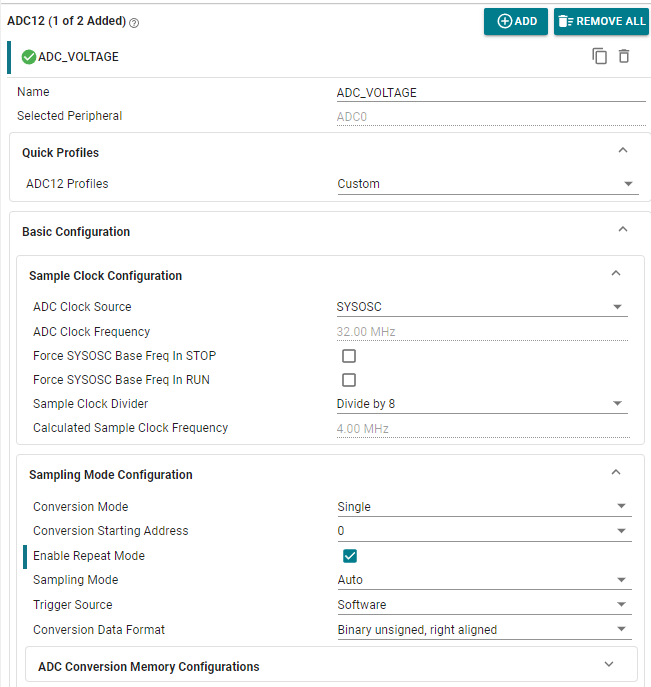
Parameter description:
ADC Clock Source: ADC clock source. Set to SYSOSC(32MHz).
ADC Clock Frequency: Shows the current ADC clock frequency.
Sample Clock Divider: Sample divider. Set to 8 divider.
Calculated Sample clock Freguency: Shows the sample frequency after division.
Conversion Mode: Conversion mode. Set to Single, single.
Conversion Starting Address: Conversion starting address. Configure to start sampling from the 0th (related to the storage register later).
Enable Repeat Mode: Whether to enable repeat conversion. Checked here, enabled.
Sampling Mode: Sampling mode. Set to Auto, automatic.
Trigger Source: ADC trigger mode. Configure as Software software trigger mode.
Conversion Data Format: ADC data conversion format. Configure as Binary unsigned, right aligned binary format right-aligned.
MSPM0G3519's ADC supports multiple data alignment methods to adapt to different application scenarios. Common data alignment methods include left-aligned and right-aligned.
Right-aligned mode: In right-aligned mode, ADC data is right-aligned to the lowest bit after conversion, with insufficient bits filled with 0 in the high bits. Right-aligned mode provides better dynamic range without precision loss.
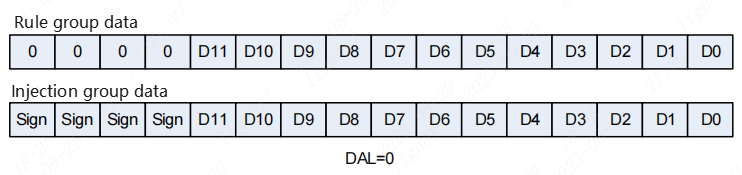
Left-aligned mode: In left-aligned mode, ADC data is left-aligned to the highest bit, with insufficient bits filled with 0 in the low bits. Left-aligned mode can improve resolution but will cause reduced dynamic range.
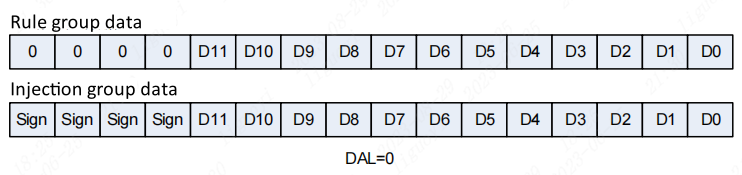
We configured as right-aligned mode, so we can directly perform operations on the converted data.
3. ADC Acquisition Channel Configuration
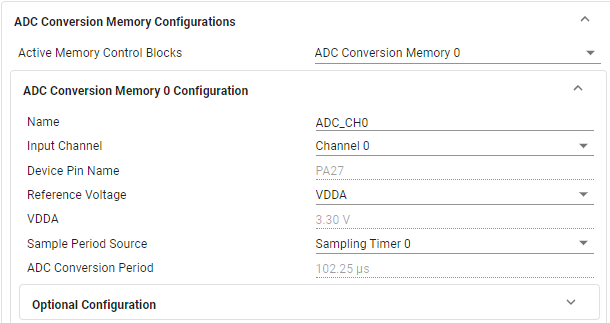
Parameter description:
Active Memory Control Blocks: ADC data storage address. Store ADC conversion result in register 0.
Input Channel: Input channel. Select channel 0 (each channel corresponds to a different pin).
Device Pin Name: Pins automatically selected based on channel. Channel 0's pin is PA27.
Reference Voltage: Voltage reference. Configure to use MCU power VDDA.
ADC Conversion Period: Shows the time for ADC to convert a single data.
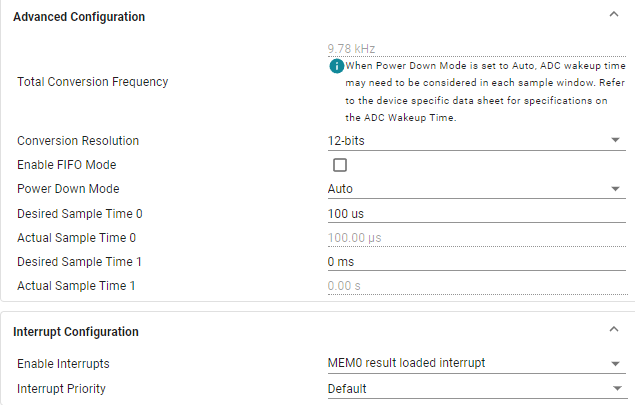
Parameter description:
Conversion Resolution: Resolution configured as 12-bits.
Desired Sample Time 0: Sample time set to 10ms.
Enable interrupts: Enable ADC acquisition complete interrupt. When ADC acquisition completes, it triggers an interrupt, and we perform data processing.

4. Serial Parameter Configuration
This case outputs ADC acquired values to the upper computer (computer) display via serial port, so serial port sending function also needs to be configured. The not shown part is the default option.
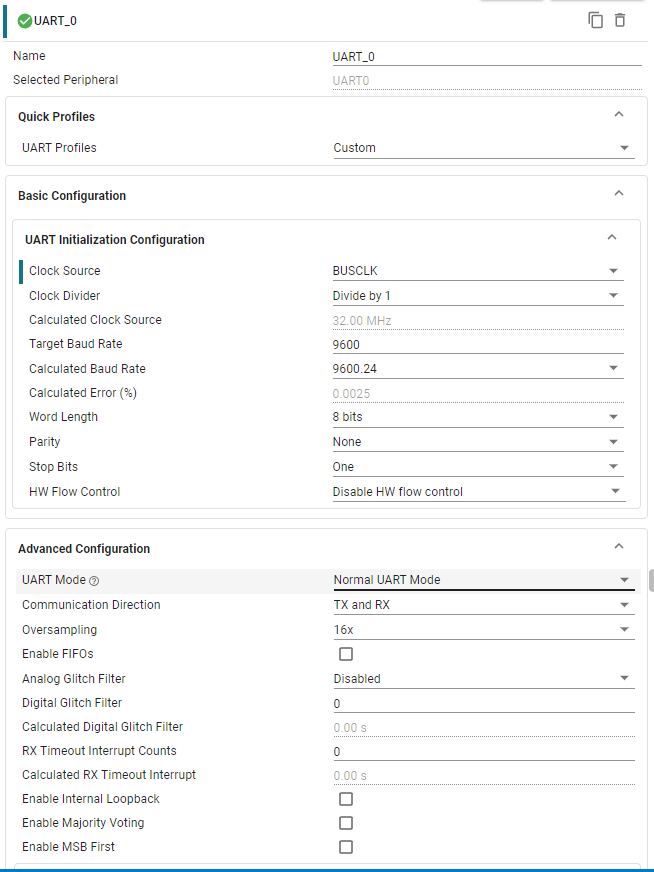

Save the configuration in the .syscfg file using the shortcut key Ctrl+S.
5. Write Program
In the empty.c file, write the following code
x#include "ti_msp_dl_config.h"#include "stdio.h"
volatile bool gCheckADC; //ADC acquisition success flagunsigned int adc_getValue(void);//Read ADC data
//Send string via serial portvoid uart0_send_string(char* str){ // The current string address is not at the end and the string's first address is not empty while(*str!=0&&str!=0) { // Wait when serial port 0 is busy, and send the incoming characters when it is not busy while( DL_UART_isBusy(UART_0_INST) == true ); // Send the characters in the first address of the string, and increment the first address after sending. DL_UART_Main_transmitData(UART_0_INST, *str++); }}
int main(void){ char output_buff[50] = {0}; unsigned int adc_value = 0; float voltage_value = 0;
SYSCFG_DL_init();
// Enable ADC interrupt NVIC_EnableIRQ(ADC_VOLTAGE_INST_INT_IRQN);
uart0_send_string("adc Demo start\r\n"); while (1) { // Get ADC data adc_value = adc_getValue(); sprintf(output_buff, "adc value:%d\r\n", adc_value); uart0_send_string(output_buff);
// Convert the data collected by ADC into voltage voltage_value = adc_value/4095.0*3.3; sprintf(output_buff, "voltage value:%.2f\r\n", voltage_value); uart0_send_string(output_buff);
delay_cycles(32000000); }}
// Read ADC dataunsigned int adc_getValue(void){ unsigned int gAdcResult = 0;
// Software triggers ADC to start conversion DL_ADC12_startConversion(ADC_VOLTAGE_INST); // If the current state is in transition, wait for the transition to end. while (false == gCheckADC) { __WFE(); } // Get data gAdcResult = DL_ADC12_getMemResult(ADC_VOLTAGE_INST, ADC_VOLTAGE_ADCMEM_ADC_CH0);
// Clear flag gCheckADC = false;
return gAdcResult;}
// ADC interrupt service functionvoid ADC_VOLTAGE_INST_IRQHandler(void){ // Query and clear ADC interrupt switch (DL_ADC12_getPendingInterrupt(ADC_VOLTAGE_INST)) { // Check whether data collection is completed case DL_ADC12_IIDX_MEM0_RESULT_LOADED: gCheckADC = true;// Set the flag position to 1 break; default: break; }}6. Compile
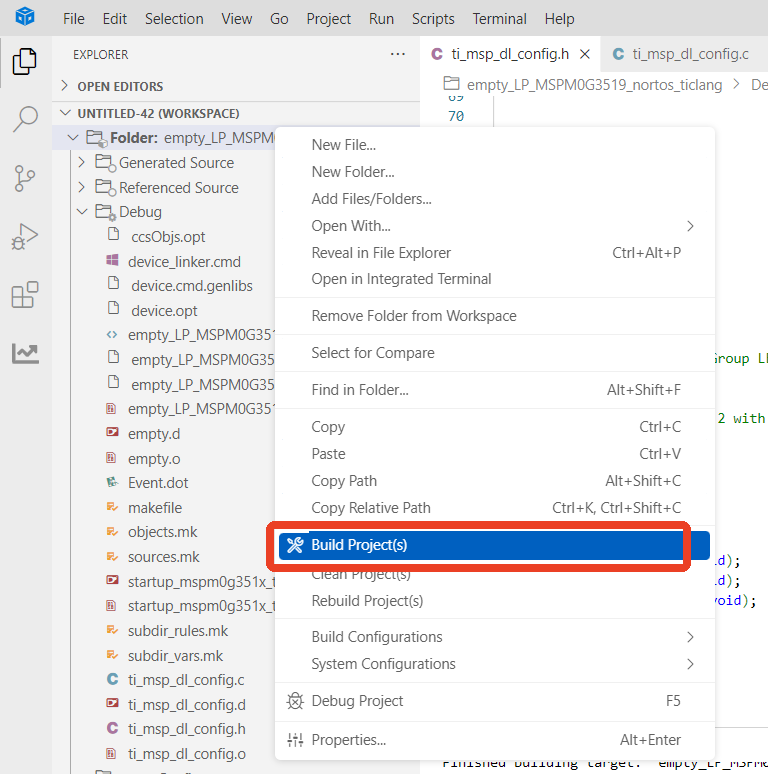
Compilation was successful. You can now download the program to the development board.
4. Program Analysis
empty.c
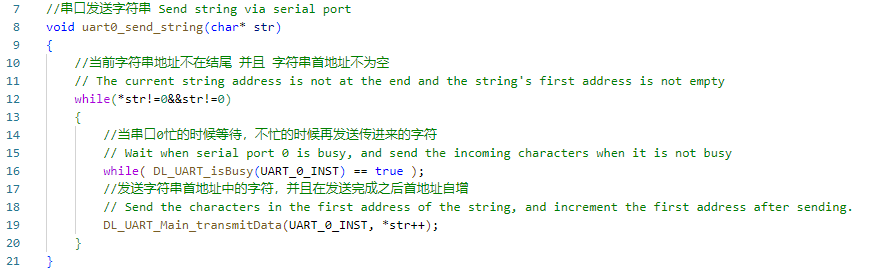
The uart0_send_string function sends a string through UART serial port. It iterates through each character with while (*str != 0) until the string ends (*str == 0). Before sending each character, it checks if UART is busy via DL_UART_isBusy(UART_0_INST). Data can only be sent when UART is idle. It sends the current character via DL_UART_Main_transmitData(UART_0_INST, *str++) and increments str to point to the next character.
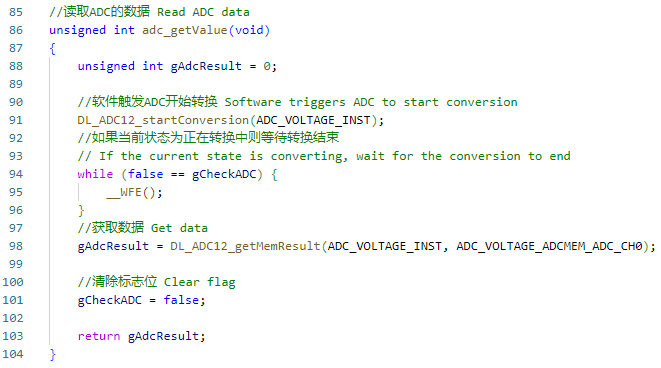
This code reads ADC (analog-to-digital converter) data. It triggers ADC conversion, waits for conversion to complete, then gets the ADC sample result and returns it.
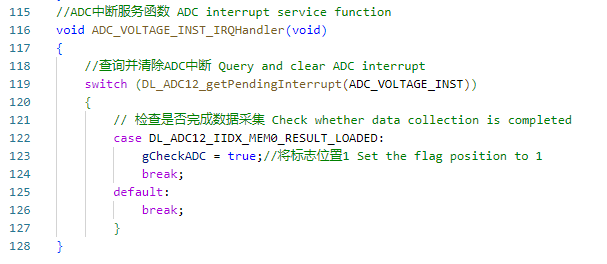
The ADC interrupt service function ADC_VOLTAGE_INST_IRQHandler is used to handle interrupt events and set the flag when ADC data acquisition is complete.
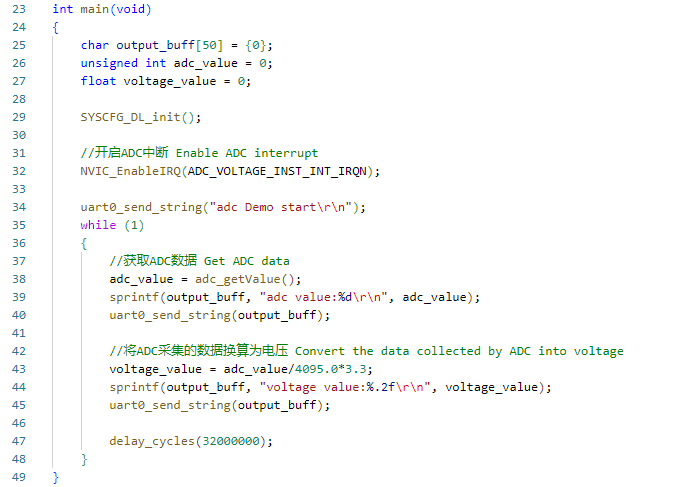
This code implements reading ADC (analog-to-digital converter) data, calculating voltage values, and outputting results through UART serial port. Initialize system configuration and ADC interrupts. Enter main loop, continuously read ADC data and calculate voltage. Send ADC values and calculated voltage through UART serial port to terminal.
5. Experimental Phenomena
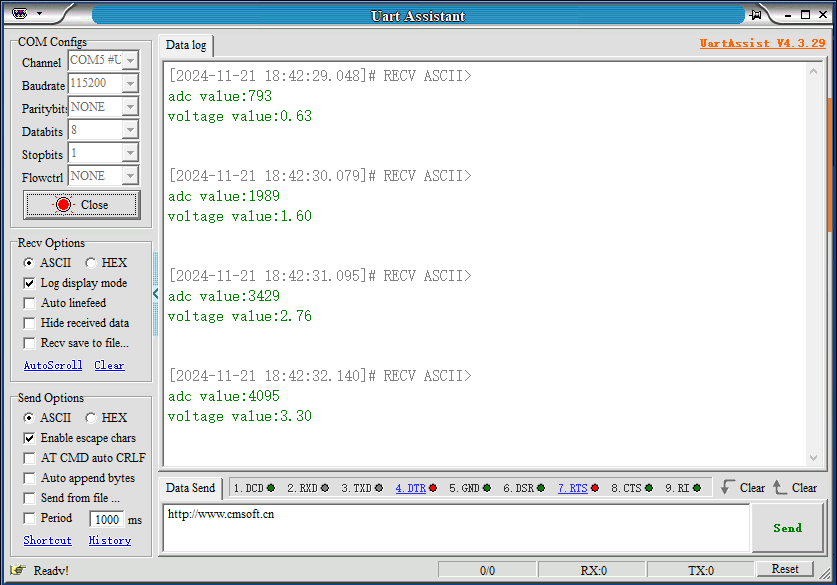
After the program is downloaded, after configuring the serial assistant as shown in the figure below, adjust the potentiometer knob. You can see the voltage changing in real-time between 0-3.3v in the serial assistant receive window.