Welcome to Raspberry Pi 4B repository
4.ROS2 service communications
ROS2 service communications
Service communication is one of the communication methods of ROS2 nodes, which is different from topic communication in that service communication has a feedback mechanism, which will feedback the results of the service. Therefore, service communication is mostly used in programs that need feedback results, such as the routine of a baby turtle, calling the Spawn service to generate a turtle, and after the service is completed (after the turtle is generated), the turtle's name will be printed. Next, it is explained how to use the Python language to achieve service communication between nodes.
1、Create a new feature pack
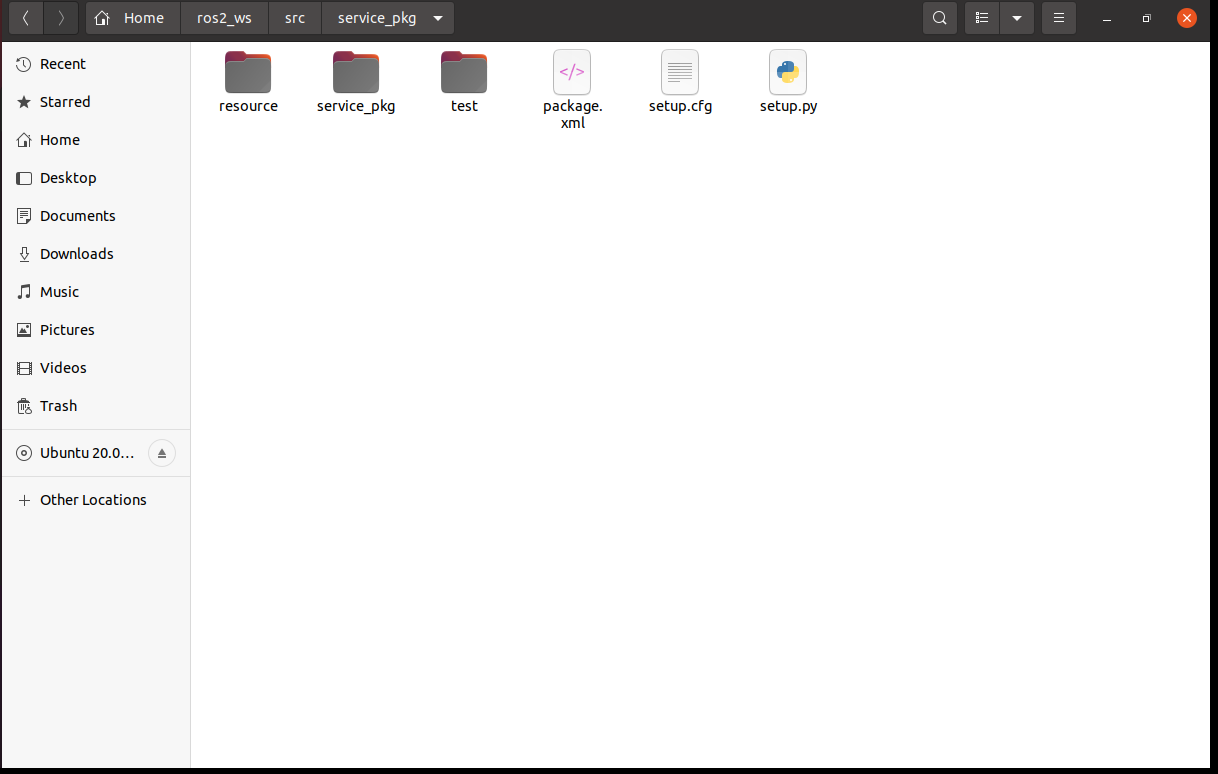
src new function package in the previously created workspace directory, terminal input,
cd ~/ros2_ws/srcros2 pkg create --build-type ament_python service_pkg
2、Write server-side python files
2.1、Program source code
Create a new file, named server_demo.py,
xxxxxxxxxxcd ~/ros2_ws/src/service_pkg/service_pkggedit server_demo.py
Copy the following sections into the file,
x#Import the relevant library filesimport rclpyfrom rclpy.node import Nodefrom example_interfaces.srv import AddTwoInts
class Service_Server(Node): def __init__(self,name): super().__init__(name) #To create a server, use create_service function, and the parameters passed in are: #The data type of the service data, the name of the service, and the service callback function (that is, the content of the service) self.srv = self.create_service(AddTwoInts, '/add_two_ints', self.Add2Ints_callback) #The content of the service callback function here is to add two integer numbers and return the result of the addition def Add2Ints_callback(self,request,response): response.sum = request.a + request.b print("response.sum = ",response.sum) return responsedef main(): rclpy.init() server_demo = Service_Server("publisher_node") rclpy.spin(server_demo)Focus on the service callback function, Add2Ints_callback, in addition to self, there are also request and response, request is the parameter required by the service, and response is the feedback result of the service. request.a and request.b are the content of the request part, response.sum is the content of the response part, here first look at the AddTwoInts type of data is how, you can use the following command to view,
xxxxxxxxxxros2 interface show example_interfaces/srv/AddTwoInts

--- The section divides this type of data into two parts, the upper side represents the request and the lower side represents the response. Then the variables in each domain, such as int64 a and int64 b, all the parameters passed in need to specify what the value of a and b is. Similarly, the result of the feedback also needs to specify what the value of sum is.
2.2、Modify the setup.py file
terminal input,
xxxxxxxxxxcd ~/ros2_ws/src/service_pkggedit setup.py
Locate the location as shown in the image below,
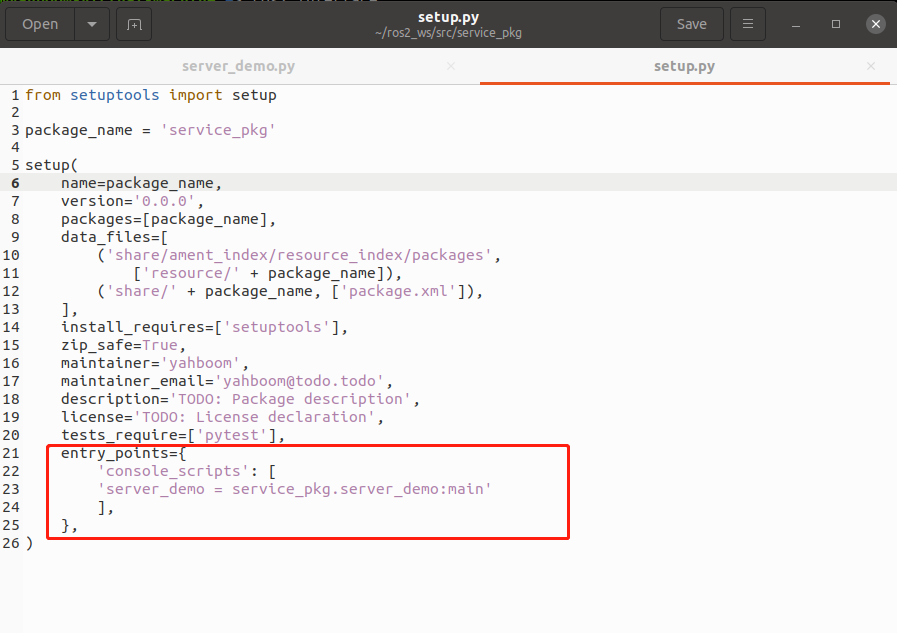
Add the following to 'console_scripts': [].
xxxxxxxxxx'server_demo = service_pkg.server_demo:main'
2.3、Compile the workspace
xxxxxxxxxxcd ~/ros2_wscolcon build
After the compilation is completed, refresh the environment variables of the workspace.
xxxxxxxxxxsource ~/ros2_ws/install/setup.bash
2.4、Run the program
terminal input,
xxxxxxxxxxros2 run service_pkg server_demo
After running, because the service is not called, there is no feedback data, you can call the service through the command line, first query what services are currently available, terminal input,
xxxxxxxxxxros2 service list
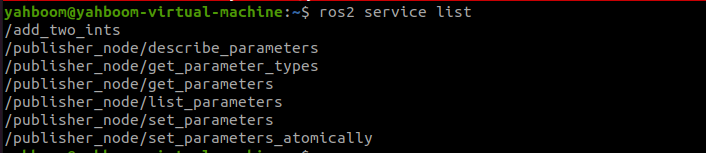
/add_two_ints is the service we need to call, call it through the following command, terminal input,
xxxxxxxxxxros2 service call /add_two_ints example_interfaces/srv/AddTwoInts "{a: 1,b: 4}"
Here we assign the value of a to 1 and the value of b to 4, that is, call the service to calculate the sum of 1 and 4,
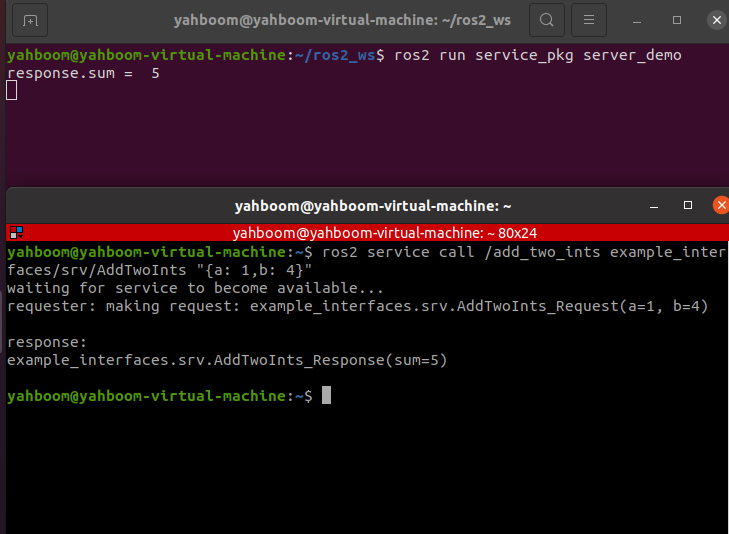
As can be seen from the above figure, after calling the service, the result of the feedback is 5, and the terminal running the server also prints the value of the feedback.
3、Write a client python file
3.1、Program source code
Create a new file, named client_demo.py,
xxxxxxxxxxcd ~/ros2_ws/srcservice_pkg/service_pkggedit client_demo.py
Copy the following into it,
xxxxxxxxxx#Import the relevant librariesimport rclpyfrom rclpy.node import Nodefrom example_interfaces.srv import AddTwoInts
class Service_Client(Node):    def __init__(self,name):        super().__init__(name)        #To create a client, you use create_client function, and the parameters passed in are the data type of the service data and the topic name of the service        self.client = self.create_client(AddTwoInts,'/add_two_ints')        #Cycle through and wait for the server side to start successfully        while not self.client.wait_for_service(timeout_sec=1.0):            print("service not available, waiting again...")        #Create a data object for the service request        self.request = AddTwoInts.Request()            def send_request(self):         self.request.a = 10        self.request.b = 90        #Send a service request        self.future = self.client.call_async(self.request)        def main():    rclpy.init() #Node initialization    service_client = Service_Client("client_node") #Create an object    service_client.send_request() #Send a service request    while rclpy.ok():        rclpy.spin_once(service_client)        #Determine whether the data processing is complete        if service_client.future.done():            try:                #Get service feedback information and print it                response = service_client.future.result()                print("Result = ",response.sum)            except Exception as e:                service_client.get_logger().info('Service call failed %r' % (e,))                    break
3.2、Modify the setup.py file
terminal input,
xxxxxxxxxxcd ~/ros2_ws/src/topic_pkggedit setup.py
Locate the location as shown in the image below,
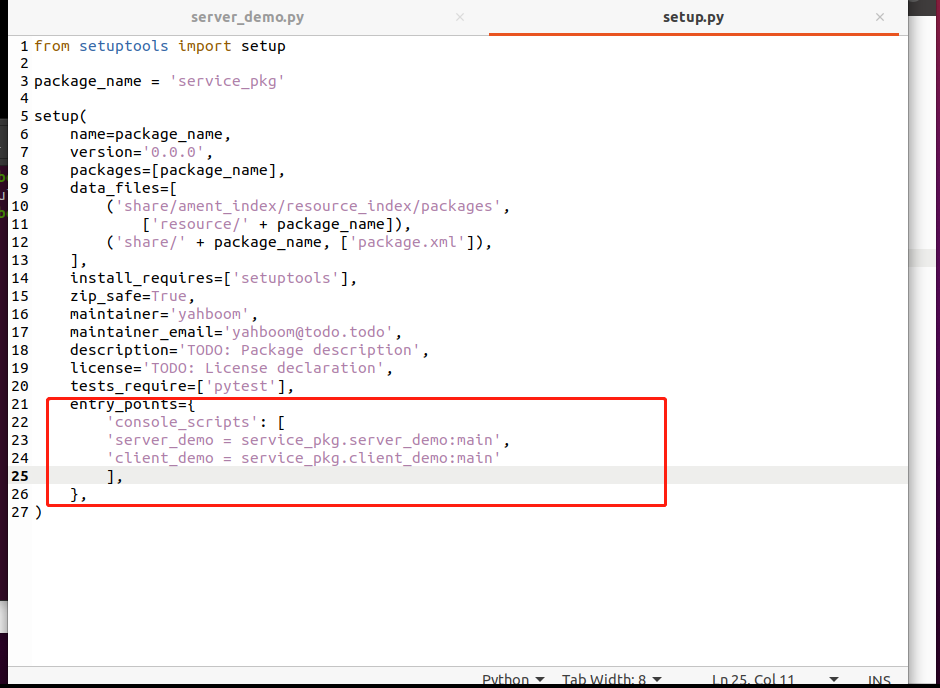
Add the following to 'console_scripts': [],
xxxxxxxxxx'client_demo = service_pkg.client_demo:main'

3.3、Compile the workspace
xxxxxxxxxxcd ~/ros2_wscolcon build
After the compilation is completed, refresh the environment variables of the workspace.
xxxxxxxxxxsource ~/ros2_ws/install/setup.bash
3.4、Run the program
terminal input,
xxxxxxxxxx#Start the serverros2 run service_pkg server_demo#Start the clientros2 run service_pkg client_demo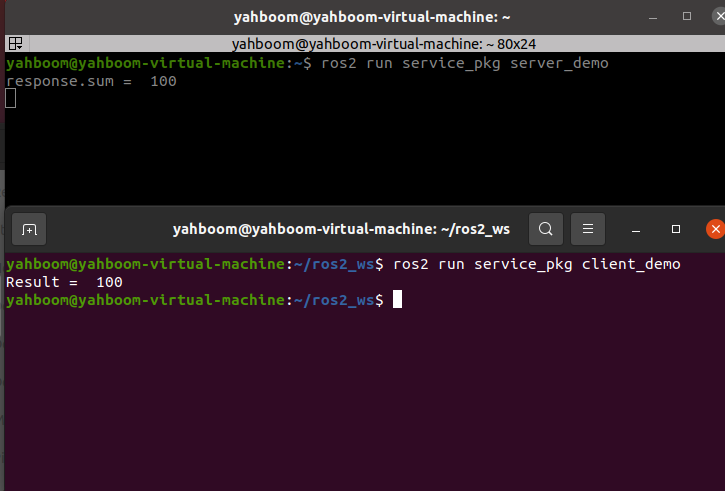
First run the server, then run the client, the client provides a=10, b=90, the server summes, the result is 100, and the result is printed at the two terminals.