yahboom
HomeLearn
Solution
Blog
Online Store
About Us
EN/中文
Raspberry Pi 4B📖
1.Preparation before use
  • 1.1 Download image
  • 1.2 Write image into SD card
  • 1.3 Start up Raspberry Pi
  • 1.4 Linux common commands
  • 1.5 Precautions
2.Basic course
  • 2.1 Log into Raspberry Pi system
  • 2.2 Change password and root account
  • 2.3 Remote transfer file
  • 2.4 Backup image file
  • 2.5 Fixing Raspberry Pi IP
  • 2.6 Set screen keep on
  • 2.7 Get Pi temperature
  • 2.8 Connect WIFI
  • 2.9 Modify Pi time
  • 2.10 Set the boot self-starting program
3.Expand course
  • 3.1 Serial port communicates with external devices
  • 3.2 2.Serial port login Pi
  • 3.3 Configured as a router
  • 3.4 Install Jupyter Lab
  • 3.5 Install Jupyter Widgets
  • 3.6 More Detail for Widgets
  • 3.7 Install OpenCV
  • 3.8 Install Tensorflow
4.Programming course
C language
  • 1.Development environment
  • 2.Print Hello World
  • 3.Pin output level
  • 4.Read pin level
  • 5.PWM output
Python language
  • 1.Development environment
  • 2.Print basic usage
  • 3.Pin output level
  • 4.Read pin level
  • 5.PWM output
5.AI vision course
A.Getting started with OpenCV
  • 6.Picture Rotation
  • 1.Introduction of OpenCV
  • 2.OpenCV image read and display
  • 3.OpenCV image write
  • 4.OpenCV image quality
  • 5.OpenCV pixel operation
B.OpenCV Geometric transformat
  • 1.Picture Zoom
  • 2.Picture Cut
  • 3.Picture Shift
  • 4.Picture Mirroring
  • 5.Affine Map
  • 7.Perspective Transformation
C.OpenCV picture processing
  • 1.Grayscale processing
  • 2.Image Binarization
  • 3.Edge detection
  • 4.Drawing line segment
  • 5.Drawing rectangle circle
  • 6.Drawing text picture
D.OpenCV image beautification
  • 1.Histogram of color pictures
  • 2.Histogram equalization
  • 3.Image restoration
  • 4.Brightness enhancement
  • 5.Skin whitening
  • 6.Gaussian mean filtering
  • 7.Median filtering
F.AI Advanced Course (Ubuntu system)
  • 1. QR code
  • 2. Human posture estimation
  • 3. Target detection
  • 4. Mediapipe development
  • 5. yolov4-tiny
E.Install TensorFlow
  • Install TensorFlow
6.ROS1 coursenew
Basic Course
  • 1.ROS introduction
  • 2.Project file structure
  • 3.Common commands and tools
  • 4.Publisher
  • 5.Subscribers
  • 6.Customize topic messages and use
  • 7.Client
  • 8.Server
  • 9.Custom service messages and usage
  • 10.TF release and monitoring
Visual Image Processing
  • 1. AR vision
  • 2. AR QR code
  • 3. ROS+Opencv foundation
  • 4. ROS+Opencv application
  • 5. MediaPipe development
7.ROS2 coursenew
Docker Course
  • 1.Overview and installation
  • 2.Common commands
  • 3.Understand and publish images
  • 4.Hardware interaction data processing
  • 5.Enter docker container
  • 6.Update docker images
Basic Course
  • 1.Introduction to ROS2
  • 2.Commands and tools
  • 3.ROS2 Topic communications
  • 4.ROS2 service communications
  • 5.ROS2launch file starts
OpenCV Course
  • 1.OpenCV Basic Course
  • 2.ROS+opencv application
  • 3.QR code recognition
  • 4.AR Vision
  • 5.Mediapipe
8.Accessories installation
  • 1. Installation of heat sink
  • 2. Wiring of cooling fan
  • 3. Double fan armor case Installation
  • 4. Argon NEO aluminum case installation
  • 5. Argon ONE aluminum alloy case installation
  • 6. Metal shell with built-in fan installation
  • 7. Acrylic case with cooling fan installation
  • 8. White-red ABS protective case installation
Download
  • Tools
  • C_code
  • Python code
  • ROS System
Download ZIP

Welcome to Raspberry Pi 4B repository

4.AR Vision

AR Vision

This tutorial takes usb no-drive camera as an example. All codes run in docker. When entering docker, you need to mount the camera. For details, please refer to docker tutorial [5、Enter the docker Container].

1、overview

Augmented Reality,Abbreviated as "AR" technology,It is a technology that cleverly integrates virtual information with the real world, widely utilizing various technical means such as multimedia, 3D modeling, real-time tracking and registration, intelligent interaction, and sensing.It can simulate and simulate virtual information such as computer-generated text, images, 3D models, music, videos, etc., and apply them to the real world. The two types of information complement each other, thereby achieving "enhancement" of the real world.

The AR system has three prominent characteristics:① Information integration between real and virtual worlds; ② Real time interactivity; ③ It is the addition of positioning virtual objects in three-dimensional scale space.

Augmented reality technology includes new technologies and new approaches such as multimedia, 3D modeling, real-time video display and control, multi-sensor fusion, real-time tracking and registration, and scene fusion.

2、Usage method

When using AR cases, it is necessary to have camera internal parameters, otherwise it cannot run. The internal parameter file is the same directory as the code, and different cameras correspond to different internal parameters. In this lesson, the usb no-drive camera is used as an example, and the internal calibration can be quickly calibrated with checkerboard (this step is already done in docker images)

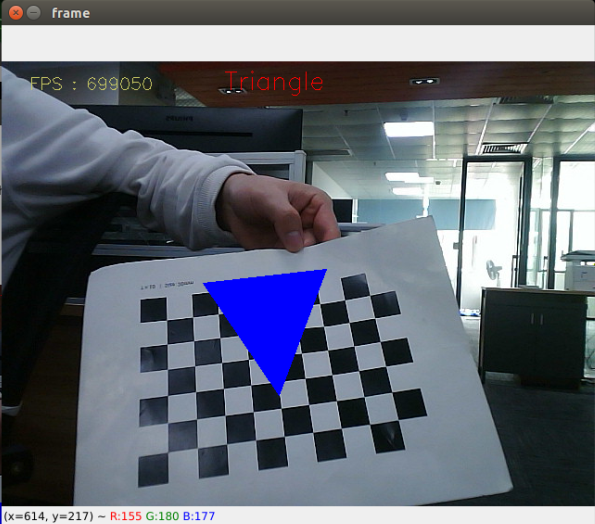
There are a total of 12 effects in this section.

["Triangle", "Rectangle", "Parallelogram","WindMill","TableTennisTable", "Ball","Arrow", "Knife", "Desk","Bench", "Stickman", "ParallelBars"]

3、start command

Code reference path

xxxxxxxxxx
/root/yahboomcar_ros2_ws/yahboomcar_ws/src/yahboomcar_visual/yahboomcar_visual/simple_AR.py

After entering the Docker container, the Docker terminal inputs

xxxxxxxxxx
ros2 run yahboomcar_visual simple_AR

image-20230426120258462

Press【q】key to exit,Press【f】key to switch between different effects.

Note: Some motherboards due to general performance, GUI display very card, resulting in key function failure, sometimes can use the key switch and sometimes press no response, if you need to switch different effects, you can refer to the following release of different topics to achieve the switching effect


3.1.1、ROS deployment

This course also deployed ROS, which mainly has the following two functions:

  • Subscribe to topic data and switch between different effects
  • Publish Image

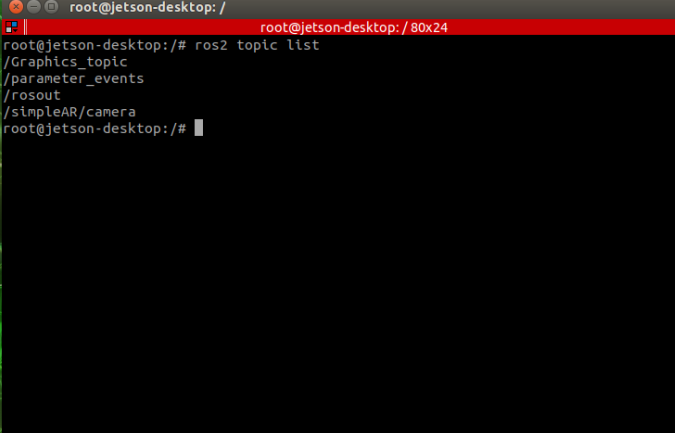
View the ROS topic through the following command, enter it on the Docker terminal

xxxxxxxxxx
ros2 topic list

image-20230426120835150

  • /Graphics_topic:The topic name of the effect and the effect that needs to be recognized for subscription.
  • /simpleAR/camera:The topic name of the image, publishing the image.

The effect can be modified using the following command. For example, I will first modify it to Desk (The effect name has been given above, you can modify it yourself)

enter it on the Docker terminal

xxxxxxxxxx
ros2 topic pub /Graphics_topic std_msgs/msg/String "data: Desk"
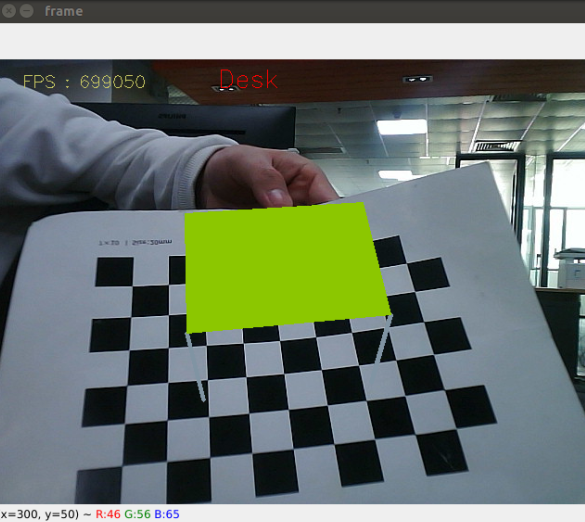
image-20230426122408985

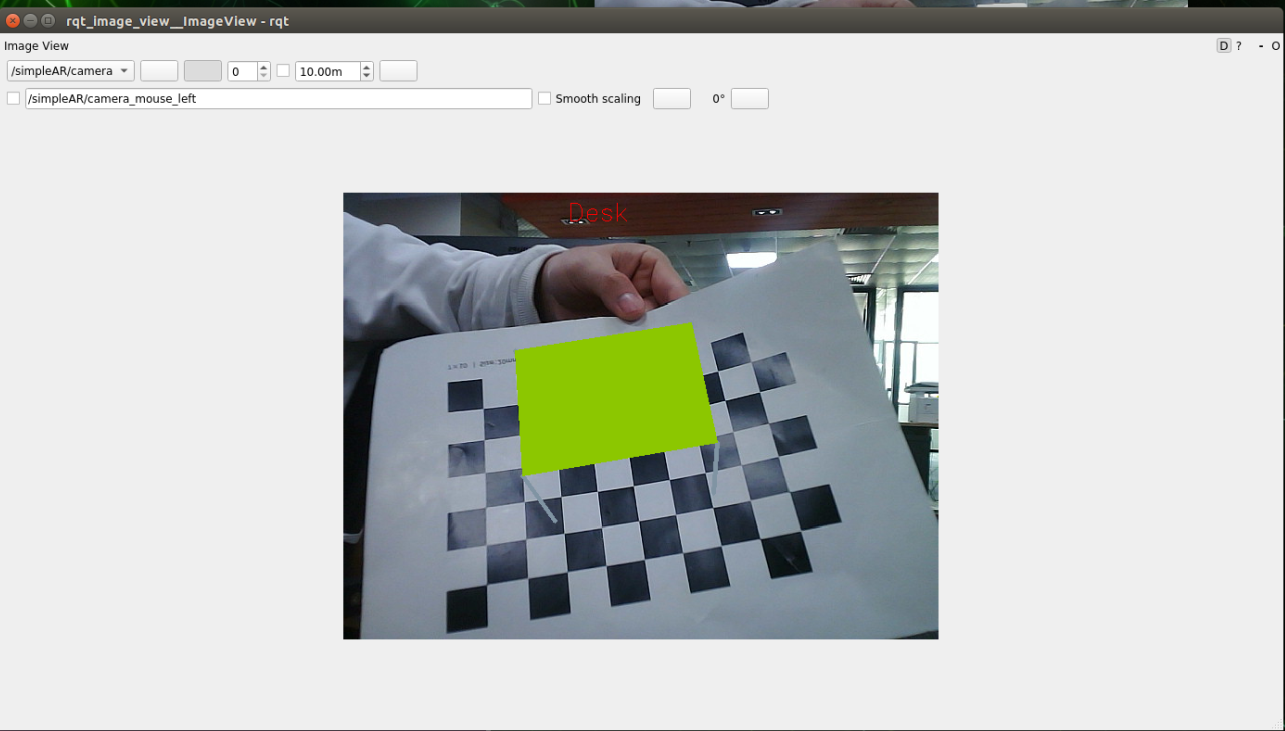
Viewing published images can be done using rqt_ Image_ View to view, Docker terminal input

xxxxxxxxxx
ros2 run rqt_image_view rqt_image_view

image-20230426122638172

Select /simpleAR/camera in the top left corner of the topic to view the image.


QR code recognition
Mediapipe

COMPANY

  • About us
  • Team Style
  • Blog

LEARNING & EXPLORATION

  • Tutorials
  • Edge AI hardware
  • Educational robots
  • Embedded intelligent hardware

WHERE TO BUY

  • Yahboom Online Store
  • Amazon
  • Alibaba
  • AliExpress
  • Mercado

TECHNOLOGY SUPPORT

  • Email: support@yahboom.com

BE A DISTRIBUTOR

  • Email: sales@yahboom.com
QR Code
QR Code

Copyright © 2017-2026 Yahboom. All Rights Reserved.

EN/中文