Welcome to Jetson AGX Orin repository
当製品の日本語版マニュアル資料は、こちらからご取得ください。
15.ROS2 time related API
15.ROS2 time related API
1. Introduction to Time-Related APIs
ROS2's time-related APIs include Rate, Time, Duration, and operations on Time and Duration. These are explained below.
- First, create a function package to store the relevant program files.
xxxxxxxxxxros2 pkg create learning_time --build-type ament_python --dependencies rclpy2. create_rate
ROS2 also provides the create_rate function, a tool for controlling loop execution frequency. Its core function is to periodically execute a section of code at a fixed frequency. Rate ensures the stability of the loop execution frequency by controlling the "sleep time" of the loop. Remember that Rate should generally not be used directly in the main thread, as doing so will permanently block callback events. It is generally only used in programs with multi-threaded callbacks or in child threads.
How it works:
- Records the start time of each loop;
- Executes the code within the loop;
- Calculates the difference between the current loop's actual duration and the target interval;
- Automatically sleeps for the corresponding difference, ensuring that the interval from the start of one loop to the start of the next strictly equals the target interval (e.g., 100 milliseconds).
While both Rate and Timer can implement periodic execution, their application scenarios differ:
| Features | Rate | Timer |
|---|---|---|
| Implementation | Based on active sleep within a loop (blocking the current thread) | Based on callback functions (non-blocking, triggered by the ROS 2 event loop) |
| Applicable Scenarios | Suitable for loops that need to execute at a fixed frequency within the same thread (such as main control logic) | Suitable for periodic tasks that need to execute asynchronously (without blocking the main thread) |
| Flexibility | Direct control flow within the loop (such as break exit) | Callback execution must be controlled using flags or other methods |
- The following is a basic usage of
Rateto implement a loop that executes twice per second: - Create a new file in the function package called rate_demo.py
xxxxxxxxxximport rclpyfrom rclpy.node import Nodeimport threadingclass RateExampleNode(Node): def __init__(self): super().__init__("rate_example_node") self.get_logger().info("Rate 示例节点启动") def run_loop(self): # Use the node's create_rate() to create a 2Hz Rate rate = self.create_rate(2) count = 0 try: while rclpy.ok(): self.get_logger().info(f"循环执行 {count} 次") count += 1 rate.sleep() # Sleep until the next cycle (0.5 seconds) except KeyboardInterrupt: self.get_logger().info("循环被中断")def main(args=None): rclpy.init(args=args) node = RateExampleNode() # Create a thread run loop (to avoid blocking the main thread) loop_thread = threading.Thread(target=node.run_loop) loop_thread.start() # The main thread executes spin to keep the ROS 2 node running try: rclpy.spin(node) except KeyboardInterrupt: pass finally: loop_thread.join() # Waiting for the thread to end node.destroy_node() rclpy.shutdown()if __name__ == "__main__": main()
- Configure the corresponding setup.py configuration file and add it in console_scripts
xxxxxxxxxx'rate_demo=learning_time.rate_demo:main'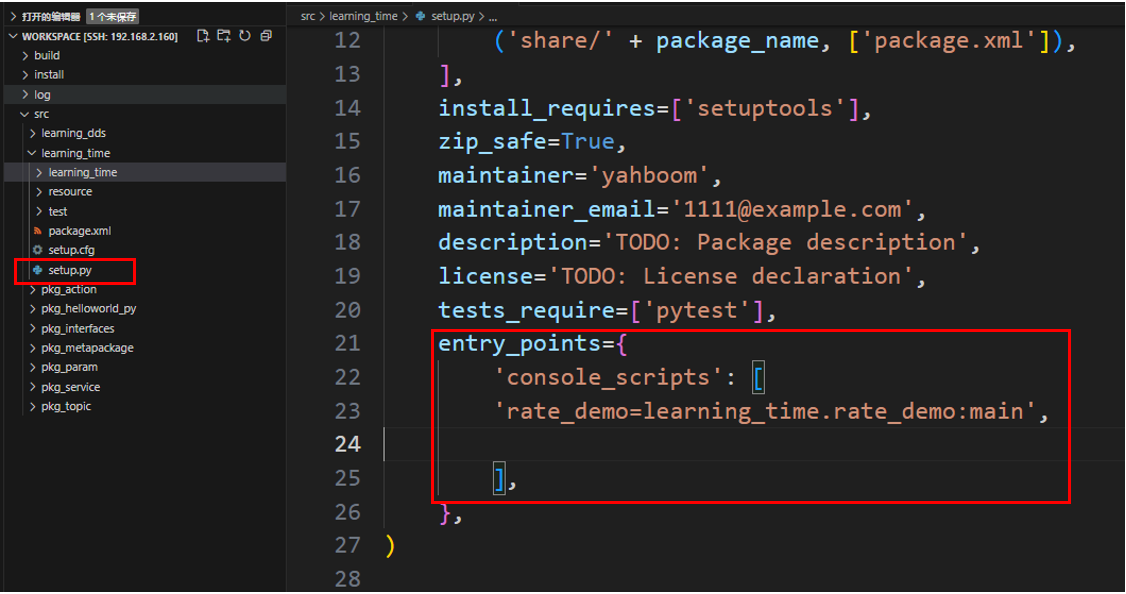
- Compile feature package
xxxxxxxxxxcolcon build --packages-select learning_time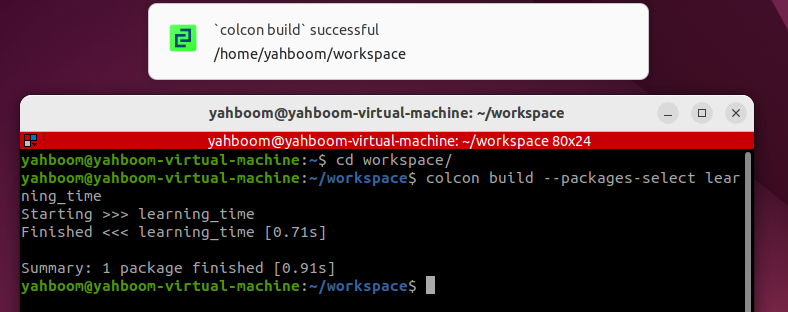
- Refresh the workspace environment and run the node
xxxxxxxxxx source ./install/setup.bashxxxxxxxxxxros2 run learning_time rate_demo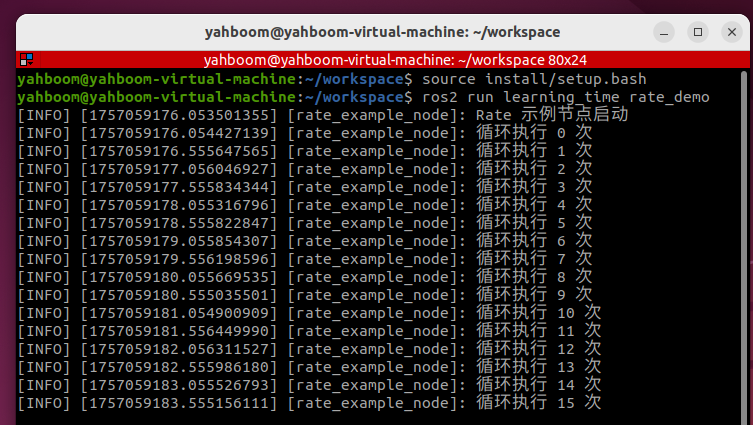
3. Timer Application
- Timer is used to create a timer that triggers periodic tasks.
- Example: Create two timers: one that prints the execution count every 1 second, and one that prints the current time every 0.5 seconds.
- Create a new program file called Timer_demo.py
xxxxxxxxxximport rclpyfrom rclpy.node import Nodeclass TimerDemoNode(Node): def __init__(self): super().__init__('timer_demo_node') # Counter, used to demonstrate the number of timer executions self.counter = 0 # Create a timer: execute the callback function every 1 second self.timer = self.create_timer(1.0, self.timer_callback) # Create a faster timer: execute every 0.5 seconds self.fast_timer = self.create_timer(0.5, self.fast_timer_callback) self.get_logger().info("定时器节点已启动") def timer_callback(self): """1 second timer callback function""" self.counter += 1 current_time = self.get_clock().now() # Print the current time and counter value self.get_logger().info( f"[1秒定时器] 第 {self.counter} 次执行,当前时间: {current_time.seconds_nanoseconds()}" ) def fast_timer_callback(self): """0.5 second timer callback function""" # Print the current timestamp (nanoseconds) self.get_logger().info( f"[0.5秒定时器] 当前时间戳: {self.get_clock().now().nanoseconds}" )def main(args=None): # Initializing ROS 2 rclpy.init(args=args) # Creating a Node node = TimerDemoNode() # Running a Node rclpy.spin(node) # Shut down ROS 2 node.destroy_node() rclpy.shutdown()if __name__ == '__main__': main()- Configure the corresponding setup.py configuration file and add it in console_scripts
xxxxxxxxxx'Timer_demo=learning_time.Timer_demo:main'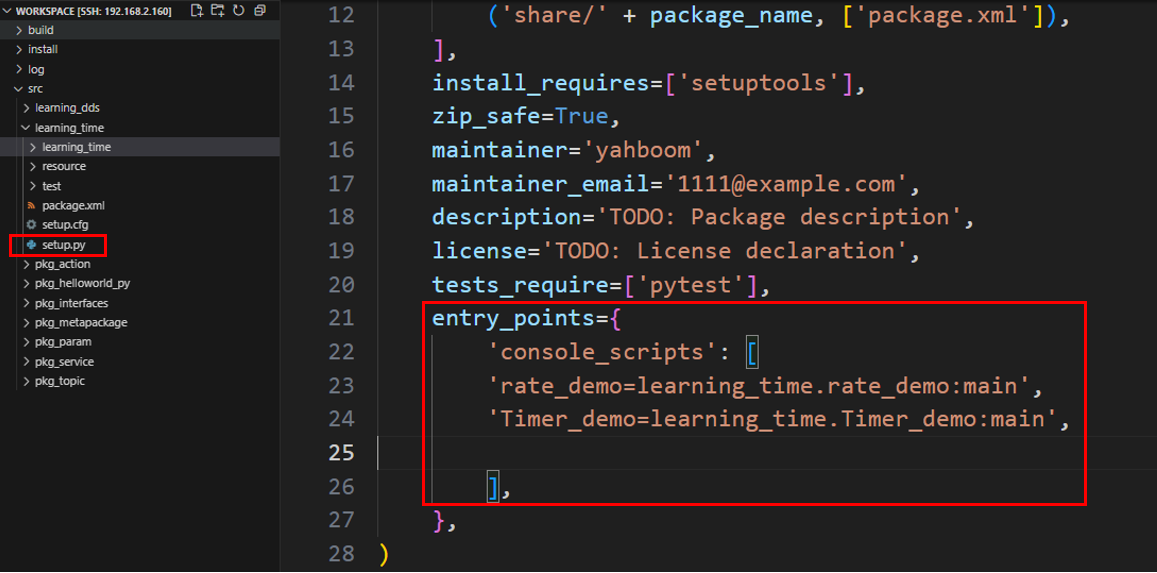
- Compile function package
xxxxxxxxxxcolcon build --packages-select learning_time
- Refresh the workspace environment and run the node
xxxxxxxxxxsource ./install/setup.bashxxxxxxxxxxros2 run learning_time Timer_demo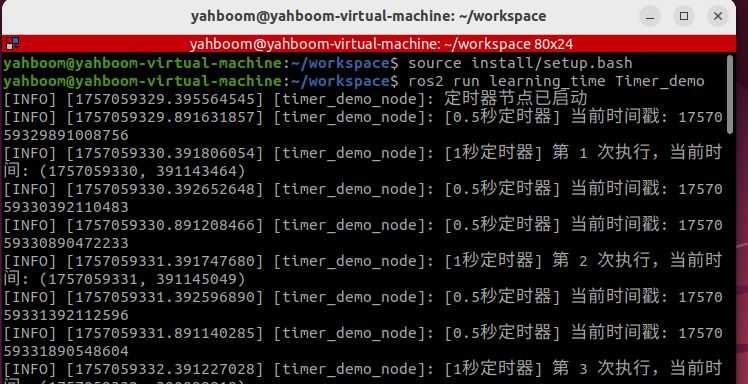
- It can be seen that the timer is triggered according to the set timing, and the corresponding log information is printed in each callback function
4. Get the Current Time with get_clock
- The get_clock function can be used to obtain a clock object and then use the () method to get the current time.
- Create a new program file, get_clock_demo.py, and fill it with the following example program:
xxxxxxxxxximport rclpyfrom rclpy.node import Nodefrom rclpy.time import Timeclass TimeExampleNode(Node): def __init__(self): super().__init__("time_example_node") # Get the node's clock object (the system clock is used by default) self.clock = self.get_clock() # Get the current time (return a Time object) current_time = self.clock.now() self.get_logger().info(f"当前时间:{current_time}")def main(args=None): rclpy.init(args=args) node = TimeExampleNode() rclpy.spin_once(node) # Run a node once node.destroy_node() rclpy.shutdown()if __name__ == "__main__": main()- Configure the corresponding setup.py configuration file and add it in console_scripts
xxxxxxxxxx'get_clock_demo=learning_time.get_clock_demo:main'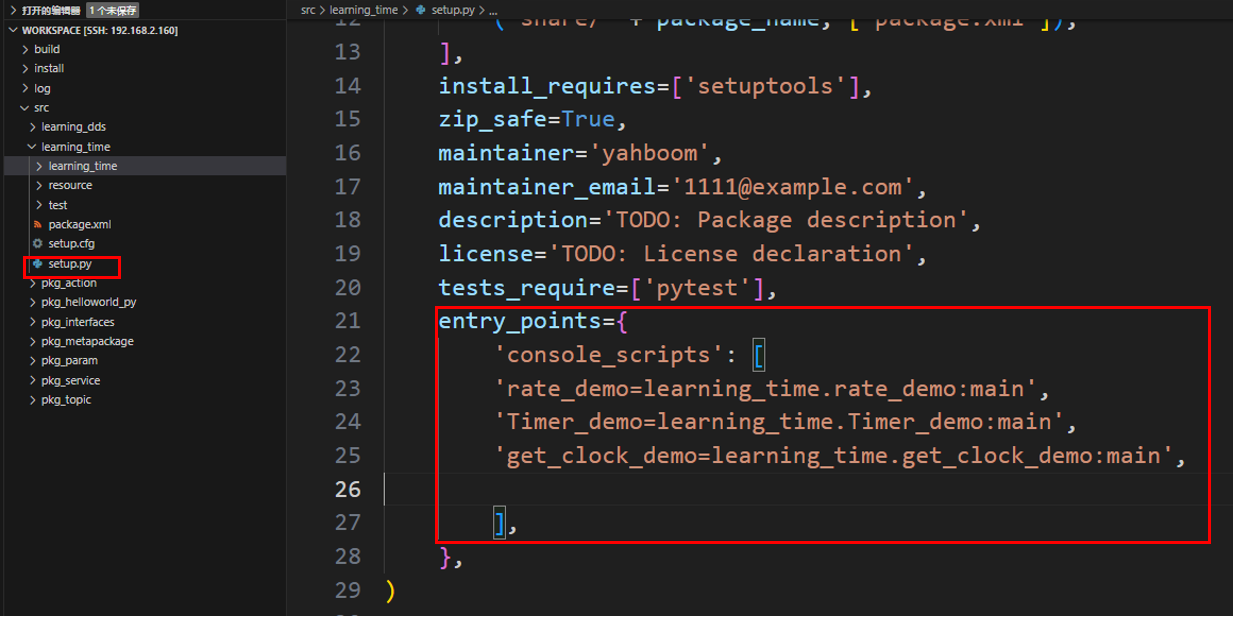
- Compile feature package
xxxxxxxxxxcolcon build --packages-select learning_time
- Refresh the workspace environment and run the node
xxxxxxxxxx source ./install/setup.bashxxxxxxxxxxros2 run learning_time get_clock_demo
5. Time and Duration
- The
Timeclass in ROS represents a specific time point (e.g., "2023-10-01 12:00:00"), typically used to mark the moment an event occurred. - The
Durationclass represents an interval between two time points (e.g., "5 seconds"), used to calculate time differences or delays. - Example: Time and Duration Application
- Create a new program file,
TimeDuration_demo.py.
xxxxxxxxxximport rclpyfrom rclpy.time import Timefrom rclpy.duration import Durationdef main(): rclpy.init() node = rclpy.create_node("time_opt_node") # How to use the time class to create 'time points and moments' time1 = Time(seconds=10) time2 = Time(seconds=4) # How to use the Duration class to create a 'duration, a period of time' duration1 = Duration(seconds=3) duration2 = Duration(seconds=5) # Moments can be compared node.get_logger().info("time1 >= time2 ? %d" % (time1 >= time2)) node.get_logger().info("time1 < time2 ? %d" % (time1 < time2)) # Time periods and times can be mathematically operated t3 = time1 + duration1 t4 = time1 - time2 t5 = time1 - duration1 node.get_logger().info("t3 = %d" % t3.nanoseconds) node.get_logger().info("t4 = %d" % t4.nanoseconds) node.get_logger().info("t5 = %d" % t5.nanoseconds) # Time periods can be compared node.get_logger().info("-" * 80) node.get_logger().info("duration1 >= duration2 ? %d" % (duration1 >= duration2)) node.get_logger().info("duration1 < duration2 ? %d" % (duration1 < duration2)) rclpy.shutdown()if __name__ == "__main__": main()- Configure the corresponding setup.py configuration file and add it in console_scripts
xxxxxxxxxx'TimeDuration_demo=learning_time.TimeDuration_demo:main'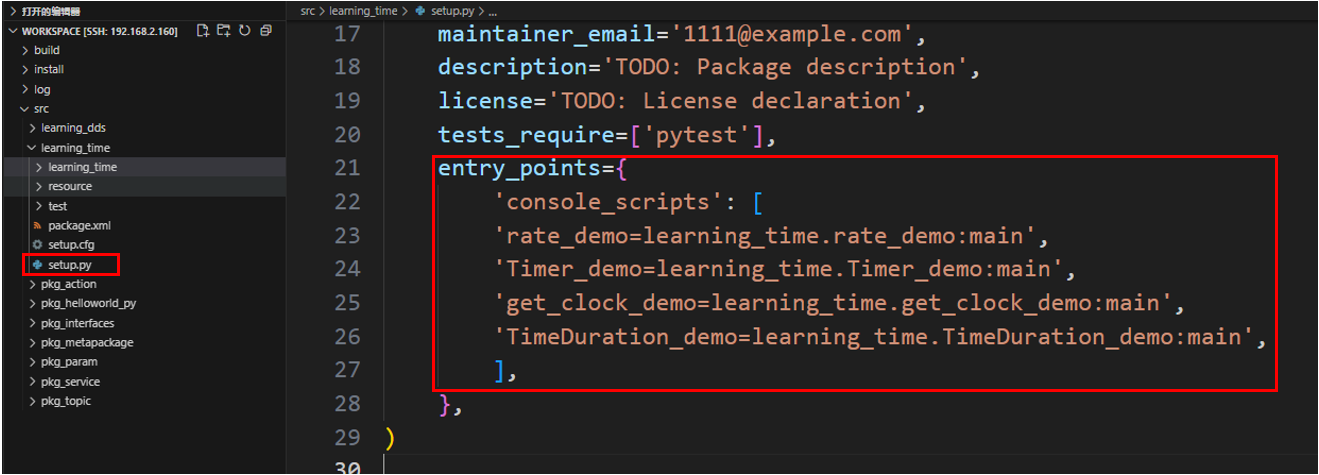
- Compile feature package
xxxxxxxxxxcolcon build --packages-select learning_time
- Refresh the workspace environment and run the node
xxxxxxxxxx source ./install/setup.bashxxxxxxxxxxros2 run learning_time TimeDuration_demo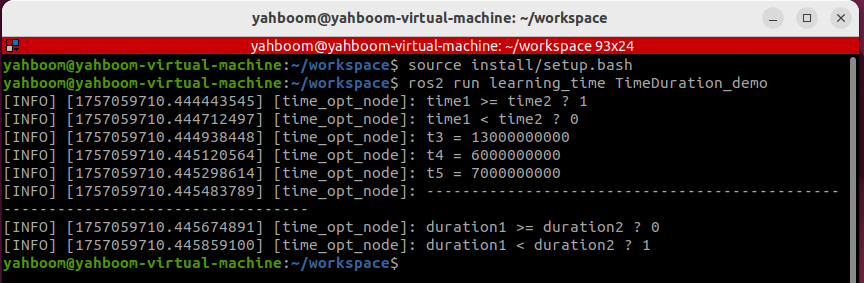
- This example proves that mathematical operations can be performed on time points and time periods, allowing us to flexibly query and operate on data with different timestamps.