Welcome to Jetson AGX Orin repository
当製品の日本語版マニュアル資料は、こちらからご取得ください。
02.Camera calibration (USB)
Camera calibration (USB)
Camera calibration (USB)1. Start the camera2. Image calibration2.1. Calibration board2.2. View topics2.3. Image calibration2.3.1. Install the image calibration tool2.3.2. Start the image calibration tool2.3.3 Calibration process2.3.4, Calibration results
1. Start the camera
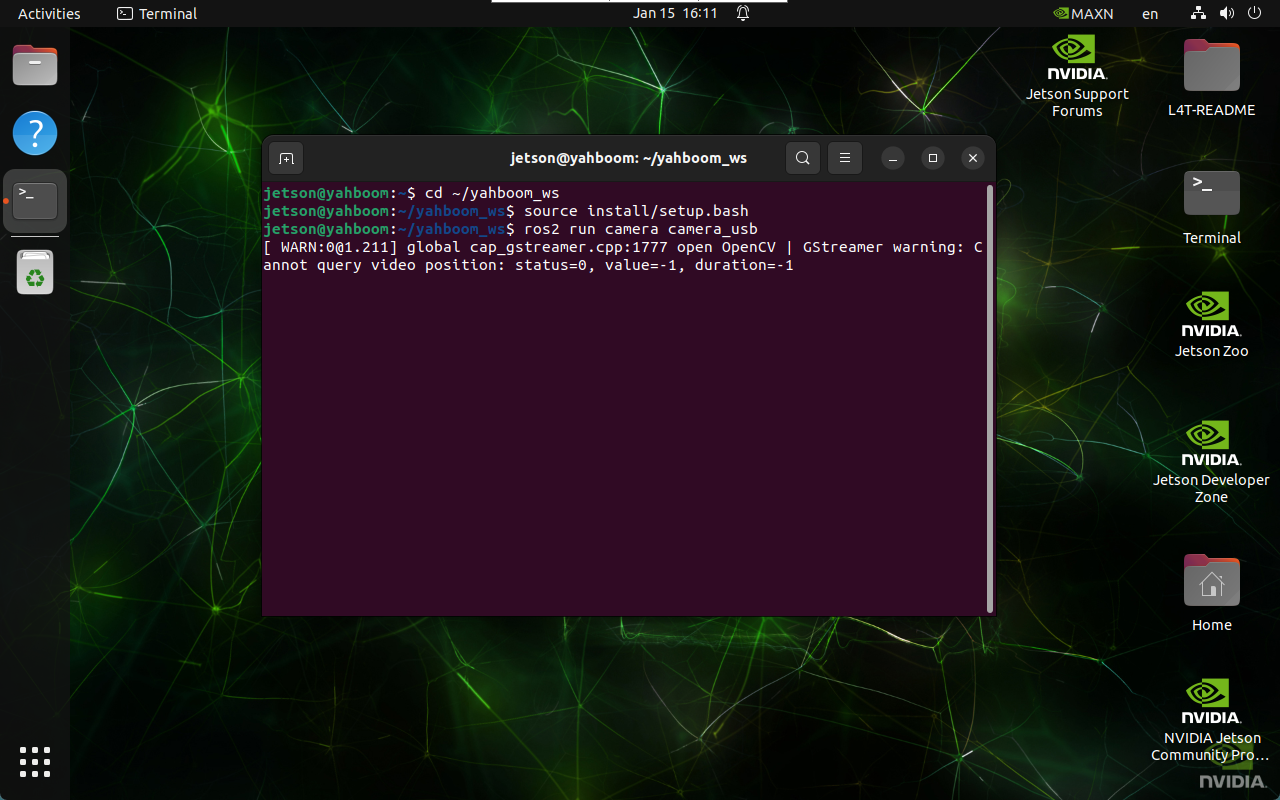
cd ~/yahboom_ws
xxxxxxxxxxsource install/setup.bash
xxxxxxxxxxros2 run camera camera_usb
2. Image calibration
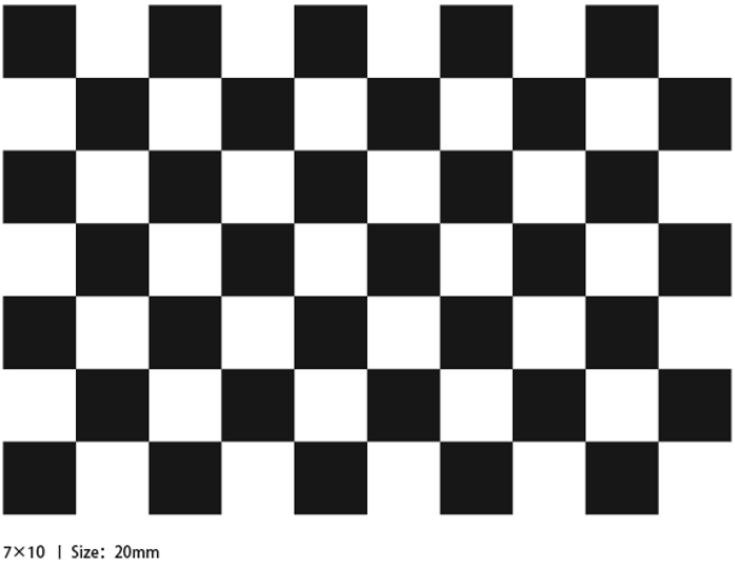
2.1. Calibration board
2.2. View topics
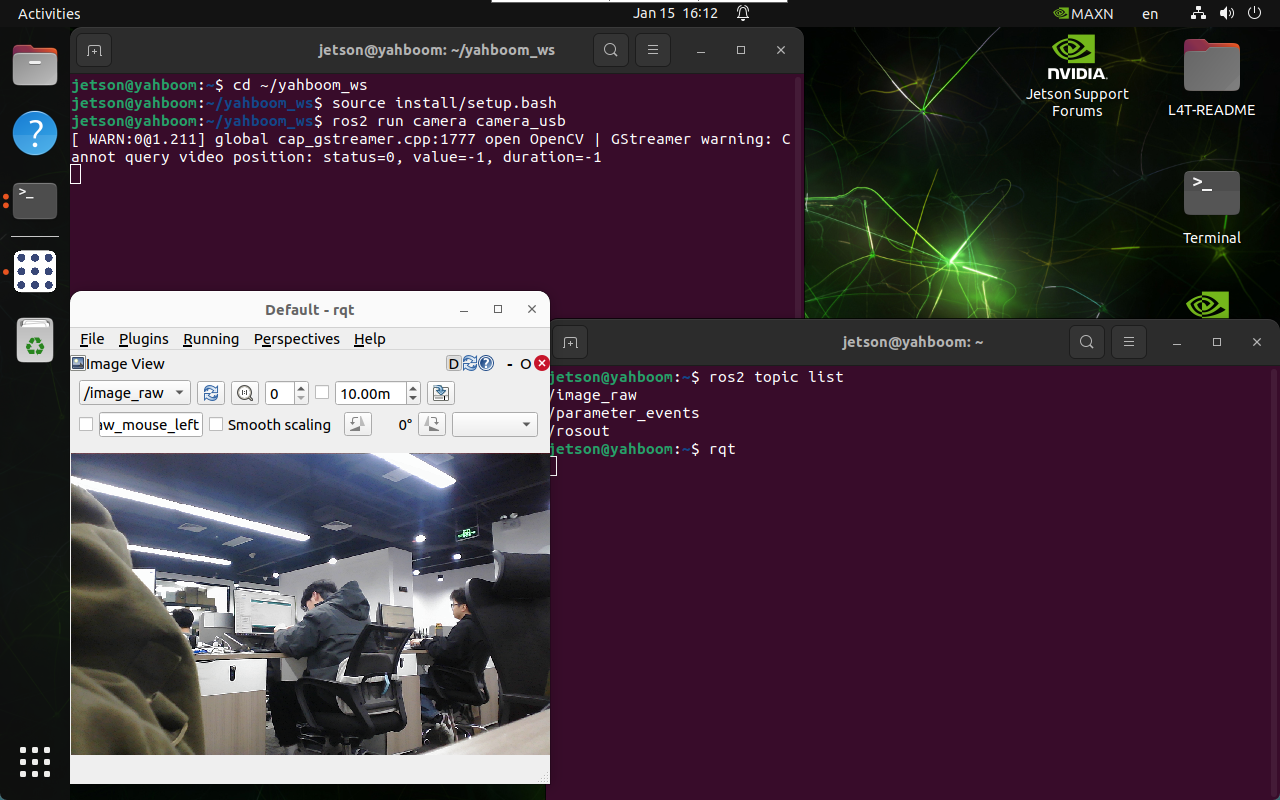
xxxxxxxxxxros2 topic list
2.3. Image calibration
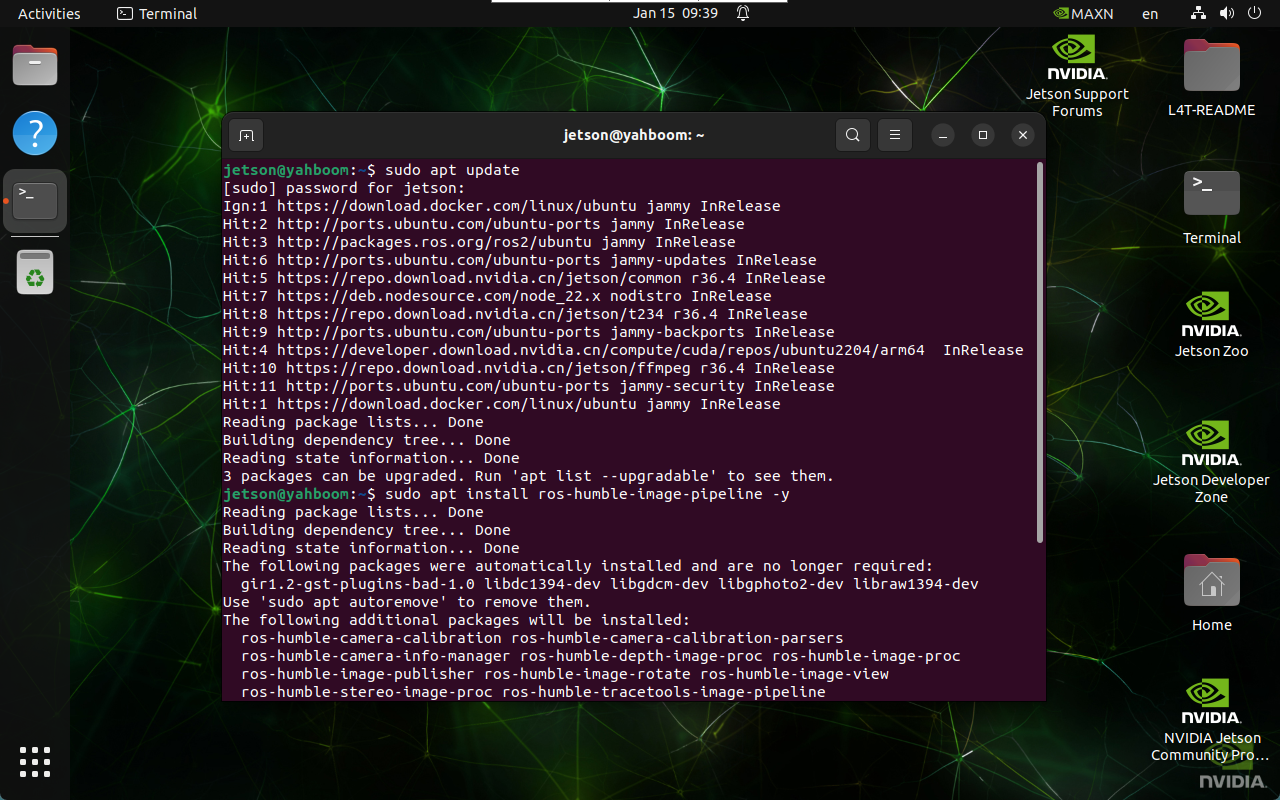
2.3.1. Install the image calibration tool
xxxxxxxxxxsudo apt updatesudo apt install ros-humble-image-pipeline -y
2.3.2. Start the image calibration tool
Start the ROS2 camera calibration tool camera_calibration and perform camera calibration: Before calibration, you need to start the camera first
xxxxxxxxxxros2 run camera_calibration cameracalibrator --size 9x6 --square 0.02 --ros-args --remap /image:=/image_raw
Parameter Description
--size:The number of inner corner points of the chessboard → 9 rows and 6 columns of inner corner points
--square:The side length of the chessboard → 0.02 meters
--ros-args:Passing ROS parameters
--remap:Topic remapping → /image_raw as image input stream
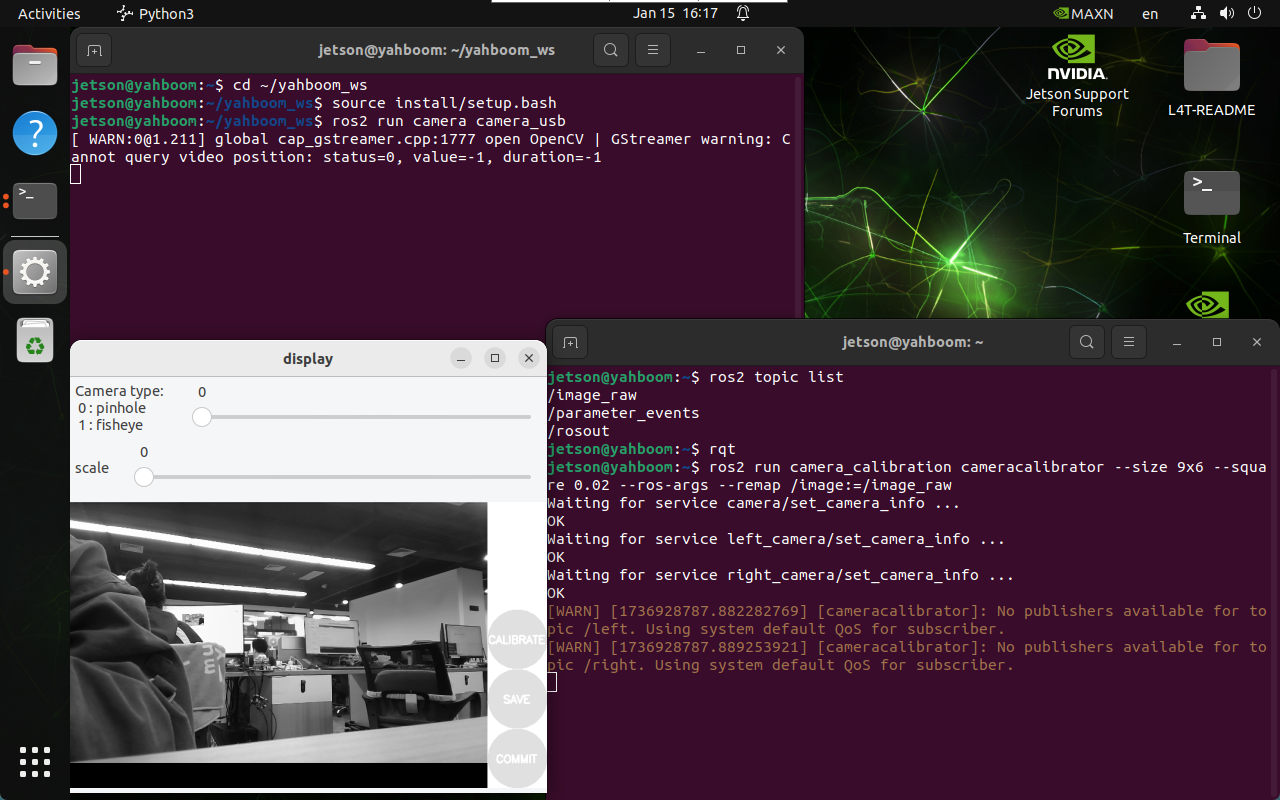
2.3.3 Calibration process
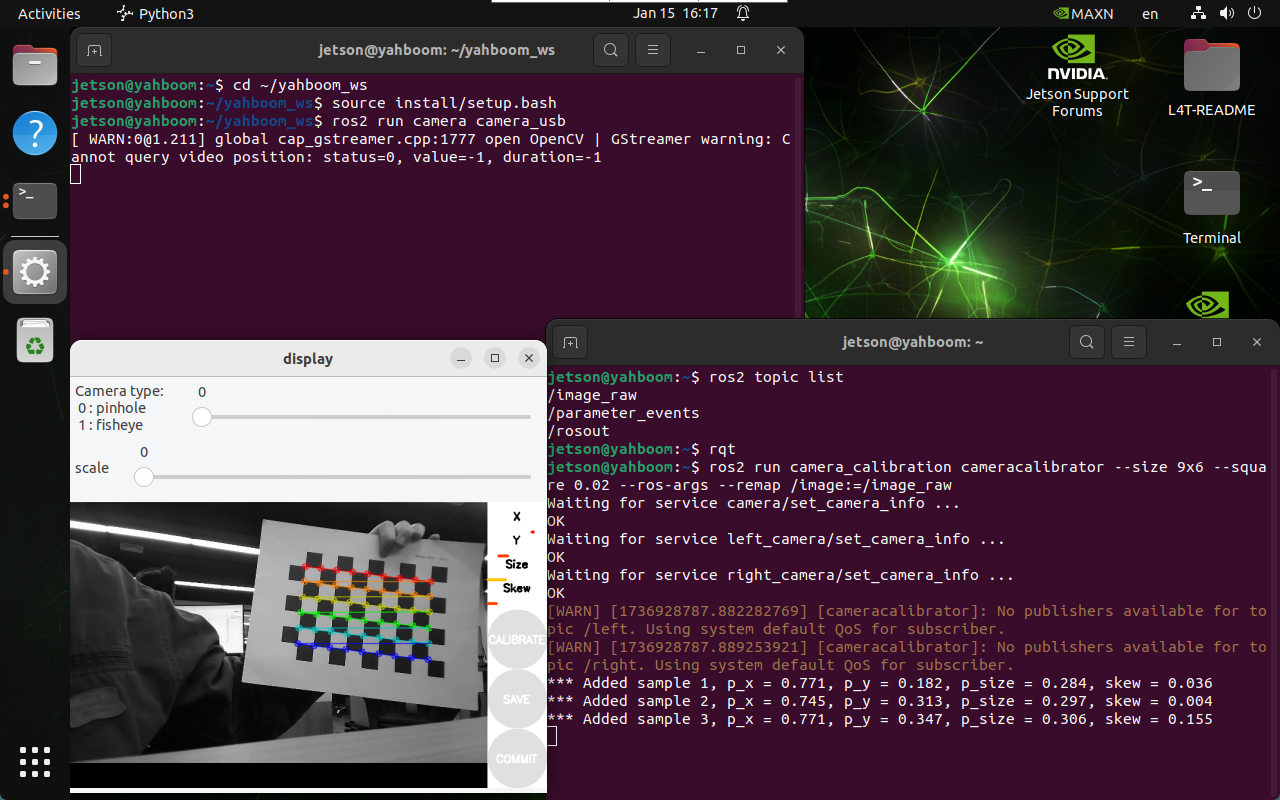
Parameter Description
X:The chessboard moves left and right in the camera's field of view
Y:The chessboard moves up and down in the camera's field of view
Size:The chessboard moves back and forth in the camera's field of view
Skew:Tilt and rotate of the chessboard in the camera's field of view
When X, Y, Size, and Skew turn green, you can click CALIBRATE to calculate the camera internal parameters: The more pictures you calibrate, the longer it takes, and the program may get stuck.
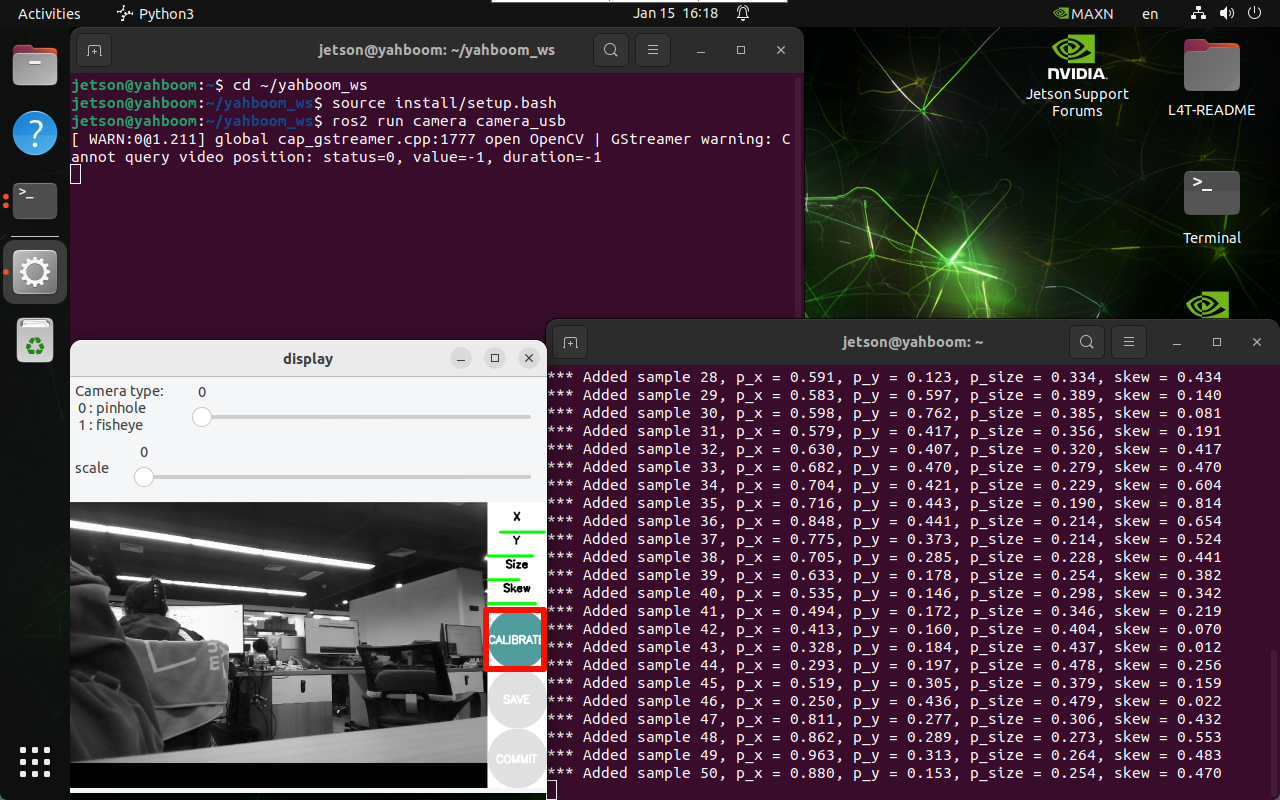
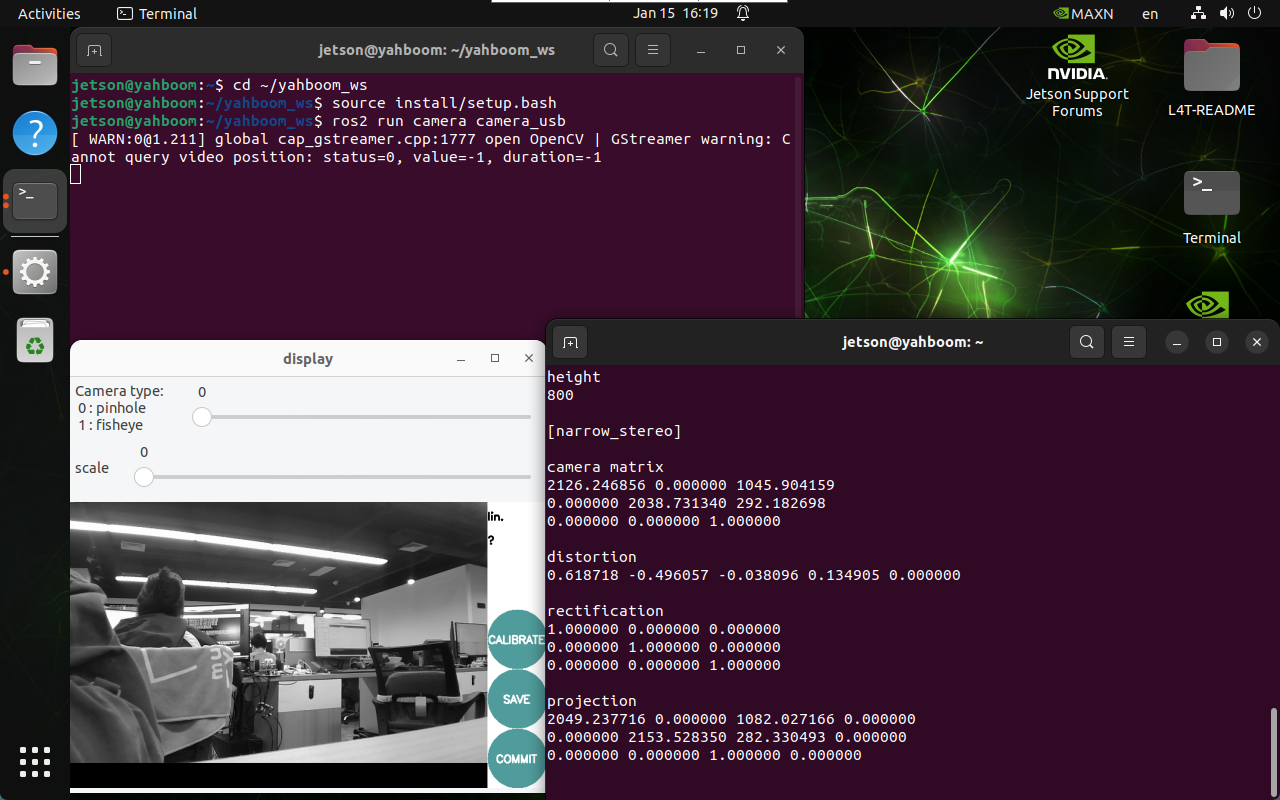
After calibration, click SAVE to save the results!
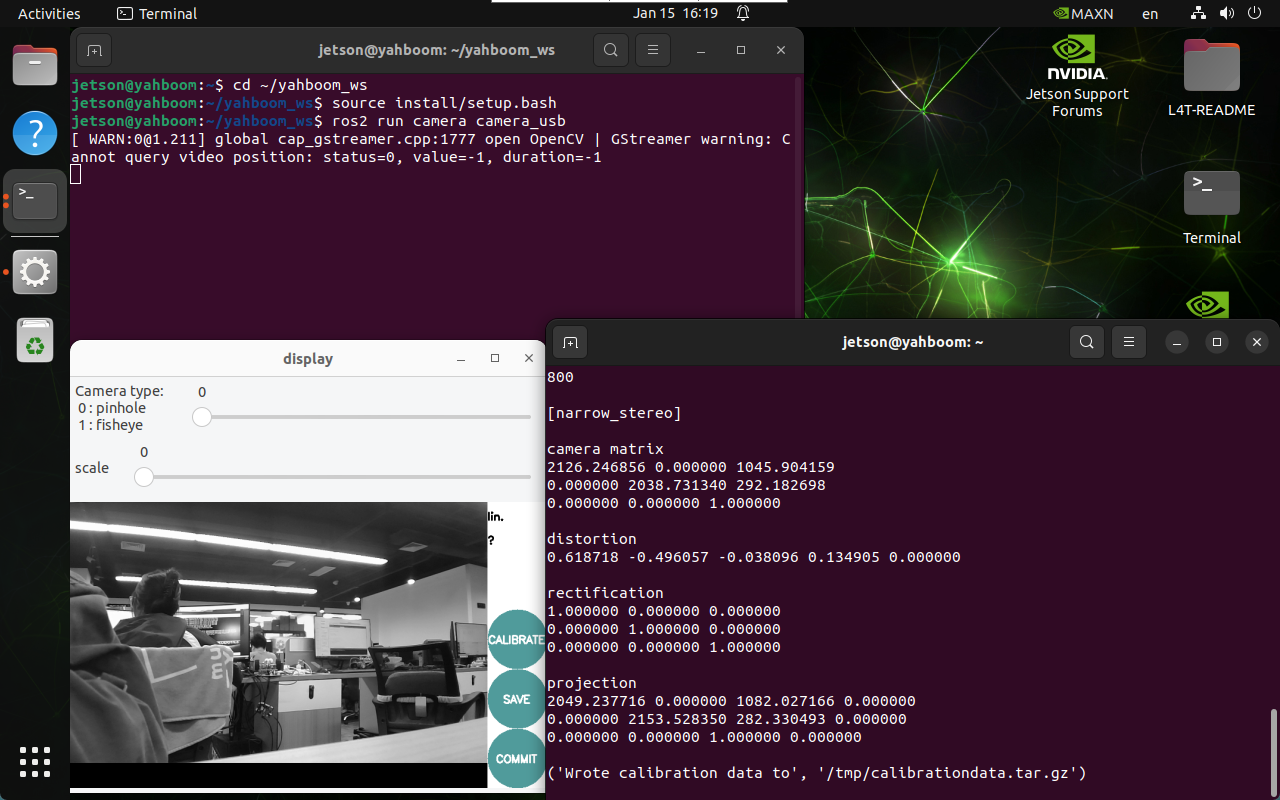
Close the program after successful saving!
2.3.4, Calibration results
Default save location and file name of calibration results:
xxxxxxxxxx/tmp/calibrationdata.tar.gz
Copy and decompress the calibration results:
xxxxxxxxxxsudo mv /tmp/calibrationdata.tar.gz ~mkdir calibrationdatatar -xzvf calibrationdata.tar.gz -C ~/calibrationdata
The decompressed files contain the calibration *.png, ost.yaml and ost.txt files. We mainly copy the data in the ost.yaml file to the camera_usb.yaml file.
ost.yaml
Replace the camera_usb.yaml file data with the image_width, image_height, data in camera_matrix, data in projection_matrix, and data in distortion_coefficients.
xxxxxxxxxximage_width: 1280image_height: 800camera_name: narrow_stereocamera_matrix:rows: 3cols: 3data: [2126.24686, 0. , 1045.90416,0. , 2038.73134, 292.1827 ,0. , 0. , 1. ]distortion_model: plumb_bobdistortion_coefficients:rows: 1cols: 5data: [0.618718, -0.496057, -0.038096, 0.134905, 0.000000]rectification_matrix:rows: 3cols: 3data: [1., 0., 0.,0., 1., 0.,0., 0., 1.]projection_matrix:rows: 3cols: 4data: [2049.23772, 0. , 1082.02717, 0. ,0. , 2153.52835, 282.33049, 0. ,0. , 0. , 1. , 0. ]
camera_csi.yaml
Modified file:
xxxxxxxxxx%YAML:1.0---image_width: 1920image_height: 1080camera_name: cameracamera_matrix: !!opencv-matrixrows: 3cols: 3dt: ddata: [2126.24686, 0. , 1045.90416,0. , 2038.73134, 292.1827 ,0. , 0. , 1. ]distortion_model: plumb_bobdistortion_coefficients: !!opencv-matrixrows: 1cols: 5dt: ddata: [0.618718, -0.496057, -0.038096, 0.134905, 0.000000]rectification_matrix:rows: 3cols: 3data: [1., 0., 0.,0., 1., 0.,0., 0., 1.]projection_matrix:rows: 3cols: 4data: [2049.23772, 0. , 1082.02717, 0. ,0. , 2153.52835, 282.33049, 0. ,0. , 0. , 1. , 0. ]