Welcome to Muto S2 Robot repository
11.Motion learning
11、motion learning
11.1 Introduction to gameplay
This course mainly implements the learning function by reading and writing the servo angle. The idea of action learning is to record each attitude into a local txt file, and then run multiple postures in sequence to form an action.
11.2Core content analysis
ACTION_FILE_NAME records the location where the action is saved. For the convenience of viewing, the text file is placed in the same directory of the program. Generally, it does not need to be modified.
ACTION_FILE_NAME = "Action_Data.txt"
Since robot motion learning requires unloading of the two front leg servos, the positions of the two middle legs need to be set first to ensure a stable state when learning is started.
xxxxxxxxxxdef ready_study():g_bot.reset()time.sleep(1)g_bot.motor(5, -60, 500)g_bot.motor(14, -60, 500)time.sleep(.5)g_bot.motor(4, 30, 500)g_bot.motor(13, -30, 500)time.sleep(.5)g_bot.motor(5, -35, 500)g_bot.motor(14, -35, 500)time.sleep(.5)
Start learning the movements and uninstall the two front leg servos, leg1 and leg6 respectively.
xxxxxxxxxxdef start_study():g_bot.unload_leg(1)time.sleep(.1)g_bot.unload_leg(6)
Learn the action, read the robot's current attitude and servo angle, and use Python's own open function to open and write a line of data (the two front leg servo angle values).
xxxxxxxxxxdef study_action():read_angle = g_bot.read_motor()angle_value = [0,0,0,0,0,0]for i in range(3):angle_value[i] = read_angle[i]angle_value[5-i] = read_angle[17-i]write_action(ACTION_FILE_NAME, angle_value)def write_action(file_name, value):if len(value) != 6:returnbase_dir = str(os.getcwd())base_dir = base_dir.replace('\\', '/')file_path = base_dir + "/" + str(file_name)with open(file_path, "a") as f:wf_str = str(value[0]) + ', ' + str(value[1]) + ', ' + \str(value[2]) + ', ' + str(value[3]) + ', ' + \str(value[4]) + ', ' + str(value[5]) + '\n'f.write(wf_str)f.flush()
Stop the learning action and reload the two front leg servos.
xxxxxxxxxxdef stop_study():g_bot.load_leg(1)time.sleep(.1)g_bot.load_leg(6)
Read all actions, read the actions in the txt text line by line, save them to the group, and return the group array.
xxxxxxxxxxdef read_all_action(file_name):base_dir = str(os.getcwd())base_dir = base_dir.replace('\\', '/')file_path = base_dir + "/" + str(file_name)group = ()try:with open(file_path, "r+") as f:lines = f.readlines()for line in lines:if len(line) != 0:list = line.split(',')if len(list) == 6:action = ([int(list[0]), int(list[1]), int(list[2]),int(list[3]), int(list[4]), int(list[5])], )group = group + actionexcept FileNotFoundError:print(str(file_name), "File not Found")return Noneexcept:return Nonereturn group
Run the action group and run the read group action groups in sequence. You can modify the runtime time of the motor function (default 800) and the sleep time below to control the speed of the servo.
xxxxxxxxxxdef play_action():group = read_all_action(ACTION_FILE_NAME)if group == None:print("No action found")returnlen_group = len(group)print("group:", len_group, group)motor_id = [1, 2, 3, 16, 17, 18]for action in group:for i in range (6):g_bot.motor(motor_id[i], action[i], 800)time.sleep(1)
The clearing action is relatively simple, just delete the ACTION_FILE_NAME file directly. Note: After clearing, the previous action data cannot be restored.
xxxxxxxxxxdef clear_action(file_name):base_dir = str(os.getcwd())base_dir = base_dir.replace('\\', '/')file_path = base_dir + "/" + str(file_name)os.system('rm ' + file_path)print("remove file:", file_path)
Create multiple new buttons to operate and perform related functions.
xxxxxxxxxxdef on_button_clicked(b):# with output:# print("Button clicked:", b.description)# print("Button clicked:", b.description)if b.description == Name_widgets['Stop_Study'][g_ENABLE_CHINESE]:stop_study()button_Start_Study.icon = "uncheck"elif b.description == Name_widgets['Start_Study'][g_ENABLE_CHINESE]:start_study()button_Start_Study.icon = "check"elif b.description == Name_widgets['Study_Action'][g_ENABLE_CHINESE]:if button_Start_Study.icon == "check":study_action()elif b.description == Name_widgets['Clear_Action'][g_ENABLE_CHINESE]:clear_action(ACTION_FILE_NAME)elif b.description == Name_widgets['Play_Action'][g_ENABLE_CHINESE]:play_action()
11.3 operation
Open the jupyterLab client and find the code path:
xxxxxxxxxxmuto/Samples/AI_Samples/11_study_mode/11.study_mode.ipynb
Click to run all cells, and then scroll to the bottom to see the generated controls.

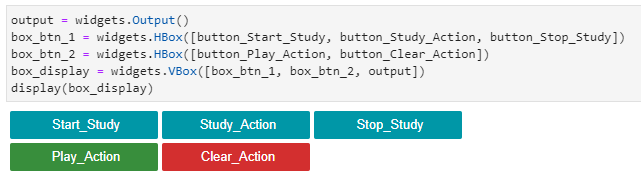
First click Start_Study to start learning. At this time, the two front legs of the robot will be unloaded, and you can turn the two front legs by hand for six servo angles.
When you turn to the posture you want to learn, click Study_Action to learn and record a posture. Record different postures repeatedly to form an action group.
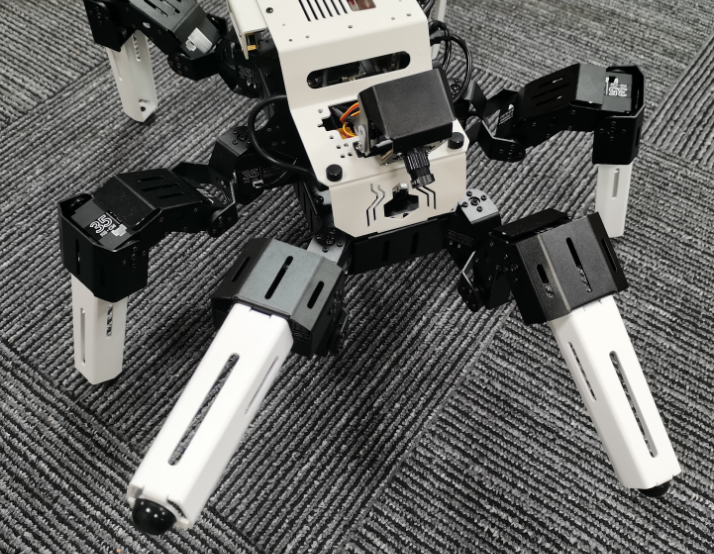
After the movement learning is completed, please click Stop_Study to end the learning. At this time, reload the two front leg servos of the robot. You cannot turn the servos angle by hand.
Click Play_Action to start playing the action you just learned.
When you need to clear the action or relearn the action, please click Clear_Action to clear the action data.