Welcome to Muto S2 Robot repository
7.Control height
7.Control height
7.Control height1.Experimental purpose2.Experimental preparation3.Experimental process4.Experiment summary
1.Experimental purpose
This course mainly learns how to control the height function of the robot's body.
2.Experimental preparation
The functions of the Muto hexapod robot Python library involved in this course are:
height(level): body height adjustment, level=1 means low height, level=2 means medium height, level=3 means the highest height.
3.Experimental process
Open the jupyterLab client and find the code path:
muto/Samples/Control/7.control_body.ipynb
By default g_ENABLE_CHINESE=False, if you need to display Chinese, please set g_ENABLE_CHINESE=True.
x# 中文开关,默认为英文 Chinese switch. The default value is Englishg_ENABLE_CHINESE = FalseName_widgets = {'End': ("End", "结束")}
Click to run all cells, and then scroll to the bottom to see the generated controls.

You can control different functions by operating different controls separately.
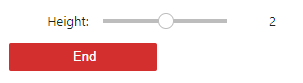
Each time you slide the Height slider, when the slider value changes, the robot's body height will be controlled immediately.
xxxxxxxxxxdef on_slider_height(value):global g_startif g_start:g_bot.height(value)print("height:", value)else:g_start = True
4.Experiment summary
This time, the JupyterLab control is used to control the body height function of the six-legged robot. For example, if Height is set to 3, the robot will immediately adjust its body height to the highest level.
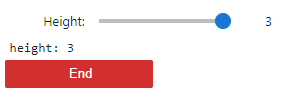
Press the End button to exit the program.