Welcome to Muto S2 Robot repository
5.Jetson-inference environment construction(selective viewing)
Jetson-inference environment construction
Jetson-inference environment construction一、Install jetson-inference environment1.Instructions before use2.The environment version configuration of this tutorial is as shown in the figure:3. Start building3.1 Download required dependencies3.2 Download related source code3.3 Download the relevant python module3.4 Make changes to files4.Install model5. Start compiling6.Verify whether the installation is successful二、Install Mediapipe environment1.Preparing Files2.Install bazel3.Install mediapipeappendix
The Raspberry Pi motherboard series does not currently support this tutorial.
一、Install jetson-inference environment
1.Instructions before use
This tutorial is suitable for building a jetson nano image independently. If you use the YAHBOOM version of the image directly, you can ignore this tutorial.
2.The environment version configuration of this tutorial is as shown in the figure:
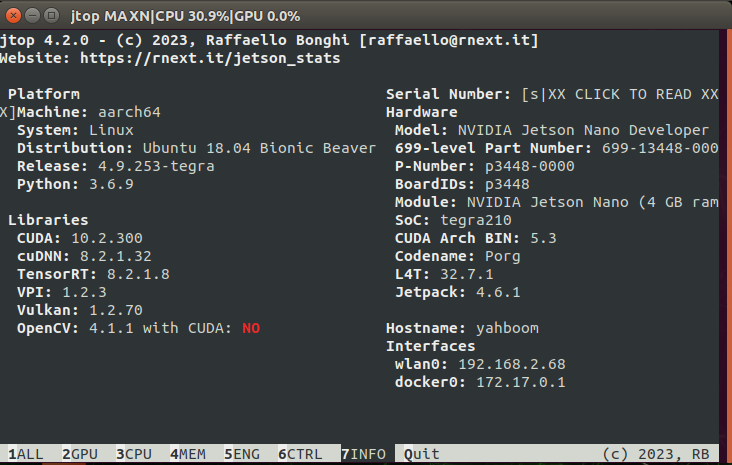
If you don’t want to build it completely by yourself, you can use the jetson-inference compressed package we provide, pass the compressed package into jetson nano, unzip it, and start directly from "Installing Modules"
3. Start building
3.1 Download required dependencies
sudo apt-get updatesudo apt-get install git cmake3.2 Download related source code
xxxxxxxxxxgit clone https://github.com/dusty-nv/jetson-inferencecd jetson-inferencegit submodule update --init 3.3 Download the relevant python module
Find the file torch-1.8.0-cp36-cp36m-linux_aarch64.whl from the attachment built by our environment and transfer it to jetson nano
xxxxxxxxxxsudo apt-get install libpython3-dev python3-numpysudo apt-get install python3-scipysudo apt-get install python3-pandassudo apt-get install python3-matplotlibsudo apt-get install python3-sklearnpip3 install torch-1.8.0-cp36-cp36m-linux_aarch64.whl3.4 Make changes to files
Edit jetson-inference/CMakePrebuild.sh. Comment out ./download-models.sh (add a # comment in front) as shown in the figure)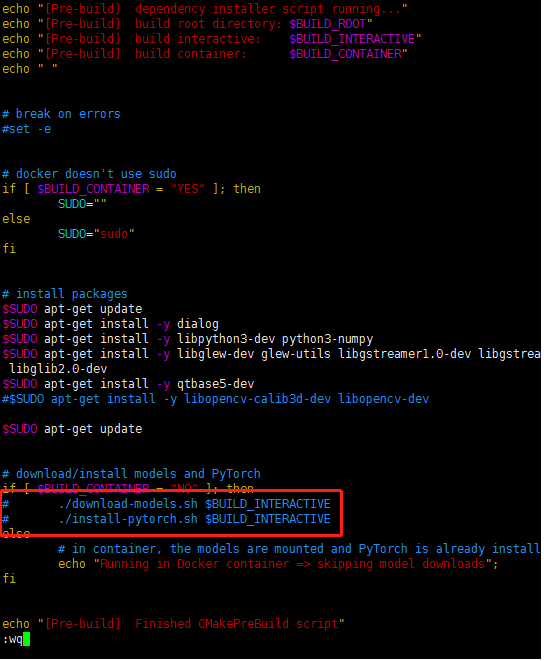
4.Install model
Method 1: You can perform the following steps
xxxxxxxxxxcd jetson-inference/tools./download-models.sh
After making a selection, the model will be automatically downloaded to the file path of data/network.
Method 2: You can find the packages required by jetson-inference in the attachments we provide for environment construction, transfer the compressed packages inside to jetson-inference/data/network of jetso nano, and then decompress them. Unzip command
xxxxxxxxxxfor tar in *.tar.gz; do tar xvf $tar; done
Note:
For decompressing multiple .gz files, use this command: for gz in *.gz; do gunzip $gz; done
For decompressing multiple .tar.gz files, use the following command for tar in *.tar.gz; do tar xvf $tar; done
5. Start compiling
xxxxxxxxxxcd jetson-inference mkdir build cd buildcmake ../make (or make -j4) #(In the build directory)sudo make install #(In the build directory)If an error is reported during the process, it means that the source code download is incomplete. please go back to step 3.2 and execute the command git submodule update --init.
6.Verify whether the installation is successful
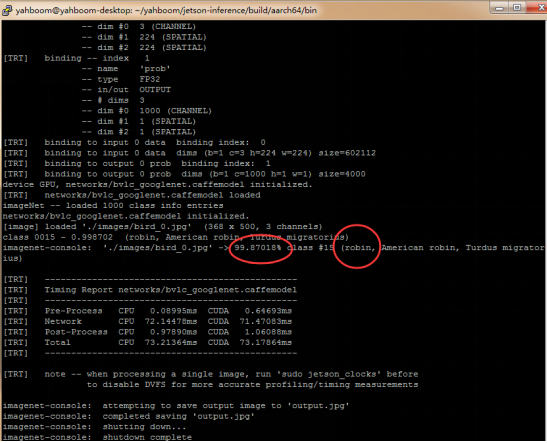
xxxxxxxxxxcd jetson-inference/build/aarch64/bin./imagenet-console ./images/bird_0.jpg output.jpg# After the execution waits for a long time, the following appears (the first time it takes a long time, the subsequent execution will be very fast)
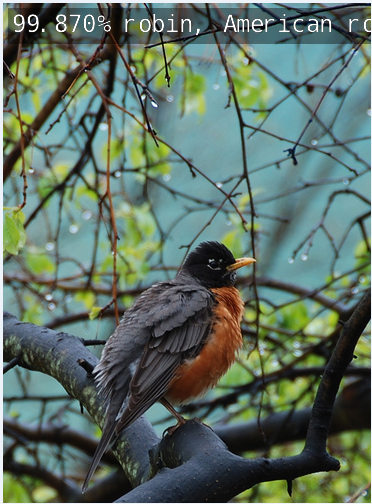
 Find the corresponding directory and view output.jpg as shown below. The recognition result will be displayed at the top of the picture.
二、Install Mediapipe environment
1.Preparing Files
Transfer the two files bazel and mediapipe-0.8-cp36-cp36m-linux_aarch64.whl in the attachment of the environment setup to the jetson nano
2.Install bazel
Open a terminal and run the following command
xxxxxxxxxxsudo chmod +x bazelmv bazel /usr/local/bin
Check whether the installation of bazel is complete. If the version number can be printed, the installation is complete.
xxxxxxxxxxbazel --version

3.Install mediapipe
Open a terminal and run the following command
xxxxxxxxxxpip3 install opencv-contrib-python==3.4.18.65pip3 install mediapipe-0.8-cp36-cp36m-linux_aarch64.whlpip3 uninstall opencv-contrib-python
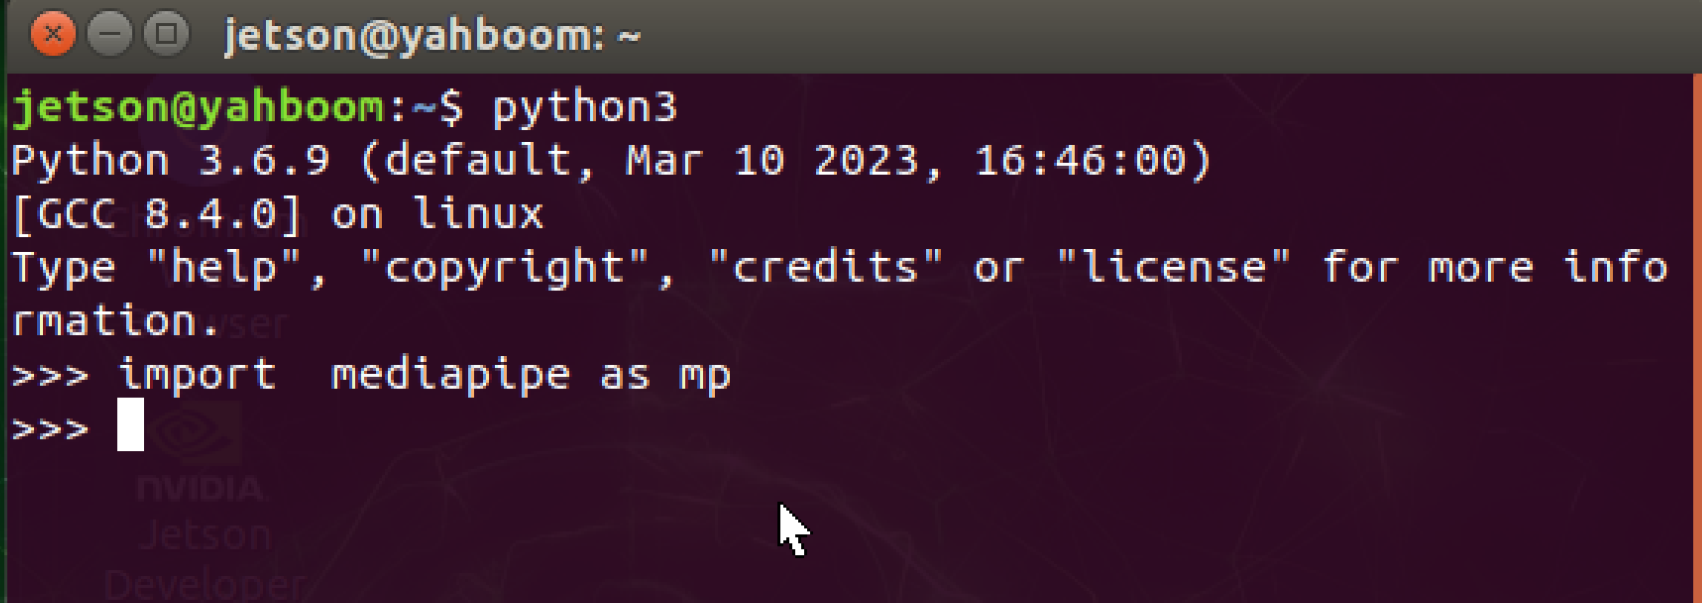
Verify successful installation
xxxxxxxxxxpython3import mediapipe as mp
appendix
Other reference tutorial URLs: 1.https://blog.csdn.net/aal779/article/details/122055432
2.https://github.com/dusty-nv/jetson-inference/blob/master/docs/building-repo-2.md
3.https://blog.csdn.net/weixin_43659725/article/details/120211312