Welcome to Muto S2 Robot repository
13.Grayscale processing
13.Open Source CV image processing and drawing text line segments
1.Grayscale processing
The process of converting a color image into a grayscale image is the grayscale processing of the image. The color of each pixel in a color image is determined by three components: R, G, and B.Each component can take a value of 0-255, so that one pixel can have a color range of more than 16 million (256256256=1677256).A grayscale image is a special color image with the same three components of R, G, and B. The range of changes of one pixel is 256.Therefore, in digital image processing, images in various formats are generally converted into grayscale images to make subsequent images less computationally intensive. The description of a grayscale image, like a color image, still reflects the distribution and characteristics of the overall and local chroma and highlight levels of the entire image.
Image grayscale processing Grayscale processing is the process of converting a color image into a grayscale image. The color image is divided into three components: R, G, and B, which display various colors such as red, green, and blue respectively. Grayscale is the process of making the color R, G, and B components equal. Pixels with large grayscale values are brighter (the maximum pixel value is 255, which is white), and vice versa (the lowest pixel is 0, which is black).
The core idea of image grayscale is R = G = B. This value is also called grayscale value.
Image grayscale algorithm
1) Maximum value method: Make the converted values of R, G, and B equal to the largest of the three values before conversion, that is: R=G=B=max (R, G, B). The grayscale image converted by this method is very bright.
2) Average method: The values of R, G, and B after conversion are the average values of R, G, and B before conversion. That is: R=G=B=(R+G+B)/3. This method produces softer grayscale images.
3) Weighted average method: According to a certain weight, the values of R, G, and B are weighted and averaged, that is, the weights of R, G, and B are respectively, and different values are taken to form different grayscale images. . Since the human eye is most sensitive to green, followed by red, and least sensitive to blue, a grayscale image that is easier to identify will be obtained. **Generally, the grayscale image obtained is the best.
There are four methods to achieve grayscale in the following code:
Code pat:muto/Samples/OpenCV/03_Image processing and text drawing/01gray processing.ipynb
x#Method 1 imread #Note: Sometimes the picture will not be displayed the first time you run it, but will be displayed the second time.import cv2import matplotlib.pyplot as pltimg0 = cv2.imread('yahboom.jpg',0) img1 = cv2.imread('yahboom.jpg',1)# print(img0.shape)# print(img1.shape)# cv2.imshow('src',img0)# cv2.waitKey(0)
#original image# img_bgr2rgb1 = cv2.cvtColor(img1, cv2.COLOR_BGR2RGB)# plt.imshow(img_bgr2rgb1)
#gray imageimg_bgr2rgb0 = cv2.cvtColor(img0, cv2.COLOR_BGR2RGB) plt.imshow(img_bgr2rgb0) plt.show()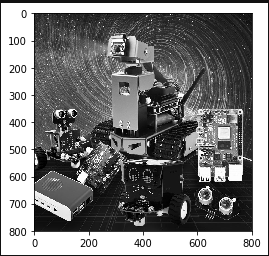
xxxxxxxxxx#Method 2 cvtColor#Note: Sometimes the picture will not be displayed the first time you run it, but will be displayed the second time.
import cv2import matplotlib.pyplot   as plt
img = cv2.imread('image0.jpg',1)dst = cv2.cvtColor(img,cv2.COLOR_BGR2GRAY)#   color space conversion 1 data 2 BGR gray#cv2.imshow('dst',dst)#cv2.waitKey(0)
#original image# img_bgr2rgb1   = cv2.cvtColor(img, cv2.COLOR_BGR2RGB)# plt.imshow(img_bgr2rgb1)
#gray imageimg_bgr2rgb0   = cv2.cvtColor(dst, cv2.COLOR_BGR2RGB)    plt.imshow(img_bgr2rgb0)    plt.show()
xxxxxxxxxx#Method 3 Average method
import cv2import   numpy as npimport   matplotlib.pyplot as pltimg =   cv2.imread('yahboom.jpg',1)imgInfo =   img.shapeheight =   imgInfo[0]width =   imgInfo[1]# RGB R=G=B   = gray  (R+G+B)/3dst =   np.zeros((height,width,3),np.uint8)for i in   range(0,height):    for j in range(0,width):        (b,g,r) = img[i,j]        gray = (int(b)+int(g)+int(r))/3        dst[i,j] = np.uint8(gray)#cv2.imshow('dst',dst)#cv2.waitKey(0)#original image#   img_bgr2rgb1 = cv2.cvtColor(img, cv2.COLOR_BGR2RGB)#   plt.imshow(img_bgr2rgb1)
#gray imageimg_bgr2rgb0   = cv2.cvtColor(dst, cv2.COLOR_BGR2RGB)plt.imshow(img_bgr2rgb0)    plt.show()
xxxxxxxxxx#Method 4 Weighted average method# gray =   r*0.299+g*0.587+b*0.114 import cv2import   numpy as npimg =   cv2.imread('yahboom.jpg',1)imgInfo =   img.shapeheight =   imgInfo[0]width = imgInfo[1]dst =   np.zeros((height,width,3),np.uint8)for i in   range(0,height):    for j in range(0,width):        (b,g,r) = img[i,j]        b = int(b)        g = int(g)        r = int(r)        gray = r*0.299+g*0.587+b*0.114        dst[i,j] = np.uint8(gray)#cv2.imshow('dst',dst)#cv2.waitKey(0)
#original image#   img_bgr2rgb1 = cv2.cvtColor(img, cv2.COLOR_BGR2RGB)#   plt.imshow(img_bgr2rgb1)
#gray imageimg_bgr2rgb0   = cv2.cvtColor(dst, cv2.COLOR_BGR2RGB)plt.imshow(img_bgr2rgb0)
    plt.show()