Welcome to Jetson ORIN NANO SUPER repository
当製品の日本語版マニュアル資料は、こちらからご取得ください。
04.Backup SSD system
Backup SSD system
Backup SSD system1. Hardware connection2. Compress the SSD2.1. Install Gparted2.2. Use GParted2.2.1. Select the SSD2.2.2. Unmount the partition2.2.3. Perform disk compression3. Back up the SSD3.1. Check disk information3.2. Start disk backup
During the development process, users may need to back up the system to prevent subsequent development from affecting the current system environment.
The image file demonstrated in the tutorial is not the actual factory image, it is only for tutorial demonstration
1. Hardware connection
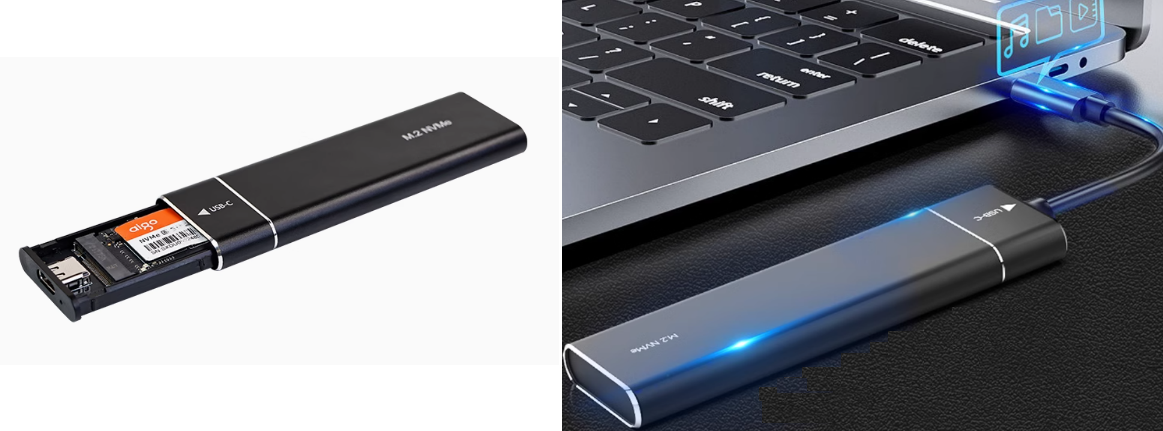
Users need to prepare the SSD box in advance, install the SSD into the SSD box and connect it to the computer or virtual machine: the computer and virtual machine systems need to be Ubuntu systems.
2. Compress the SSD
Since the SSD capacity of the Jetson Orin series motherboard is relatively large, we need to compress it to an appropriate space for system backup to save time for backup and burning the system.
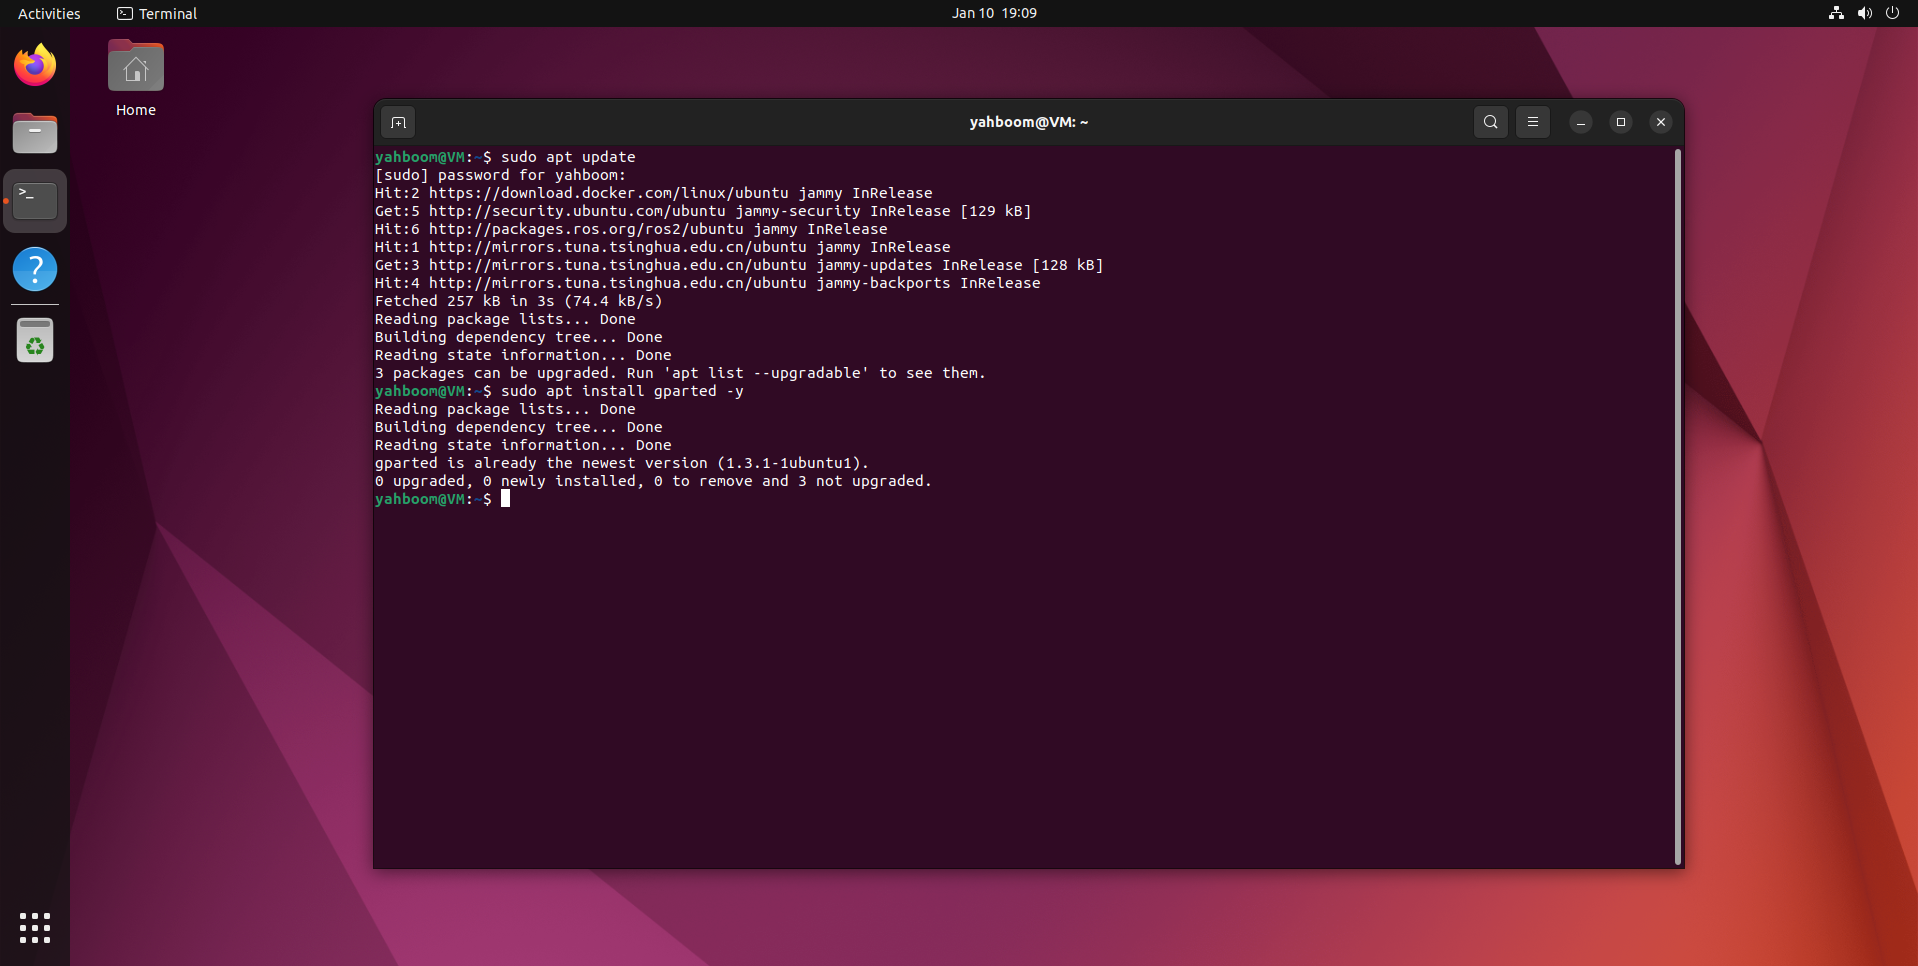
2.1. Install Gparted
xxxxxxxxxxsudo apt updatesudo apt install gparted -y
2.2. Use GParted
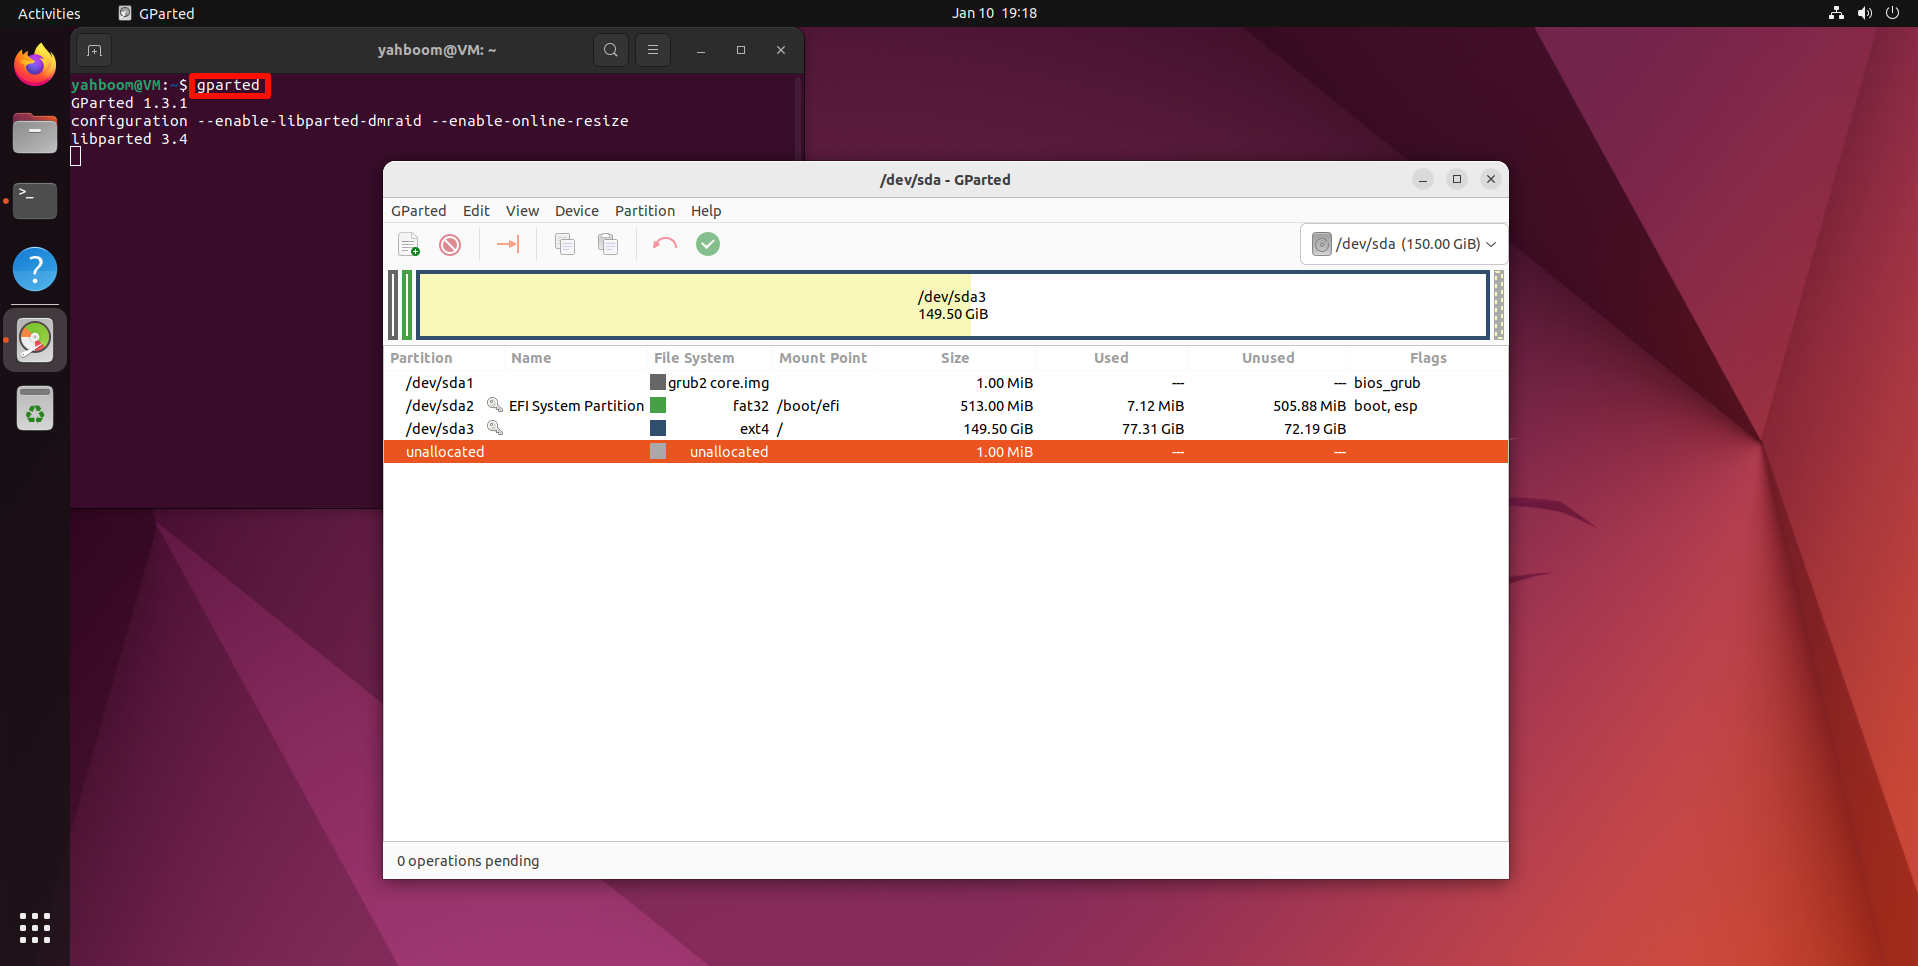
Find the GParted application icon in the system application menu bar to open it or enter the following command in the terminal to start it:
xxxxxxxxxxgparted
2.2.1. Select the SSD
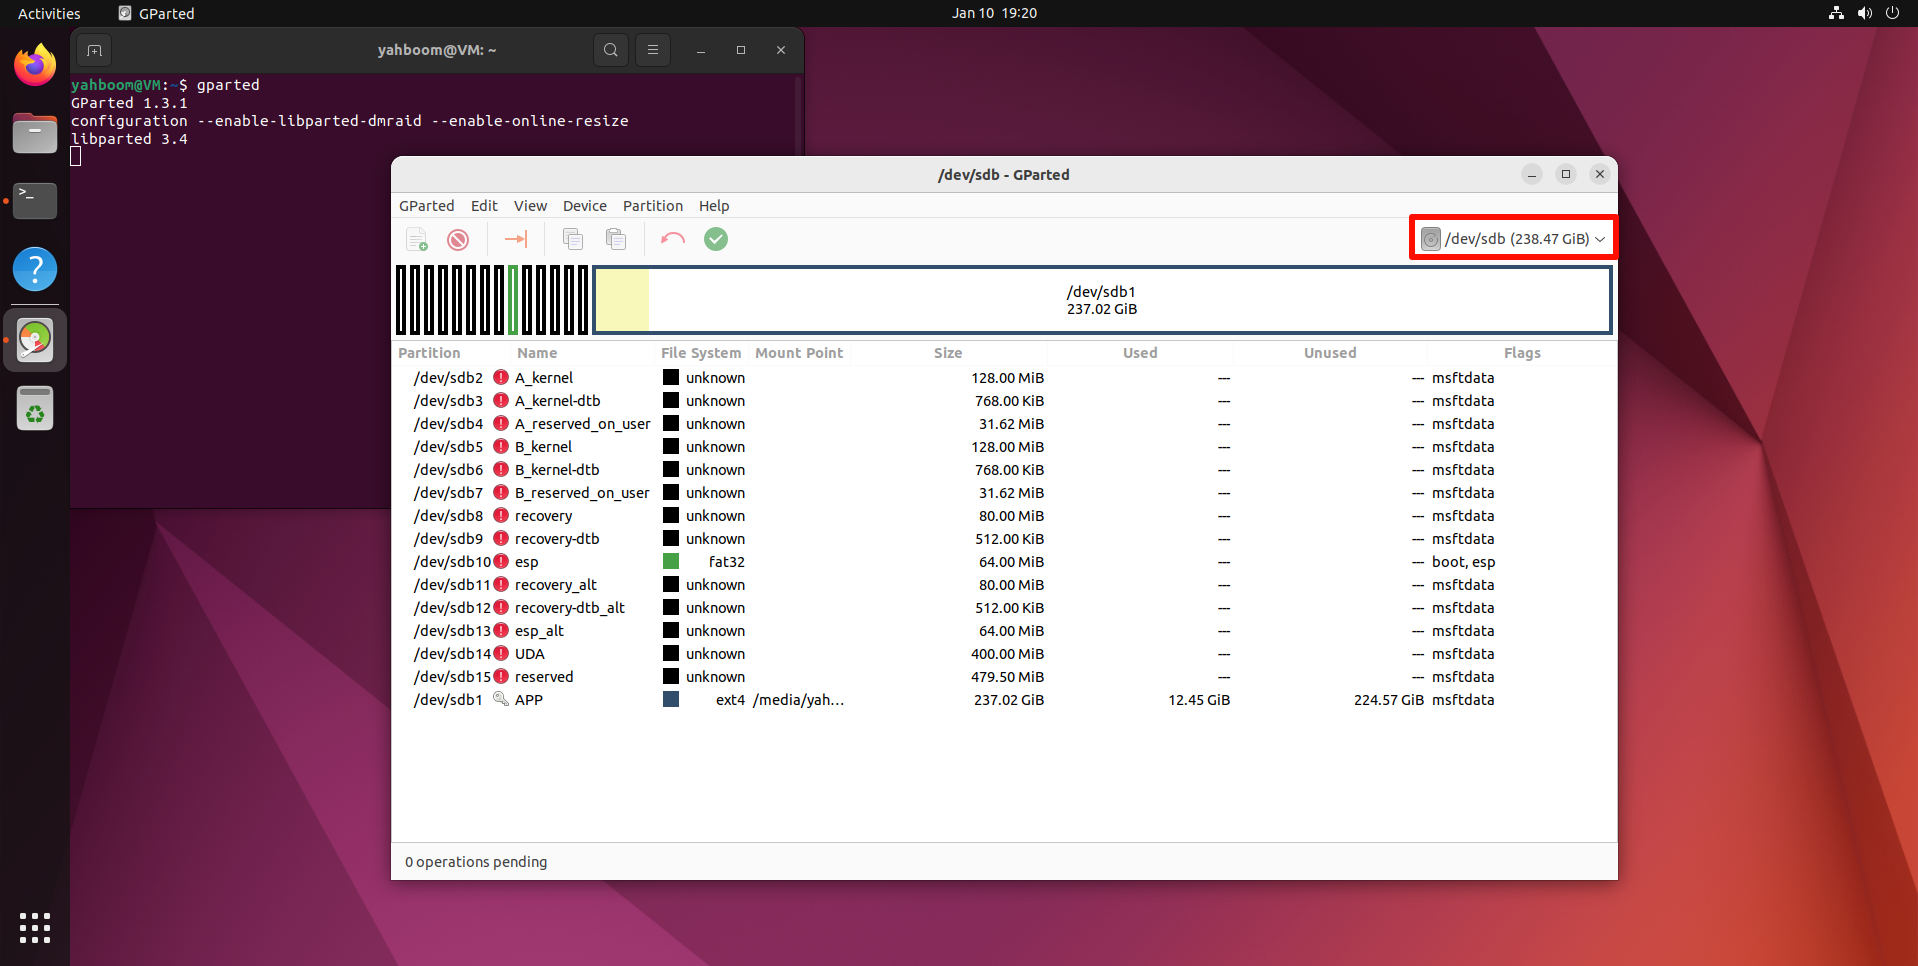
Select the newly added disk symbol: You can confirm again whether it is the SSD you mounted based on the disk capacity
2.2.2. Unmount the partition
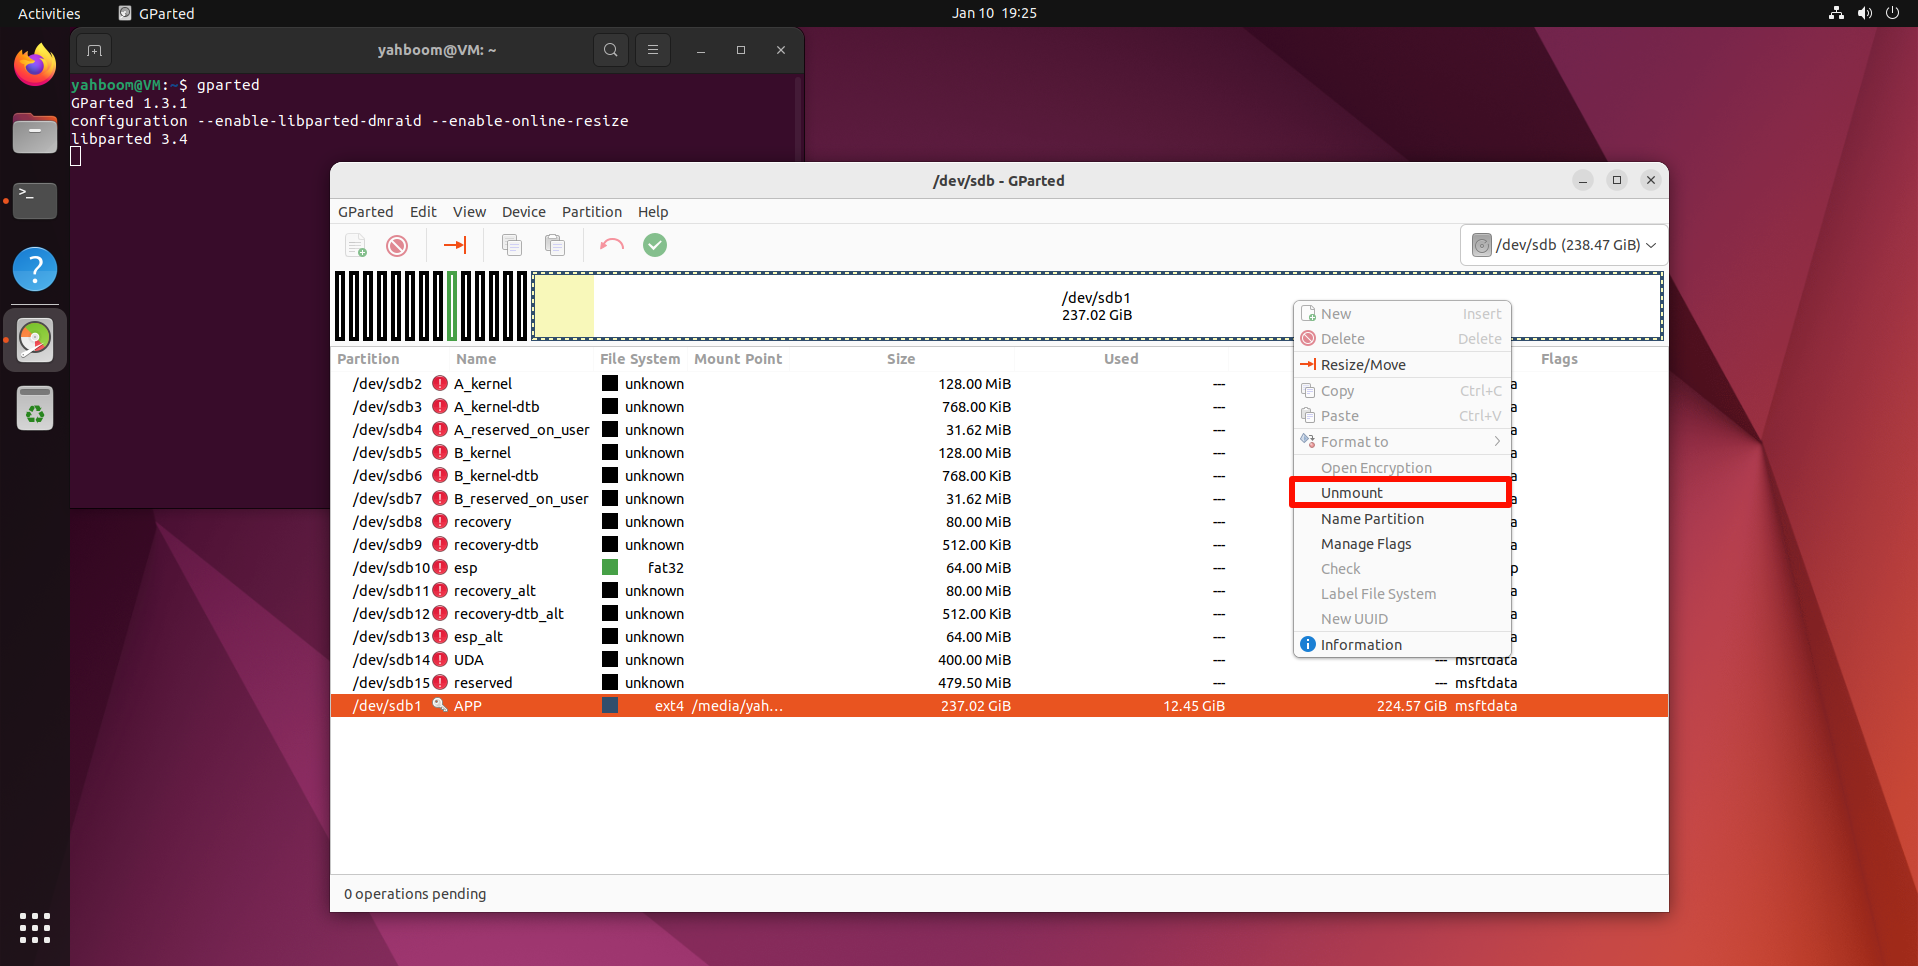
Before operating the disk, you need to unmount the disk: select the APP partition (largest partition) in the disk, and click Unmount to unmount the partition
2.2.3. Perform disk compression
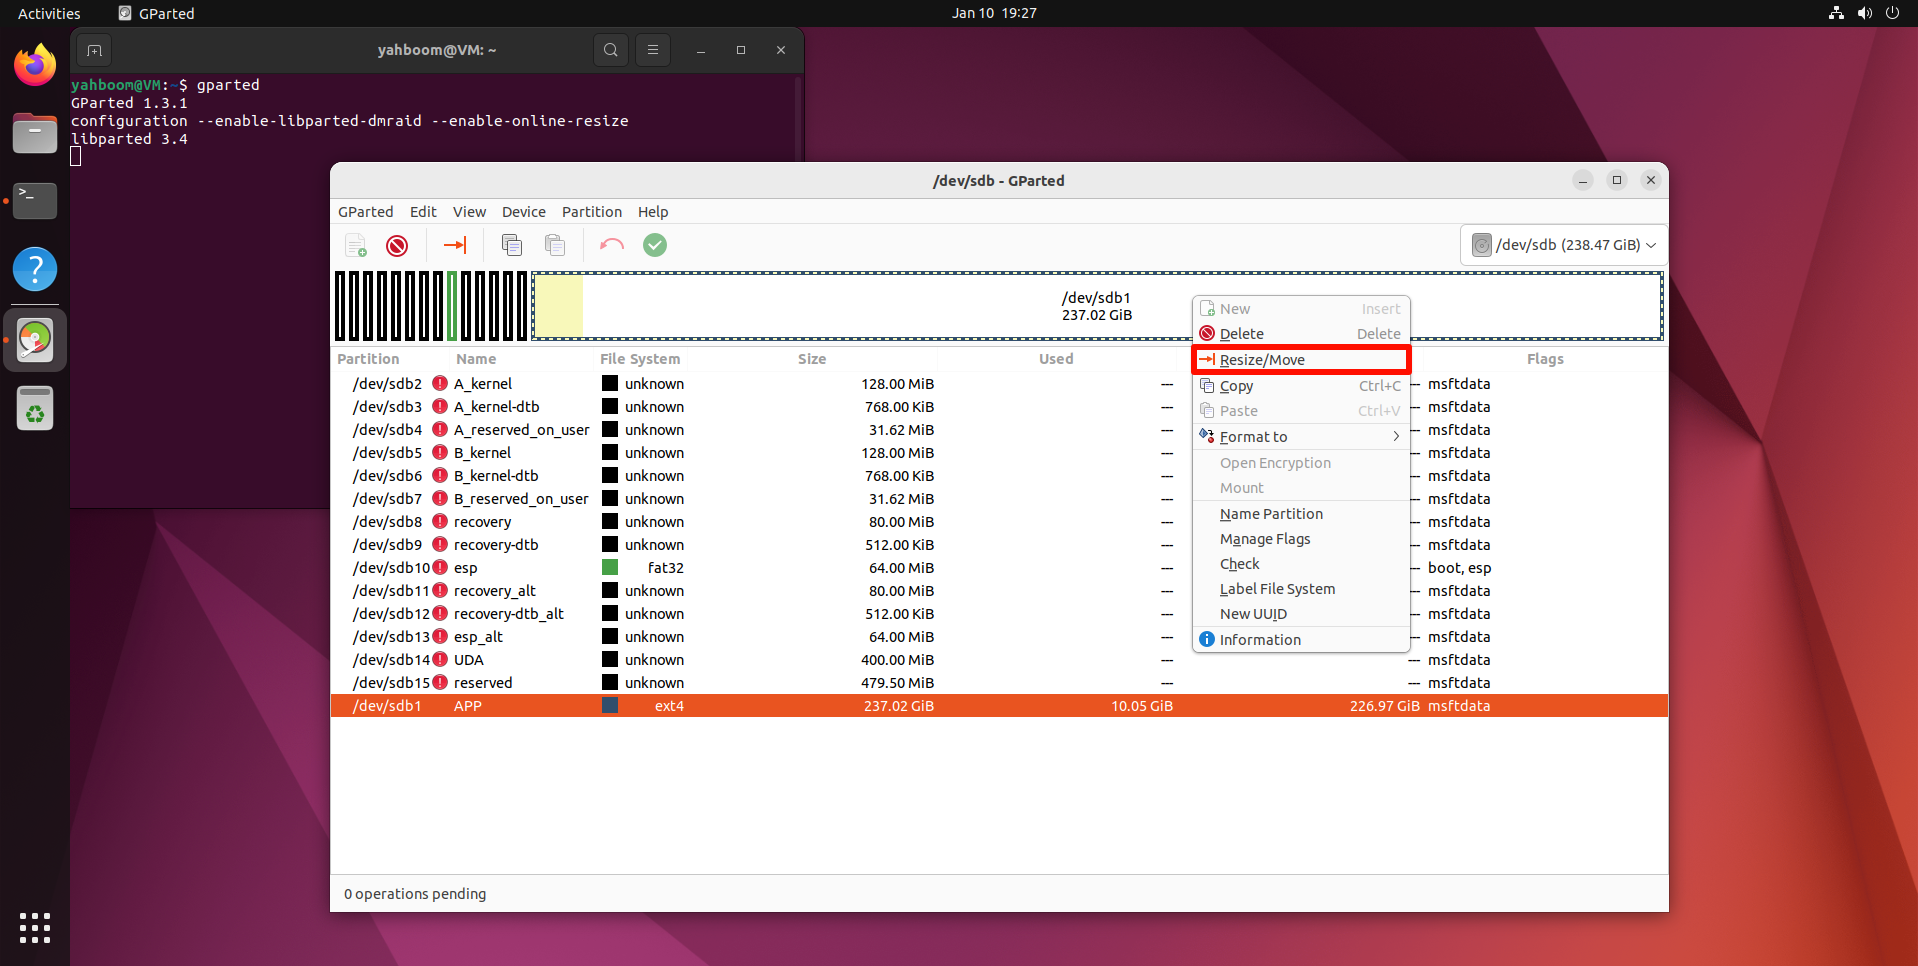
Right-click the uninstalled disk partition and resize the previously uninstalled partition space:
You can adjust the partition size using the slider: yellow is the space used by the partition, white is the unused space, it is recommended to leave about 5-10G of unused space in the partition to avoid the system from failing to start
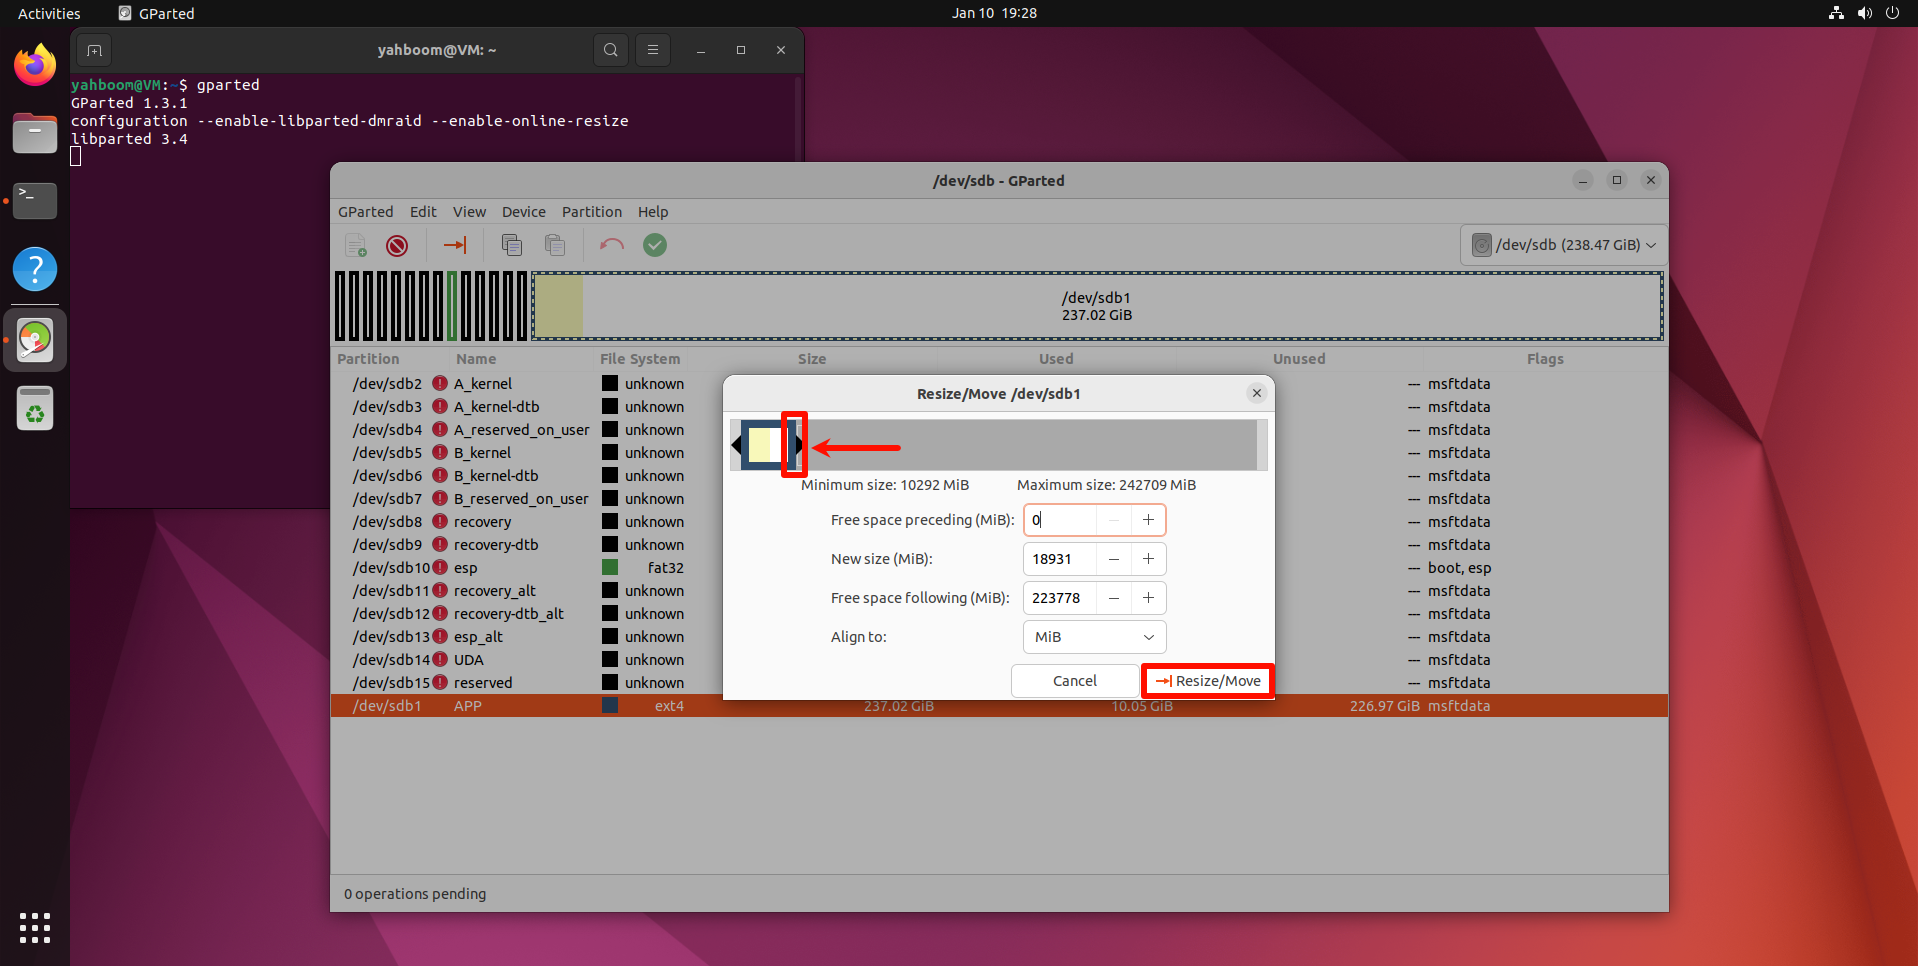
Confirm the disk operation:
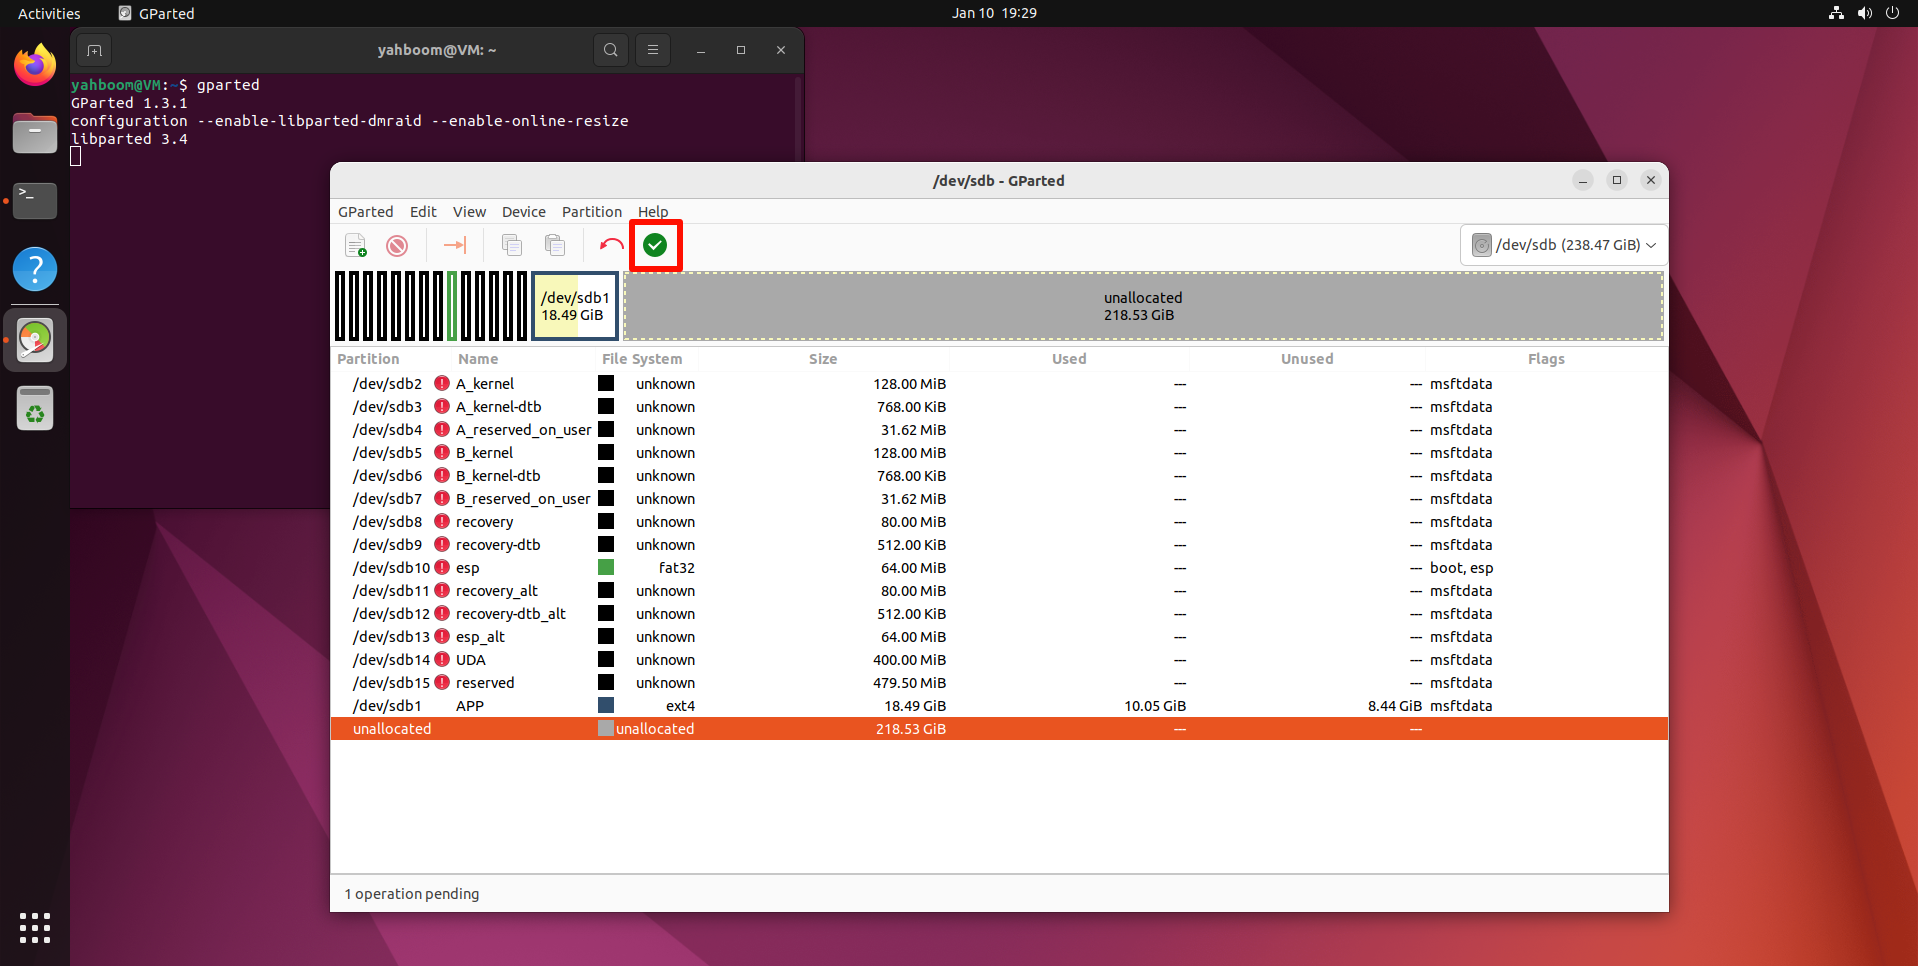
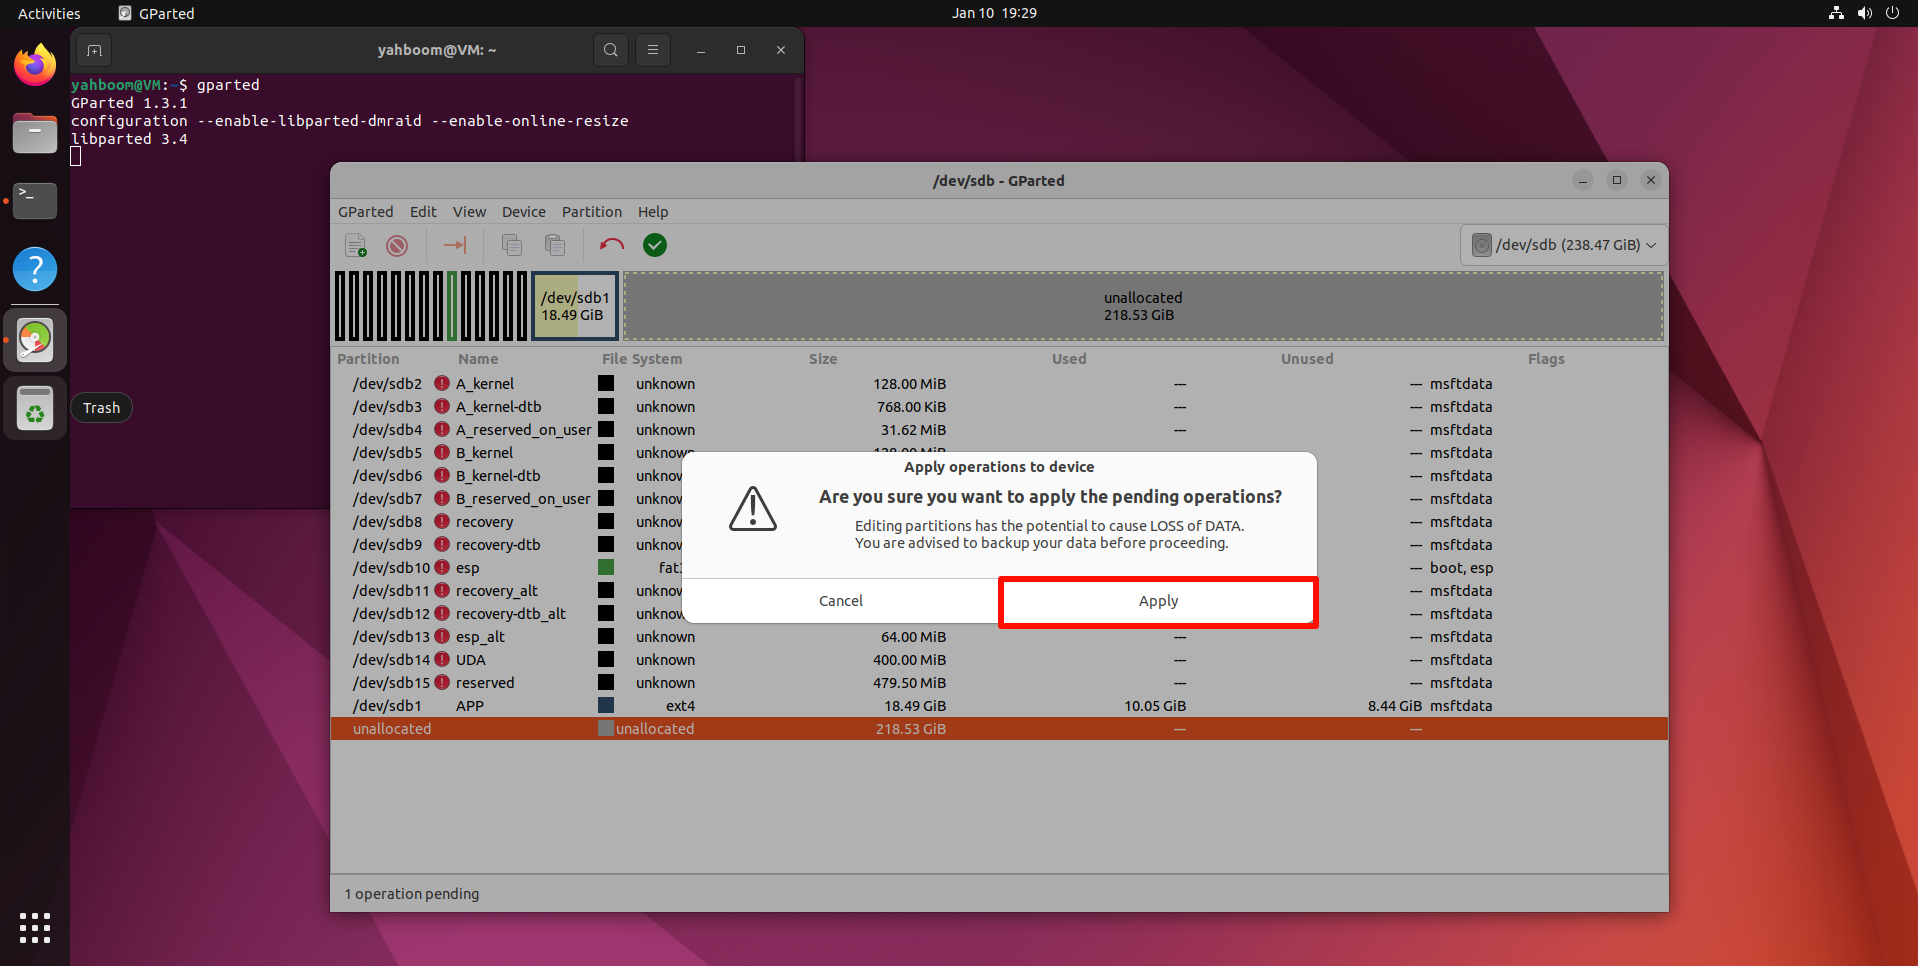
Wait for the operation to complete:

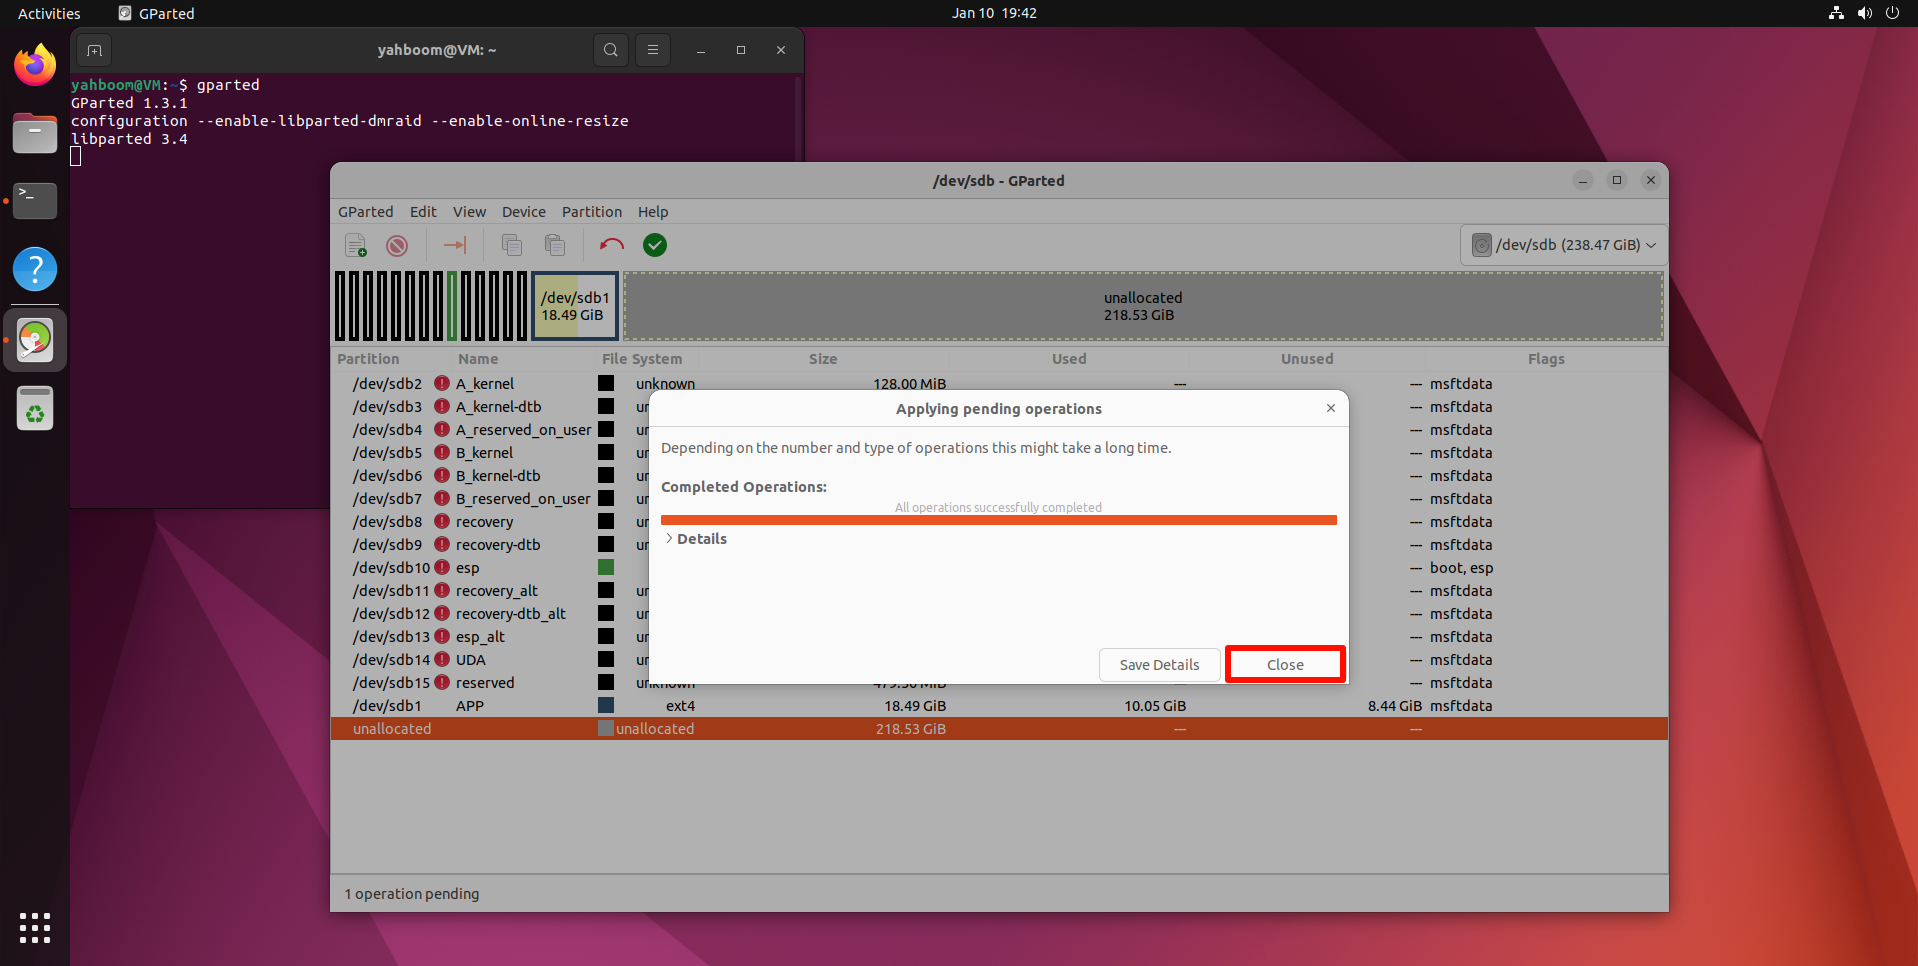
After completing the above operations, close GParted!
3. Back up the SSD
3.1. Check disk information
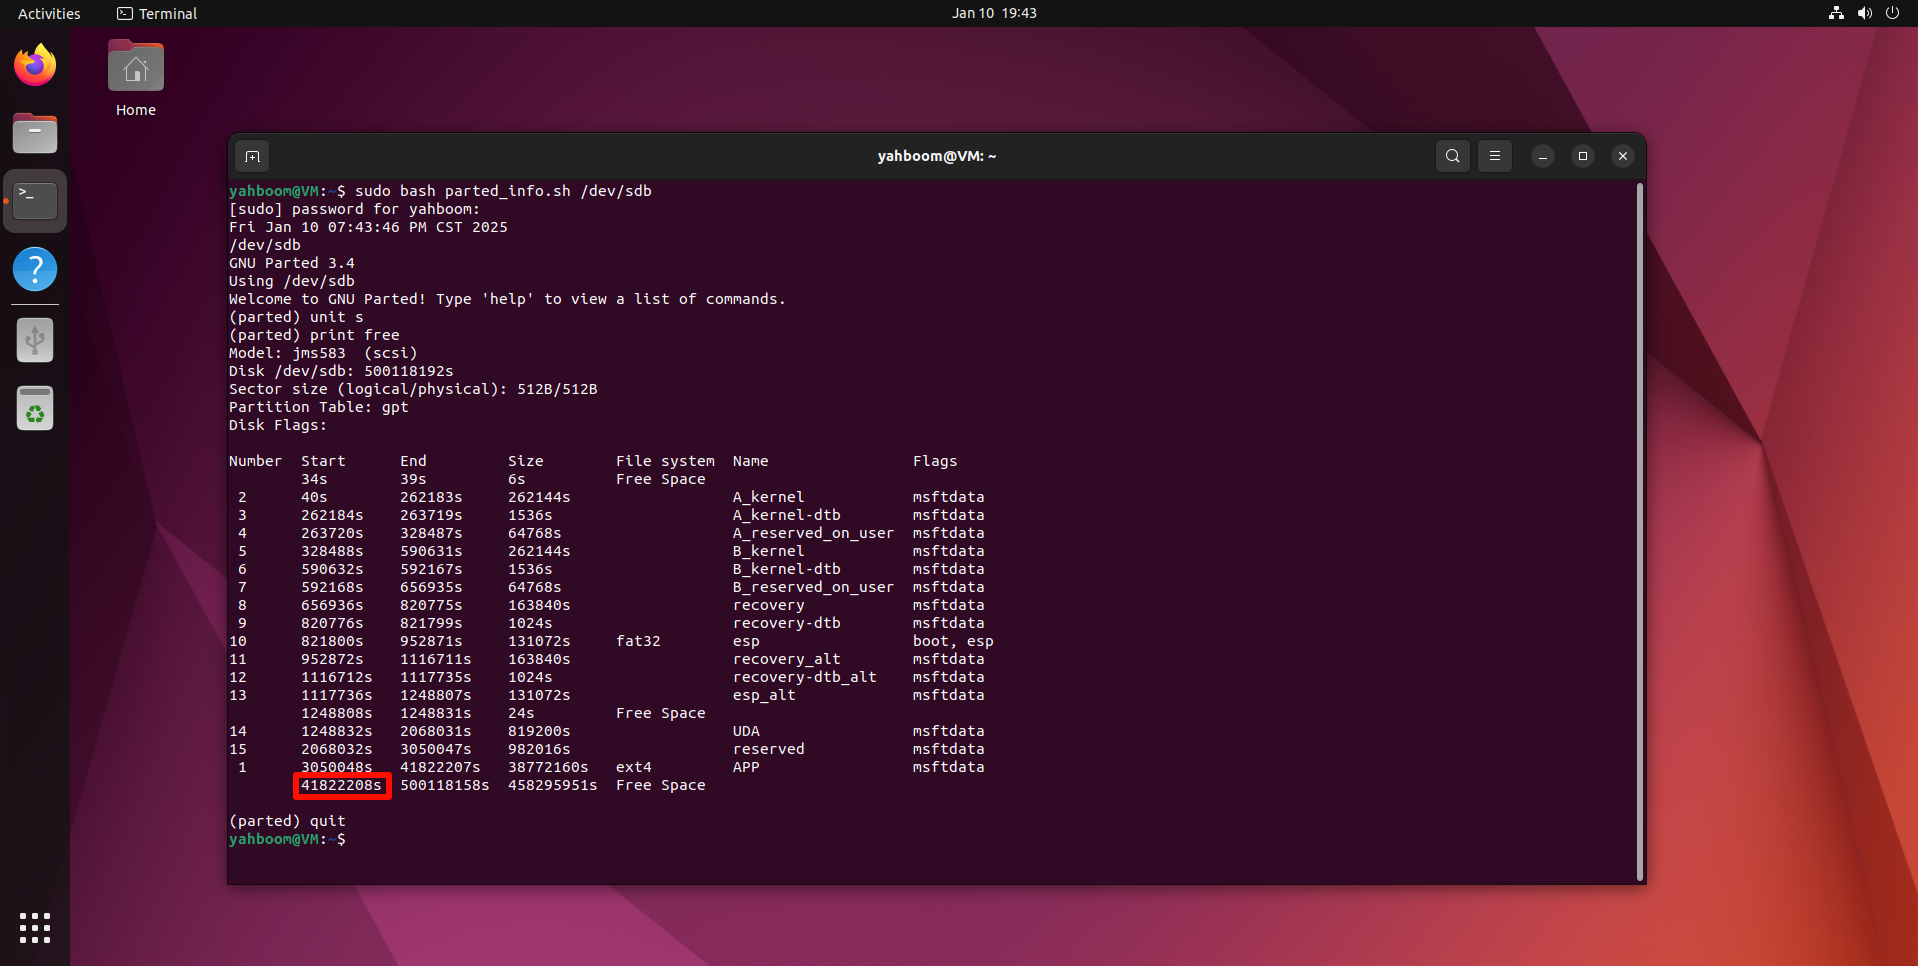
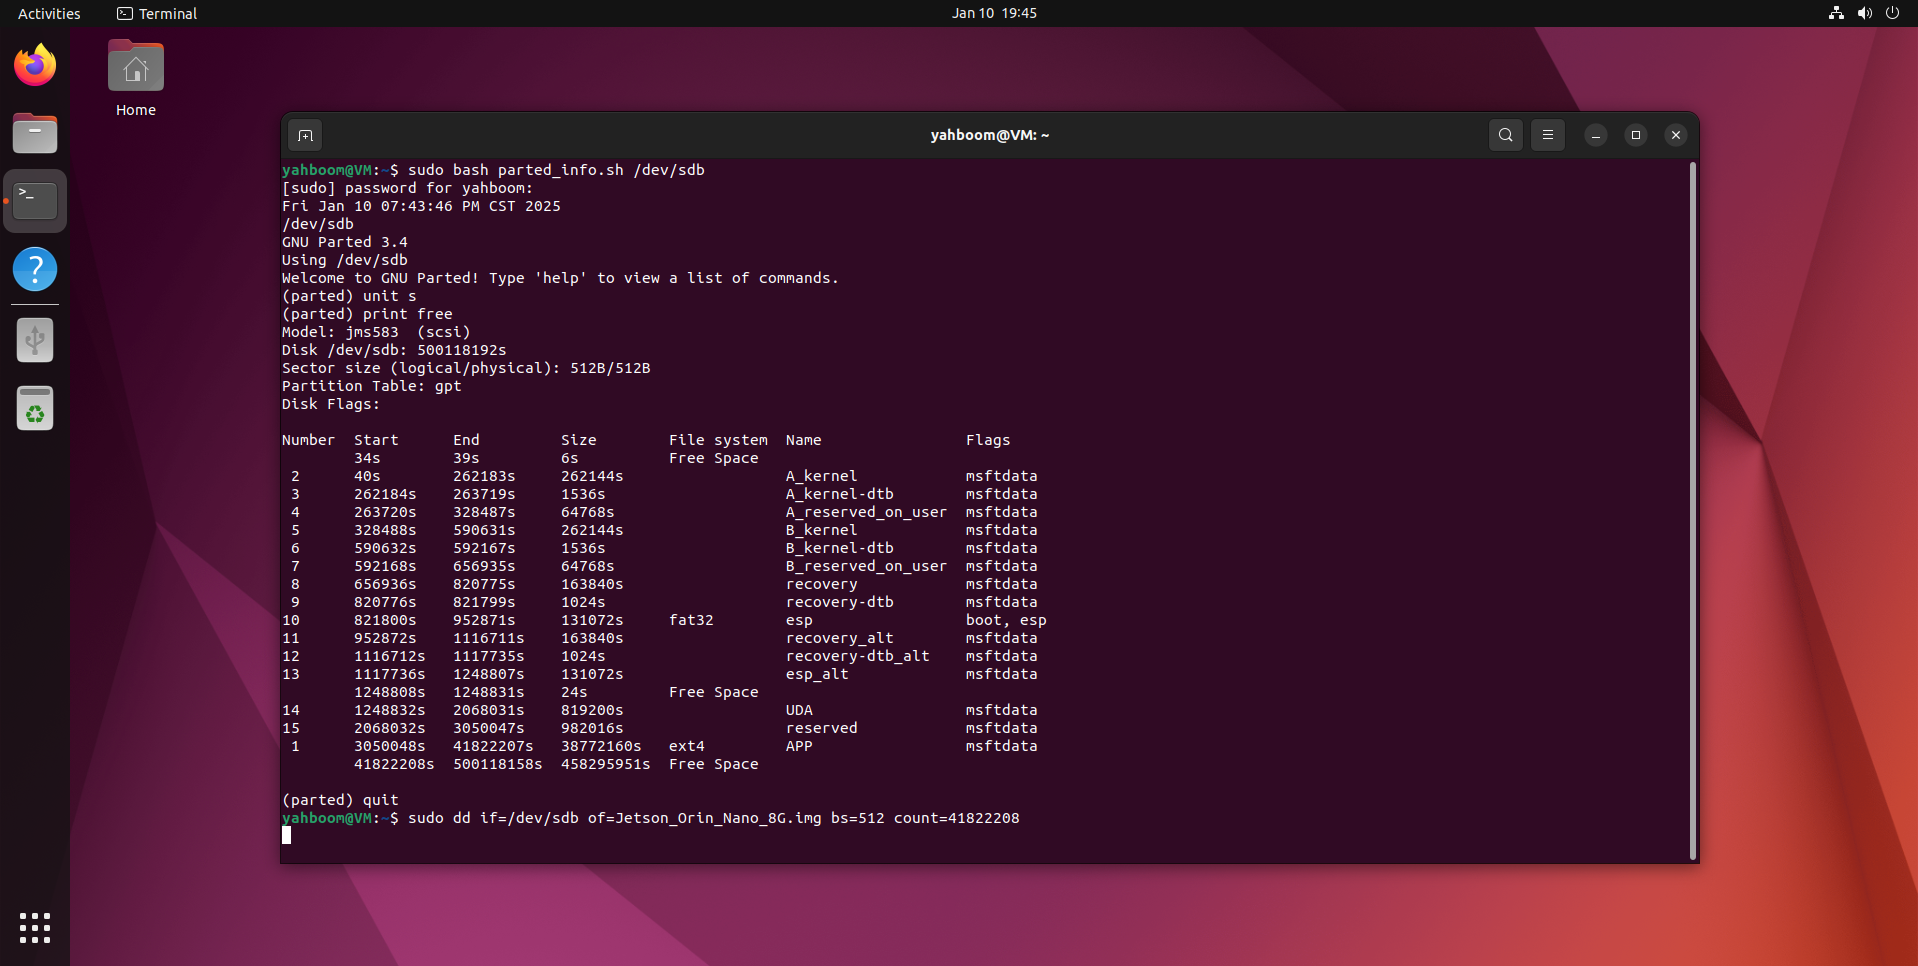
Open the terminal and use the script to view the current disk information: the drive letter needs to correspond to the drive letter of the SSD you backed up
xxxxxxxxxxsudo bash parted_info.sh /dev/sdb
parted_info.sh script content
xxxxxxxxxx#!/bin/bashdateecho $1sudo parted $1 <<EOFunit sprint freequitEOF
Record the data in the figure: 41822208s
3.2. Start disk backup
Use the dd command to back up the SSD to the img file. Enter the following in the terminal:
xxxxxxxxxxsudo dd if=/dev/sdb of=Jetson_Orin_Nano_8G.img bs=512 count=41822208
/dev/sdb: SSD drive letter
Jetson_Orin_Nano_8G.img: Image name
bs=512: Set block size to 512 bytes
56393728: Data queried by the script
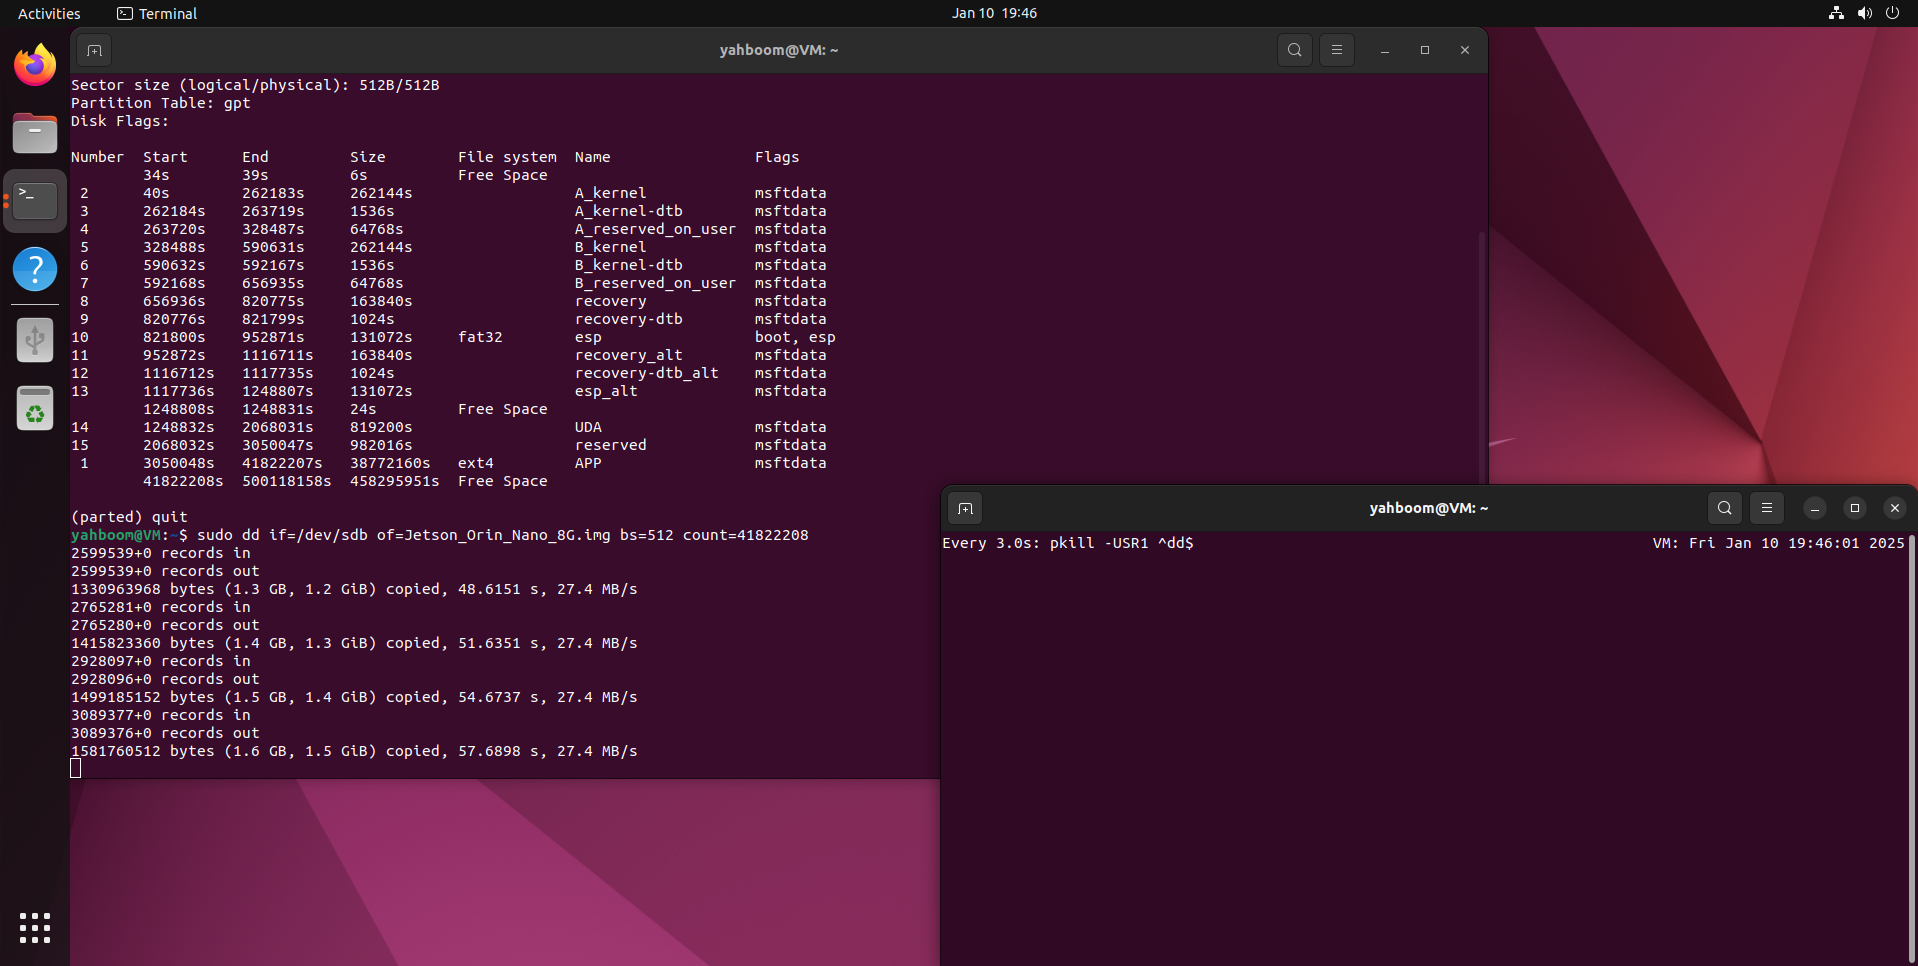
To view the dd process information, open another terminal and enter the following command:
xxxxxxxxxxsudo watch -n 3 pkill -USR1 ^dd$
Wait for the backup to complete:
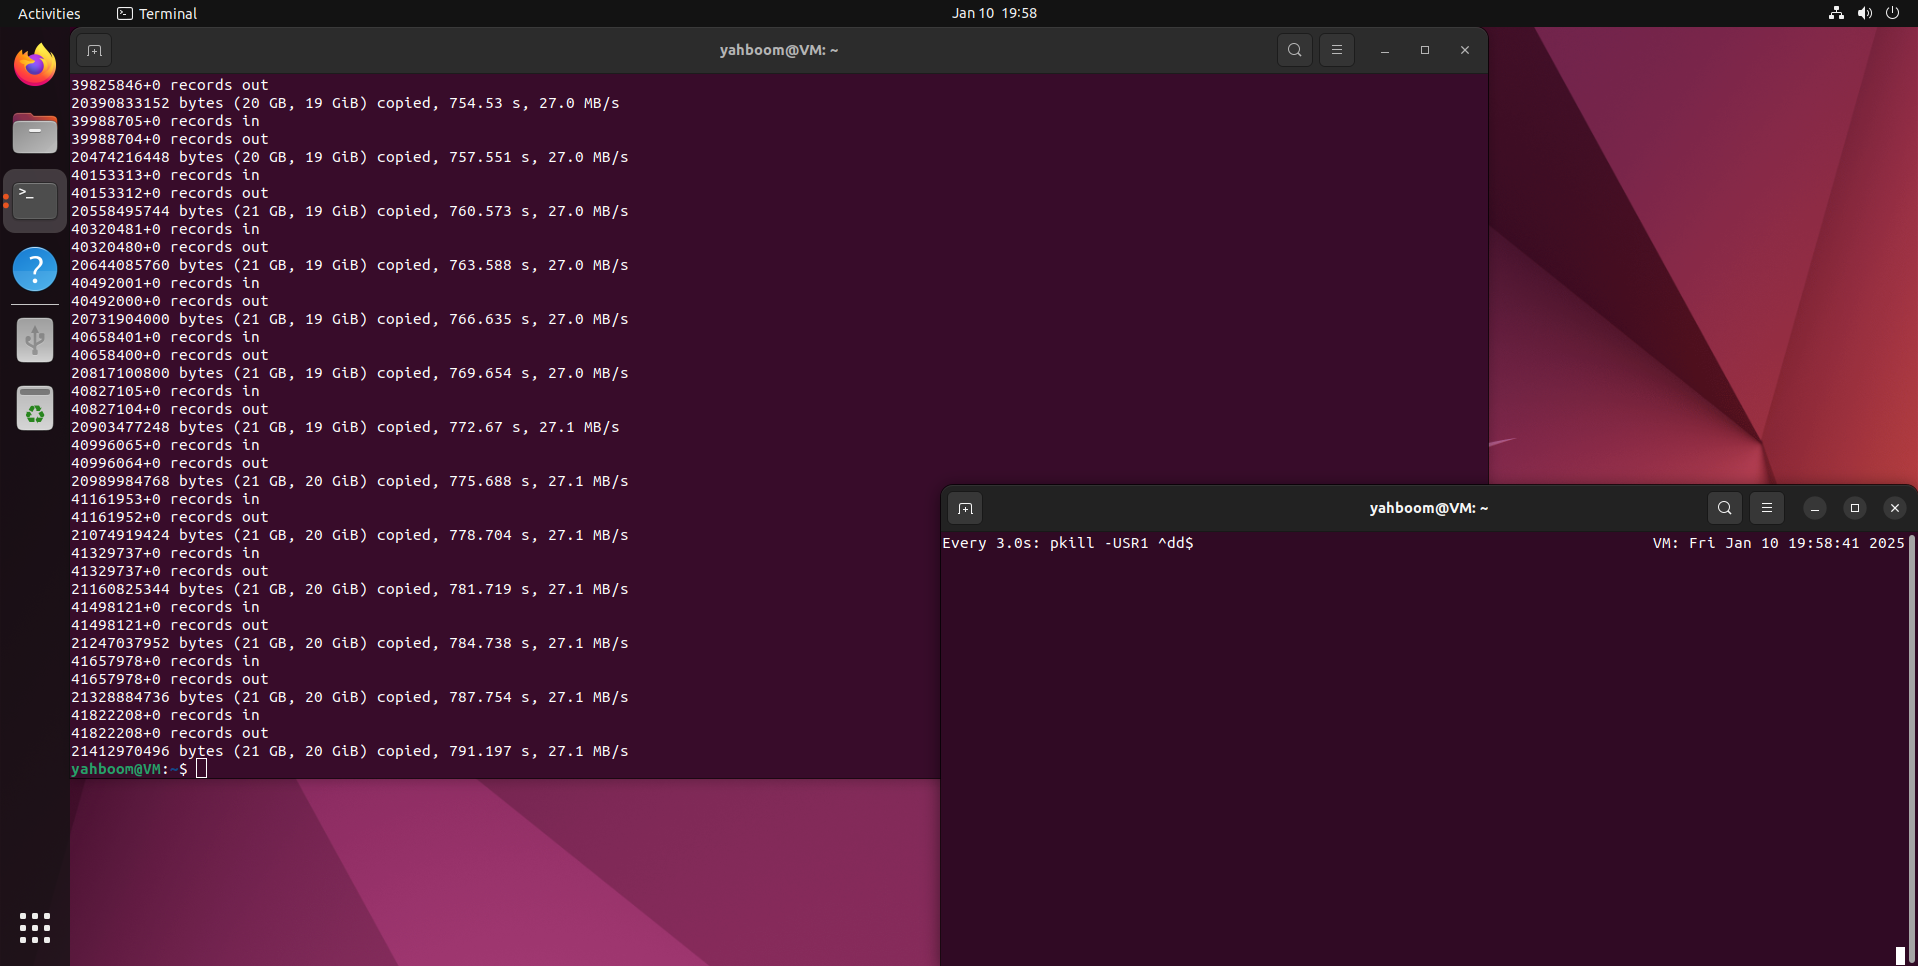
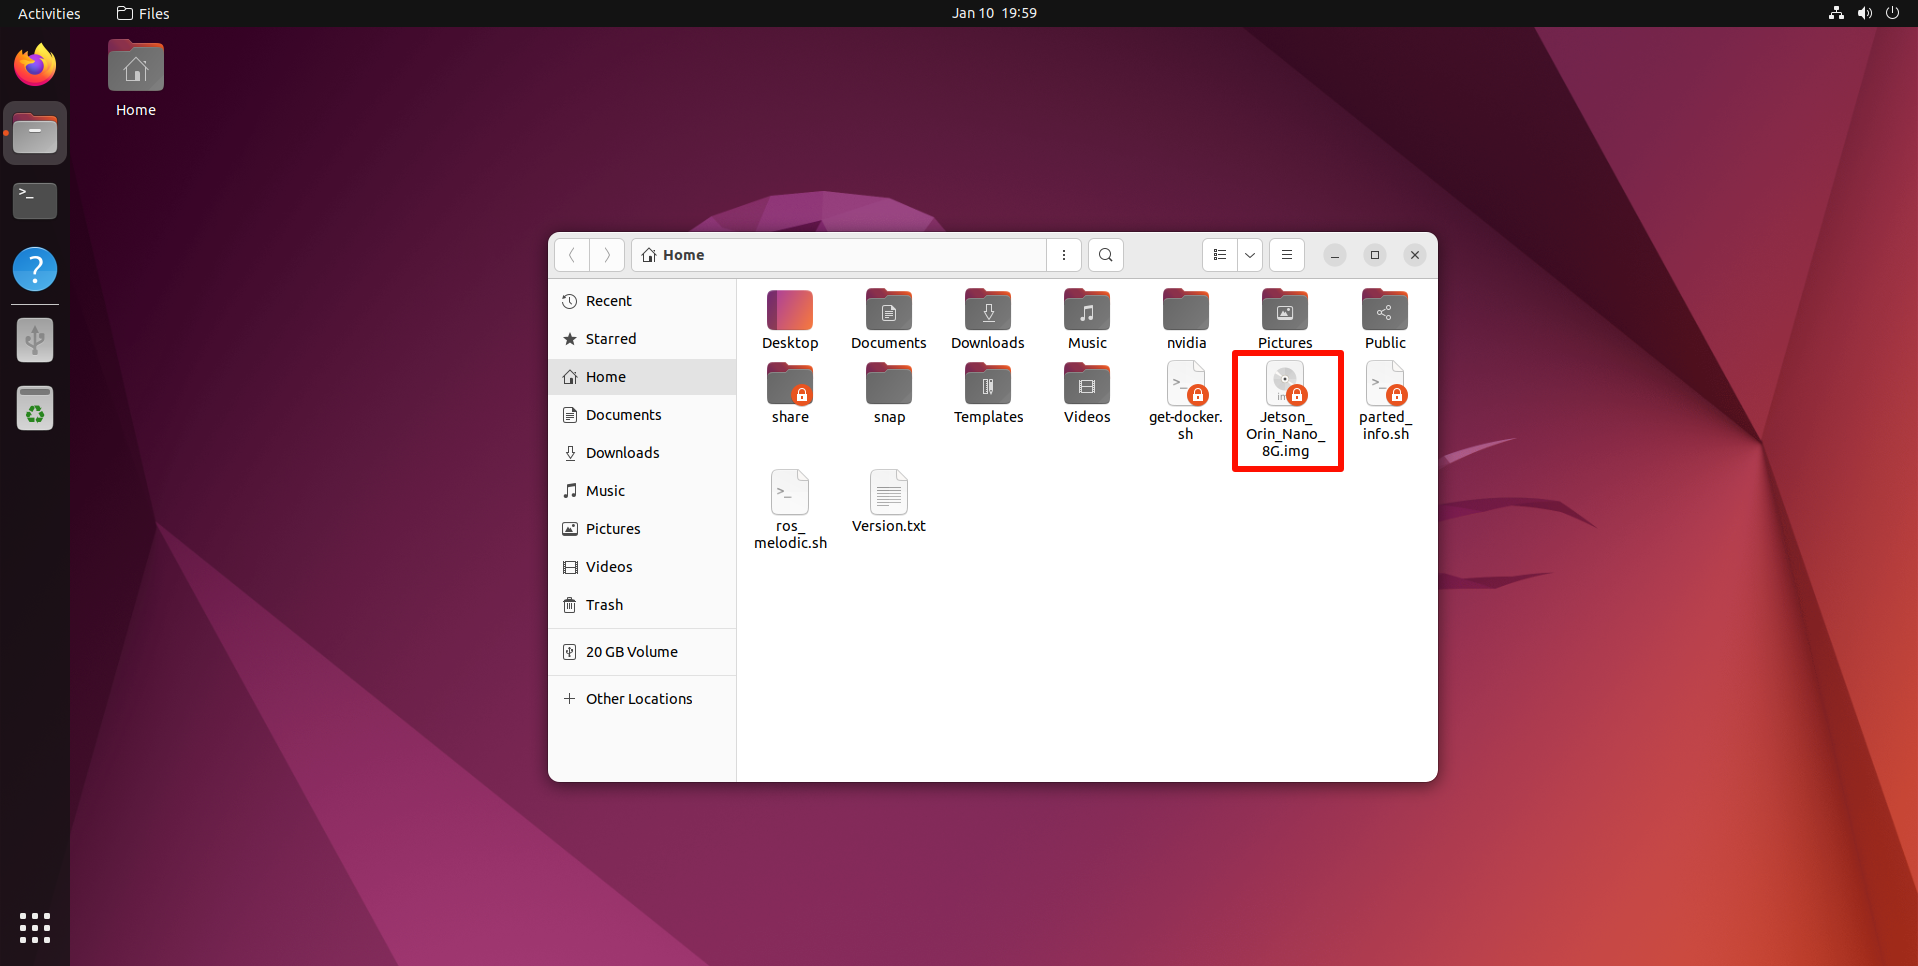
After the system backup is complete, move the backup file (Jetson_Orin_Nano_8G.img) to the Windows system for use.