Welcome to RDK S100(P) Board repository
1.2 Install Operating System
Install Operating System
Install Operating System1.Preparation for Flashing2.Image Download3. System Flashing4. Booting the System5. Set Login Mode
1.Preparation for Flashing
Before burning the Ubuntu system image, the following preparations are required:
- Download the sunrise5_winusb.zip compressed file and install the Windows driver.
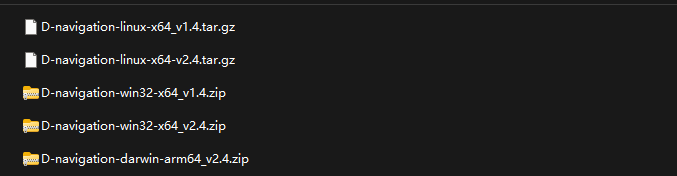
- Download the PC-side flashing tool D-Navigation.
- Prepare a Type-C data cable. Connect one end of the cable to the Type-C interface on the board, and the other end to the PC.
You can find the flashing tool and USB driver suitable for your operating system in the download section of the tutorial.

2.Image Download
The RDK suite currently provides an Ubuntu 22.04 system image, supporting desktop graphical interaction.
The RDK S100(P) development board requires system flashing before use. Download the image from this interface:https://d-robotics.github.io/rdk_doc/en/rdk_s/Quick_start/download
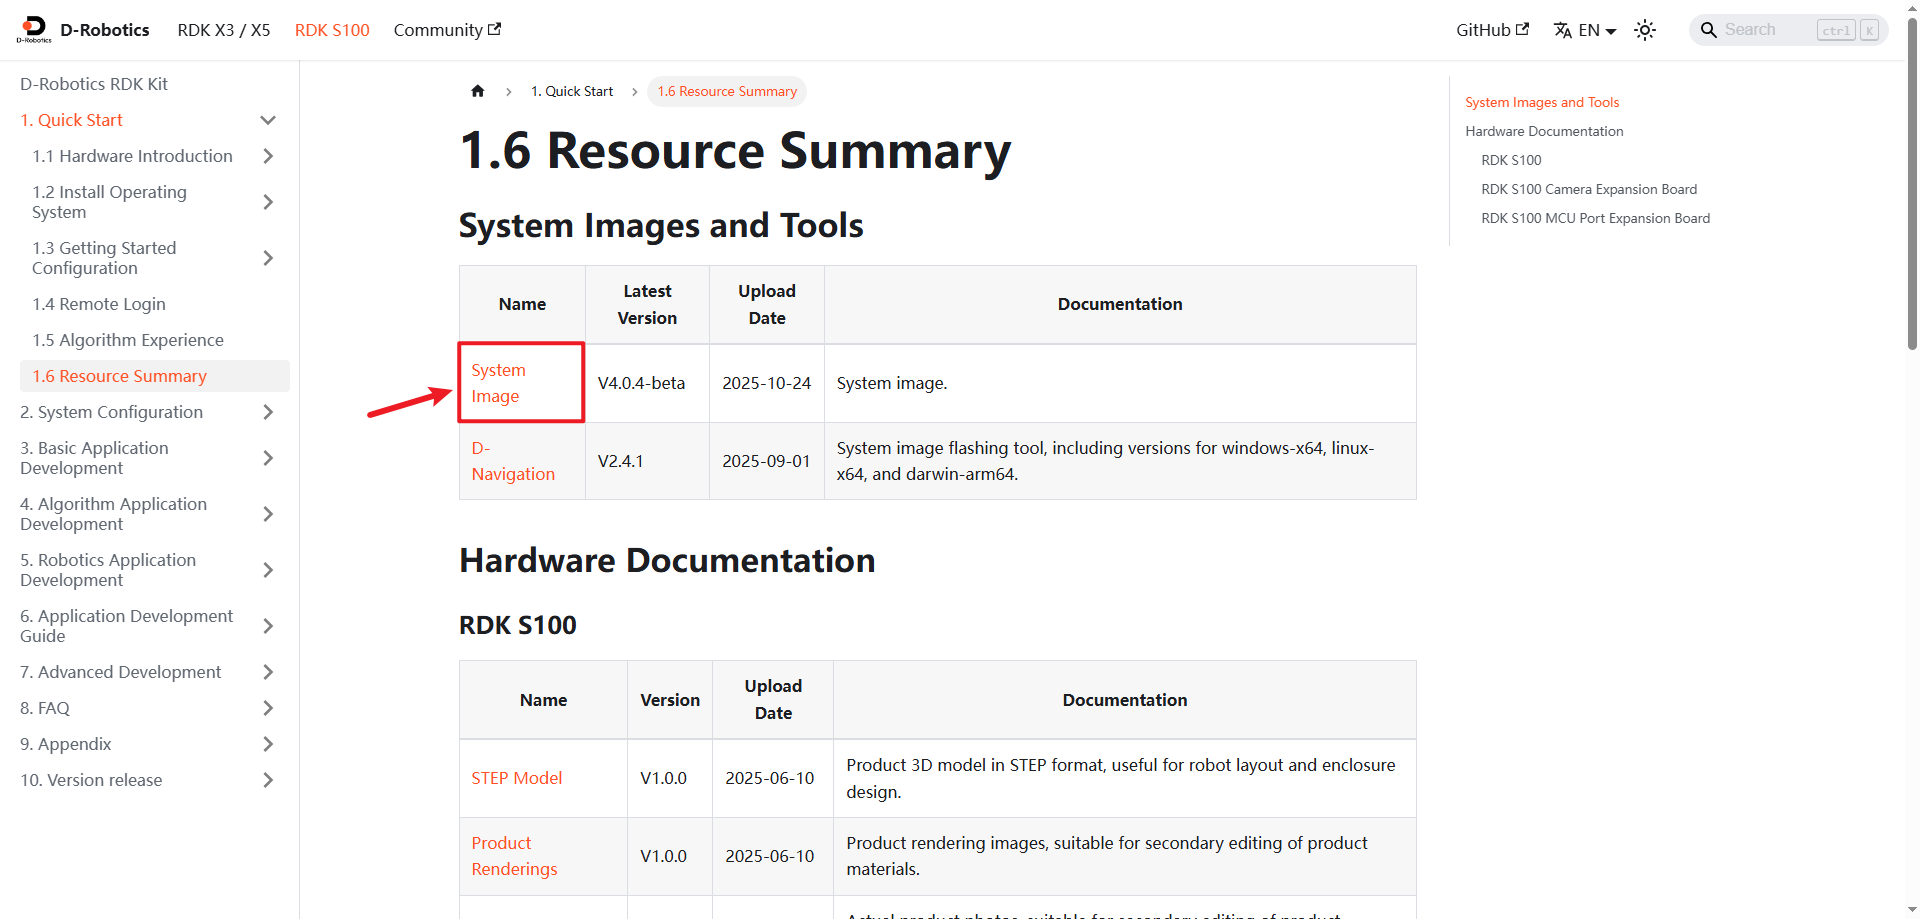
Notes:
For RDK S100(P) images, select the image file with LNX in the image download interface. This file is the motherboard image file. The image with MCU is the MCU expansion board image; the motherboard needs to have LNX programmed into it to boot into the system normally.

3. System Flashing
The RDK S100(P) development kit uses the PC-based tool D-Navigation to flash the Ubuntu system. This flashing process currently supports two USB download modes, which can be selected in the “Download Mode” option under the “Download Selection” interface of the flashing tool. The differences between these two modes are as follows:
- Uboot Flashing Mode: This mode requires the RDK S100(P) to enter Uboot’s flashing mode (i.e., fastboot mode). It is commonly used in everyday flashing scenarios and meets most standard system flashing requirements.
- USB Flashing Mode: This mode is based on the DFU protocol and is used when the RDK S100(P) cannot enter Uboot mode or when the system is corrupted (e.g., “bricked” device), helping to recover the system.
Uboot Flashing
Prepare the RDK S100(P) image package. Download the image package from the website.

After extraction, you will get a
productfolder with the following structure. Ensure that both theimg_packagesfolder and thexmodem_toolsfile are in the same directory.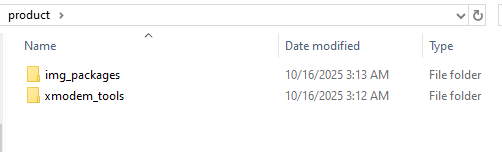
Power on the development board.
The Uboot method requires exclusive access to the serial port. Ensure the serial port is not occupied by other devices or applications.
Open the D-Navigation tool and perform the following operations:
Select product model: S100
Download mode: uboot; Storage medium: emmc; Type: secure
Click Open and select the
productfolder containing the firmwareSelect the serial port connected to the RDK S100(P) (baud rate: 921600)
Click Upgrade (if a "Need manual reset" prompt appears during the upgrade, power-cycle the board)
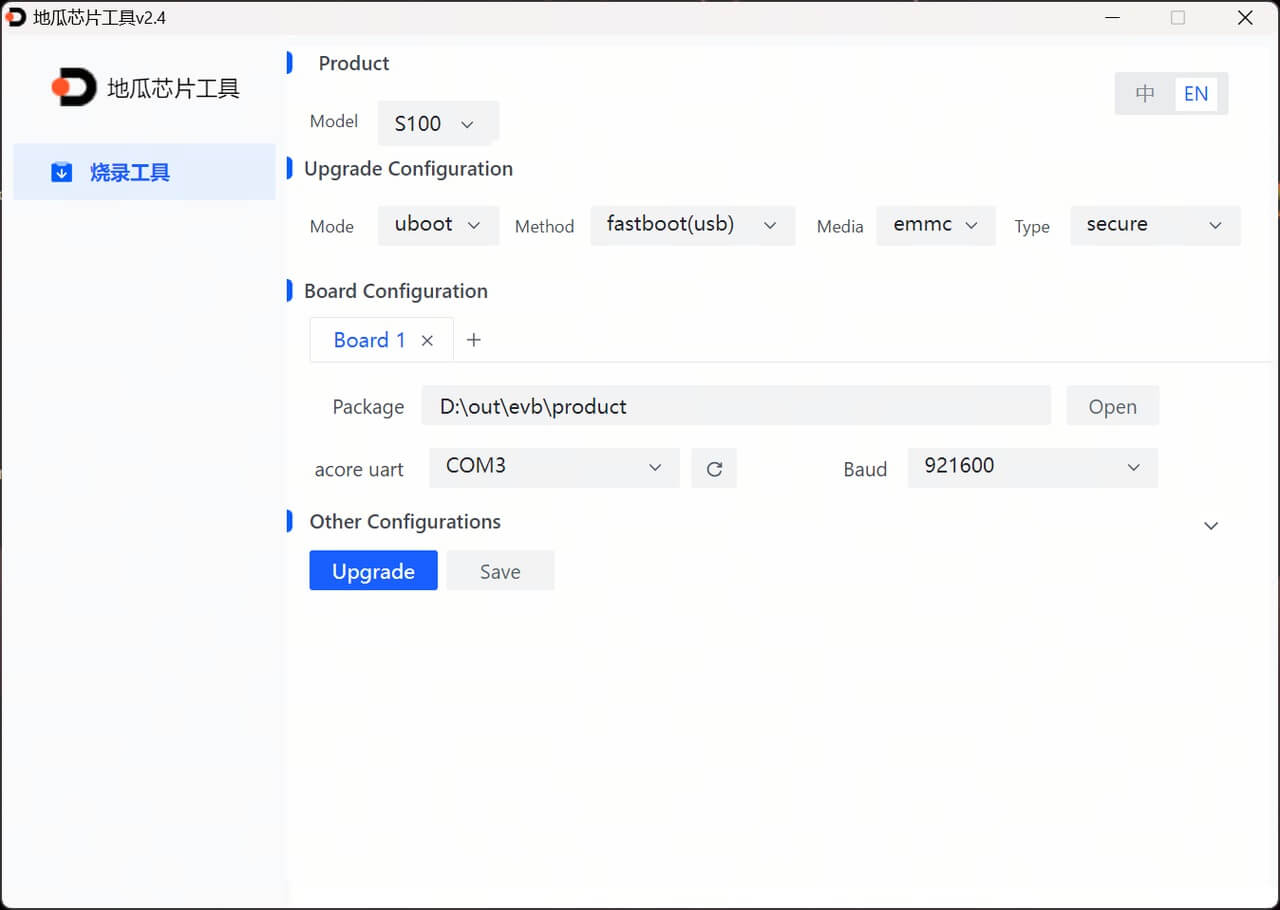
After the upgrade completes, power-cycle the board
USB Flashing (for blank chips or recovery after failed flashing)
- Prepare the RDK S100(P) image package. Download the image package from the website.
- After extraction, you will get a
productfolder with the following structure. Ensure that both theimg_packagesfolder and thexmodem_toolsfile are in the same directory.
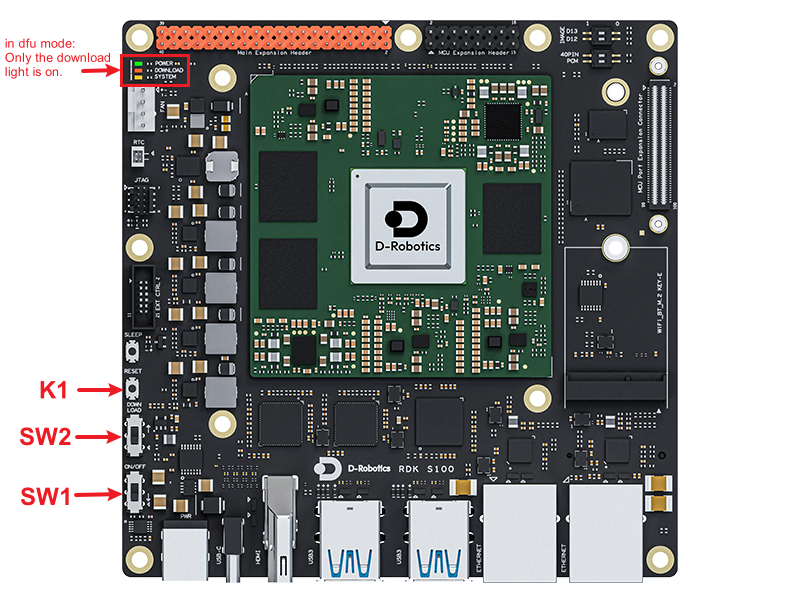
Switch the device to DFU mode by following these steps:
- Set SW1 to ↑ and turn off power.
- Set SW2 to ↑ to enter Download mode.
- Set SW1 to ▽ and turn on power.
- If the
DOWNLOADLED lights up, the board has entered DFU mode. Otherwise, press theK1button to reset the system.
- Prepare the RDK S100(P) image package. Download the image package from the website.
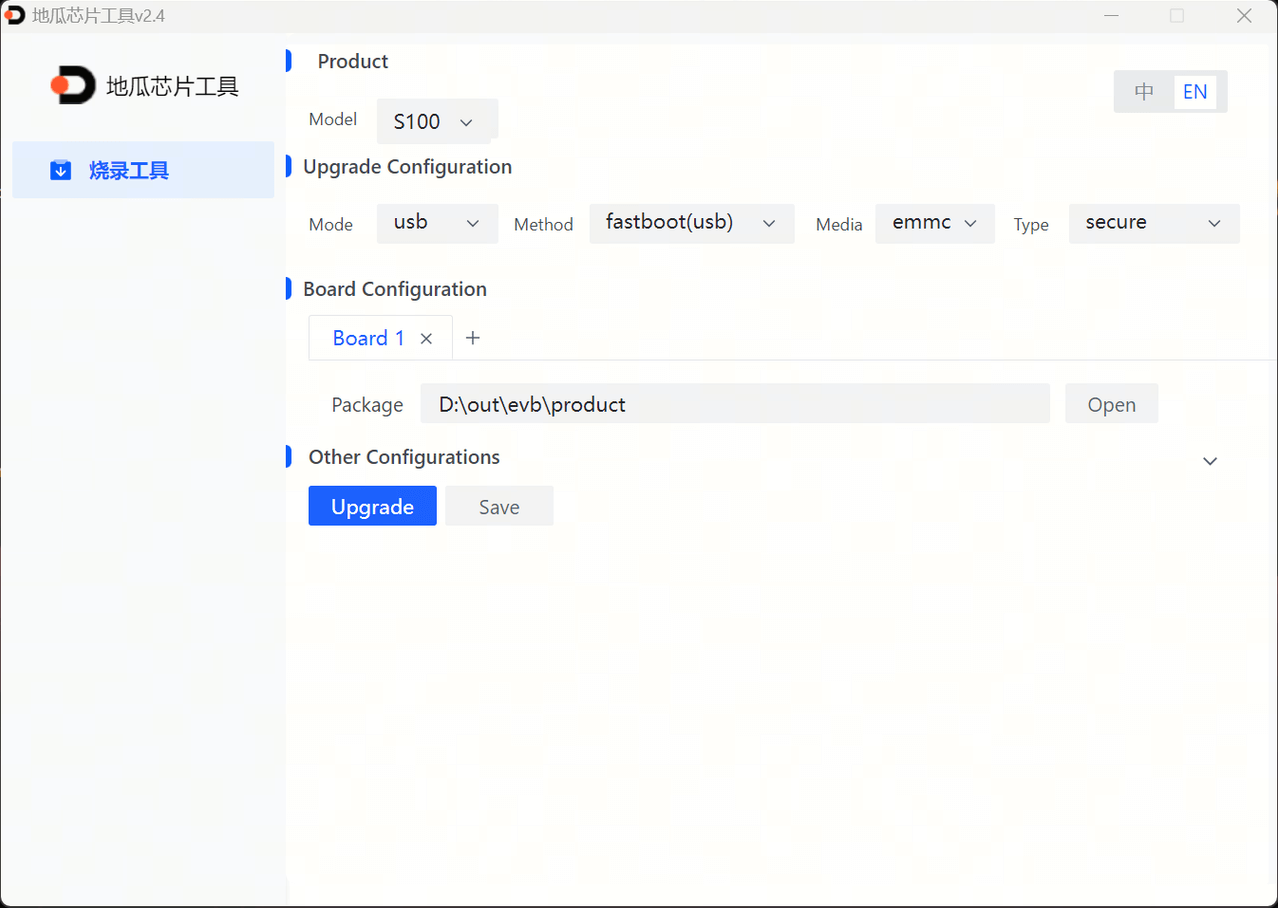
Open the D-Navigation tool and perform the following operations:
- Select product model: S100
- Download mode: usb; Storage medium: emmc; Type: secure
- Click Open and select the
productfolder containing the firmware - Power-cycle the device, click Upgrade, and wait for the process to complete
After the upgrade completes, power off the device, switch the flashing jumper back down (to exit DFU mode), and then power on again.
4. Booting the System
First, ensure the development board is powered off. Connect the board to a monitor using an HDMI cable, then power on the development board.
Notes: Development Board LED Indicators
- Green LED: Illuminated indicates normal hardware power-up.
If there is no display output after powering on the board for more than 2 minutes, the board has failed to boot properly. In this case, connect via a serial cable for debugging to verify whether the board is functioning correctly.
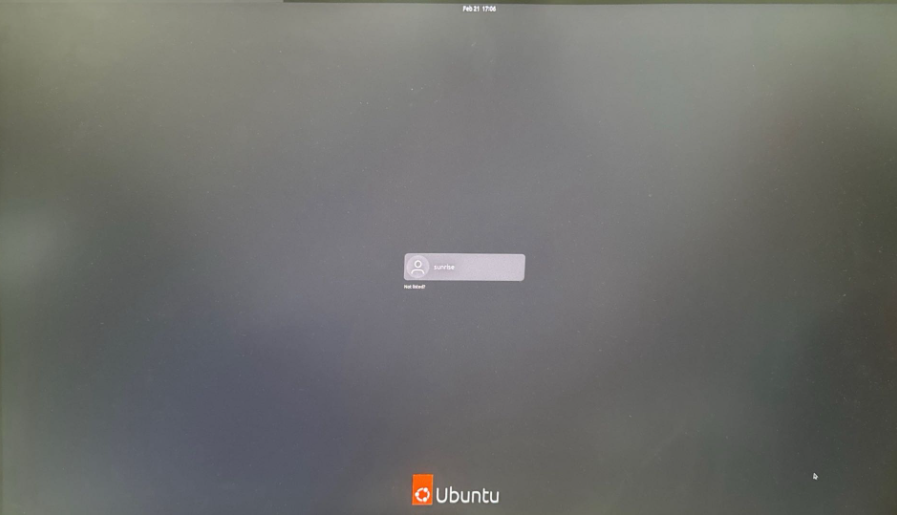
After the Ubuntu Desktop system finishes booting, it outputs the desktop interface to the monitor via the Display interface, as shown below:
5. Set Login Mode
The desktop graphical system supports two login modes:
- Automatic Login on Text Terminal
- Manual Login on Text Terminal
Modify the serial-getty@.service file to enable passwordless login. Follow the steps below:
- Open
serial-getty@.service:
xxxxxxxxxx# If logged in as rootvim /lib/systemd/system/serial-getty@.service# If logged in as sunrise usersudo vim /lib/systemd/system/serial-getty@.service- Modify the line containing
ExecStart=-/sbin/agettyas follows:
xxxxxxxxxxExecStart=-/sbin/agetty -a root --keep-baud 921600,115200,38400,9600 %I $TERMParameter Explanation:
The -a parameter specifies the username for automatic login. The option -o '-p -- \\u' further customizes the login process by preserving the current environment variables and displaying the username in the login prompt.
- After rebooting, the user will be automatically logged in.