Welcome to RDK S100(P) Board repository
8.OpenClawClawHub Introduction (Skill Installation)
ClawHub
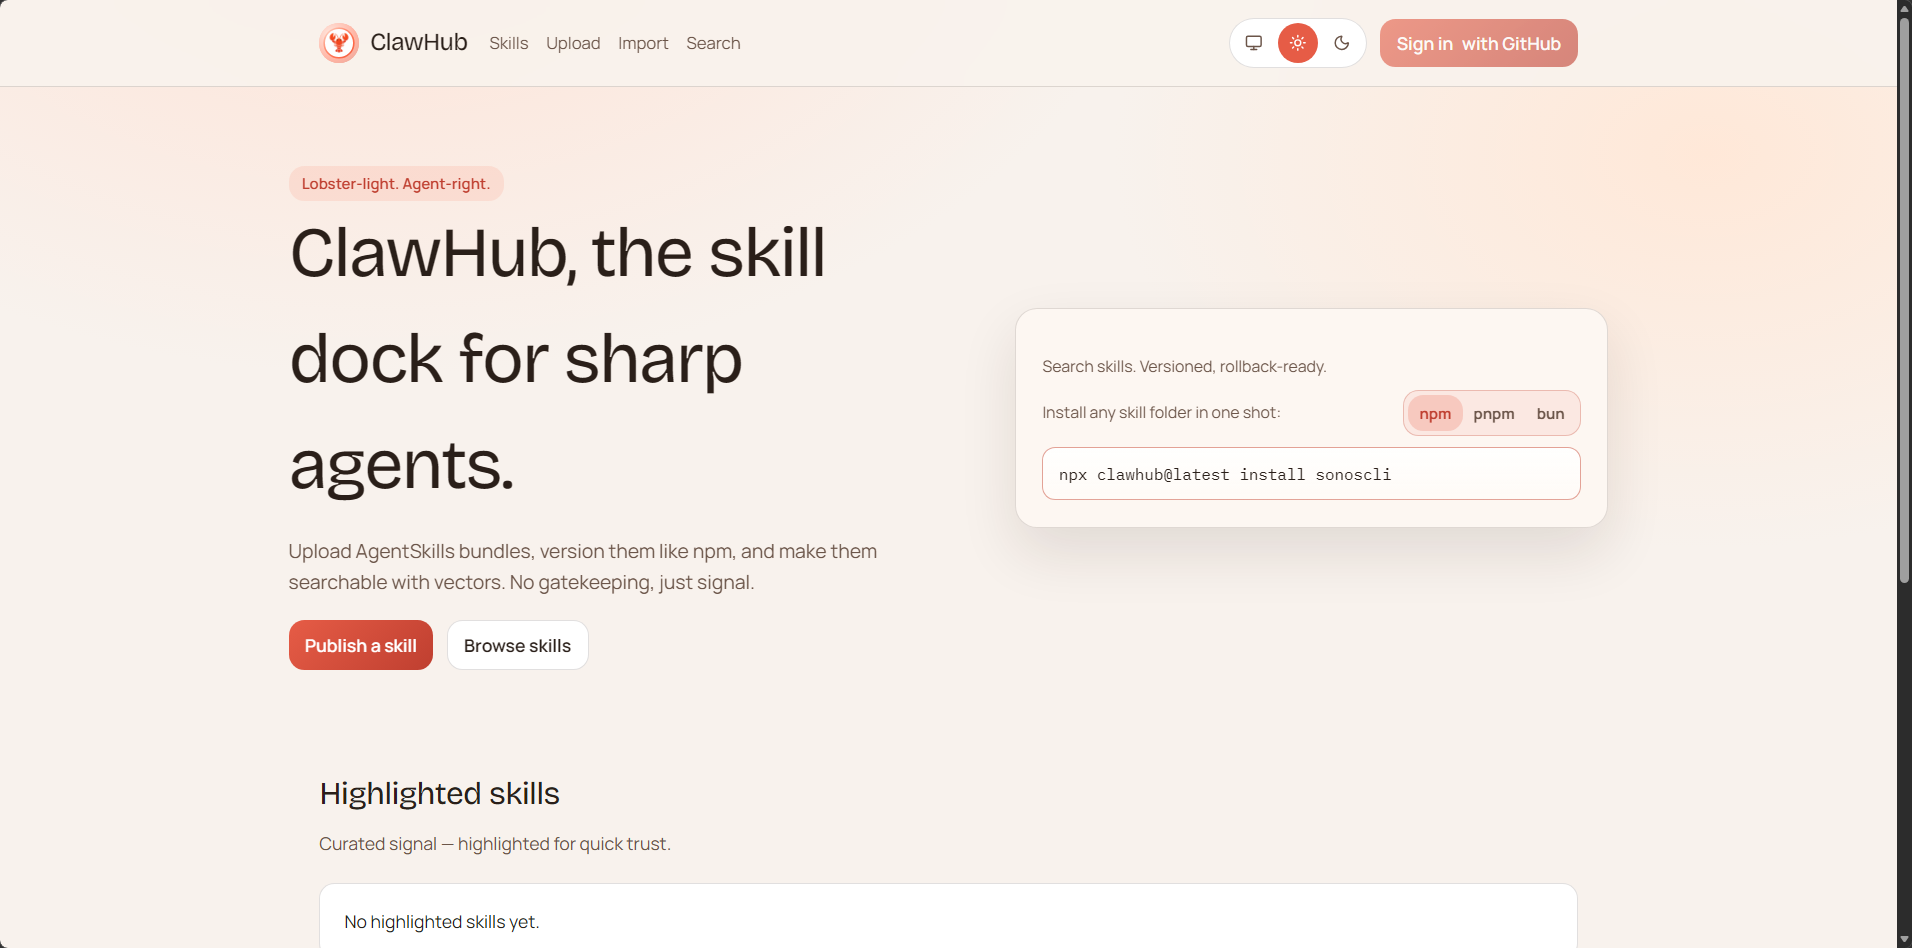
ClawHub is the public Skills registry for OpenClaw. It is a free service: all Skills are public, open, and can be viewed, shared, and reused by everyone. A Skill is simply a folder containing a SKILL.md file (and supporting text files). You can browse Skills in the web application, and use the CLI to search, install, update, and publish Skills. Website: clawhub.com
Positioning in OpenClaw
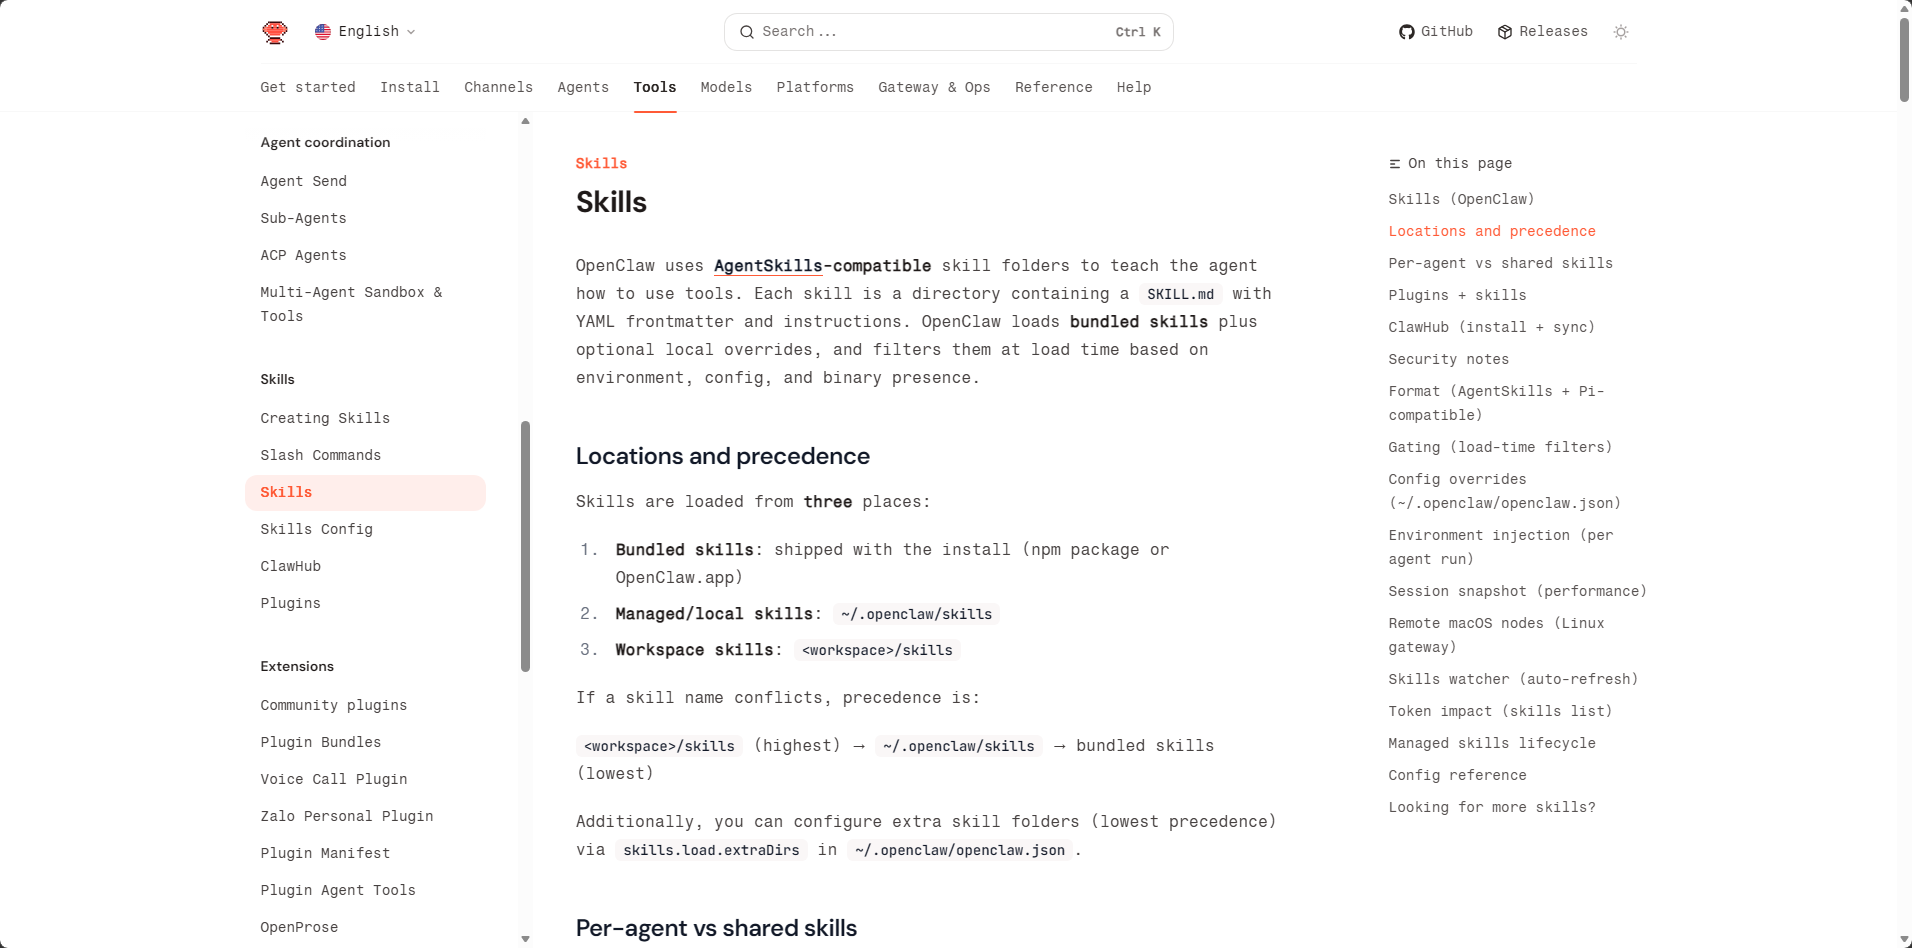
By default, the CLI installs Skills to ./skills in the current working directory. If an OpenClaw workspace is configured, clawhub will fall back to that workspace unless you override it with --workdir (or CLAWHUB_WORKDIR). OpenClaw loads workspace Skills from <workspace>/skills and they will take effect in the next session. If you're already using ~/.openclaw/skills or built-in Skills, workspace Skills have higher priority. For more details on Skills loading, sharing, and permission control, see Skills.
Target Audience (Beginner Friendly)
If you want to add new functionality to OpenClaw agents, ClawHub is the easiest way to find and install Skills. You don't need to understand how the backend works. You can:
- Search for Skills using natural language.
- Install Skills to your workspace.
- Update Skills with one command later.
- Back up your own Skills by publishing them.
Installing the CLI
Original ClawHub CLI (For International Users)
Choose one of the following:
npm i -g clawhubpnpm add -g clawhub

SkillHub CLI (Recommended for Chinese Users) ⭐
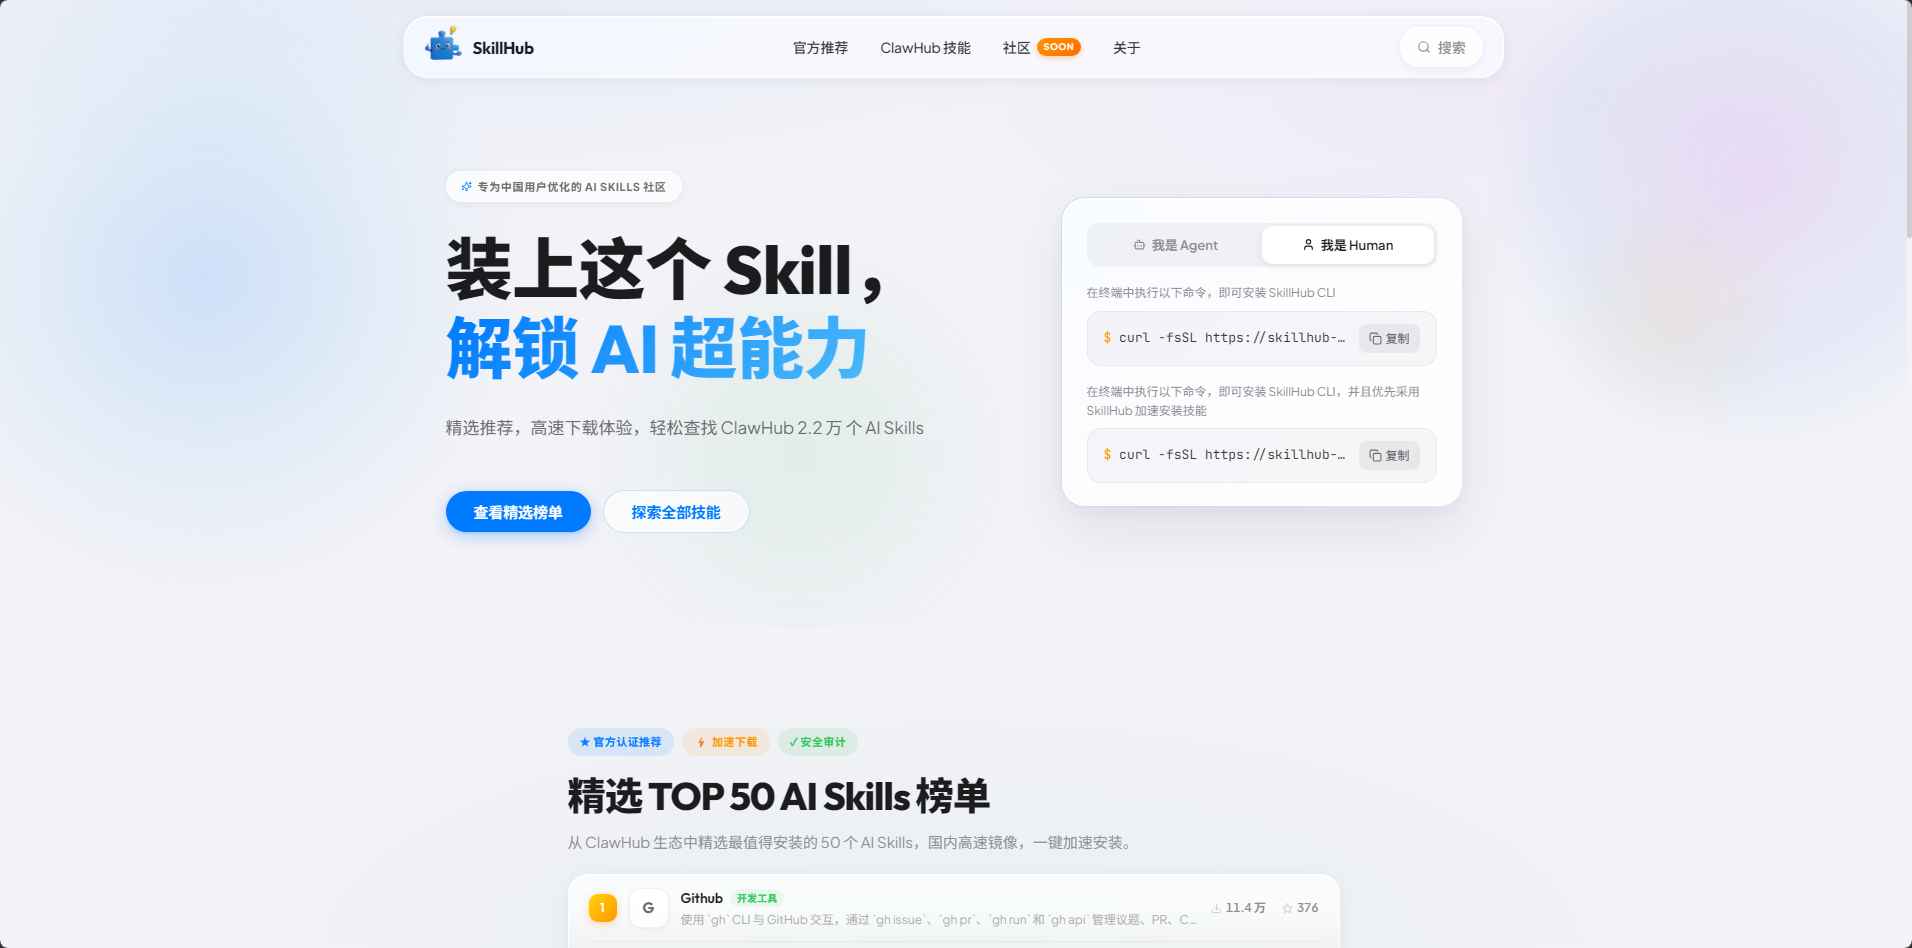
SkillHub is the Chinese mirror site of ClawHub, optimized for Chinese users, providing high-speed download experience. Visit the website: skillhub.tencent.com
Installation method:
xxxxxxxxxxnpm i -g skillhub
Advantages of SkillHub:
- Accelerated downloads: Chinese high-speed mirror, no need for VPN
- Security audit: All Skills undergo security checks
- Data synchronization: Includes 22,000 Skills from the ClawHub ecosystem
SkillHub Mirror Site Introduction (For Chinese Users)
What is SkillHub
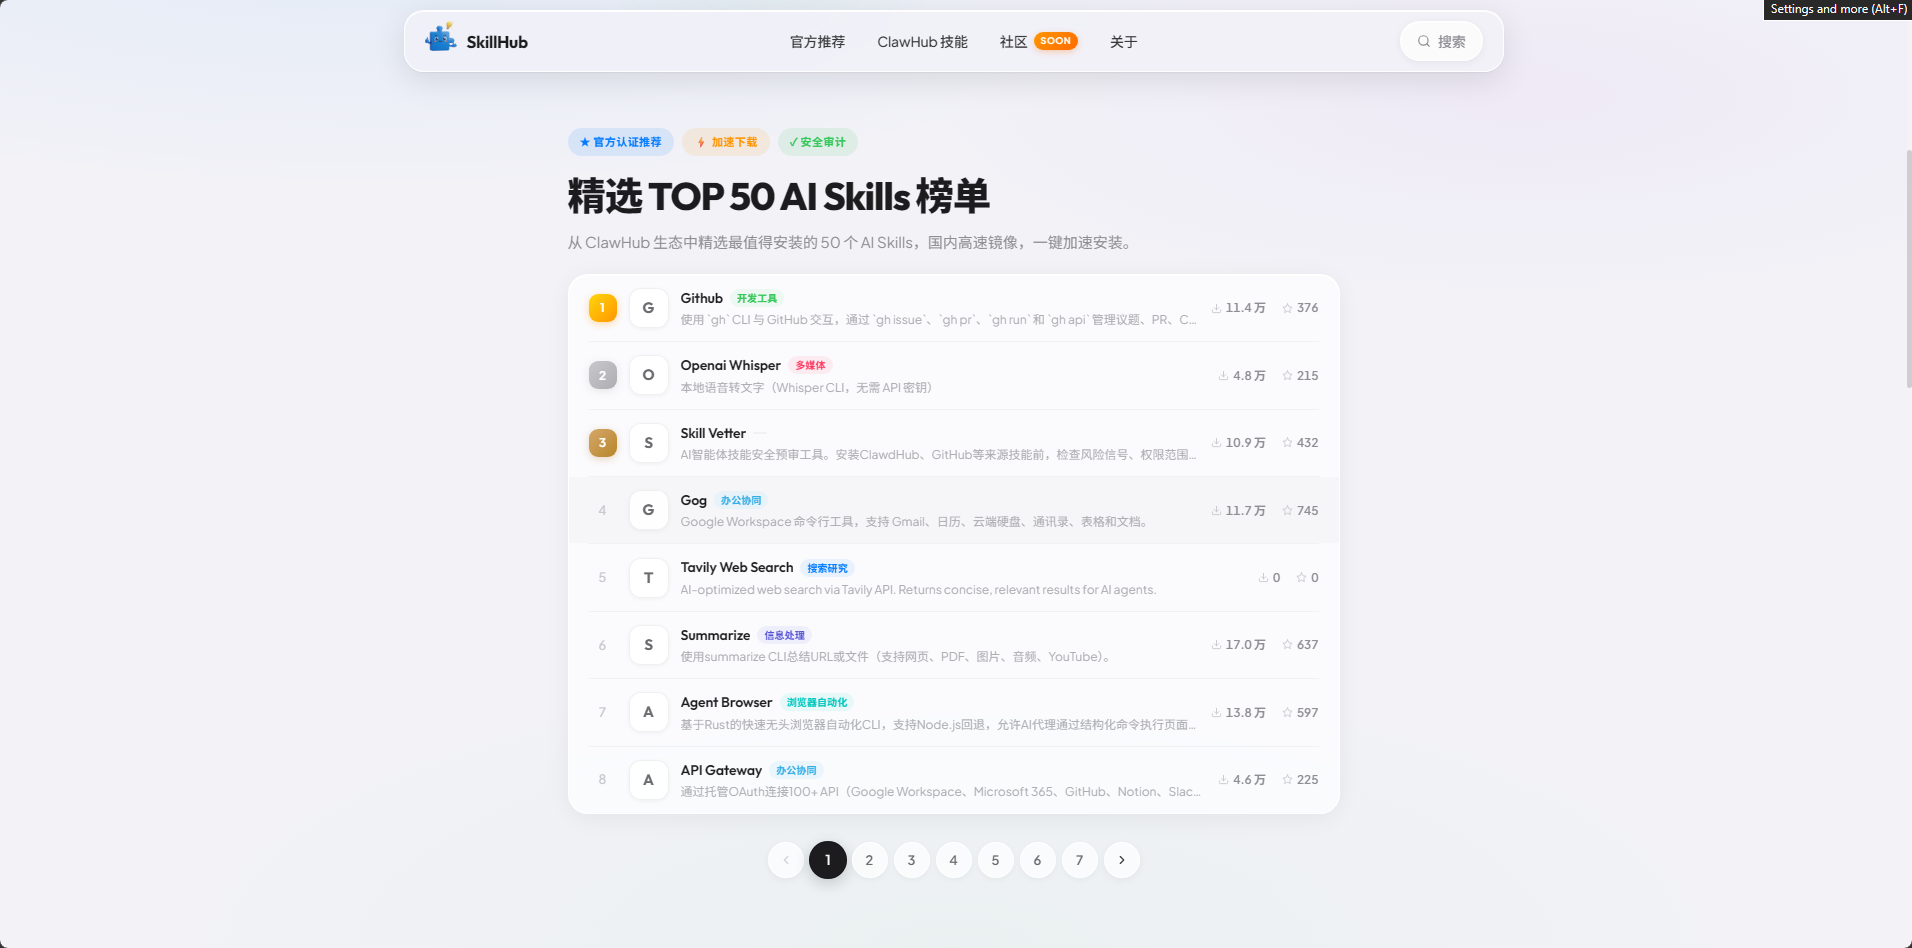
SkillHub is the Chinese mirror site of ClawHub. The data source is completely consistent with ClawHub, but it provides a service experience more suitable for Chinese users.
Core Features
- Featured Recommendations: Officially selected TOP 50 AI Skills, one-click installation
- High-Speed Downloads: Chinese servers, significantly improved download speeds
- Security Audit: All Skills undergo security checks to reduce risks
- Convenient Search: Supports Chinese search to quickly find needed skills
- Real-time Synchronization: Real-time sync with ClawHub data to ensure latest updates
Usage
SkillHub CLI usage is completely consistent with the original clawhub:
- Search:
skillhub search "keyword" - Install:
skillhub install <skill-slug> - Update:
skillhub update --all - List:
skillhub list
Relationship with Original Version
- Data Source: SkillHub's data comes from ClawHub, both have consistent content
- Command Compatibility: SkillHub supports all clawhub commands and parameters
- Installation Location: Also installs to
./skillsdirectory, automatically recognized by OpenClaw - Switchable: You can install both clawhub and skillhub simultaneously, use as needed
Logging into ClawHub Account
Why Login
Although ClawHub allows non-logged-in users to search and install Skills, logging into an account has the following important benefits:
- ✅ Avoid rate limiting: Non-logged-in users may encounter download rate limits
- ✅ Access full features: Some advanced features require login to use
- ✅ Publish Skills: Only logged-in users can publish their own Skills
- ✅ Favorites and comments: Can favorite liked Skills and post comments
- ✅ Usage statistics: View your own usage situation
Login Steps
Method 1: Login via GitHub (Recommended)
This is the simplest and most secure login method.
1.1 Visit ClawHub Official Website
Open in browser: https://clawhub.com
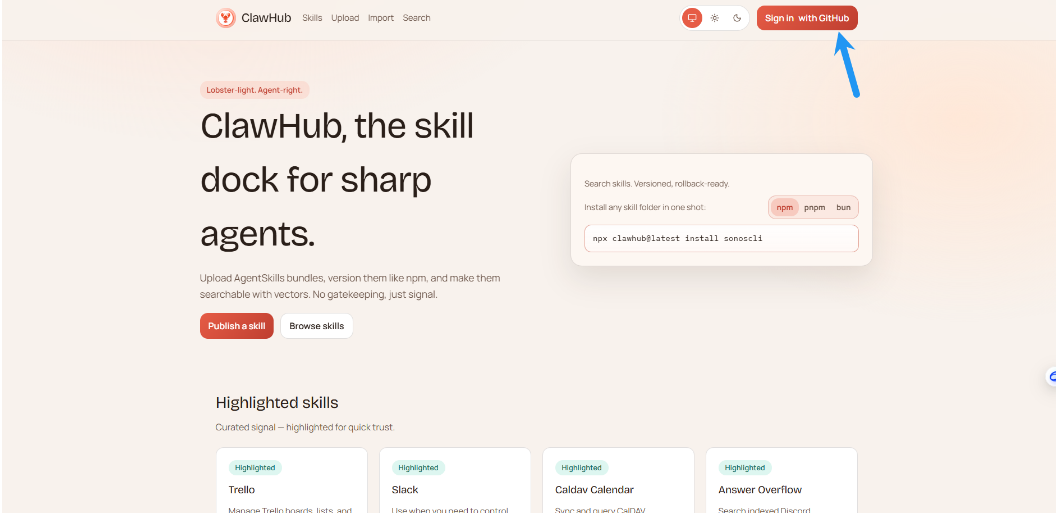
1.2 Click Login
Click the "Login" button in the top right corner of the page:
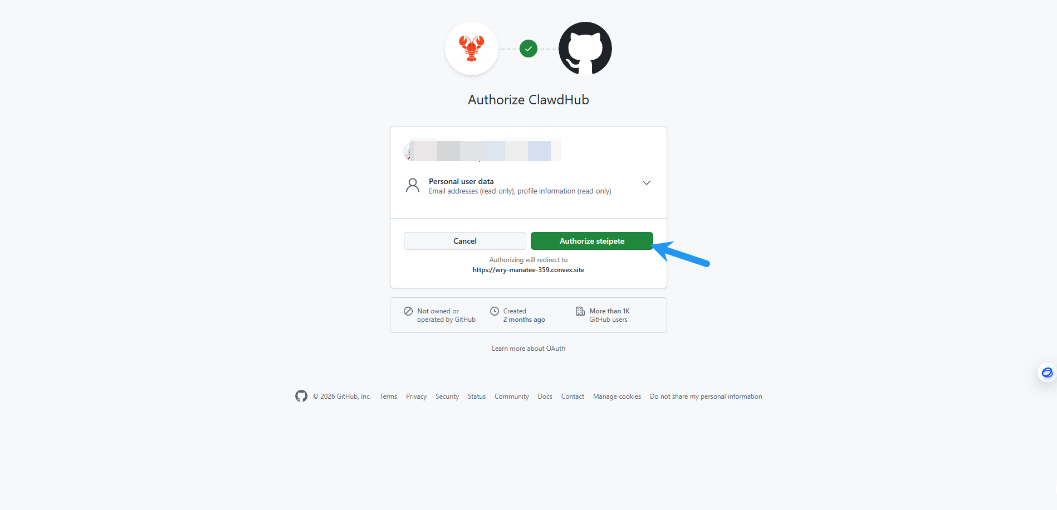
1.3 Choose GitHub Login
On the login page, click "Sign in with GitHub".
1.4 Authorize Access
After successful authorization, you will be automatically redirected back to ClawHub and show logged-in status.
Method 2: Login using Token
If you cannot use GitHub login, you can use Token login.
2.1 Login Account
First follow the steps in Method 1 to log in to ClawHub official website via GitHub.
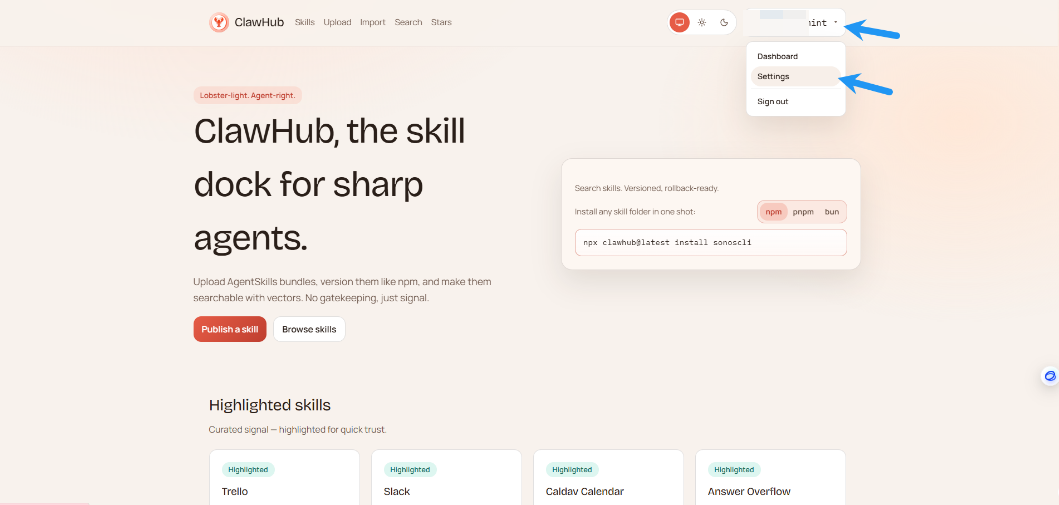
2.2 Enter Settings Page
After logging in, click your user avatar in the top right corner of the page, select "Settings":
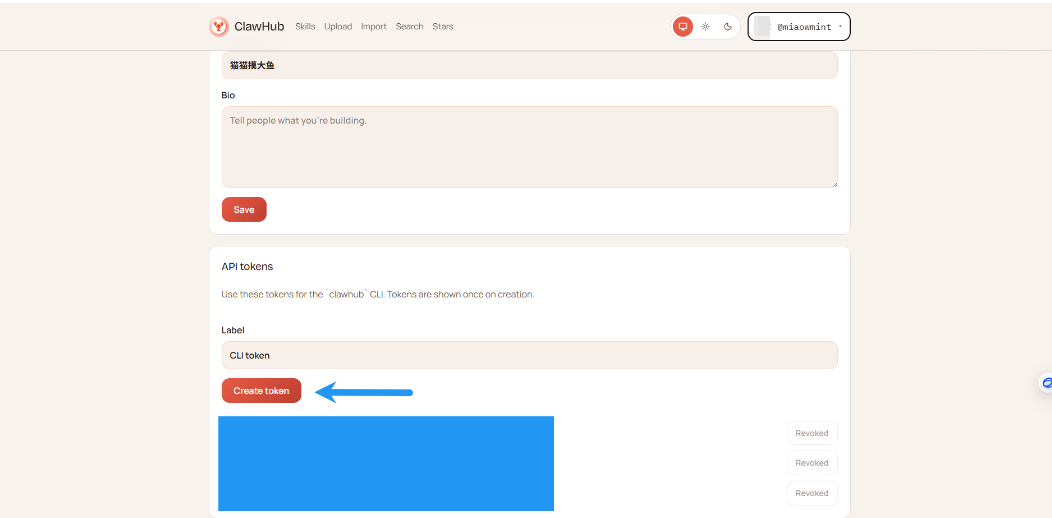
2.3 Create API Token
In the settings page, find the "API Tokens" section, click "Create token":
2.4 Copy Token
The system will generate a new API Token, click the copy button to copy this Token:
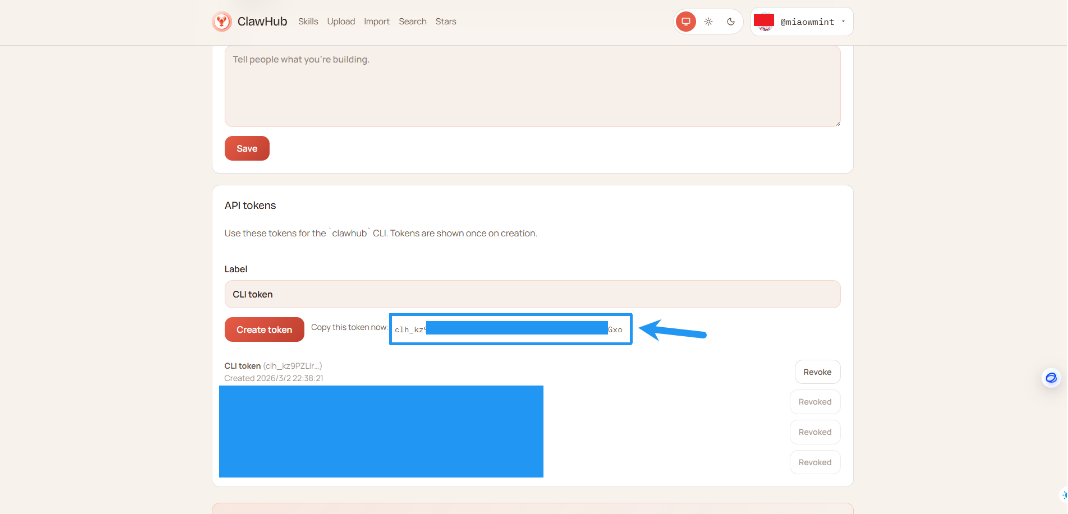
⚠️ Important Notes:
- Token is only shown once, be sure to copy and save it properly
- Do not share the Token with others
- Token can be deleted at any time in the settings page
2.5 Login in Terminal
Open terminal, run the following command (replace YourToken with the Token you just copied):
xxxxxxxxxxclawhub login --token YourToken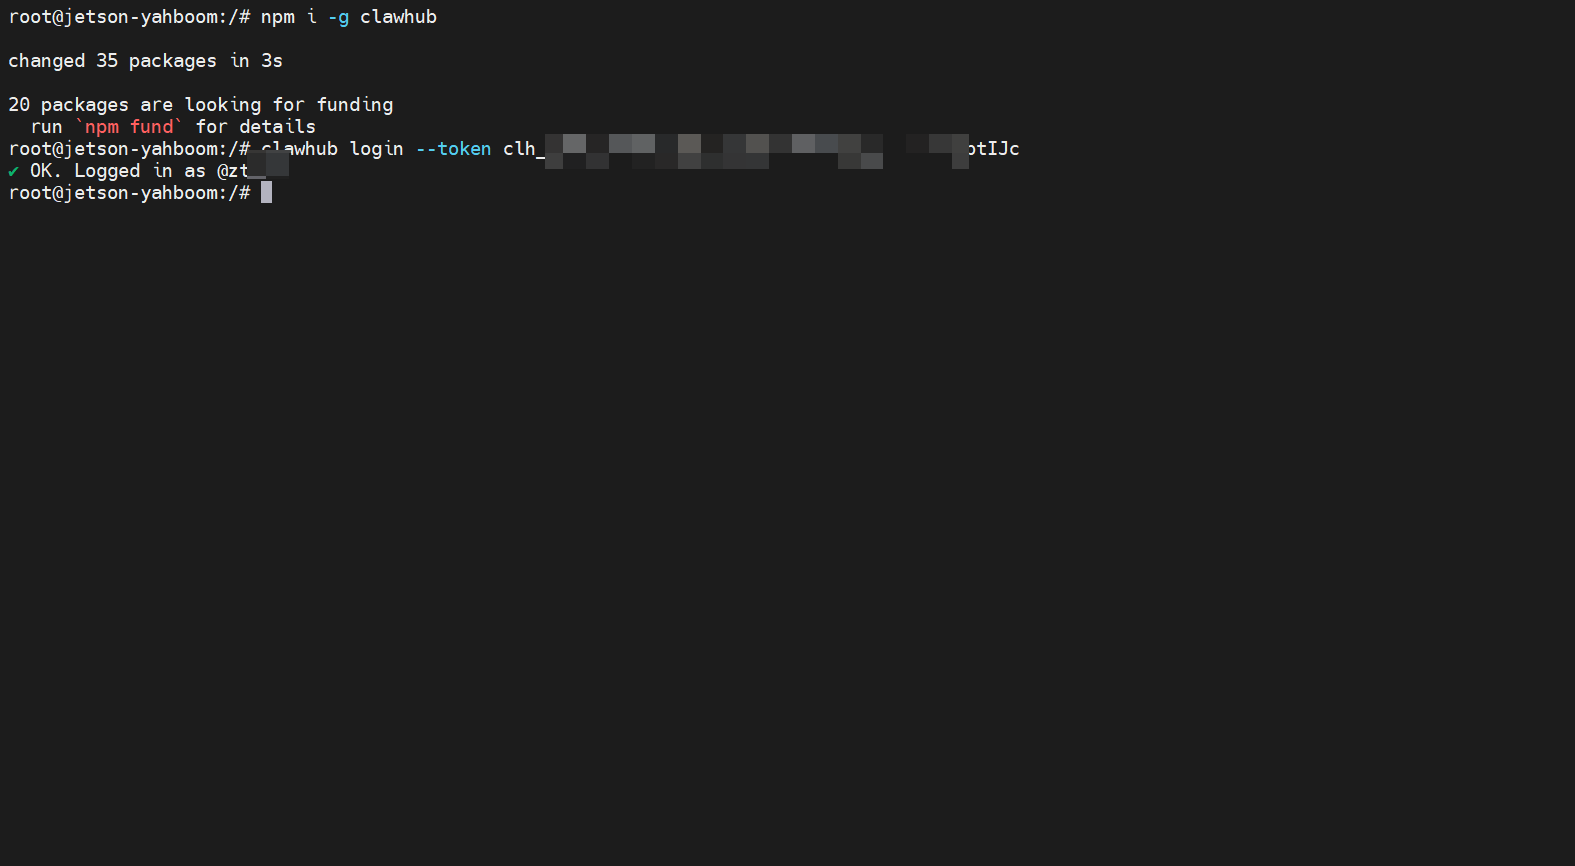
Note: There is a space after --token, then paste your Token.
Common Issues
Issue 1: Login shows invalid Token
Error message:
xxxxxxxxxxError: Invalid token
Possible causes:
- Token copied incompletely
- Token expired or deleted
- Extra spaces or characters when inputting
Solutions:
- Recreate Token and copy again
- Ensure no extra spaces when copying
- Check if Token is complete
Issue 2: GitHub login failed
Possible causes:
- Network connection issues
- GitHub account email not verified
- Browser blocked redirect
Solutions:
- Check network connection
- Confirm GitHub account email is verified
- Try using other browser or incognito mode
Issue 3: Still rate limited after login
Possible causes:
- Login not effective
- Using wrong CLI (clawhub vs skillhub)
Solutions:
- Run
clawhub whoamito confirm login status - Confirm using correct CLI command
- Login again
Quick Start
Using Original ClawHub
Install CLI (see previous section).
Search for what you need: (VPN required in China)
xxxxxxxxxxclawhub search "find"
Install a Skills:
Syntax:
clawhub install <skill-slug>xxxxxxxxxxclawhub install findStart a new OpenClaw session to load new Skills.
Using SkillHub (For Chinese Users)
Install SkillHub CLI:
xxxxxxxxxxnpm i -g skillhubSearch for what you need:
xxxxxxxxxxskillhub search "find"Install a Skills:
Syntax:
skillhub install <skill-slug>xxxxxxxxxxskillhub install findStart a new OpenClaw session to load new Skills.
Agent Common Workflows
Search Skills
xxxxxxxxxxclawhub search "postgres backups"
Or use SkillHub:
xxxxxxxxxxskillhub search "postgres backups"
Download New Skills
xxxxxxxxxxclawhub install my-skill-pack
Or use SkillHub:
xxxxxxxxxxskillhub install my-skill-pack
Update Installed Skills
xxxxxxxxxxclawhub update --all
Or use SkillHub:
xxxxxxxxxxskillhub update --all
Backup Your Skills (Publish or Sync)
For a single Skills folder:
xxxxxxxxxxclawhub publish ./my-skill --slug my-skill --name "My Skill" --version 1.0.0 --tags latest
Scan and backup multiple Skills at once:
xxxxxxxxxxclawhub sync --all
CLI Commands and Parameters
Global options (apply to all commands):
--workdir <dir>: Working directory (default: current directory; fallback to OpenClaw workspace).--dir <dir>: Skills directory, relative to working directory (default:skills).--site <url>: Website base URL (browser login).--registry <url>: Registry API base URL.--no-input: Disable prompts (non-interactive mode).-V, --cli-version: Print CLI version.
Authentication:
clawhub login(browser flow) orclawhub login --token <token>clawhub logoutclawhub whoami
Options:
--token <token>: Paste API token.--label <label>: Label for browser login token storage (default:CLI token).--no-browser: Do not open browser (requires--token).
Search:
clawhub search "query"--limit <n>: Maximum number of results.
Install:
clawhub install <slug>--version <version>: Install specified version.--force: Overwrite if folder already exists.
Update:
clawhub update <slug>clawhub update --all--version <version>: Update to specified version (single slug only).--force: Force overwrite when local files don't match any published version.
List:
clawhub list(reads.clawhub/lock.json)

Publish:
clawhub publish <path>--slug <slug>: Skills identifier.--name <name>: Display name.--version <version>: Semantic version number.--changelog <text>: Changelog text (can be empty).--tags <tags>: Comma-separated tags (default:latest).
Delete/Undelete (owners/admins only):
clawhub delete <slug> --yesclawhub undelete <slug> --yes
Sync (scan local Skills + publish new/updated Skills):
clawhub sync--root <dir...>: Additional scan root directories.--all: Upload everything without prompts.--dry-run: Show what will be uploaded.--bump <type>: Version increment type for updatespatch|minor|major(default:patch).--changelog <text>: Changelog for non-interactive updates.--tags <tags>: Comma-separated tags (default:latest).--concurrency <n>: Registry check concurrency (default: 4).
Environment Variables
CLAWHUB_SITE: Override website URL.CLAWHUB_REGISTRY: Override registry API URL.CLAWHUB_CONFIG_PATH: Override location where CLI stores tokens/config.CLAWHUB_WORKDIR: Override default working directory.CLAWHUB_DISABLE_TELEMETRY=1: Disable telemetry forsync.
For more content about ClawHub, refer to: ClawHub - OpenClaw