Welcome to RDK S100(P) Board repository
12. Multimodal text to image application
Multimodal Text-to-Image Applications
Multimodal Text-to-Image Applications1. Concept Introduction1.1 What is Text-to-Image?Core Principles1.2 What is FastSDCPU?Core FeaturesApplicable Scenarios2. Project Deployment2.1 Deployment Environment2.2 Local Area Network Access2.3 Using the Image Generator Function2.4 Startup Method After Successful Deployment2.5 Changing the Model Download Location
Since Ollam doesn't support text-to-image functionality, we need to use other tools to implement local text-to-image functionality.
1. Concept Introduction
1.1 What is Text-to-Image?
Text-to-image is an artificial intelligence technology that automatically generates corresponding images based on text descriptions. Simply input a text (e.g., "A Shiba Inu wearing sunglasses is surfing on the beach"), and the AI model will generate an image that matches the description based on semantic understanding, requiring no drawing or design skills.
Core Principles
- Language Understanding: The AI first parses your text and identifies keywords (such as "Shiba Inu," "sunglasses," and "beach").
- Image Generation: Based on training with massive amounts of image data, the AI converts text into visual elements and combines them into a reasonable image.
- Style Adaptation: You can specify a style (realistic, cartoon, watercolor, etc.), and the AI will adjust the generated effect.
1.2 What is FastSDCPU?
FastSDCPU is an open-source project for stable diffusion image generation, specifically optimized for CPU devices. Through algorithmic and engineering optimizations, it enables the rapid generation of high-quality images on ordinary computers without GPUs, significantly lowering the hardware barrier for AI painting.
Core Features
- Pure CPU Operation: No dedicated graphics card required; can run directly on laptops, desktops, or edge devices.
- High-Speed Inference: Combining technologies such as Latent Consistency Models (LCM), images can be generated in just 4–8 steps, significantly reducing waiting time.
- Lightweight Deployment: Supports model quantization (such as INT8) and OpenVINO acceleration, reducing resource consumption and improving response efficiency.
Applicable Scenarios
- Localized AI Creation Tools
- Enterprise Intranet Image Generation Service
- Teaching Demonstration and Prototype Development
- Lightweight Deployment in Resource-Constrained Environments
2. Project Deployment
2.1 Deployment Environment
Open a terminal and execute the following code:
xxxxxxxxxx# If git is not installed on your motherboard, run the following first:sudo apt updatesudo apt install git -ysudo apt install python3.10-venv -y# Add environment variablesecho 'export PATH="$HOME/.local/bin:$PATH"' >> ~/.bashrcsource ~/.bashrc# Clone the project codegit clone https://github.com/rupeshs/fastsdcpu.gitcd fastsdcpu# Create a virtual environment and install dependenciespython -m venv venvsource venv/bin/activate# Install UVcurl -Ls https://astral.sh/uv/install.sh | sh (This step may fail if you are not using a proxy in China. If not, you can skip this step and execute the next command.)#If the previous step of installing UV using curl failed, run these three commands:wget https://mirrors.huaweicloud.com/astral/uv/0.8.4/uv-aarch64-unknown-linux-gnu -O ~/.local/bin/uvchmod +x ~/.local/bin/uv~/.local/bin/uv --versionchmod +x install.sh start-webui.sh./install.sh --disable-gui
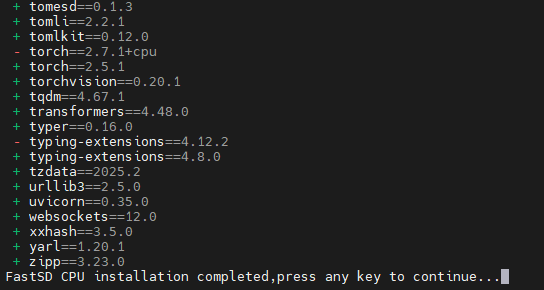
Installation successful. Press any key to exit:
2.2 Local Area Network Access
Before starting, you need to modify a file to support local area network access; otherwise, webUI can only be accessed locally:
xxxxxxxxxxvim ~/fastsdcpu/src/frontend/webui/ui.py
After opening the ui.py file, scroll to the last line and find the line **webui.launch(share=share)**. Modify it to **webui.launch(server_name="0.0.0.0",share=share)**
Then save. Start:
xxxxxxxxxx./start-webui.sh
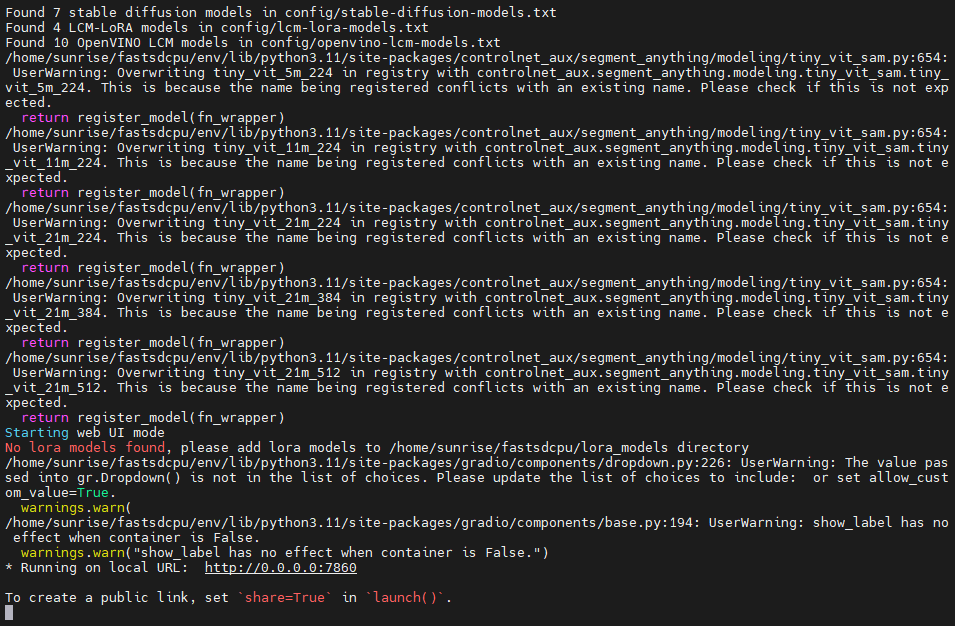
Then you can access webUI by entering your motherboard IP:7860 in your browser.
2.3 Using the Image Generator Function
In the terminal, use ifconfig to find your motherboard's IP address. For example, mine is 192.168.2.106.
Then open your browser and enter your motherboard IP:7860. For example, I entered 192.168.2.106:7860, and then I was able to access the web UI.
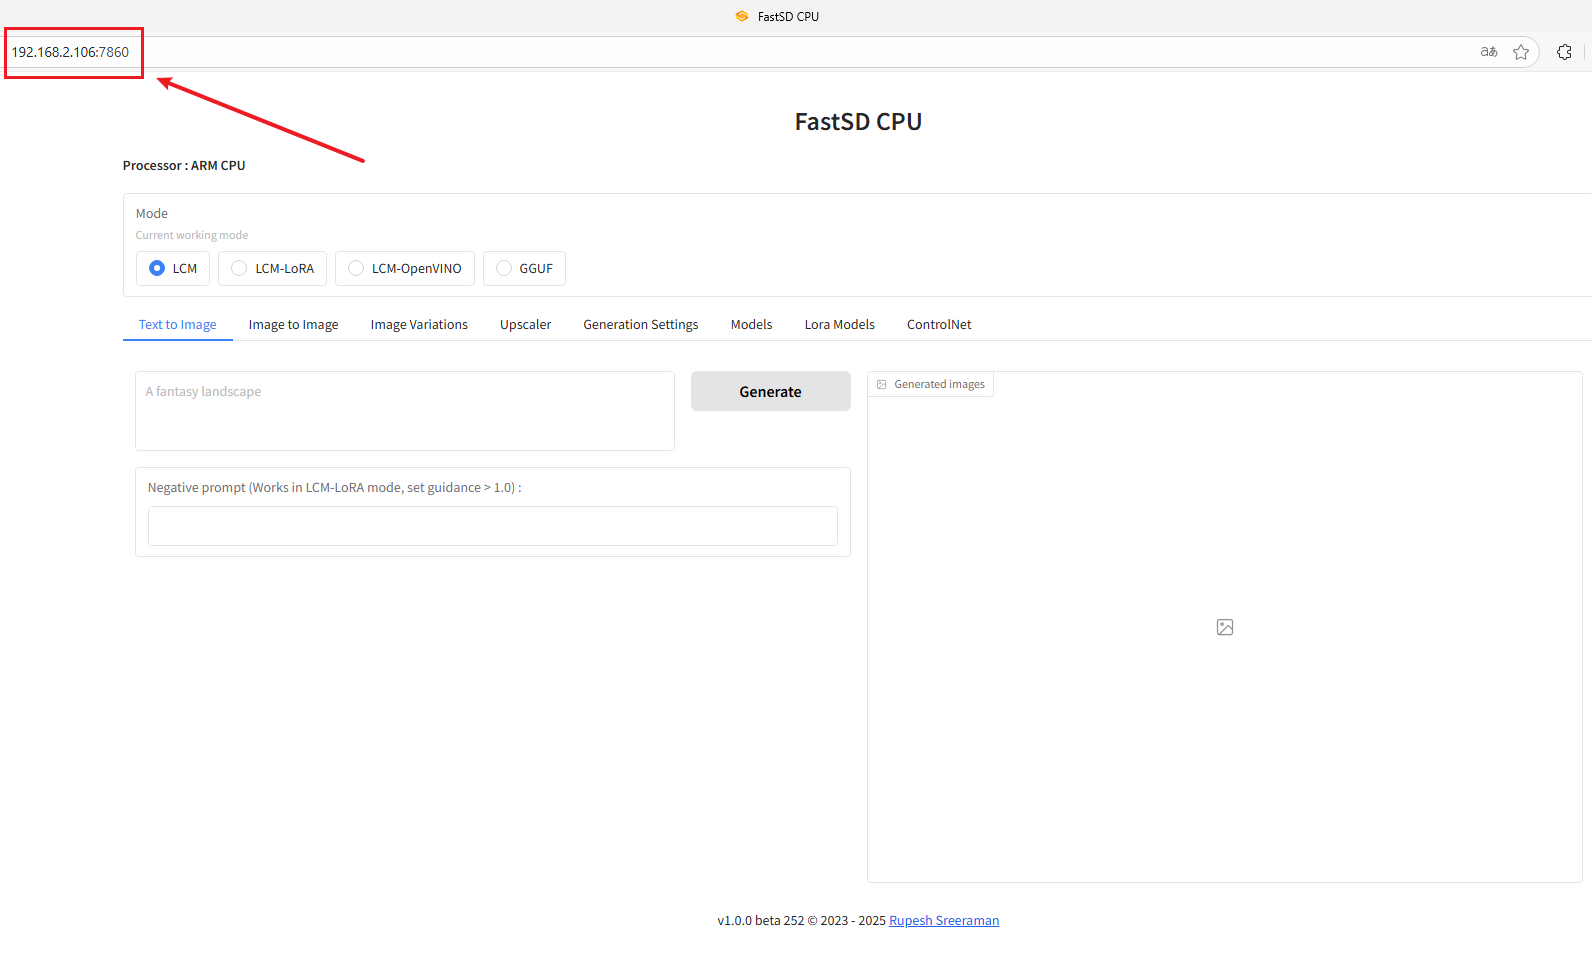
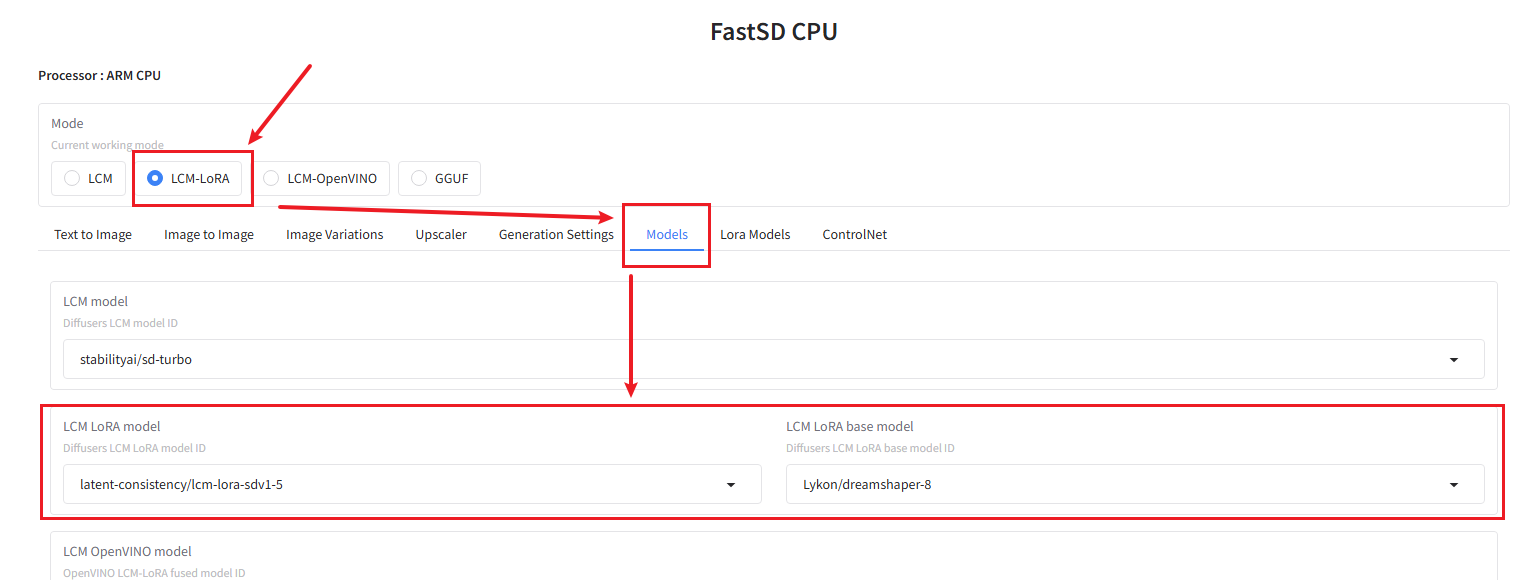
Next, click on LCM-LoRA. This model has a relatively small memory footprint. If you want to use other models, you can explore them on your own.
Then click on Models. You can see the LCM LoRA model settings. You can change the model you want, or you can choose the default settings like I did.
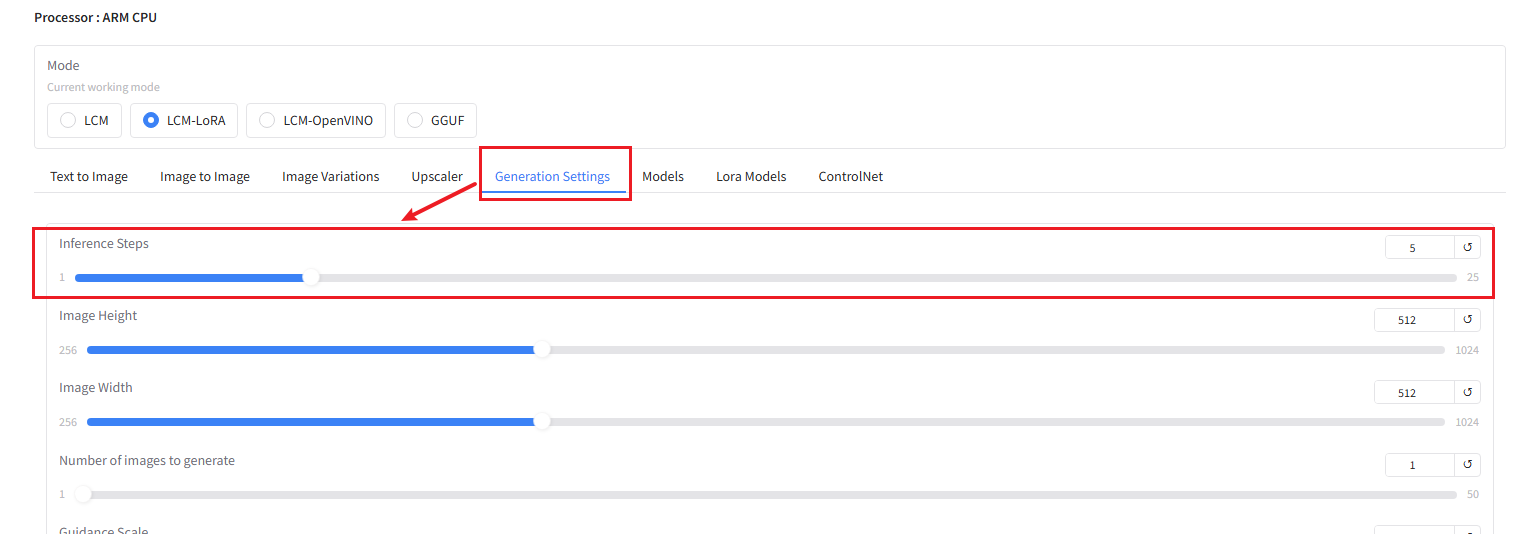
Next, click Generation Settings and increase the Inference Steps to improve the quality of the generated image. I've set it to 5 here.
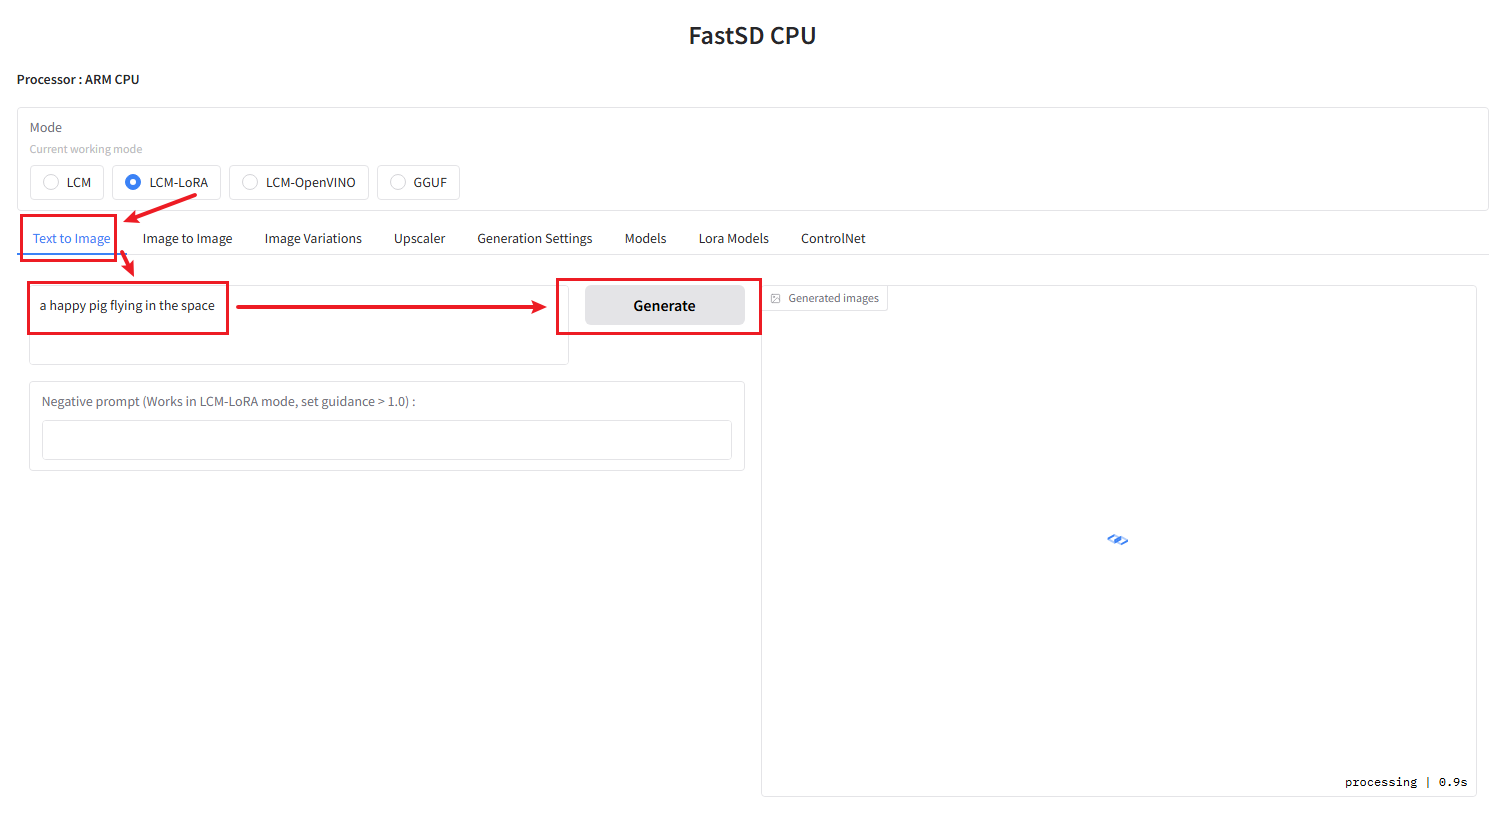
Then return to Text to Image. Enter the content you want to generate in the dialog box, and then click Generate to start generating the image.
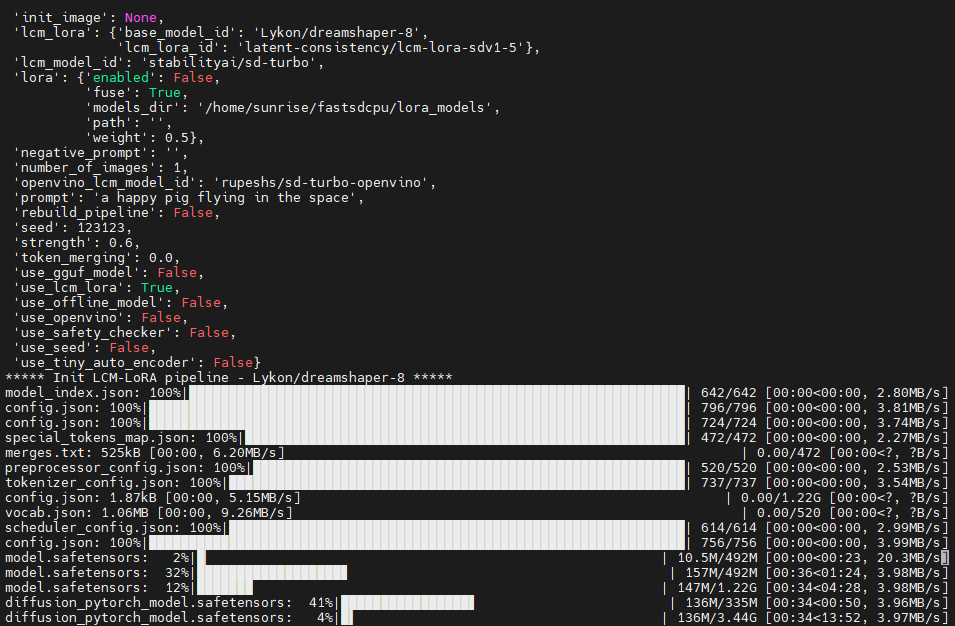
For first-time use, you need to download the model. You can see the default model being downloaded in the terminal. Once the download is complete, the text-to-image generation function will begin.
Generated Result:
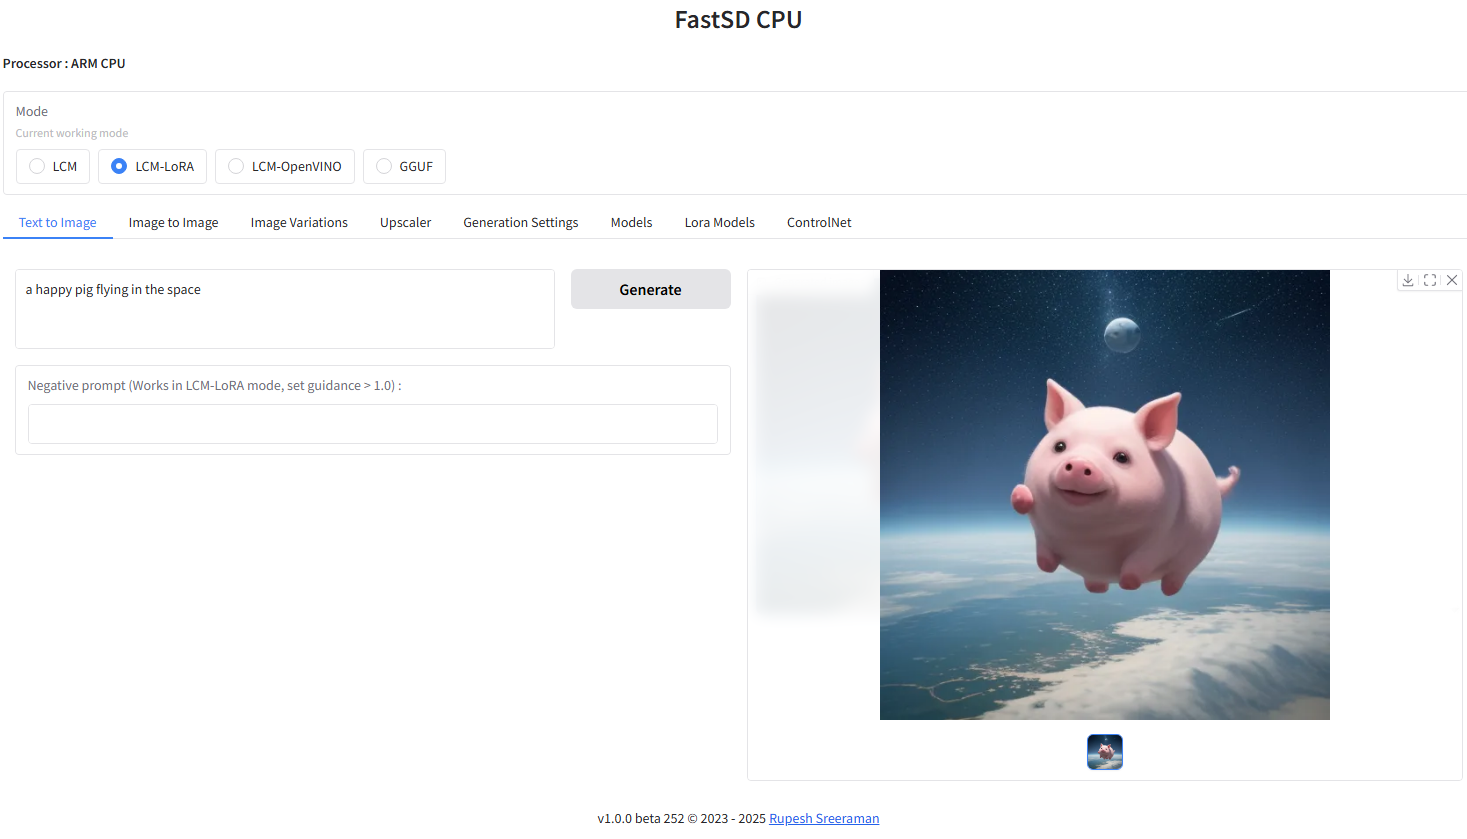
In practice, this project supports English better, and the generated images are more closely matched to the text. It is recommended to use English descriptions to generate images.
2.4 Startup Method After Successful Deployment
xxxxxxxxxxcd fastsdcpu # Enter the fastsdcpu directorysource venv/bin/activate # Enter the virtual environment./start-webui.sh # Start webui
After webui starts successfully, enter your motherboard IP:7860 in your browser to start the text-to-image generation function.
2.5 Changing the Model Download Location
The default download location for models is: /.cache/huggingface/hub
We can change the download path of our Huggingface models in the terminal before each model download:
xxxxxxxxxxexport HF_HOME=/path/to/cache/directory # Replace "path to" with your desired path
This will change the download path of your Huggingface models. For example, if I want to place the model on an SSD and not use the motherboard's hard drive space, I can enter the following command:
xxxxxxxxxxexport HF_HOME=/media/ssd/HF_Model
Here, /media/ssd is the path of my mounted SSD. You should modify it according to your own situation.
If you have already downloaded the model to the default path and want to change its location later, you can use the following command:
xxxxxxxxxxmv ~/.cache/huggingface /path/to/cache/directory # Replace "path to" with the path you want to move the model to
If you find it troublesome to use this command every time you download a model, you can directly add this export command to your .bahrc file.