Welcome to STM32-BoardCar repository
7. PS2 handle remote control
PS2 handle remote control
PS2 handle remote control1、software-hardware2、Brief principle2.1、Hardware schematic diagram2.2、Physical connection diagram2.3、Principle of control3、Main Function4、Experimental phenomenon
This tutorial is a comprehensive experiment with multiple peripherals. You can learn about a single peripheral before doing the experiment.
1、software-hardware
STM32F103CubeIDE
STM32 robot expansion board
Handle receiver: External
Type-C cable or ST-Link
Download or simulate the program of the development board
2、Brief principle
2.1、Hardware schematic diagram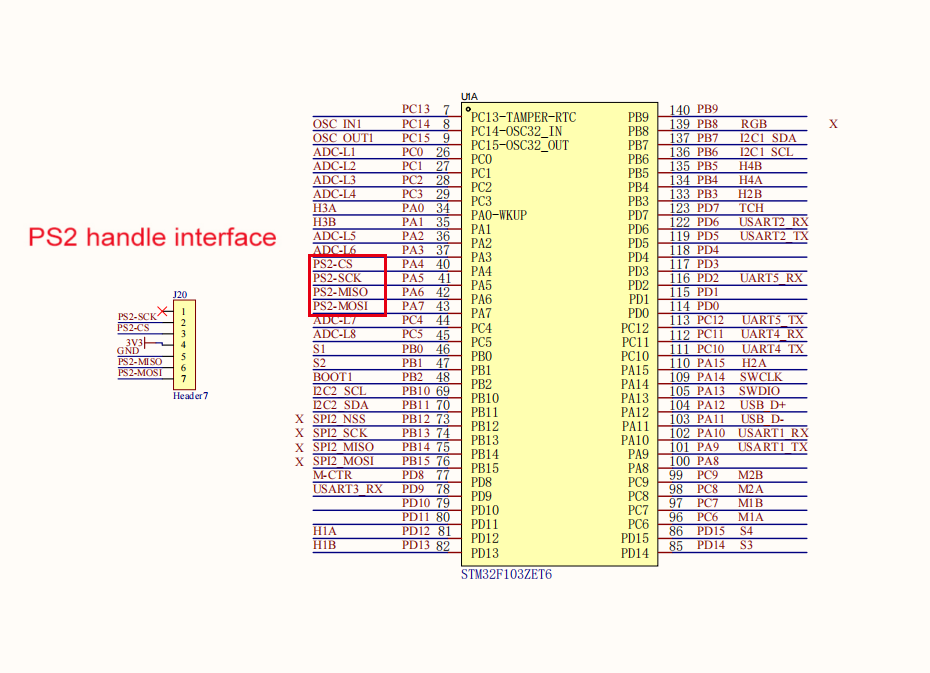
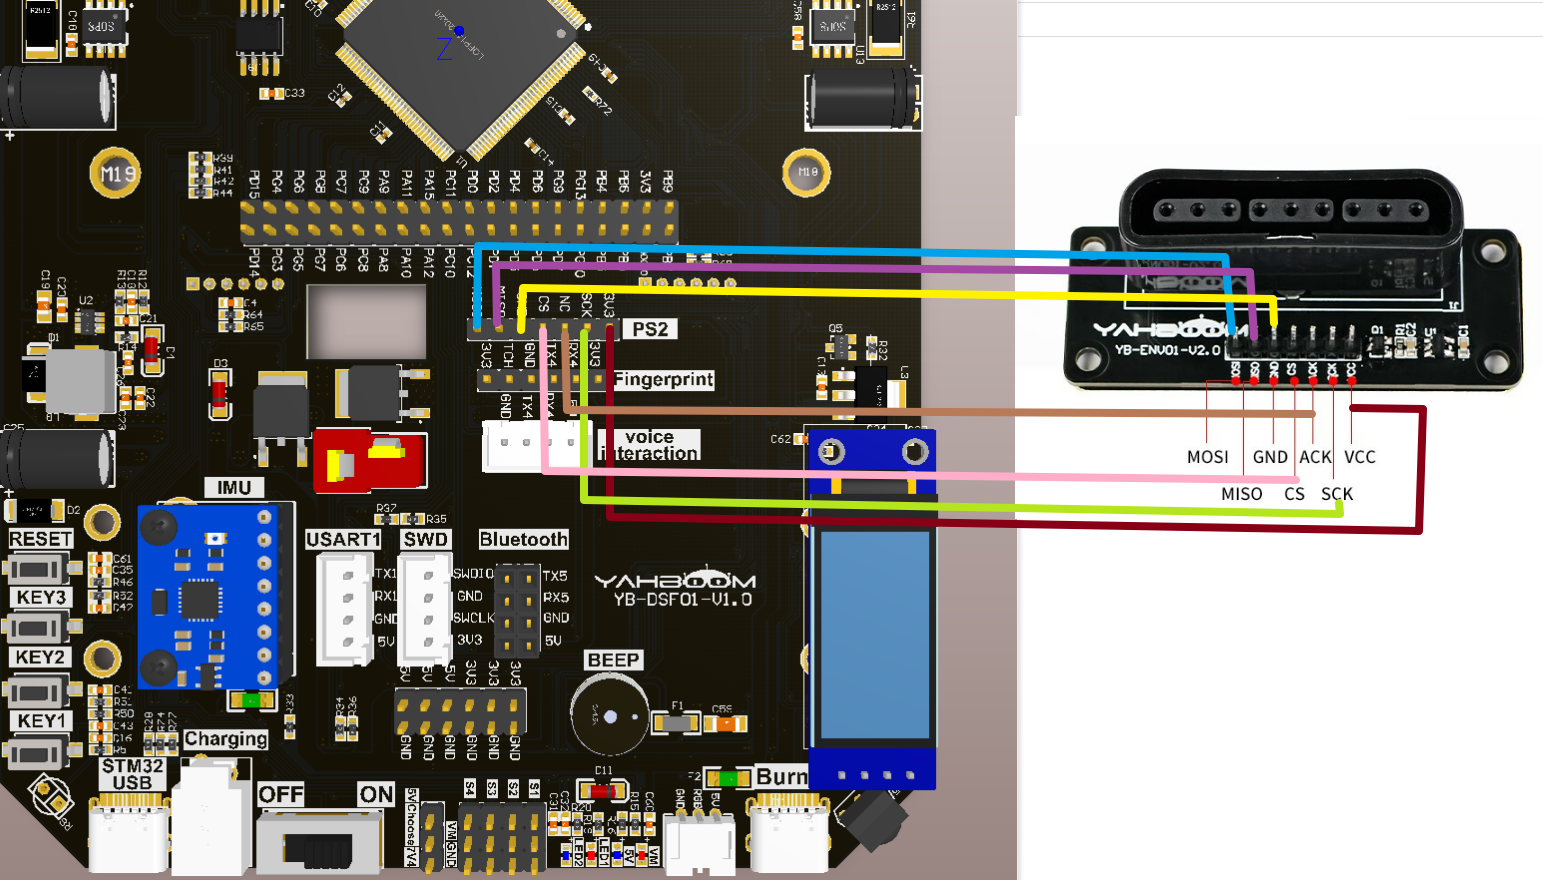
2.2、Physical connection diagram
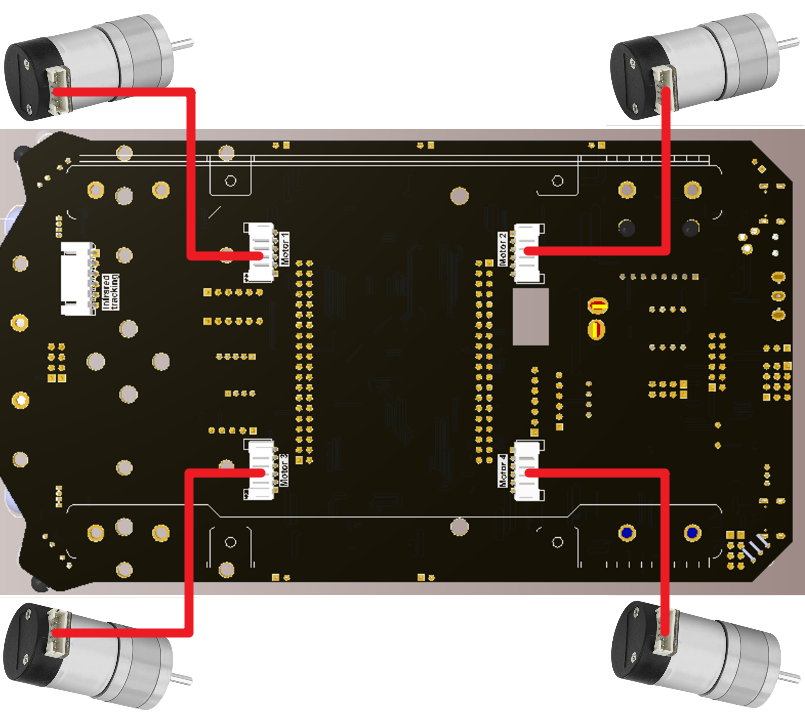
Motor wiring:
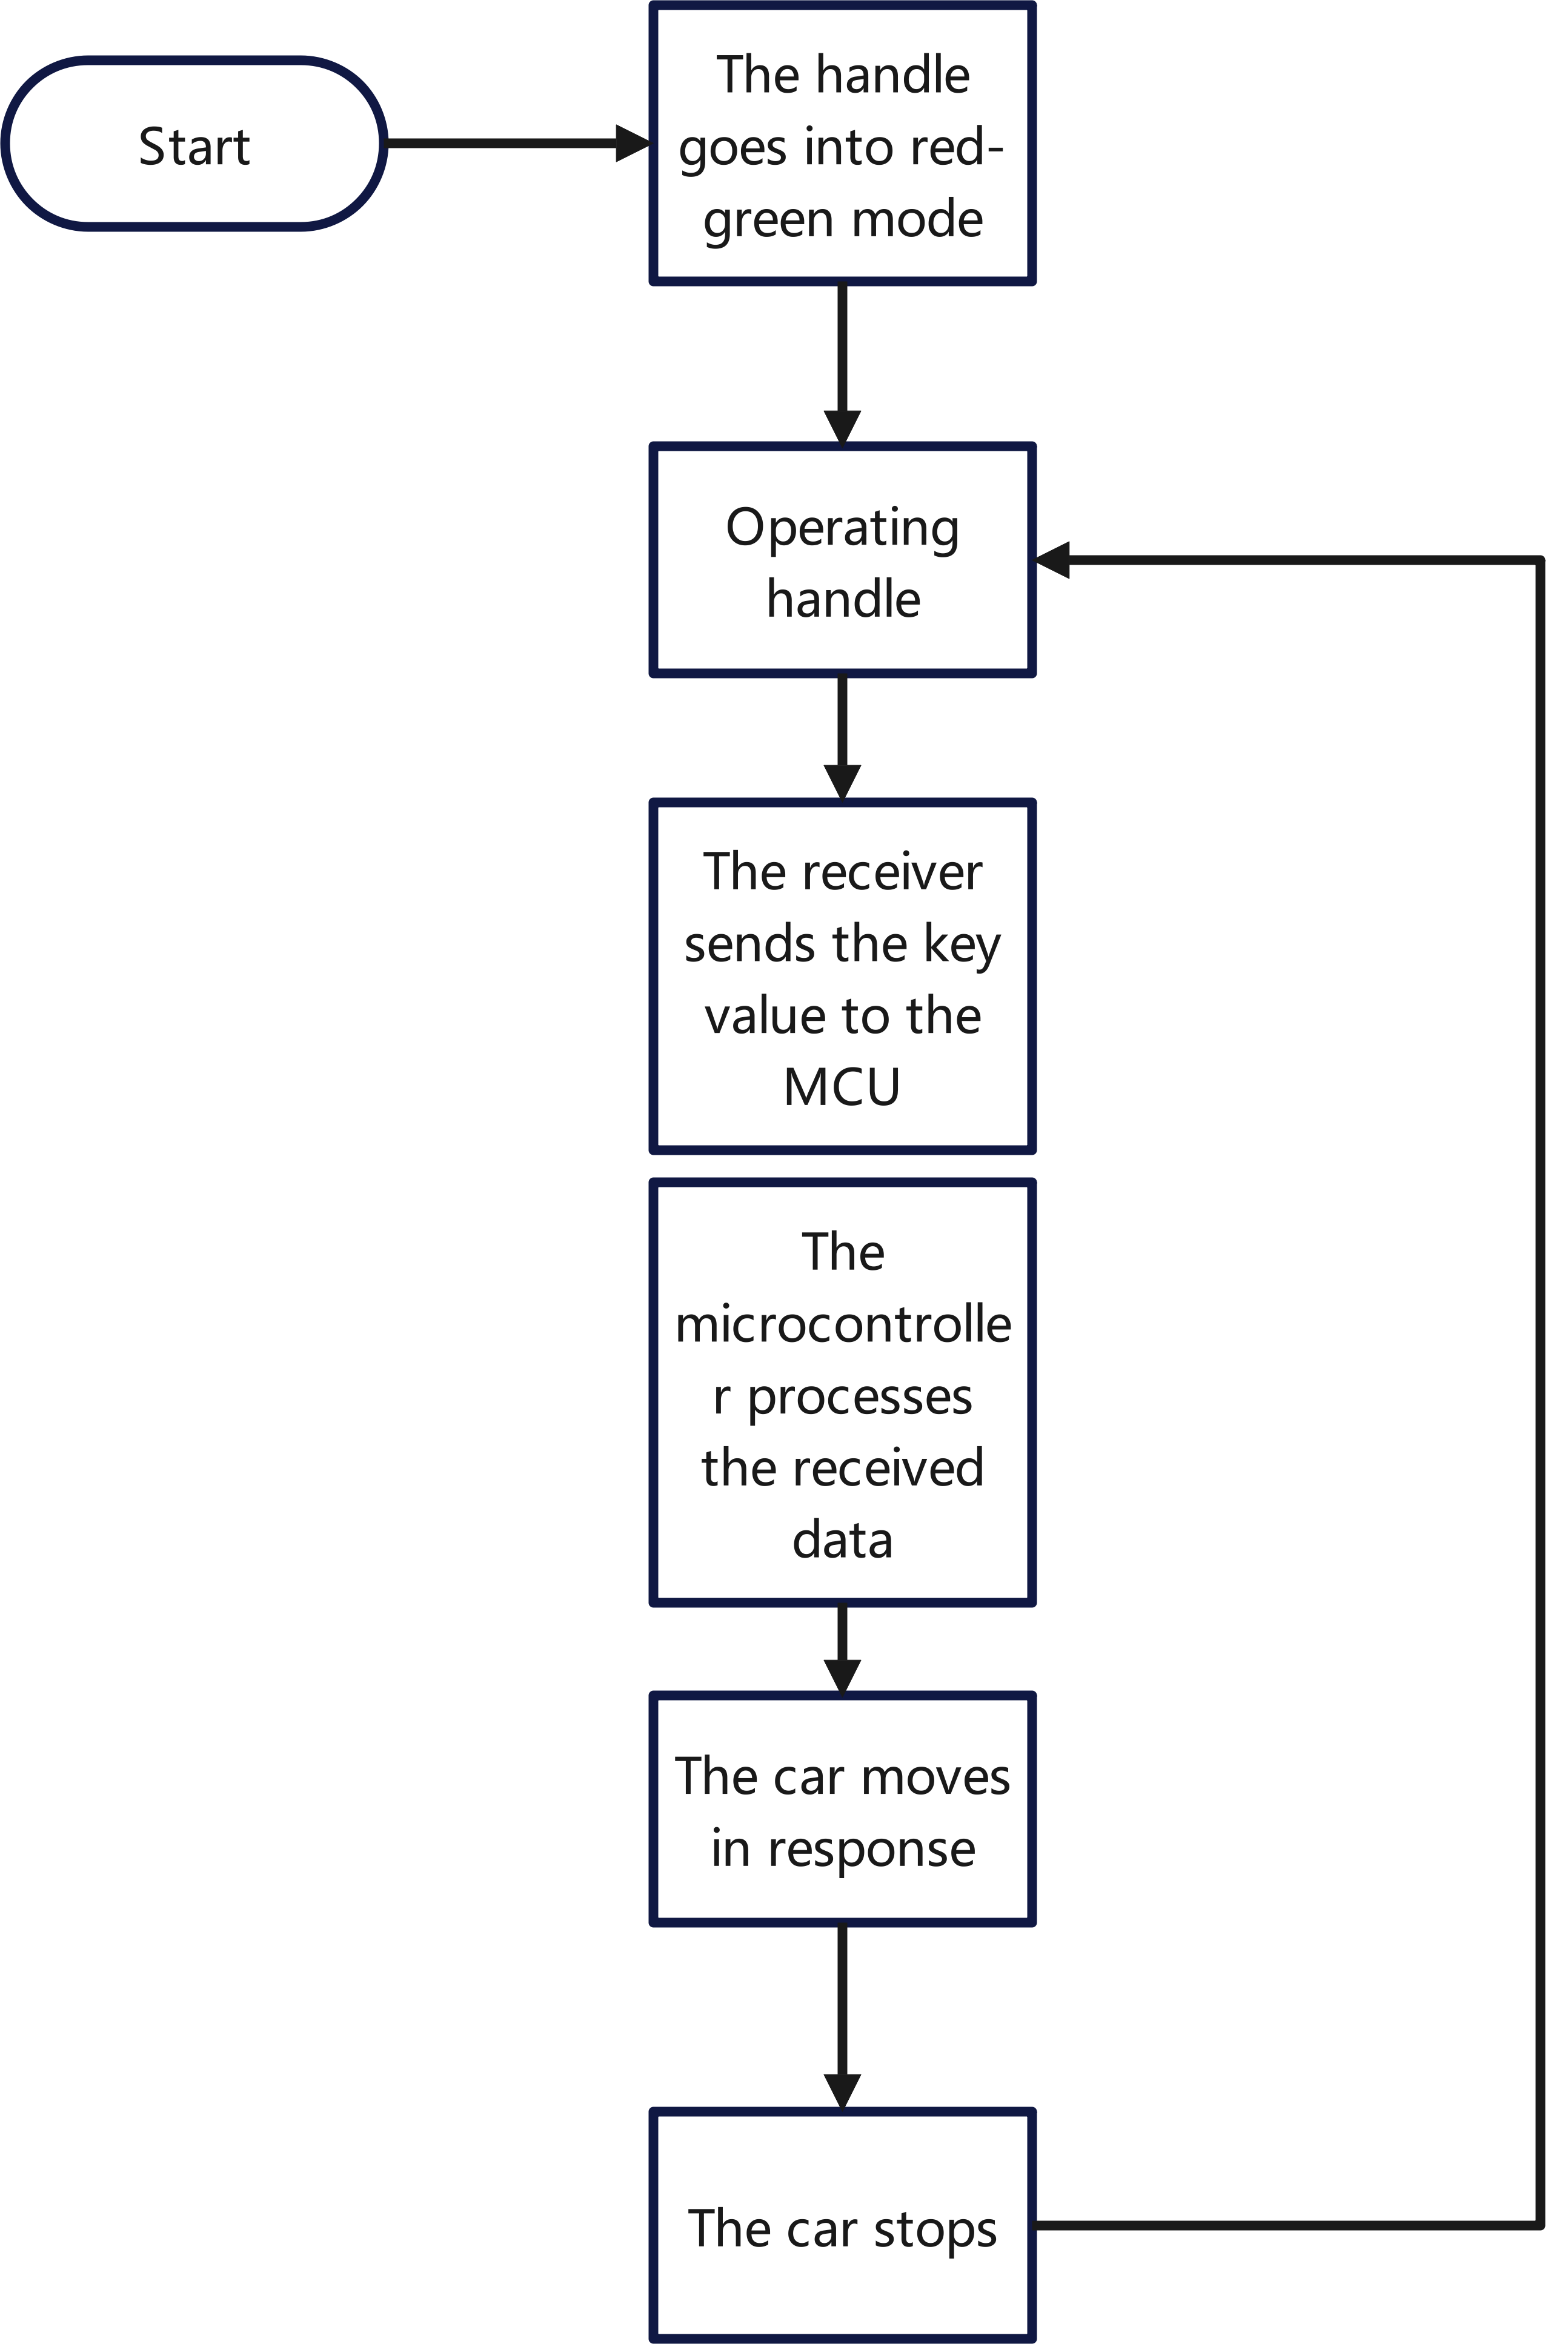
2.3、Principle of control
- Principle of control
| module | feature |
|---|---|
| PS2 handle receiver | Communication with the single chip microcomputer |
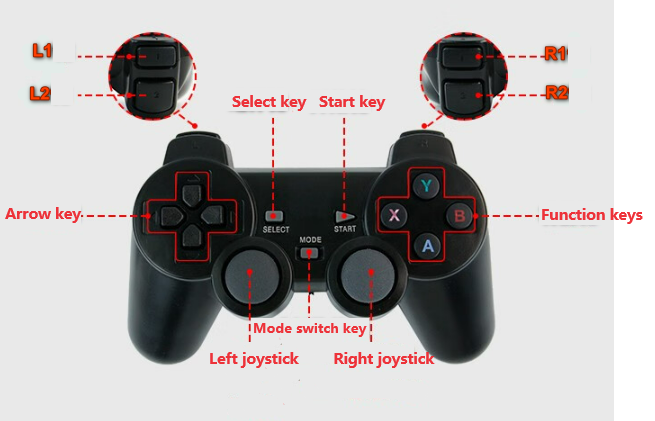
Key value rule:
| Key nameKey value | |
|---|---|
| L1 | 11 |
| L2 | 9 |
| R1 | 12 |
| R2 | 10 |
| Arrow keys (up, down, left and right) | 5/7/8/6 |
| Function key(X/A/Y/B) | 16/15/13/14 |
| Select key | 1 |
| Start key | 4 |
Note: The above key values are from the project code
PS2 handle is composed of a handle and a receiver. The handle is mainly responsible for sending key information. The receiver is connected to the microcontroller for receiving the information from the handle and passing it to the microcontroller. The microcontroller can also send commands to the handle through the receiver to configure the sending mode of the handle.
3、Main Function
function:PS2_ShortPoll
| Function prototypes | void PS2_ShortPoll(void) |
|---|---|
| Functional Description | Handle configuration initialization |
| Input parameters | None |
| Return value | None |
function:PS2_EnterConfing
| Function prototypes | void PS2_EnterConfing(void) |
|---|---|
| Functional Description | Go to Configuration |
| Input parameters | None |
| Return value | None |
function:PS2_SetInit
| Function prototypes | void PS2_SetInit(void) |
|---|---|
| Functional Description | Handle configuration initialization |
| Input parameters | None |
| Return value | None |
function:PS2_Cmd
| Function prototypes | void PS2_Cmd(uint8_t CMD) |
|---|---|
| Functional Description | Handle configuration initialization |
| Input parameters | CMD instruction |
| Return value | None |
function:PS2_TurnOnAnalogMode
| Function prototypes | void PS2_TurnOnAnalogMode(void) |
|---|---|
| Functional Description | Sending mode Settings |
| Input parameters | None |
| Return value | None |
function:PS2_ExitConfing
| Function prototypes | void PS2_ExitConfing(void) |
|---|---|
| Functional Description | Finish and save the configuration |
| Input parameters | None |
| Return value | None |
function:User_PS2_Control
| Function prototypes | void User_PS2_Control(void) |
|---|---|
| Functional Description | ps2 controls the car |
| Input parameters | None |
| Return value | None |
For low-level drivers, see Chapter 3: Advanced Timer Tutorial and Chapter 4: Motor Control Tutorial.For the application layer, you can read the source code in the project files yourself
4、Experimental phenomenon
xxxxxxxxxxProgram download can refer to [2, development environment construction and use: program download and simulation]
After downloading the program successfully, connect the handle receiver to the expansion board.
Turn on the switch on the handle, and then we need to pair the handle receiver with the handle.
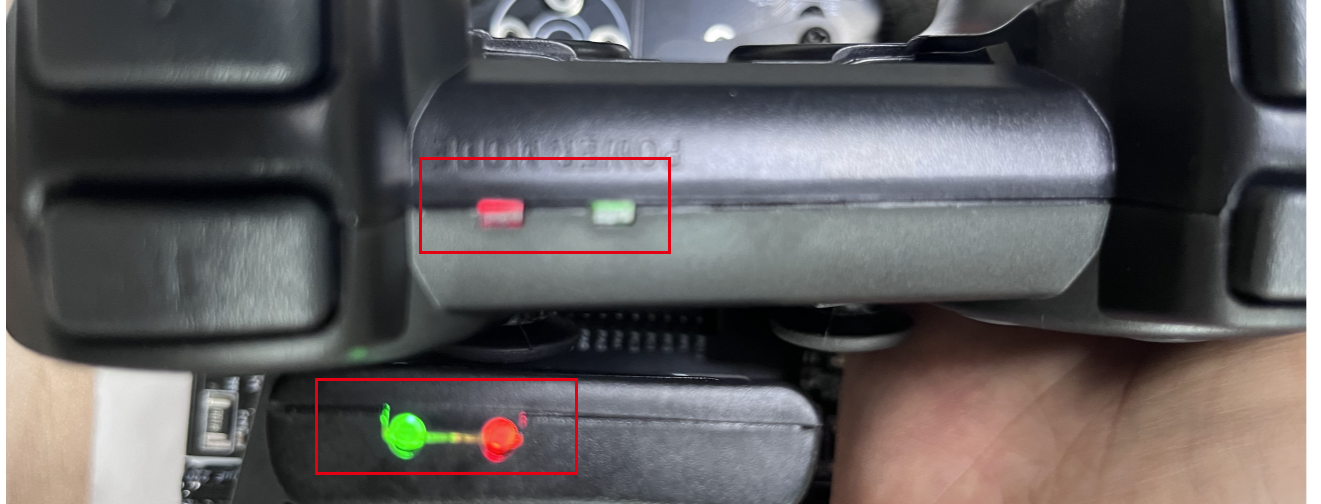
The pairing indicator is shown below: The handle receiver and the handle indicator are the traffic light is always on, if it is not, you can long press the "Mode" button on the handle to switch the handle mode to red and green mode.
See the demo video for details: