Welcome to STM32-BoardCar repository
3. Button control (EXTI)
Button control
Button control1. Software-Hardware2. Brief principle1. Hardware schematic diagram2. Physical connection diagram3. Control principle3. Project configuration1. Description2. Pin configuration4. Main functions1. User function2. HAL library function analysis5. Experimental phenomena
This tutorial demonstrates: triggering an external interrupt through GPIO input, and controlling the LED and buzzer according to the key that triggers the interrupt.
1. Software-Hardware
STM32F103CubeIDE
STM32 Robot Development Board
GPIO: chip internal peripherals
Buttons, LEDs and active buzzer: onboard
Type-C data cable or ST-Link
Download programs or simulate the development board
2. Brief principle
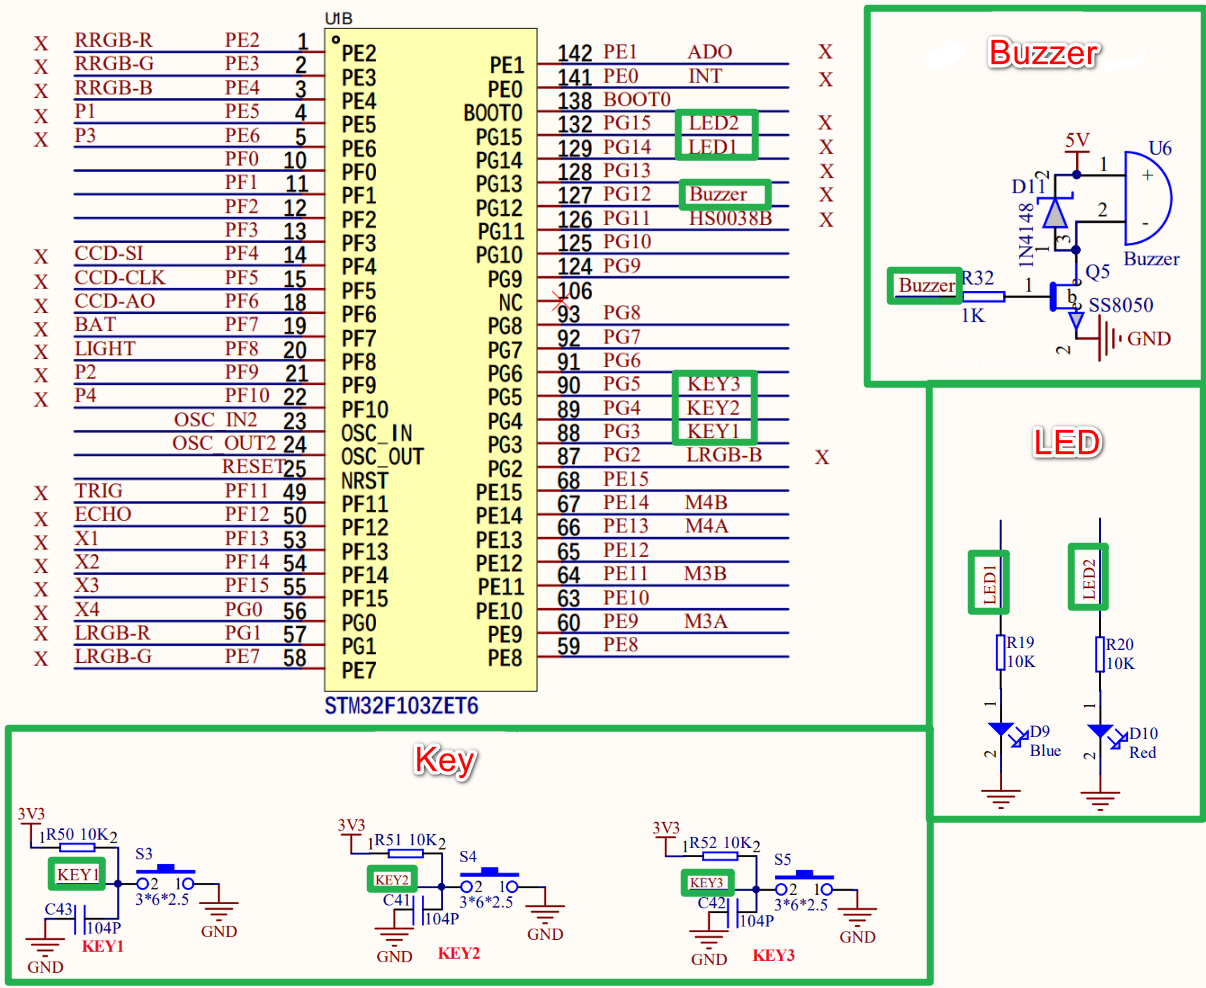
1. Hardware schematic diagram
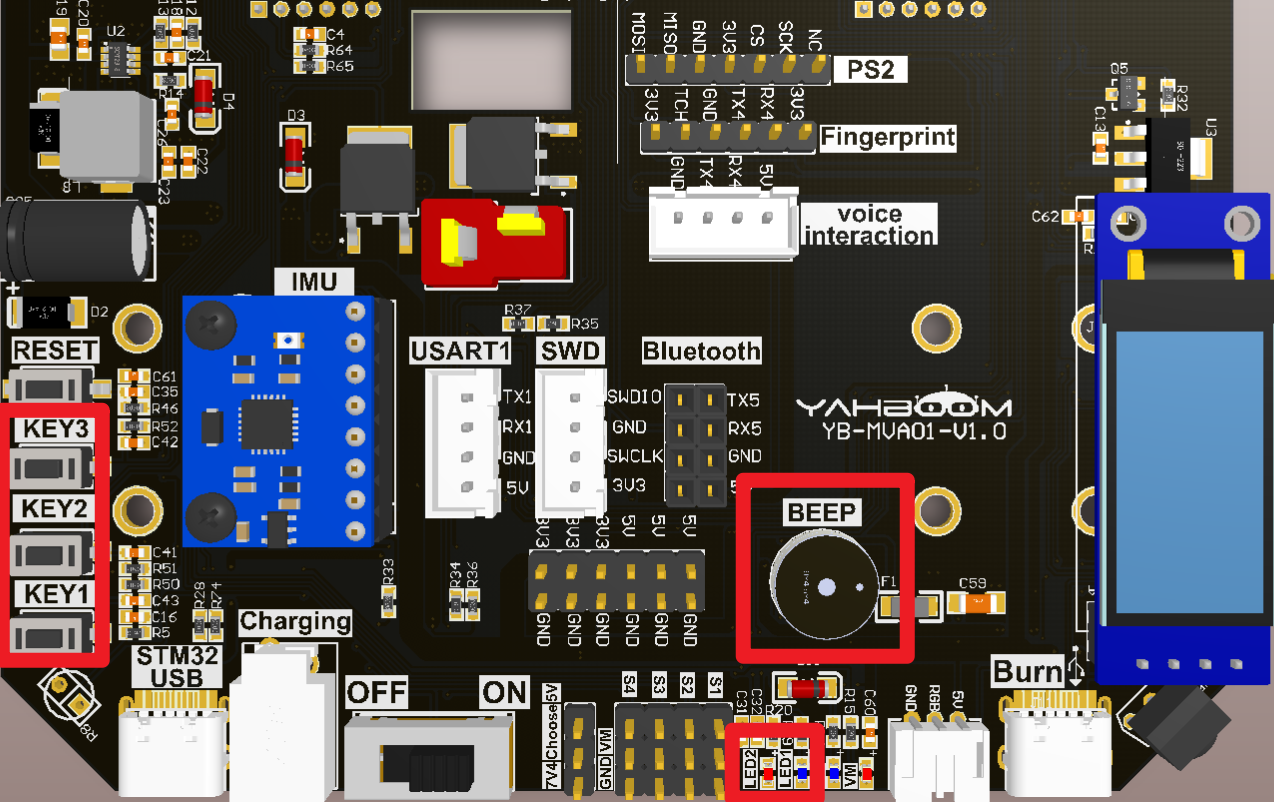
2. Physical connection diagram
3. Control principle
Trigger an external interrupt by pressing a button, and control the LED to turn on and off and the buzzer to sound according to the triggered button.
LED: High level lights up, low level turns off
| LED(schematic name) | control pin | Function |
|---|---|---|
| LED1 | PG14 | Control LED1 to turn on and off |
| LED2 | PG15 | Control LED2 to turn on and off |
KEY: High level by default, low level when the button is pressed
| KEY(schematic name) | control pin | Function |
|---|---|---|
| KEY1 | PG3 | Change the KEY1 pin level state |
| KEY2 | PG4 | Change the KEY2 pin level state |
| KEY3 | PG5 | Change the KEY3 pin level state |
Buzzer: High level sounds, low level does not sound
| Buzzer(schematic name) | control pin | Function |
|---|---|---|
| Buzzer | PG12 | Control the buzzer sound |
- NVIC (Nested Vectored Interrupt Controller)
NVIC controls the interrupt-related functions of the entire chip and provides a reliable interrupt handling mechanism for the system.
- Interrupt Priority
Preemption priority: The preemption priority is used to determine the relative priority between interrupts. When an interrupt with a high preemption priority occurs, it can interrupt the executing interrupt with a low preemption priority;
Response priority: When multiple interrupt sources have the same preemption priority, the interrupt with high response priority will be processed first and will not be interrupted by interrupts with the same preemption priority but low response priority.
- EXTI (External Interrupt)
The external interrupt/event controller consists of 19 edge detectors that generate event/interrupt requests.
Each input line can be independently configured with input type (pulse or suspend) and corresponding trigger event (rising edge, falling edge, or both edges), and each input line can be independently shielded.
External Interrupt/Event Line Image
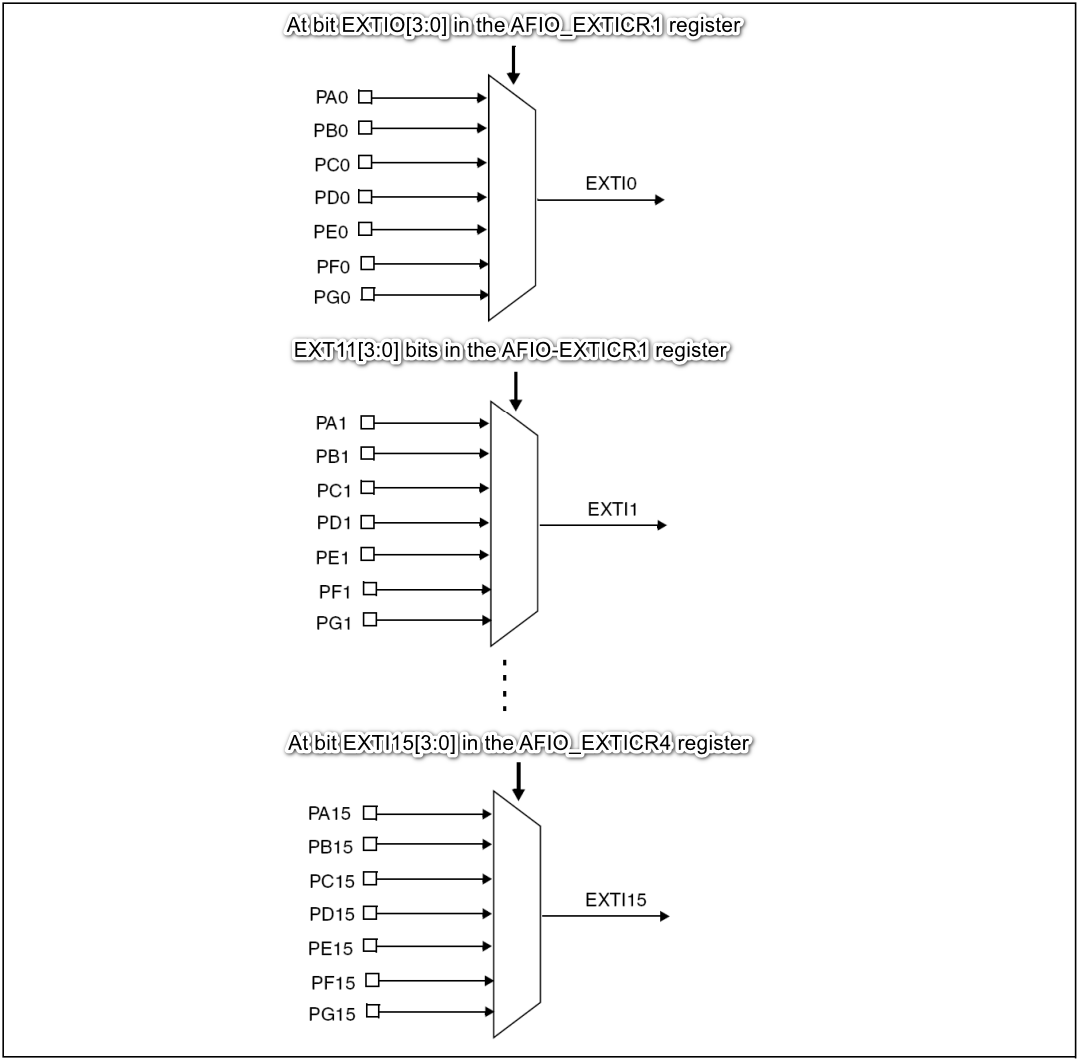
xxxxxxxxxxEXTI0~EXIT4 each have independent interrupt channelsEXTI5~EXIT9 share the same interrupt channel: EXTI9_5_IRQEXTI10~EXIT15 share the same interrupt channel: EXTI15_10_IRQ
| KEY(schematic name) | control pin | External interrupt service function |
|---|---|---|
| KEY1 | PG3 | EXTI3_IRQHandler function |
| KEY2 | PG4 | EXTI4_IRQHandler function |
| KEY3 | PG5 | EXTI9_5_IRQHandler function |
This section tutorial external interrupt trigger mode: rising edge trigger.
3. Project configuration
Project configuration: Prompt configuration options during STM32CubeIDE project configuration
1. Description
Omitted project configuration part: New project, chip selection, project configuration, SYS of pin configuration, RCC configuration, clock configuration and project configuration content
The project configuration part that is not omitted is the key point that needs to be configured in this tutorial.
xxxxxxxxxxPlease refer to [2. Development environment construction and use: STM32CubeIDE installation and use] to understand how to configure the omitted parts of the project.
2. Pin configuration
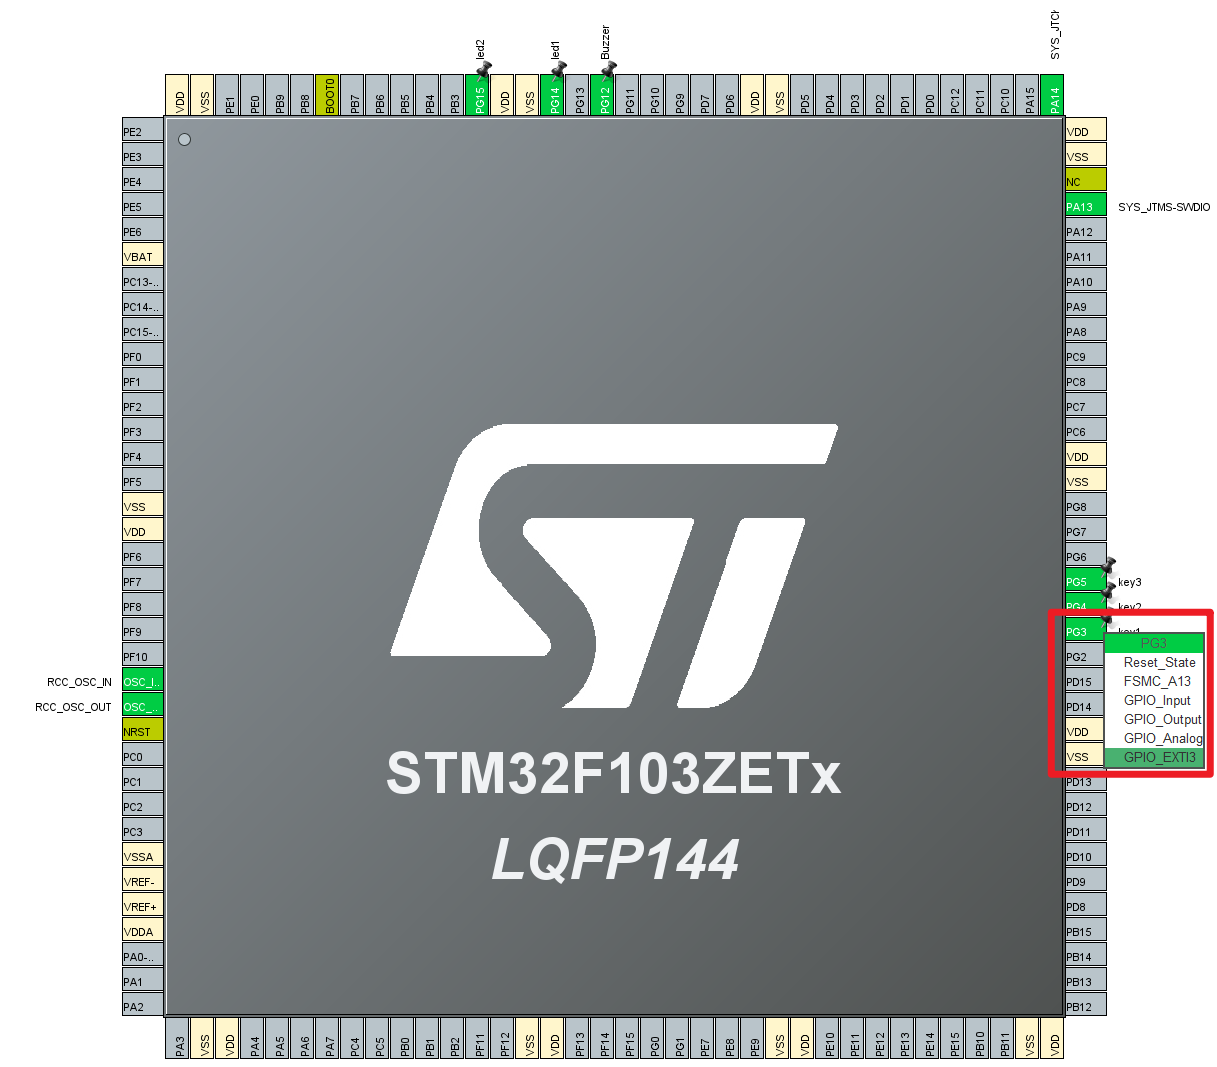
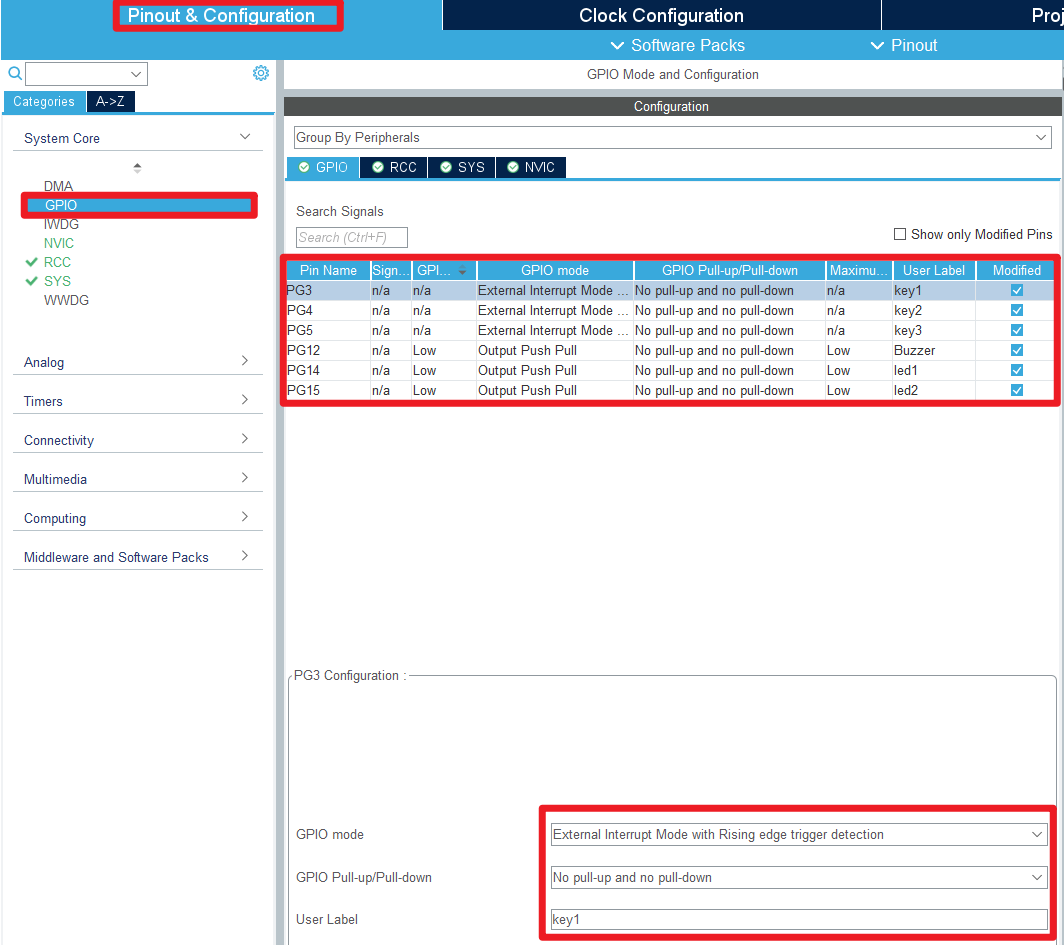
- Configure specified pin function
You can directly select the corresponding pin number in the pin view, and the corresponding options will appear when you left-click the mouse.
- GPIO
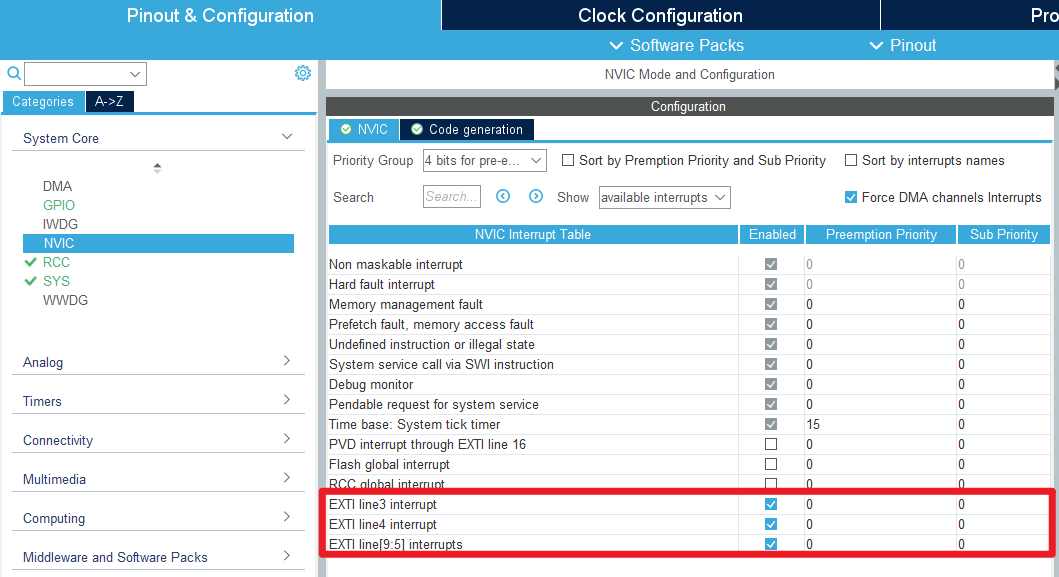
- NVIC
Later, when it comes to modifying the interrupt priority, you need to enter the NVIC interface settings. The default priority is used here.
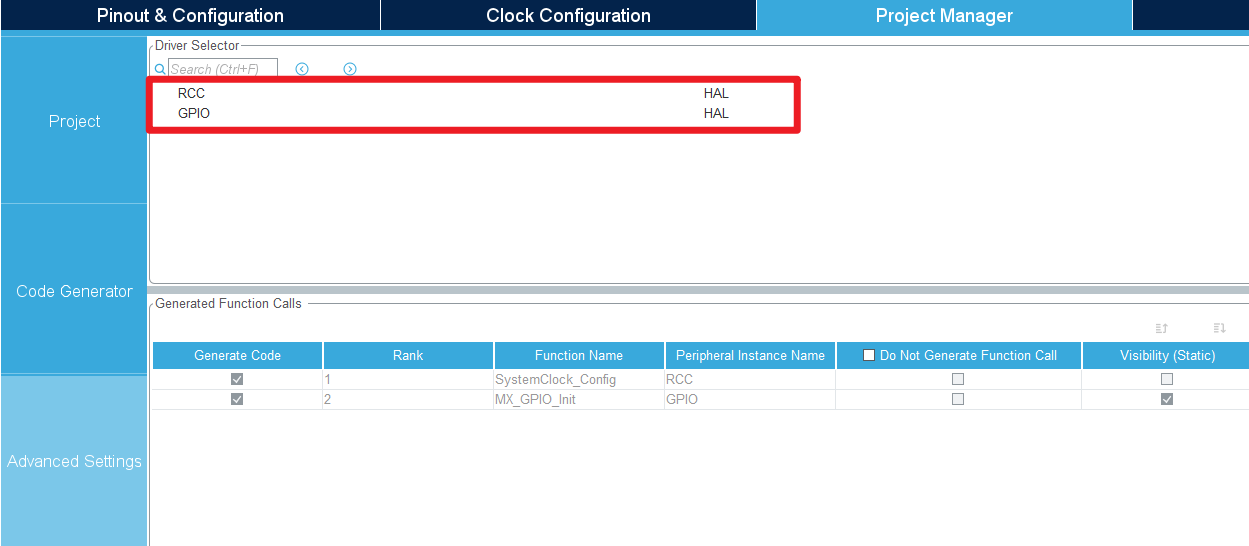
- Advanced Settings
- Generate code

4. Main functions
It mainly introduces the functional code written by the user. For detailed code, you can open the project file provided by us yourself and enter the Bsp folder to view the source code. **
1. User function
function :Set_led
| function prototype | void Set_led(uint8_t id, uint8_t i) |
|---|---|
| Function description | Set the LED to turn on and off |
| Input parameter 1 | id:LED id(1:LED1,2:LED2) |
| Input parameter 2 | i:Switch (0: off, 1: on) |
| return value | none |
2. HAL library function analysis
The HAL library functions that have been introduced in the previous tutorial will not be introduced again in the tutorial!
xxxxxxxxxxIf you want to find the HAL library and LL library function analysis involved in the entire tutorial, you can view the documents in the folder [8. STM32 Manual: STM32F1_HAL Library and LL Library_User Manual]
function :HAL_NVIC_SetPriority
| function prototype | void HAL_NVIC_SetPriority(IRQn_Type IRQn, uint32_t PreemptPriority, uint32_t SubPriority) |
|---|---|
| Function description | Configure interrupt priority |
| Input parameter 1 | IRQn:Interrupt source |
| Input parameter 2 | PreemptPriority |
| Input parameter 3 | SubPriority |
| return value | none |
function :HAL_NVIC_EnableIRQ
| function prototype | void HAL_NVIC_EnableIRQ(IRQn_Type IRQn) |
|---|---|
| Function description | Enable interrupt source |
| Input parameter | IRQn: interrupt source |
| return value | none |
function :HAL_GPIO_EXTI_IRQHandler
| function prototype | void HAL_GPIO_EXTI_IRQHandler(uint16_t GPIO_Pin) |
|---|---|
| Function description | General processing function after all external interrupts occur |
| Input parameter | GPIO_Pin: pin of external interrupt source |
| return value | none |
function :HAL_GPIO_EXTI_Callback
| function prototype | void HAL_GPIO_EXTI_Callback(uint16_t GPIO_Pin) |
|---|---|
| Function description | External interrupt callback function |
| Input parameter | GPIO_Pin: pin of external interrupt source |
| return value | none |
| Precautions | 1. This function is called by the external interrupt general processing function HAL_GPIO_EXTI_IRQHandler 2. This function is used to handle specific interrupt tasks |
5. Experimental phenomena
After downloading the program successfully, press the RESET button of the development board and observe the development board phenomenon!
xxxxxxxxxxFor program download, please refer to [2. Development environment construction and use: program download and simulation]
Phenomenon:
Press the KEY1 button and release it: the buzzer will not sound, LED1 and LED2 will turn off
Press the KEY2 button and release: LED1 lights up
Press the KEY3 button and release: the buzzer sounds and LED2 lights up
For experimental phenomena, please see [Button Control_Experimental Phenomenon.mp4]