Welcome to STM32-BoardCar repository
11.K230 QR code command
K230 QR code instructions
K230 QR code instructions1. Software-Hardware2. Brief principle1. Hardware schematic2. Physical connection diagram3. Control principle3. Main functions4. Partial code analysis5. Experimental phenomenon
This tutorial is a comprehensive experiment combining multiple peripherals. You can first understand a single peripheral and then conduct this experiment.
1. Software-Hardware
STM32F103CubeIDE
STM32 Robot Development Board
K230 module: external
Type-C data cable or ST-Link
Download or simulate the development board
2. Brief principle
1. Hardware schematic
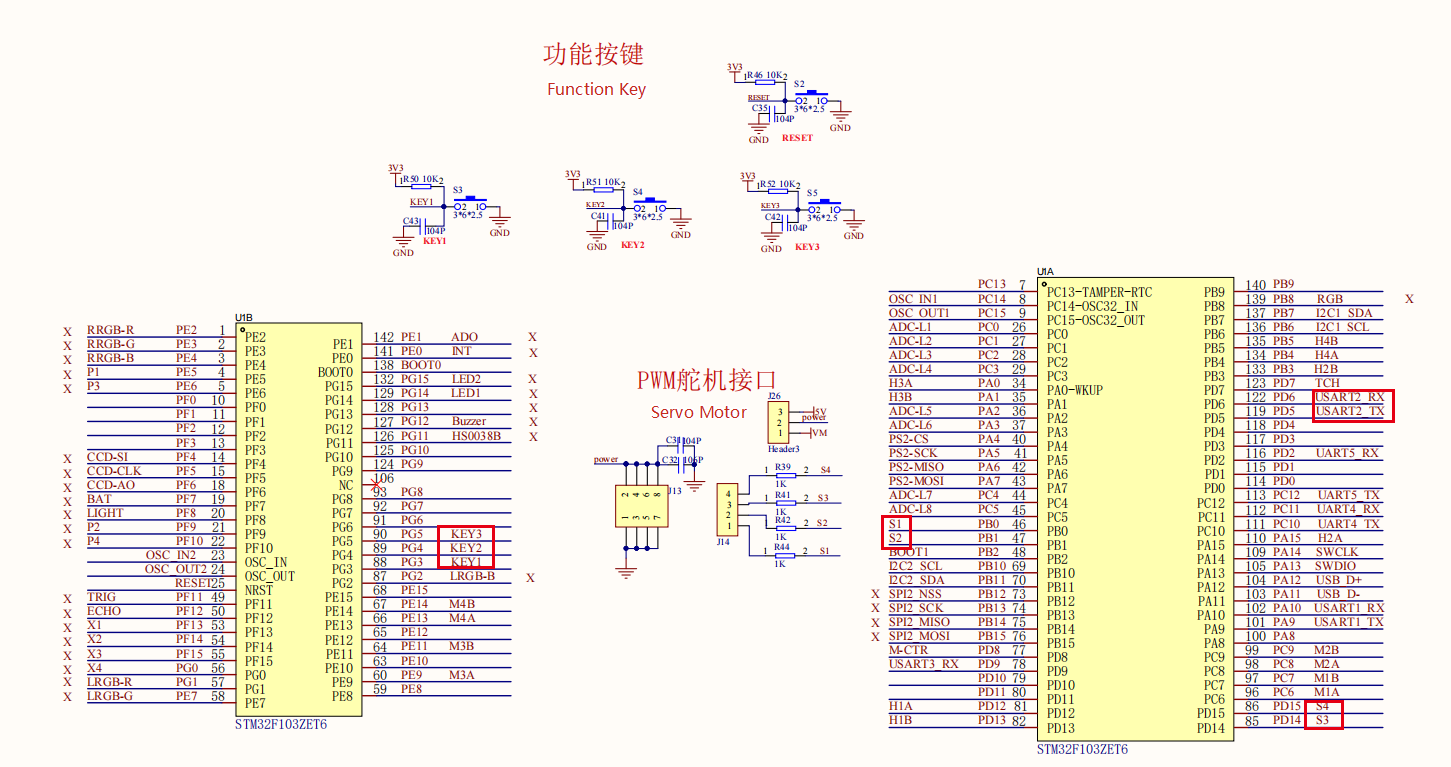
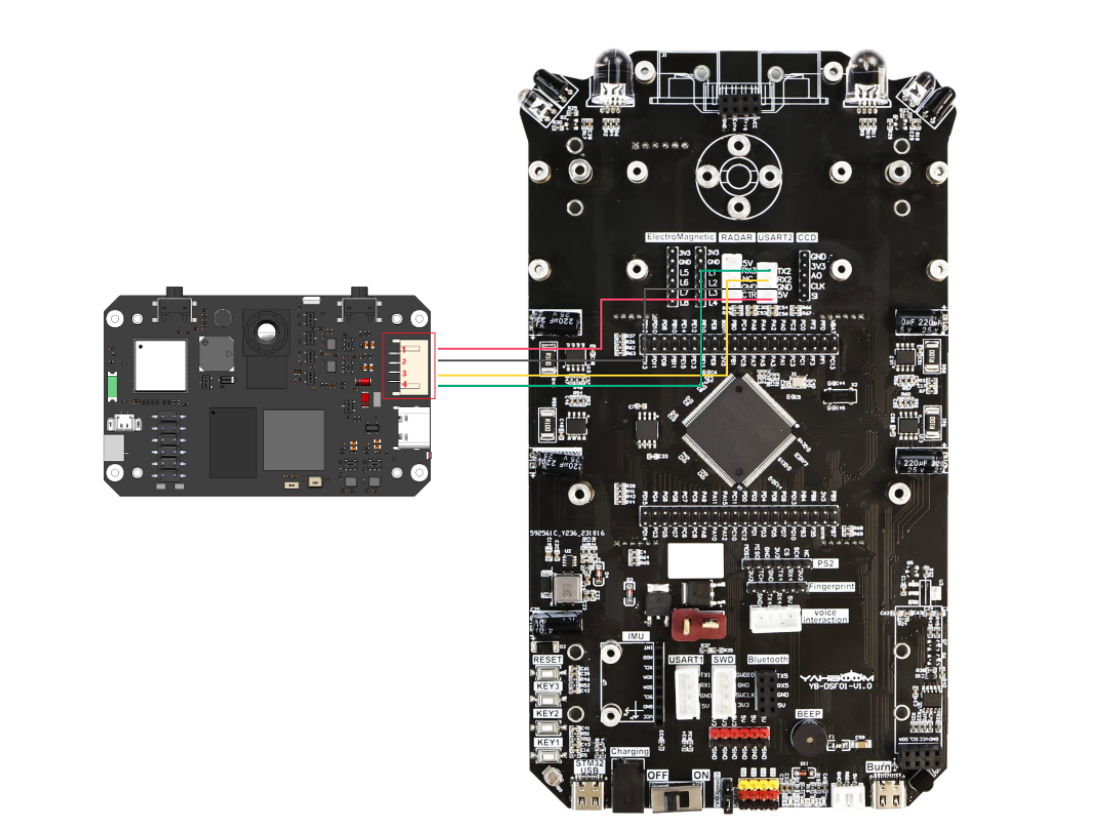
2. Physical connection diagram
K230 wiring (Note: The wiring in the figure below is for position reference only. We are equipped with K230 dual-head PH2.0 4Pin all-black wire, with fool-proof design, no need to worry about wiring problems)
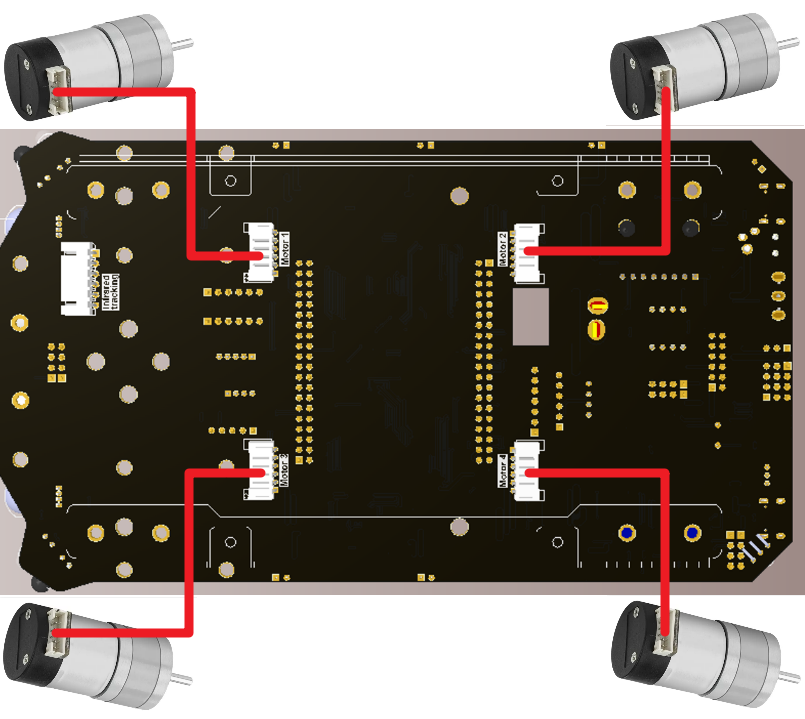
Motor wiring
3. Control principle
Program flow chart
Communication protocol:
When k230 recognizes the content of the scanned QR code, it will send a data frame through the serial port, the format is as follows
| Start character | Length | Delimiter | Routine number | delimiter | x | delimiter | y | delimiter | w | delimiter | h | delimiter | msg | end |
|---|---|---|---|---|---|---|---|---|---|---|---|---|---|---|
| $ | XX | , | 03 | , | XXX | , | XXX | , | XXX | , | XXX | , | ... | # |
The microcontroller receives the data sent by k230 through the serial port and processes the data. By judging whether the received data content is in the above frame format, we process the data into string data after it meets the data frame format. It should be distinguished from the previous "x, y, w, h" coordinate information, and then compare this string array. If the comparison is a specific QR code instruction content, the corresponding instruction is executed on the car.
For example: "$XX, 03, XXX, XXX, XXX, XXX, goback#"
When the microcontroller receives the above data frame, it will split the data frame with commas, and the data after the commas is the data we need to obtain. After parsing the data frame content, it will compare this content with goback. If it is the corresponding instruction, the car will move backward.
Note: For the analysis part, please refer to the code
3. Main functions
Function: Car_qcode
| Function prototype | void Car_qcode(void) |
|---|---|
| Function description | Perform different actions according to different instructions sent by k230 |
| Input parameters | None |
| Return value | None |
Function: Motion_Set_Speed
Function prototype void Motion_Set_Speed(int16_t speed_m1, int16_t speed_m2, int16_t speed_m3, int16_t speed_m4) Function description Control the speed of the car Input parameters 1, 2, 3, 4 Speed control: speed=0~1000. Return value None Function: wheel_State
| Function prototype | void wheel_State(uint8_t state, uint16_t speed) |
|---|---|
| Function description | Control the motion state of the car |
| Input parameter 1 | Speed control: speed=0~1000. |
| Input parameter 2 | Car status value |
| Return value | None |
xxxxxxxxxxFor the underlying driver, please refer to the tutorials in Chapter 3 and Chapter 4For the application layer, you can read the source code in the project file by yourself
4. Partial code analysis
yb_protocol.c
x
//* * @Brief: 数据分析 Data analysis * @Note: 解析传入的数据帧,提取字段值并处理 * Parse the incoming data frame, extract field values and process them * @Parm: 传入接受到的一个数据帧和长度 Pass in a received data frame and length * @Retval: 无返回值 No return value */void Pto_Data_Parse(uint8_t *data_buf, uint8_t num){ uint8_t pto_head = data_buf[0]; uint8_t pto_tail = data_buf[num-1]; // 验证帧头和帧尾 Verify frame header and footer if (!(pto_head == PTO_HEAD && pto_tail == PTO_TAIL)) { return; }
uint8_t data_index = 1; uint8_t field_index[PTO_BUF_LEN_MAX] = {0}; int i = 0;
// 处理分隔符,将逗号替换为字符串结束符,记录字段位置 // Process delimiters, replace commas with string terminators and record field positions for (i = 1; i < num-1; i++) { if (data_buf[i] == ',') { data_buf[i] = 0; field_index[data_index] = i; data_index++; } }
// 处理无分隔符的情况,整个数据作为标签处理 // Handle the case without delimiters, treat the entire data as a label if (data_index == 1) { uint8_t len = num - 2; memcpy(lubiao, (char*)data_buf+1, len); lubiao[len] = '\0'; // 确保字符串以'\0'结尾 Ensure the string ends with '\0' } else { // 处理多字段情况 Process multiple fields for (i = 0; i < data_index; i++) { uint8_t start = field_index[i] + 1; uint8_t len; if (i == data_index - 1) { // 最后一个字段,长度计算到帧尾前 // Last field, length calculated up to before the frame footer len = (num - 1) - start; } else { // 中间字段,长度为下一个分隔符位置减去当前起始位置 // Middle field, length is the next delimiter position minus the current start position len = field_index[i + 1] - start; } // 根据字段索引和总数处理不同类型的数据 // Process different types of data based on field index and total count if (i == 6 && data_index == 7) { memcpy(msg, (char*)data_buf + start, len); msg[len] = '\0'; // 确保字符串以'\0'结尾 Ensure the string ends with '\0' } else if (i == 2 && data_index == 3) { memcpy(game, (char*)data_buf + start, len); game[len] = '\0'; // 确保字符串以'\0'结尾 Ensure the string ends with '\0' } else { // 其他字段转换为整数值 // Convert other fields to integer values values[i] = Pto_Char_To_Int((char*)data_buf + start); } } // 帧长度验证,检查协议定义的长度与实际长度是否一致 // Frame length verification, check if the protocol-defined length matches the actual length uint8_t pto_len = values[0]; if (pto_len != num) { printf("pto_len error:%d , data_len:%d\n", pto_len, num); return; }
// 提取协议ID Extract protocol ID pto_id = values[1]; }
// 提取坐标和尺寸信息 Extract coordinate and dimension information int x = values[2]; int y = values[3]; int w = values[4]; int h = values[5];
// 打印坐标和尺寸信息 Print coordinate and dimension information printf("dmcode:x:%d, y:%d, w:%d, h:%d,\n", x, y, w, h);
// 打印游戏信息 Print game information printf("msg:%s\n", game);
// 调试信息已注释 Debug information commented out // printf("game:%d\n", pto_id); // printf("msg:%s\n", msg);}
app_motor.c
x
/* @brief设置四个电机的速度// speed_mX=[-1000, 1000], 单位为:mm/s//speed_mX=[-1000,1000],Unit: mm/svoid Motion_Set_Speed(int16_t speed_m1, int16_t speed_m2, int16_t speed_m3, int16_t speed_m4){ g_start_ctrl = 1; motor_data.speed_set[0] = speed_m1; motor_data.speed_set[1] = speed_m2; motor_data.speed_set[2] = speed_m3; motor_data.speed_set[3] = speed_m4; for (uint8_t i = 0; i < MAX_MOTOR; i++) { PID_Set_Motor_Target(i, motor_data.speed_set[i] * 1.0); }}5. Experimental phenomenon
After successfully downloading the program, take out a specific QR code and place it under the lens of the k230 visual module for recognition. After recognition, the car will make corresponding actions, and after completing the action, the car will stop.
xxxxxxxxxxFor program download, please refer to [Chapter 2: Development Environment Construction and Use → 2.6 Program Download and Simulation]
K230 Code Burning
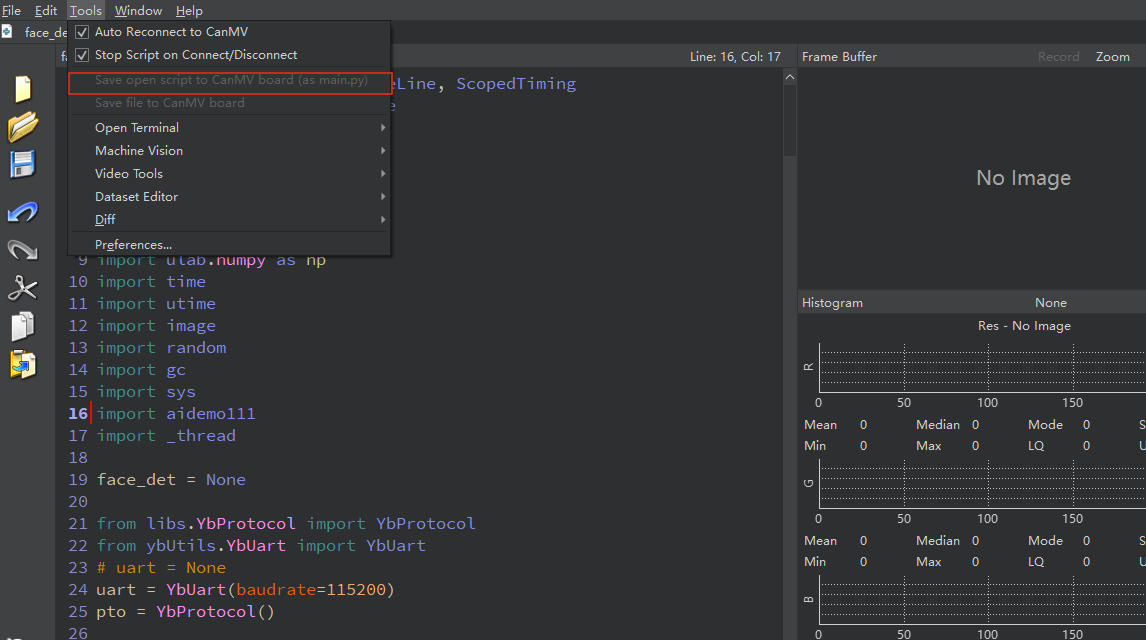
Required tools: K230, SD card, CanMV IDE K230
We find the k230_track_recong.py file in the project folder, then drag it to CanMV IDE K230, and then choose to save the opened script as main.py to CanMV
The following is the QR code used in the tutorial:

goback

Goahead
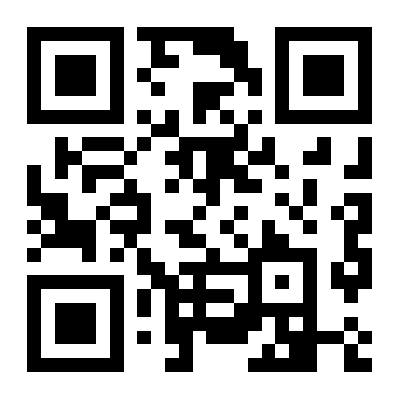
turnleft
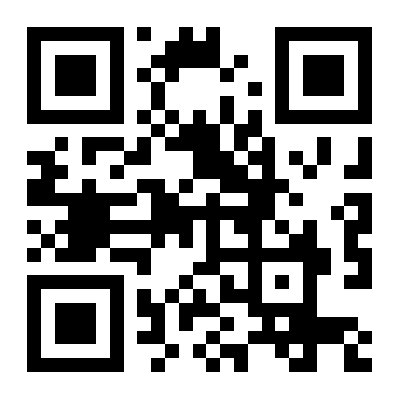
turnright