Welcome to RDK X5 MagicBox repository
2. Troubleshooting boot failure
Hello everyone, I'm a technical support engineer from D-Robotics. This article aims to help developers solve the following common issues:
- System fails to start after flashing
- Wi-Fi and other modules are abnormal (unavailable) after system startup
- Some software functions cannot load properly
Problem Background
During development and usage, everyone uses different SD card brands and models. These SD cards have differences in power-on timing, boot methods, and other aspects, causing system compatibility issues on certain cards.
To solve this problem, we have upgraded the Miniboot bootloader, thereby significantly improving compatibility with mainstream SD cards.
Miniboot Introduction
Miniboot is a lightweight bootloader that mainly performs initialization during early system startup.
In the RDK X5 platform, Miniboot is embedded in the onboard NAND Flash and is responsible for loading the file system and core components from the SD card after startup.
Miniboot Upgrade Guide
We provide two upgrade paths for users in different situations:
 Option 1: System can start normally — Automatic online upgrade
Applicable when the system can be accessed and the network is working normally.
Simply execute the following command for one-click upgrade:
bash
Copy and edit
xxxxxxxxxxroot@ubuntu:~# rdk-miniboot-update
 Option 2: System cannot start — Manual flashing of Miniboot
Applicable when the system is abnormal or fails to start.
1. Environment Preparation
| Tool Category | Download Link | Description |
|---|---|---|
| Flashing Tool | http://rdk-doc.oss-cn-beijing.aliyuncs.com/doc/asset/rdk_x5/burn/xburn-gui_1.1.3_x64-setup.exe | Tool for flashing miniboot system (includes various drivers for RDK series) |
| miniboot | Recommended version: https://archive.d-robotics.cc/downloads/miniboot/rdk_x5/product_20250610.zip All versions: Index of /downloads/miniboot/rdk_x5/ | Lightweight boot bootloader |
| Connection Cable | |Micro USB cable |
2. Flashing Tool Installation
- Download and install the flashing tool (must be operated on Windows system)
We will provide macOS and Ubuntu platform support in the future
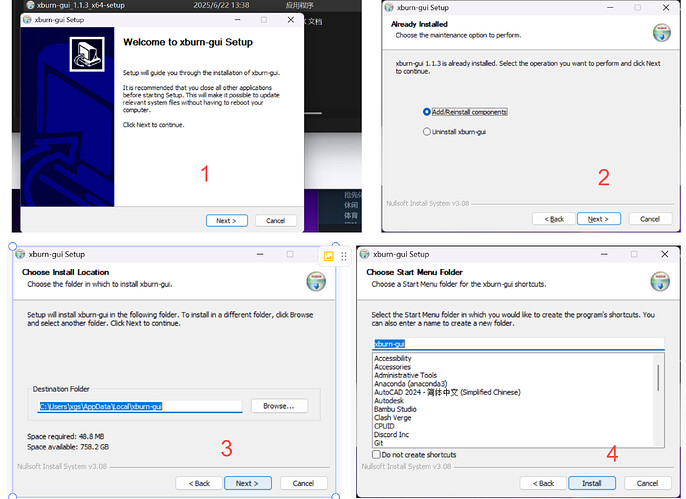
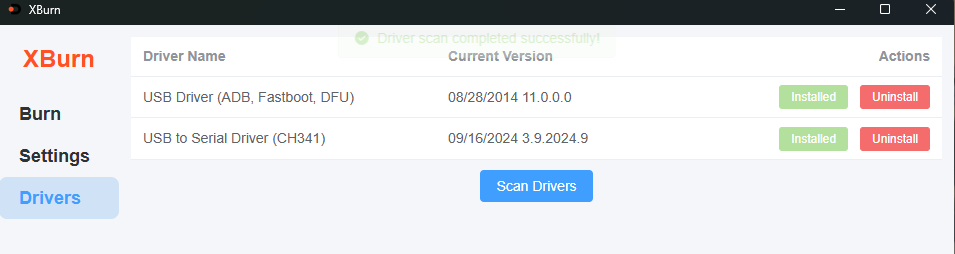
- Install drivers: Ensure relevant USB drivers are installed
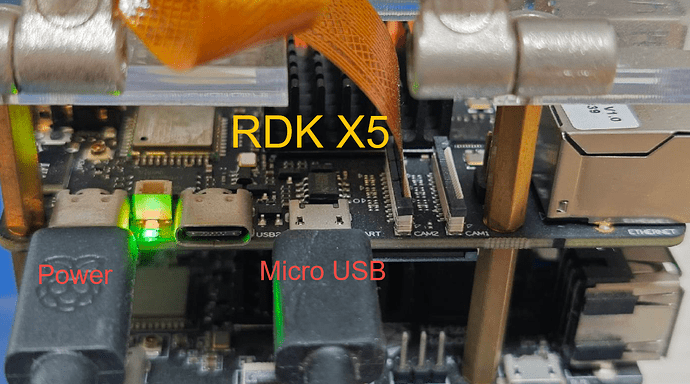
3. Hardware Connection
Use Micro-USB data cable to connect the development board and PC. Note:
- The Micro-USB port on RDK X5 is also the Debug UART interface
- Ensure stable connection, recommend using high-quality data cable
4. Software Configuration Parameters
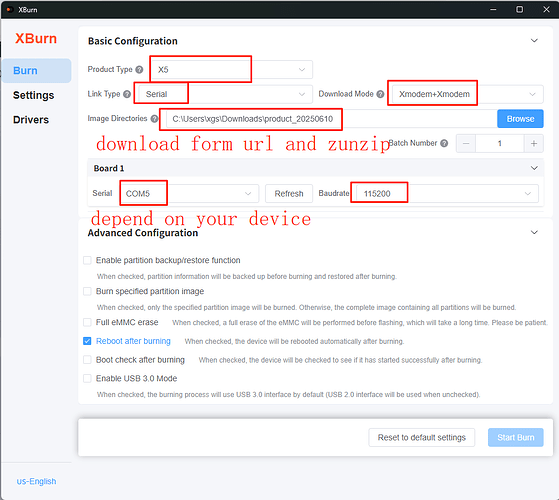
Open the flashing tool and set parameters as follows:
wrap:normal;}
| Parameter Item | Configuration Content |
|---|---|
| Product Type | X5 |
| Link Type | Serial |
| Download Mode | Xmodem+Xmodem |
| Serial | Select actual serial port |
| Baudrate | 115200 |
Configure as shown in the figure below:
Refer to the figure below for specific configuration
5. Start Flashing Process
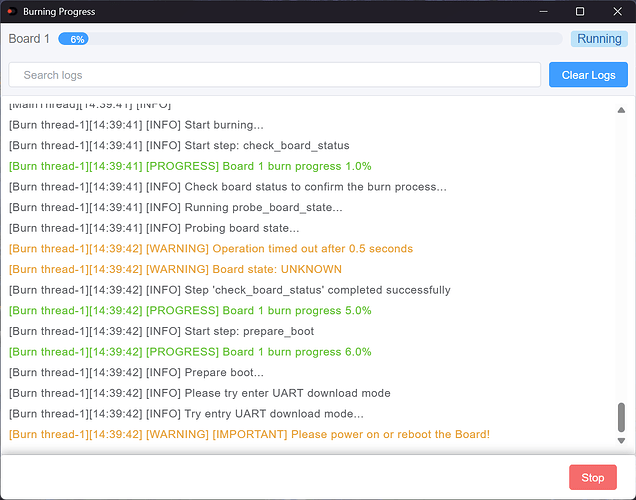
 Power on and click "Flash"
The software will progress to 6% and then pause, prompting to wait for restart.
![Flashing start interface]
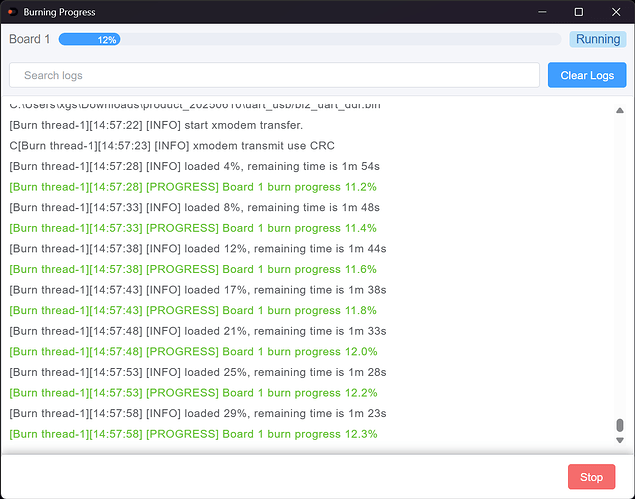
 Power off → Power on again
This officially enters the flashing phase
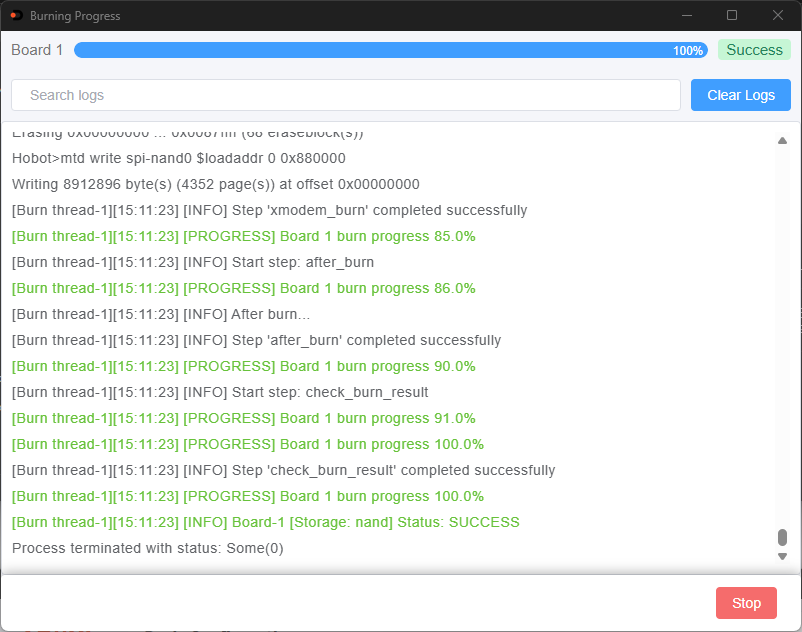
 Flashing Complete
The flashing process takes about 10 minutes (serial port speed is slow, please wait patiently).
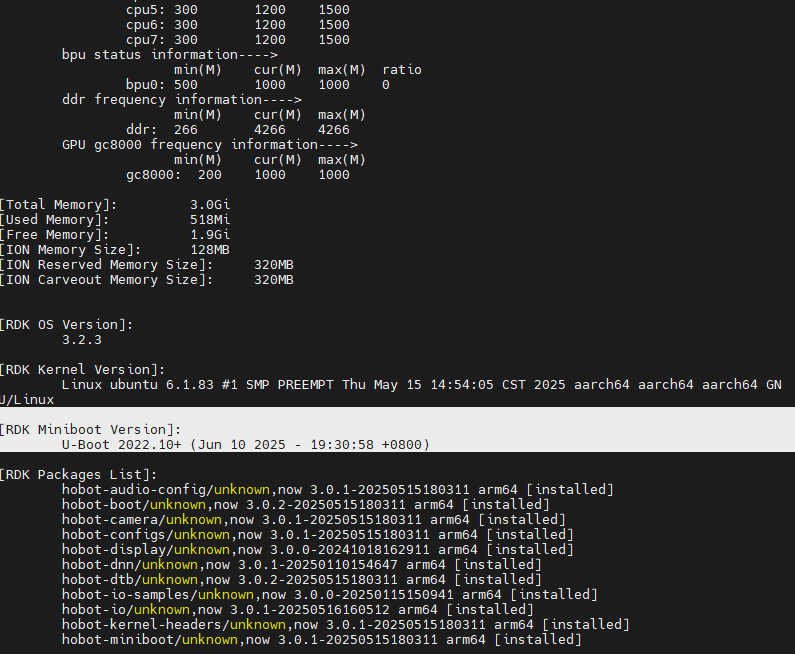
Verify Miniboot Update Success
After system startup, execute the following command to view current system information:
xxxxxxxxxxroot@ubuntu:~# rdkos_info
This command will output key parameters such as current operating system version, Miniboot version, etc.