Welcome to RDK X5 MagicBox repository
7.ROS2 topic communication
7. ROS2 Topic Communication
1. Introduction to Topic Communication
Topic communication is the most frequently used communication method in ROS2. A publisher publishes data on a specified topic, and subscribers who subscribe to that topic receive the data.
Topic communication is based on the publish/subscribe model, as shown in the figure:
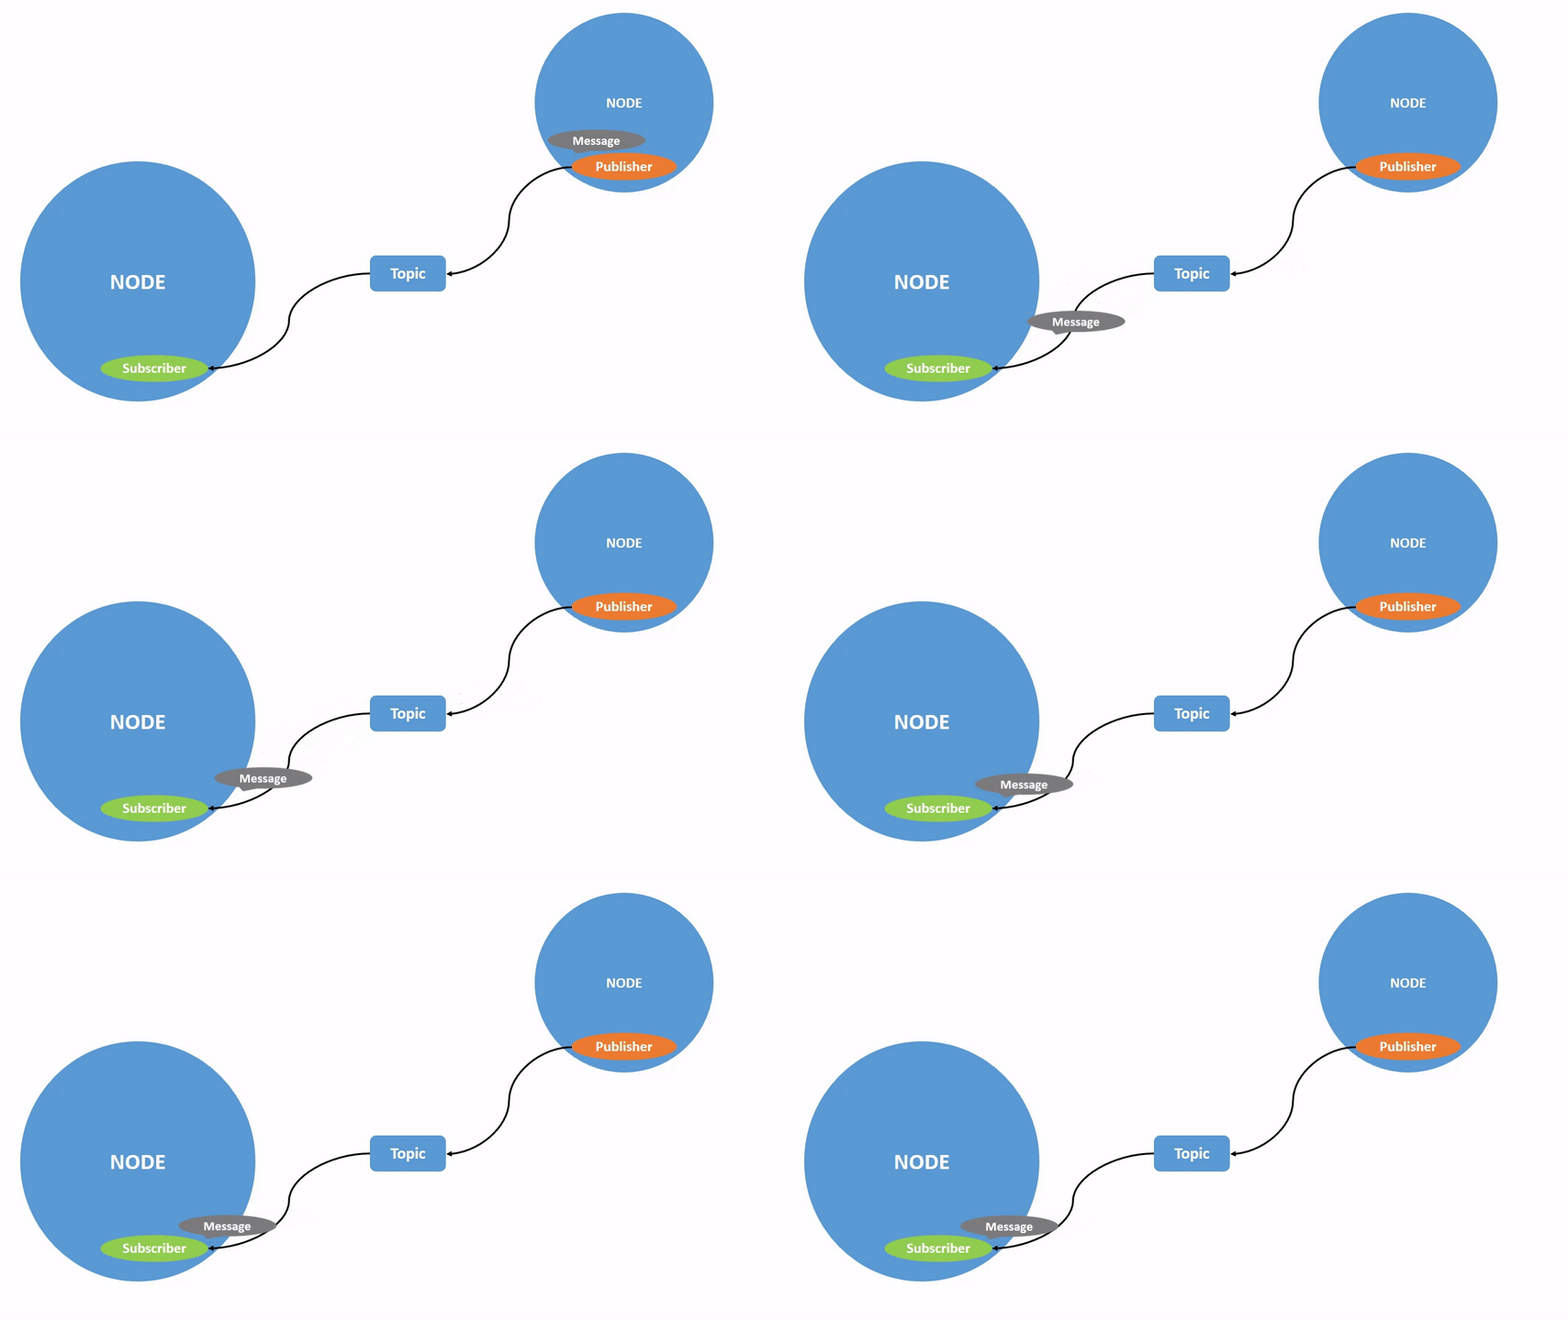
Topic data transmission is a process where the data is transmitted from one node to another. The object sending data is called a publisher, and the object receiving data is called a subscriber. Each topic must have a name, and the data transmitted must have a fixed data type.
Next, we will explain how to implement topic communication between nodes using Python.
2. Create a New Package
- Switch to the src directory of the workspace
- Create a new pkg_topic package
xxxxxxxxxxros2 pkg create pkg_topic --build-type ament_python --dependencies rclpy --node-name publisher_demoAfter executing the above command, the pkg_topic package will be created, along with a publisher_demo node and the relevant configuration files.
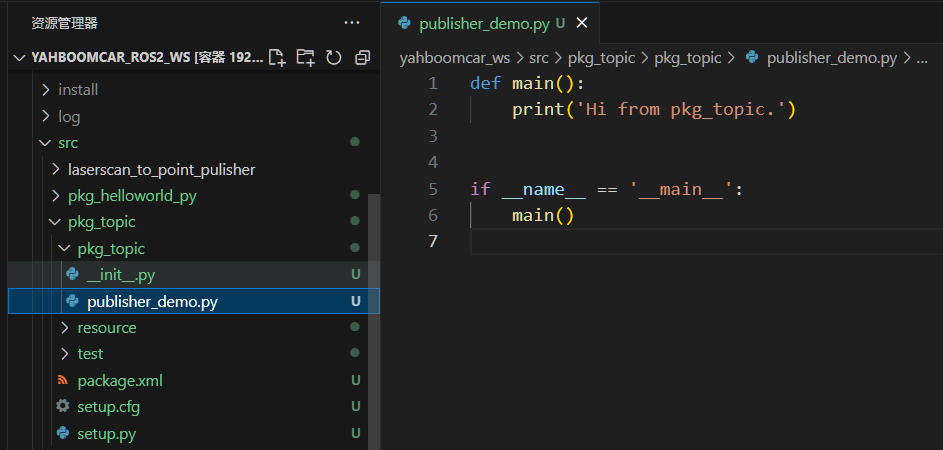
3. Publisher Implementation
3.1 Create a Publisher
Next, edit [publisher_demo.py] to implement the publisher functionality and add the following code:
xxxxxxxxxx#Import the rclpy libraryimport rclpyfrom rclpy.node import Node#Import String messagesfrom std_msgs.msg import String #Create a Topic_Pub node subclass that inherits from the Node baseclass Topic_Pub(Node): def __init__(self,name): super().__init__(name) #Create a publisher using the create_publisher function. The passed parameters are: #Topic data type, topic name, and queue length for storing messages self.pub = self.create_publisher(String,"/topic_demo",1) #Create a timer that enters the interrupt handler every 1 second. The passed parameters are: #Interval between interrupt executions, interrupt handler function self.timer = self.create_timer(1,self.pub_msg) #Define the interrupt handler function def pub_msg(self): msg = String() #Create a String variable, msg msg.data = "Hi,I send a message." #Assign data to msg self.pub.publish(msg) #Publish topic data #Main functiondef main(): rclpy.init() #Initialization pub_demo = Topic_Pub("publisher_node") #Create a Topic_Pub class object, passing in the node name as a parameter rclpy.spin(pub_demo) #Execute the rclpy.spin function, passing in the Topic_Pub class object just created as a parameter pub_demo.destroy_node() #Destroy the node object rclpy.shutdown() #Shut down the ROS2 Python interface
3.2 Editing the Configuration File
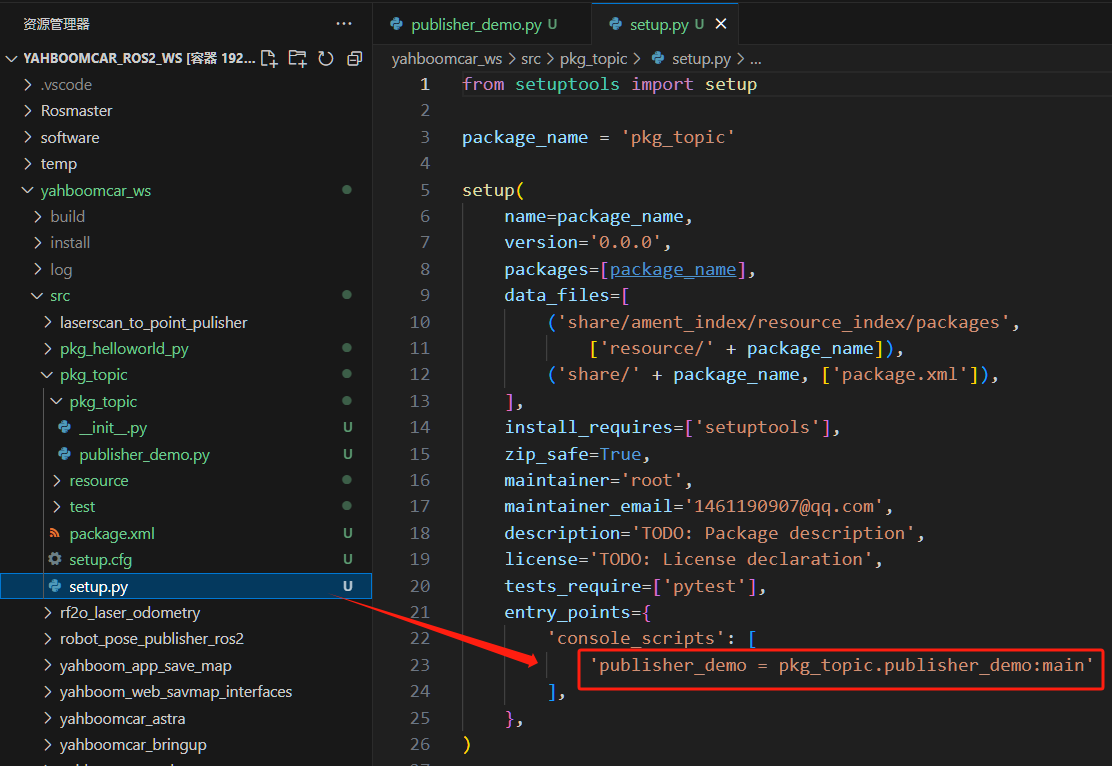
3.3 Compiling the Package
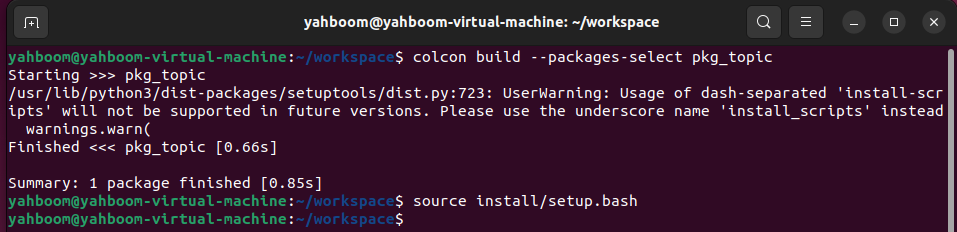
- Compiling the Package
xxxxxxxxxxcolcon build --packages-select pkg_topic- Refresh the environment variables in the workspace
3.4 Running the Program
- After refreshing the environment variables, run the command
xxxxxxxxxxros2 run pkg_topic publisher_demoAfter the program successfully runs, nothing is printed. We can use the ros2 topic tool to view the data. First, check if there are any topics being published. Open another terminal and enter:
xxxxxxxxxxros2 topic list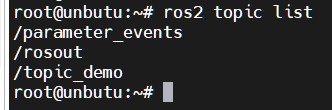
This topic_demo is the topic data defined in the program. Next, we'll use ros2 topic echo to print this data. In the terminal, enter:
xxxxxxxxxxros2 topic echo /topic_demo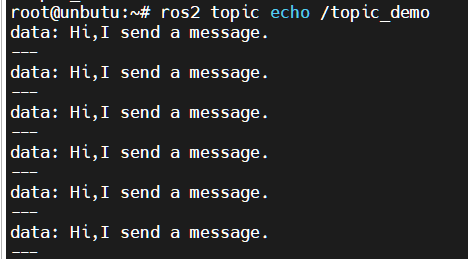
As you can see, the output "Hi, I send a message." from the terminal matches the line msg.data = "Hi, I send a message." in our code.
4. Subscriber Implementation
4.1 Creating a Subscriber
Create a new file, [subscriber_demo.py], in the same directory as [publisher_demo.py].
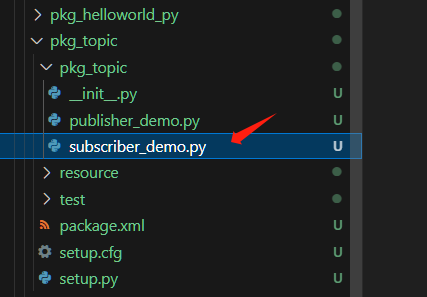
Next, edit [subscriber_demo.py] to implement the subscriber functionality and add the following code:
xxxxxxxxxx#Import related librariesimport rclpyfrom rclpy.node import Nodefrom std_msgs.msg import Stringclass Topic_Sub(Node): def __init__(self,name): super().__init__(name) #Create a subscriber using create_subscription. The passed parameters are: topic data type, topic name, callback function name, and queue length. self.sub = self.create_subscription(String,"/topic_demo",self.sub_callback,1) #Callback function executes the program: prints the received message. def sub_callback(self,msg): # print(msg.data,flush=True) self.get_logger().info(msg.data)def main(): rclpy.init() #Initialize the ROS2 Python interface. sub_demo = Topic_Sub("subscriber_node")#Create the object and initialize it. rclpy.spin(sub_demo) sub_demo.destroy_node() #Destroy the node object rclpy.shutdown() #Shut down the ROS2 Python interface
4.2 Editing the Configuration File
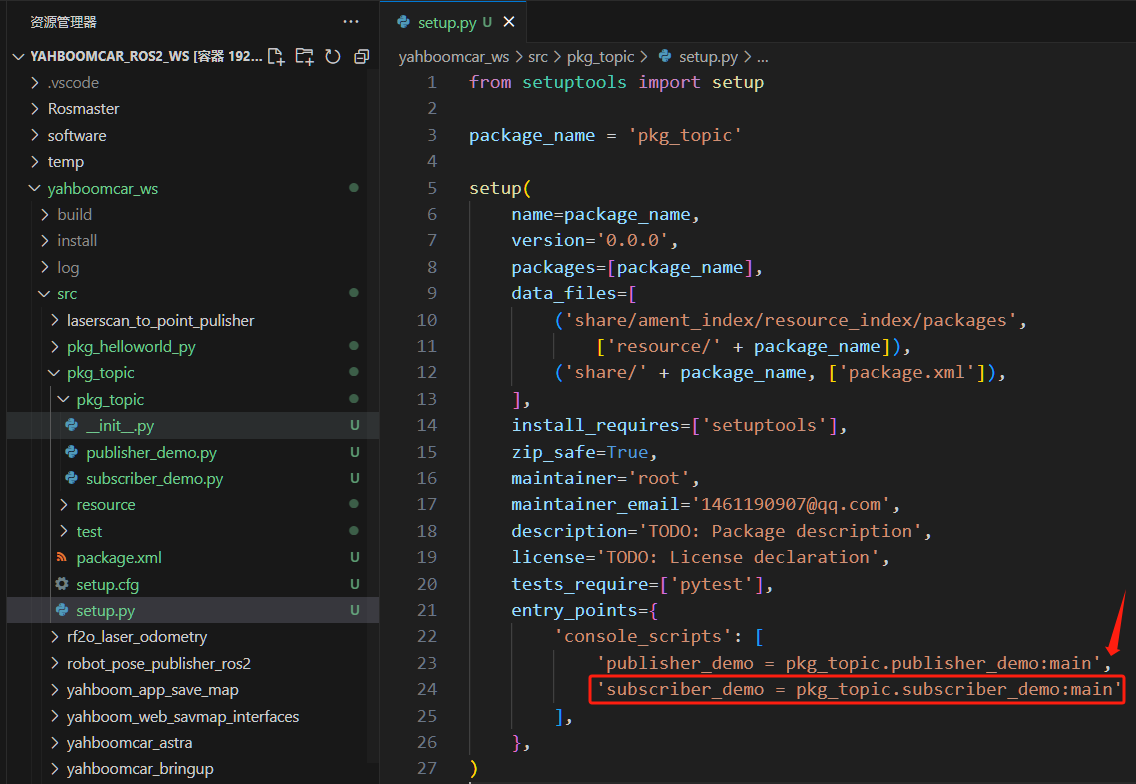
4.3 Compile the Workspace
- Compile the package
xxxxxxxxxxcolcon build --packages-select pkg_topic- Refresh the environment variables in the workspace
4.4 Run the Program
Execute the following command in a separate terminal:
xxxxxxxxxx# Start the publisher noderos2 run pkg_topic publisher_demo# Start the subscriber noderos2 run pkg_topic subscriber_demo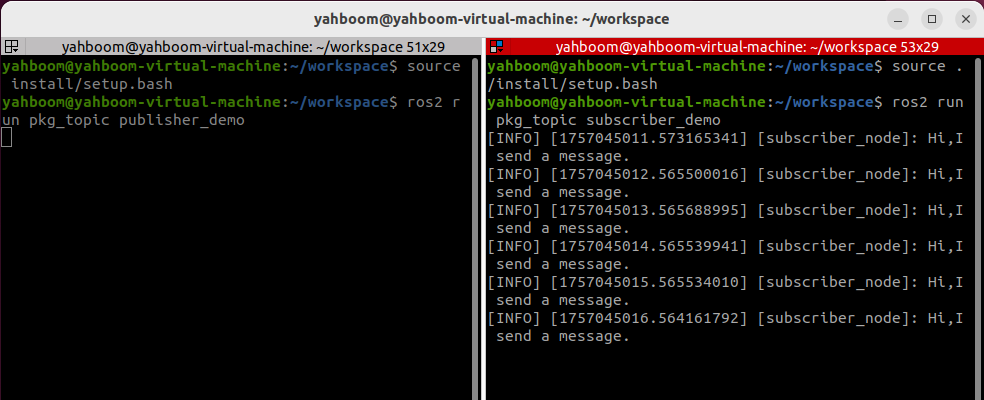
As shown in the figure above, the terminal running the subscriber node will print the information published by the publisher, /topic_demo.