yahboom
HomeLearn
Solution
Blog
Online Store
About Us
EN/中文
Rider Pi Robot📖
0.Quick Start
  • 0. Notes (Must Read)new
  • 1.APP control experience
  • 2.Web page image transmission controlnew
  • 3.Manual
1.RPi Basic course
  • 1.SSH remote login
  • 2.VNC remote login desktop
  • 3. Remote file transfer
  • 4. JupyterLab environment construction and use
  • 5. Write system image
  • 6. Connect to WiFi
  • 7. Close startup programs(MustRead)
  • 8. Raspberry Pi system expansion
2.Car basic control course
  • 1. Car screen display control
  • 2. Car recording audio
  • 3. Car plays audio
  • 4. Car recording video
  • 5. Car plays video
  • 6. RGB light control
  • 7. Car attitude angle reading
  • 8. Read the battery level of the car
3.Car motion control
  • 1. Car forward and backward
  • 2. Car rotation movement
  • 3. Adjust car height
  • 4. Adjust car posture
  • 5. Car self-stabilization mode
  • 6. Car squats and shakes
4.Open Source CV
A. Getting started with OpenCV
  • 1. Introduction to OpenCV
  • 2. OpenCV image reading and display
  • 3. OpenCV image writing
  • 4. OpenCV Image Quality
  • 5.OpenCV pixel operations
B. OpenCV geometric transformation
  • 1. Image scaling
  • 2. Image cutting
  • 3. Image translation
  • 4. Image mirroring
  • 5. Affine Transformation
  • 6. Image Rotation
  • 7. Perspective Transformation
C. OpenCV image processing and drawing text segments
  • 1. Grayscale processing
  • 2. Image Binarization
  • 3. Edge Detection
  • 4. Line drawing
  • 5. Rectangle and circle drawing
  • 6. Text and picture drawing
D. Image beautification
  • 1. Color Image Histogram
  • 2. Histogram Equalization
  • 3. Image repair
  • 4. Brightness enhancement
  • 5. Skin whitening
  • 6. Gaussian mean filtering
  • 7. Median Filter
5.AI Visual recognition course
  • 1. Camera driver tutorial
  • 2. Color recognition
  • 3. HSV value test
  • 4. Object Recognition
  • 5. QR code recognition
  • 6. Human face mask
  • 7. License Plate Recognition
  • 8. Human Pose Estimation
  • 9. Object Detection
  • 10.Yolo detection
  • 11. Face Detection
  • 12. Face effects
  • 13. 3D Object Recognition
  • 14. Paintbrush
  • 15. Finger recognition
  • 16. Gesture Recognition
  • 17.Facial Recognitionnew
  • 18.Emotion Recognitionnew
  • 19.Motion Detectionnew
6.AI Visual interaction course
  • 1. Color tracking
  • 2. Color follows
  • 3. QR code recognition action
  • 4. Face tracking
  • 5. Finger control
  • 6. Gesture following
  • 7. Gesture control car
  • 8. Human Body Followingnew
7. AI Large Model Interaction
  • 0.Principles of Large AI Models
  • 1.Large model premise use configuration
  • 2.Q&A(For cm5)
  • 3.Q&A and ChatGPT(For cm4)
  • 4.Speech recognition
  • 5.Picture to Text
  • 6.Embodied intelligence
Download
  • APP(iOS/Android)
  • System_File
  • Code
  • Hareware_Info
  • AI_Model_File
  • 3D_Model_File
  • Instruction_Manual
Download ZIP

Welcome to Rider Pi Robot repository

3. HSV value test

3. HSV value test

1. Experimental purpose

Drive the car to calibrate HSV value and identify color

2. Experimental path source code

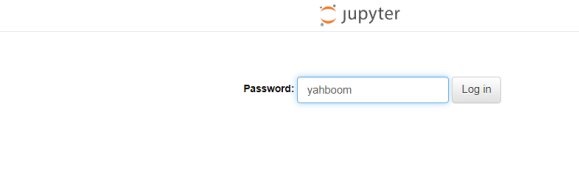
Enter the car system, end the car program, enter "ip (ip is the car's ip): 8888" in the browser, enter the password "yahboom" image-2024112100001 Then log in Enter the path of Rider-pi_class/5.AI Visual Recognition Course/3. HSV value test and run color_recognition+hsv.ipynb.
3. Experimental phenomenon

  1. Determine the HSV value of the color by calling the HSV slider. If you don't want to adjust it, you can skip this step and use the HSV value that has been adjusted in the tutorial image-2024112100002
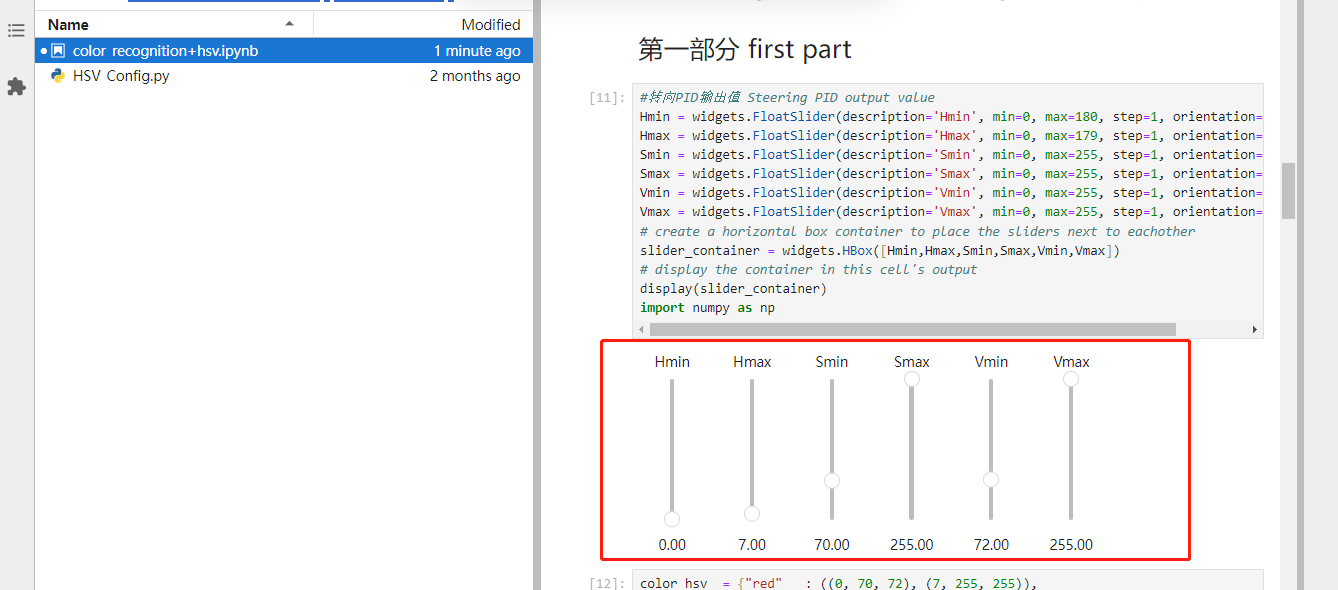
  2. Overwrite the adjusted value with the value in the program. If you haven't adjusted it, you can skip it directly. image-2024112100003

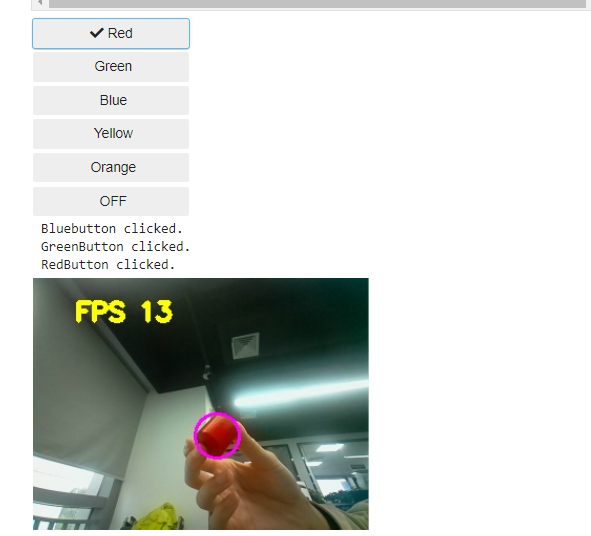
  3. Then run it down, the car will select the color to be recognized according to the adjusted HSV value and perform the corresponding color recognition image-2024112100004
4. Analysis of main source code parameters

​x
def Color_Recongnize():
    global color_lower, color_upper, g_mode 
    t_start = time.time()
    fps = 0
    while True:
        ret, frame = image.read()#USB摄像头 USB Camera
        # frame = picam2.capture_array() #CSI摄像头 CSI Camera
        #frame = cv2.resize(frame, (400, 400))
        frame_ = cv2.GaussianBlur(frame,(5,5),0)                    
        hsv = cv2.cvtColor(frame,cv2.COLOR_BGR2HSV)
        mask = cv2.inRange(hsv,color_lower,color_upper)  
        mask = cv2.erode(mask,None,iterations=2)
        mask = cv2.dilate(mask,None,iterations=2)
        mask = cv2.GaussianBlur(mask,(3,3),0)     
        cnts = cv2.findContours(mask.copy(),cv2.RETR_EXTERNAL,cv2.CHAIN_APPROX_SIMPLE)[-2] 
        if g_mode == 1: # 按钮切换开关 Push button switch
            if len(cnts) > 0:
                cnt = max (cnts, key = cv2.contourArea)
                (color_x,color_y),color_radius = cv2.minEnclosingCircle(cnt)
                if color_radius > 10:
                # 将检测到的颜色用原形线圈标记出来 Mark the detected color with a prototype circle
                    cv2.circle(frame,(int(color_x),int(color_y)),int(color_radius),(255,0,255),2)  
                    # Proportion-Integration-Differentiation
        fps = fps + 1
        mfps = fps / (time.time() - t_start)
        cv2.putText(frame, "FPS " + str(int(mfps)), (40,40), cv2.FONT_HERSHEY_SIMPLEX, 0.8, (0,255,255), 3)
        # 实时传回图像数据进行显示 Real-time image data transmission for display
        image_widget.value = bgr8_to_jpeg(frame)
        image_widget1.value = bgr8_to_jpeg(mask)
​
        #显示在小车的lcd屏幕上
        b,g,r = cv2.split(frame)
        img = cv2.merge((r,g,b))
        imgok = Image.fromarray(img)
        mydisplay.ShowImage(imgok)
        # print(g_mode)
​

Color_Recongnize: is a function thread for color recognition. By recognizing the target color, the result is displayed on the screen of the car and the screen of the computer.

Color recognition
Object Recognition

COMPANY

  • About us
  • Team Style
  • Blog

LEARNING & EXPLORATION

  • Tutorials
  • Edge AI hardware
  • Educational robots
  • Embedded intelligent hardware

WHERE TO BUY

  • Yahboom Online Store
  • Amazon
  • Alibaba
  • AliExpress
  • Mercado

TECHNOLOGY SUPPORT

  • Email: support@yahboom.com

BE A DISTRIBUTOR

  • Email: sales@yahboom.com
QR Code

Copyright © 2017-2026 Yahboom. All Rights Reserved.

EN/中文