Welcome to Rider Pi Robot repository
4. Face tracking
Face tracking
1. Experimental purpose
Drive the car to do face tracking
2. Experimental path source code
Enter the car system, end the car program, enter "ip (ip is the car's ip): 8888" in the browser, enter the password "yahboom"
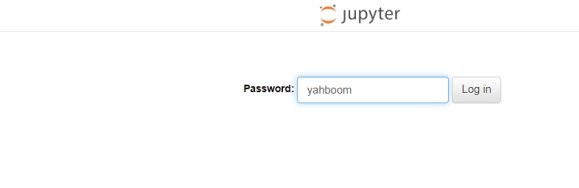 Then log in
Enter the path /home/pi/Rider-pi_class/6.AI Visual Interaction Course/4. Facial tracking/ and run face_decetion.ipynb.
Or directly enter
Then log in
Enter the path /home/pi/Rider-pi_class/6.AI Visual Interaction Course/4. Facial tracking/ and run face_decetion.ipynb.
Or directly enter
/home/pi/Rider-pi_class/6.AI Visual Interaction Course/4. Facial tracking/python3 face_decetion.py3. Experimental phenomenon
After running the source code, the car tracks the face detected by the camera.
The car cannot be in a stopped state (i.e. not in a standing balance state), otherwise it cannot move.
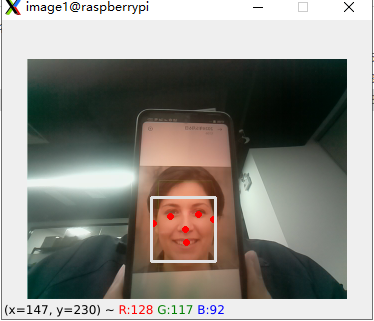
4. Analysis of main source code parameters
x#-----------------------COMMON INIT-----------------------import cv2import mediapipe as mpmp_face_detection = mp.solutions.face_detectionmp_drawing = mp.solutions.drawing_utils# For static images:IMAGE_FILES = []with mp_face_detection.FaceDetection( model_selection=1, min_detection_confidence=0.5) as face_detection: for idx, file in enumerate(IMAGE_FILES): image = cv2.imread(file) # Convert the BGR image to RGB and process it with MediaPipe Face Detection. results = face_detection.process(cv2.cvtColor(image, cv2.COLOR_BGR2RGB)) # Draw face detections of each face. if not results.detections: continue annotated_image = image.copy() for detection in results.detections: print('Nose tip:') print(mp_face_detection.get_key_point( detection, mp_face_detection.FaceKeyPoint.NOSE_TIP)) mp_drawing.draw_detection(annotated_image, detection) cv2.imwrite('/tmp/annotated_image' + str(idx) + '.png', annotated_image)# For webcam input:cap=cv2.VideoCapture(0)cap.set(3,320)cap.set(4,240)with mp_face_detection.FaceDetection( model_selection=0, min_detection_confidence=0.5) as face_detection: while cap.isOpened(): success, image = cap.read() if not success: print("Ignoring empty camera frame.") # If loading a video, use 'break' instead of 'continue'. continue # To improve performance, optionally mark the image as not writeable to # pass by reference. image.flags.writeable = False image = cv2.cvtColor(image, cv2.COLOR_BGR2RGB) results = face_detection.process(image) # Draw the face detection annotations on the image. image.flags.writeable = True image = cv2.cvtColor(image, cv2.COLOR_RGB2BGR) if results.detections: for detection in results.detections: value_x=0 value_y=0 mp_drawing.draw_detection(image, detection) xy=(mp_face_detection.get_key_point(detection, mp_face_detection.FaceKeyPoint.NOSE_TIP)) face_x=320-xy.x*320 face_y=xy.y*240 value_x = face_x - 160 value_y = face_y - 120 rider_x=value_x print(face_x,face_y) if value_x > 55: value_x = 55 elif value_x < -55: value_x = -55 if value_y > 75: value_y = 75 elif value_y < -75: value_y = -75 else: value_x=value_y=face_x=face_y=0 rider_x=9999 print(['y','p'],[value_x/9, value_y/15]) if car_type=='L' or car_type=='M': car.attitude(['y','p'],[value_x/9, value_y/15]) elif car_type=='R': print(value_x,value_y) car.rider_height(75+int((190-face_y)/70*40)) if rider_x==9999: car.rider_turn(0) else: if rider_x > 35: car.rider_turn(20) elif rider_x < -35: car.rider_turn(-20) else: car.rider_turn(0) b,g,r = cv2.split(image) image = cv2.merge((r,g,b)) image = cv2.flip(image, 1) imgok = Image.fromarray(image) display.ShowImage(imgok) #显示在屏幕上 r,g,b = cv2.split(image) image1 = cv2.merge((b,g,r)) cv2.imshow("image1",image1) # Flip the image horizontally for a selfie-view display. #cv2.imshow('MediaPipe Face Detection', cv2.flip(image, 1)) if cv2.waitKey(5) & 0xFF == 27: break if button.press_b(): car.reset() breakcap.release()From the source code analysis, we can get that the car will track the face according to the camera. If the face looks up, the car will stand up; if the face looks down, the car will squat; if the face looks left or right, the car will follow.