Welcome to NUWA-HP60C Depth Camera repository
5.Pixel Operation
OpenCV pixel operations
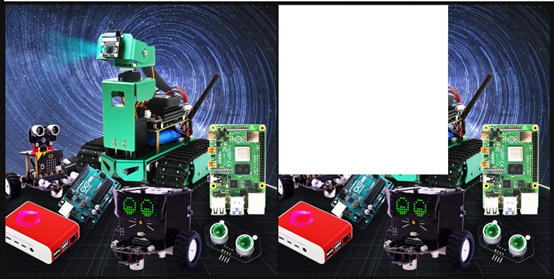
For pixel operations, we can change any position to a new pixel color. Here we first read the image, and then assign an area to white.
Start Docker
After entering the Raspberry Pi 5 desktop, open a terminal and run the following command to start the container corresponding to Dofbot:
xxxxxxxxxx./Docker_Ros.sh
Access Jupyter Lab within Docker:
xxxxxxxxxxIP:9999 // Example: 192.168.1.11:9999
Code path:
/root/Dofbot/4.opencv/1.OpenCV_basic/04_pixel_pic.ipynb
The main code is as follows:
ximport cv2
img = cv2.imread('yahboom.jpg',1)(b,g,r) = img[100,100]print(b,g,r)# bgr#10 100 --- 110 100i=j=0for j in range(1,500): img[i,j] = (255,255,255) for i in range(1,500): img[i,j] = (255,255,255)#cv2.imshow('image',img)#cv2.waitKey(0) #1000 msxxxxxxxxxx#bgr8 to jpeg formatimport enumimport cv2def bgr8_to_jpeg(value, quality=75): return bytes(cv2.imencode('.jpg', value)[1])JupyterLab shows image comparison before and after:
xxxxxxxxxximport ipywidgets.widgets as widgetsimage_widget1 = widgets.Image(format='jpg', )image_widget2 = widgets.Image(format='jpg', )# create a horizontal box container to place the image widget next to each otherimage_container = widgets.HBox([image_widget1, image_widget2])# display the container in this cell's outputdisplay(image_container)img1 = cv2.imread('yahboom.jpg',1)image_widget1.value = bgr8_to_jpeg(img1) #Original
image_widget2.value = bgr8_to_jpeg(img) #After pixel operation
After the code block is run, you can compare and see that part of the second image has turned into white pixels.