Welcome to NUWA-HP60C Depth Camera repository
10.ROS service server
10.ROS service server
In the previous tutorial, we talked about how to write a client node program, so this program will explain how to write a server node. The server has a service callback function, which can be compared to the callback function of a topic subscriber. After receiving the request for service, describe the specific service content in the service callback function, and then return a response value.
10.1 Create a server
The general creation steps are as follows:
- Initialize ROS nodes
- Create server instance
- Loop waiting for service requests and enter the callback function
- Complete the function processing of the service in the callback function and feed back the response data
10.2 C++ version
10.2.1 Writing source code
In the src folder of the function package learn_server, create a C++ file (the file suffix is .cpp), name it turtle_vel_command_server.cpp, and paste the following content into turtle_vel_command_server.cpp.
/*** This routine will execute the /turtle_vel_command service, service data type std_srvs/Trigger*/ros::Publisher turtle_vel_pub;bool pubvel = false;// service callback function, input parameter req, output parameter resbool pubvelCallback(std_srvs::Trigger::Request &req,std_srvs::Trigger::Response &res){ pubvel = !pubvel; ROS_INFO("Do you want to publish the vel?: [%s]", pubvel==true?"Yes":"No");// Print client request data // Set feedback data res.success = true; res.message = "The status is changed!"; return true;}int main(int argc, char **argv){ ros::init(argc, argv, "turtle_vel_command_server"); ros::NodeHandle n; // Create a server called /turtle_vel_command and register the callback function pubvelCallback ros::ServiceServer command_service = n.advertiseService("/turtle_vel_command", pubvelCallback); // Create a Publisher, publish a topic named /turtle1/cmd_vel, the message type is geometry_msgs::Twist, and the queue length is 8 turtle_vel_pub = n.advertise<geometry_msgs::Twist>("/turtle1/cmd_vel", 8); ros::Rate loop_rate(10);// Set the frequency of the loop while(ros::ok()) { ros::spinOnce();// View a callback function queue // If pubvel is judged to be True, the turtle speed command will be issued. if(pubvel) { geometry_msgs::Twist vel_msg; vel_msg.linear.x = 0.6; vel_msg.angular.z = 0.8; turtle_vel_pub.publish(vel_msg); } loop_rate.sleep();//Delay according to cycle frequency } return 0;}10.2.2 Modify CMakeLists.txt file
Configure in CMakelist.txt, under the build area, add the following content,
xxxxxxxxxxadd_executable(turtle_vel_command_server src/turtle_vel_command_server.cpp)target_link_libraries(turtle_vel_command_server ${catkin_LIBRARIES})
10.2.3 Compile
Terminal input,
xxxxxxxxxxcd ~/ros_wscatkin_make
After the compilation is passed, you need to re-source the current environment variables to find or update the program. Enter in the terminal.
xxxxxxxxxxcd ~/ros_wssource devel/setup.bash10.2.4 Running the program
Open roscore,
xxxxxxxxxxroscore
Run the little turtle node program,
xxxxxxxxxxrosrun turtlesim turtlesim_node
Run the server node,
xxxxxxxxxxrosrun learn_service turtle_vel_command_server
Calling a service,
xxxxxxxxxxrosservice call /turtle_vel_command
Program running instructions:
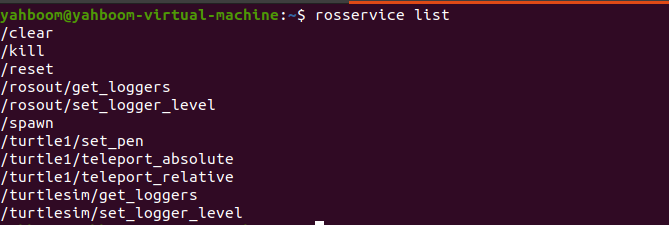
First, after running the Little Turtle node, you can enter rosservice list in the terminal to see what services are currently available. The results are as follows:
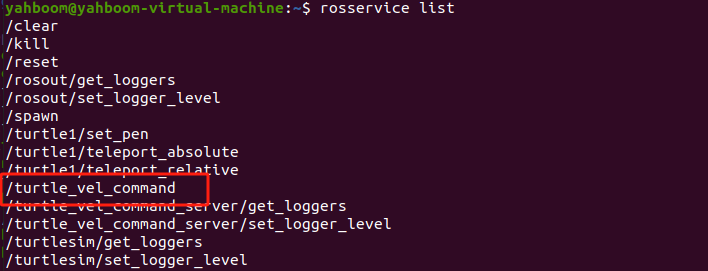
Then, we run the turtle_vel_command_server program and enter rosservice list, and we will find that there is an additional turtle_vel_command, as shown in the figure below,
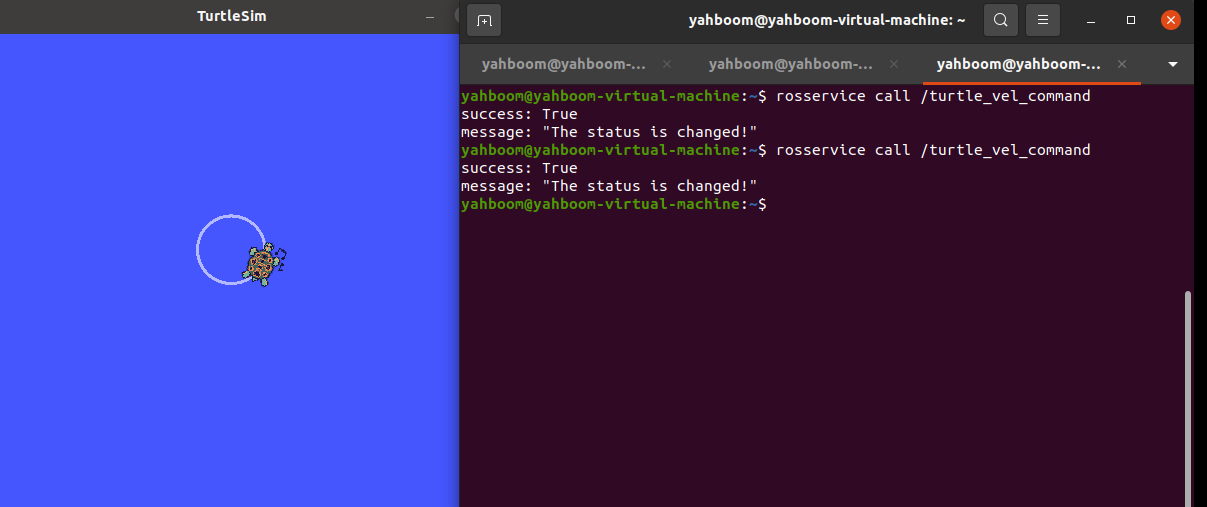
Then, we call this service by entering rosservice call /turtle_vel_command in the terminal, and we will find that the little turtle makes a circular motion. If we call the service again, the little turtle stops moving. This is because in the service callback function, we invert the value of pubvel and then feed it back. The main function will judge the value of pubvel. If it is True, the speed command will be issued. If it is False, no command will be issued.
10.3 Python version
10.3.1 Writing source code
Create a new scripts folder under the function package learn_service, then create a new python file (file suffix .py) in this scripts folder, name it turtle_vel_command_server.py, copy and paste the following program code into the turtle_vel_command_server.py file,
xxxxxxxxxx#!/usr/bin/env python# -*- coding: utf-8 -*-# This routine will execute the /turtle_command service, service data type std_srvs/Triggerimport rospyimport _thread,timefrom geometry_msgs.msg import Twistfrom std_srvs.srv import Trigger, TriggerResponsepubvel = False;turtle_vel_pub = rospy.Publisher('/turtle1/cmd_vel', Twist, queue_size=8)def pubvel_thread(): while True: if pubvel: vel_msg = Twist() vel_msg.linear.x = 0.6 vel_msg.angular.z = 0.8 turtle_vel_pub.publish(vel_msg) time.sleep(0.1)def pubvelCallback(req): global pubvel pubvel = bool(1-pubvel) rospy.loginfo("Do you want to publish the vel?[%s]", pubvel)# Show request data return TriggerResponse(1, "Change state!")# Feedback datadef turtle_pubvel_command_server(): rospy.init_node('turtle_vel_command_server')# ROS node initialization # Create a server named /turtle_command and register the callback function pubvelCallback s = rospy.Service('/turtle_vel_command', Trigger, pubvelCallback) # Loop waiting for callback function print ("Ready to receive turtle_pub_vel_command.") _thread.start_new_thread(pubvel_thread, ()) rospy.spin()if __name__ == "__main__": turtle_pubvel_command_server()10.3.2 Running the program
Open roscore,
xxxxxxxxxxroscore
Run the little turtle node program,
xxxxxxxxxxrosrun turtlesim turtlesim_node
Run the server node,
xxxxxxxxxxrosrun learn_service turtle_vel_command_server.py
Calling a service,
xxxxxxxxxxrosservice call /turtle_vel_command
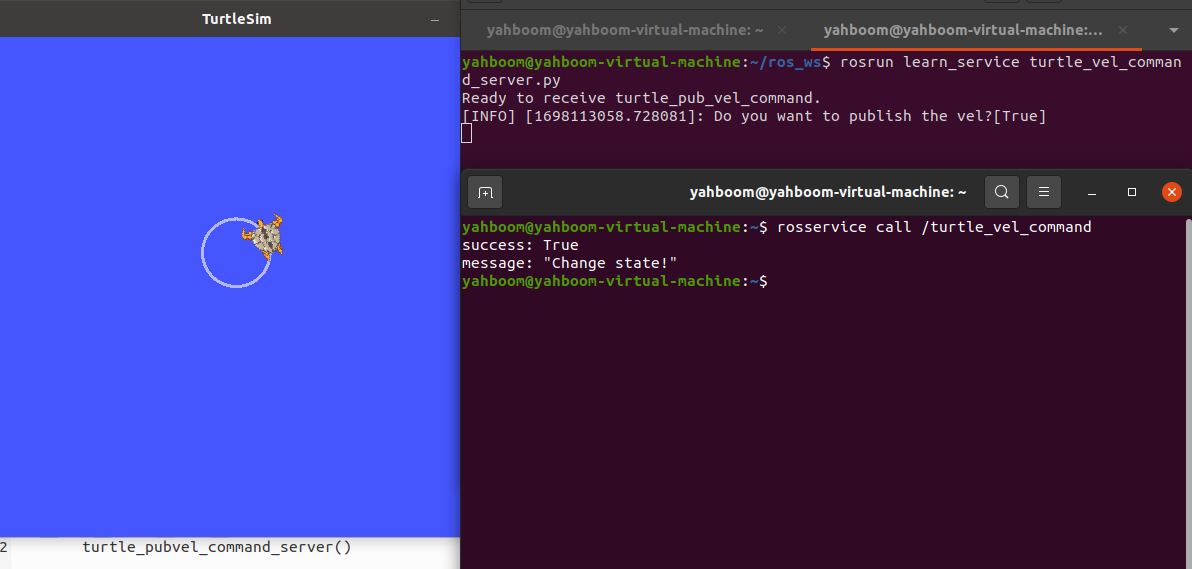
Enter rosservice call /turtle_vel_command in the terminal to call this service. You will find that the little turtle moves in a circle. If you call the service again, the little turtle stops moving.